When I first started training for endurance sports, I made the mistake of eating flavored instant oatmeal for breakfast. Just add boiling water and a tasty bowl of sugary oats was ready within minutes. I’ve since learned that steel cut oats (also known as Irish oats) is much healthier.
Steel cut oats contain no sugar, unlike flavored instant oatmeal which is loaded with sugar. Some rolled oats also contain sugar.
Both steel cut oats and rolled oats have a lower glycemic index. Glycemic index (GI) measures how carbohydrates in foods affect blood sugar and insulin. The lower the GI, the slower the glucose enters the bloodstream. Because steel cut oats are denser, they will take longer to digest and be absorbed. This causes a steady rise in blood sugar rather than a sudden spike. Foods with a lower GI will also make you feel full longer. (For more information on glycemic index: http://www.webmd.com/diabetes/glycemic-index-good-versus-bad-carbs)
Steel cut oats undergo less processing than rolled oats and instant oats.
The problem with steel cut oats is that it takes about 20-30 minutes to prepare. I tried soaking steal cut oats in water overnight. Although that helped to reduce the cooking time, it still wasn’t fast enough for me. So I tried preparing the oatmeal the night before, storing it in the refrigerator, then warming it up in the microwave the next morning. Unfortunately, I did not enjoy how the oatmeal congealed into a mushy glob. Finally, I tried cooking the oatmeal in a slow cooker overnight. That was a huge success!
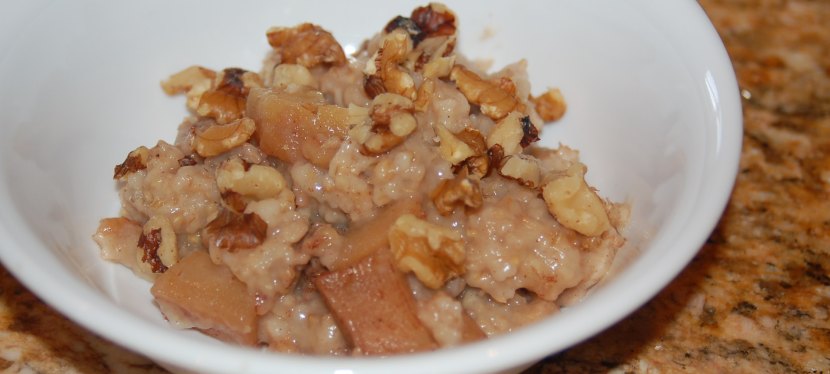
I mixed all of the ingredients into a slow cooker before I go to bed and then voila, I wake up to warm, cooked and delicious oatmeal.
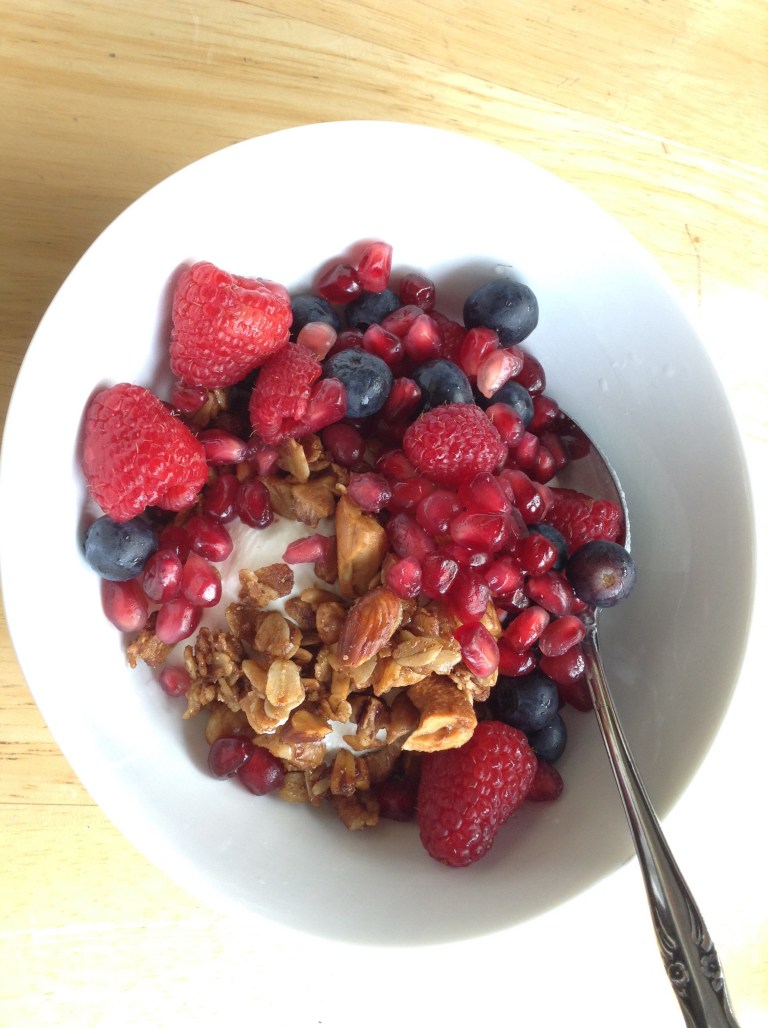
Since it’s important to refuel within 20 minutes after a workout, I will pack another serving of oatmeal to bring to work. I’ll either eat it cold or warm it up in the microwave. Yes, this means that on the mornings I workout, I have 2 breakfasts. In addition, I like to consume a protein along with a second serving oatmeal, such as a hard boiled egg or Greek yogurt with fruit and/or granola.
Serving size: 4
Ingredients:
1 cup steel cut oatmeal (also called Irish oatmeal)
2 cups water
1 apple, pealed and cut into ½ inch cubes
1 cup Almond milk
1 tablespoon dark brown sugar*
1/4 teaspoon of vanilla
1/4 teaspoon ground cinnamon
1/8 (pinch) of ground nutmeg (freshly grated if you have it)
Unsalted roasted chopped almonds or walnuts (optional)
Note: Ideally, if you can do without the dark brown sugar, that is the healthiest option, but I personally prefer to have a small amount of it in my oatmeal. Since this recipe is a serving size for 4, one tablespoon isn’t so bad. The apples also help to naturally sweeten the oatmeal. If you prefer your oatmeal on the sweeter side, you may want to add up to another tablespoon full, however I encourage you to try to savor the natural sweetness from the apple and avoid adding more sugar.
Directions:
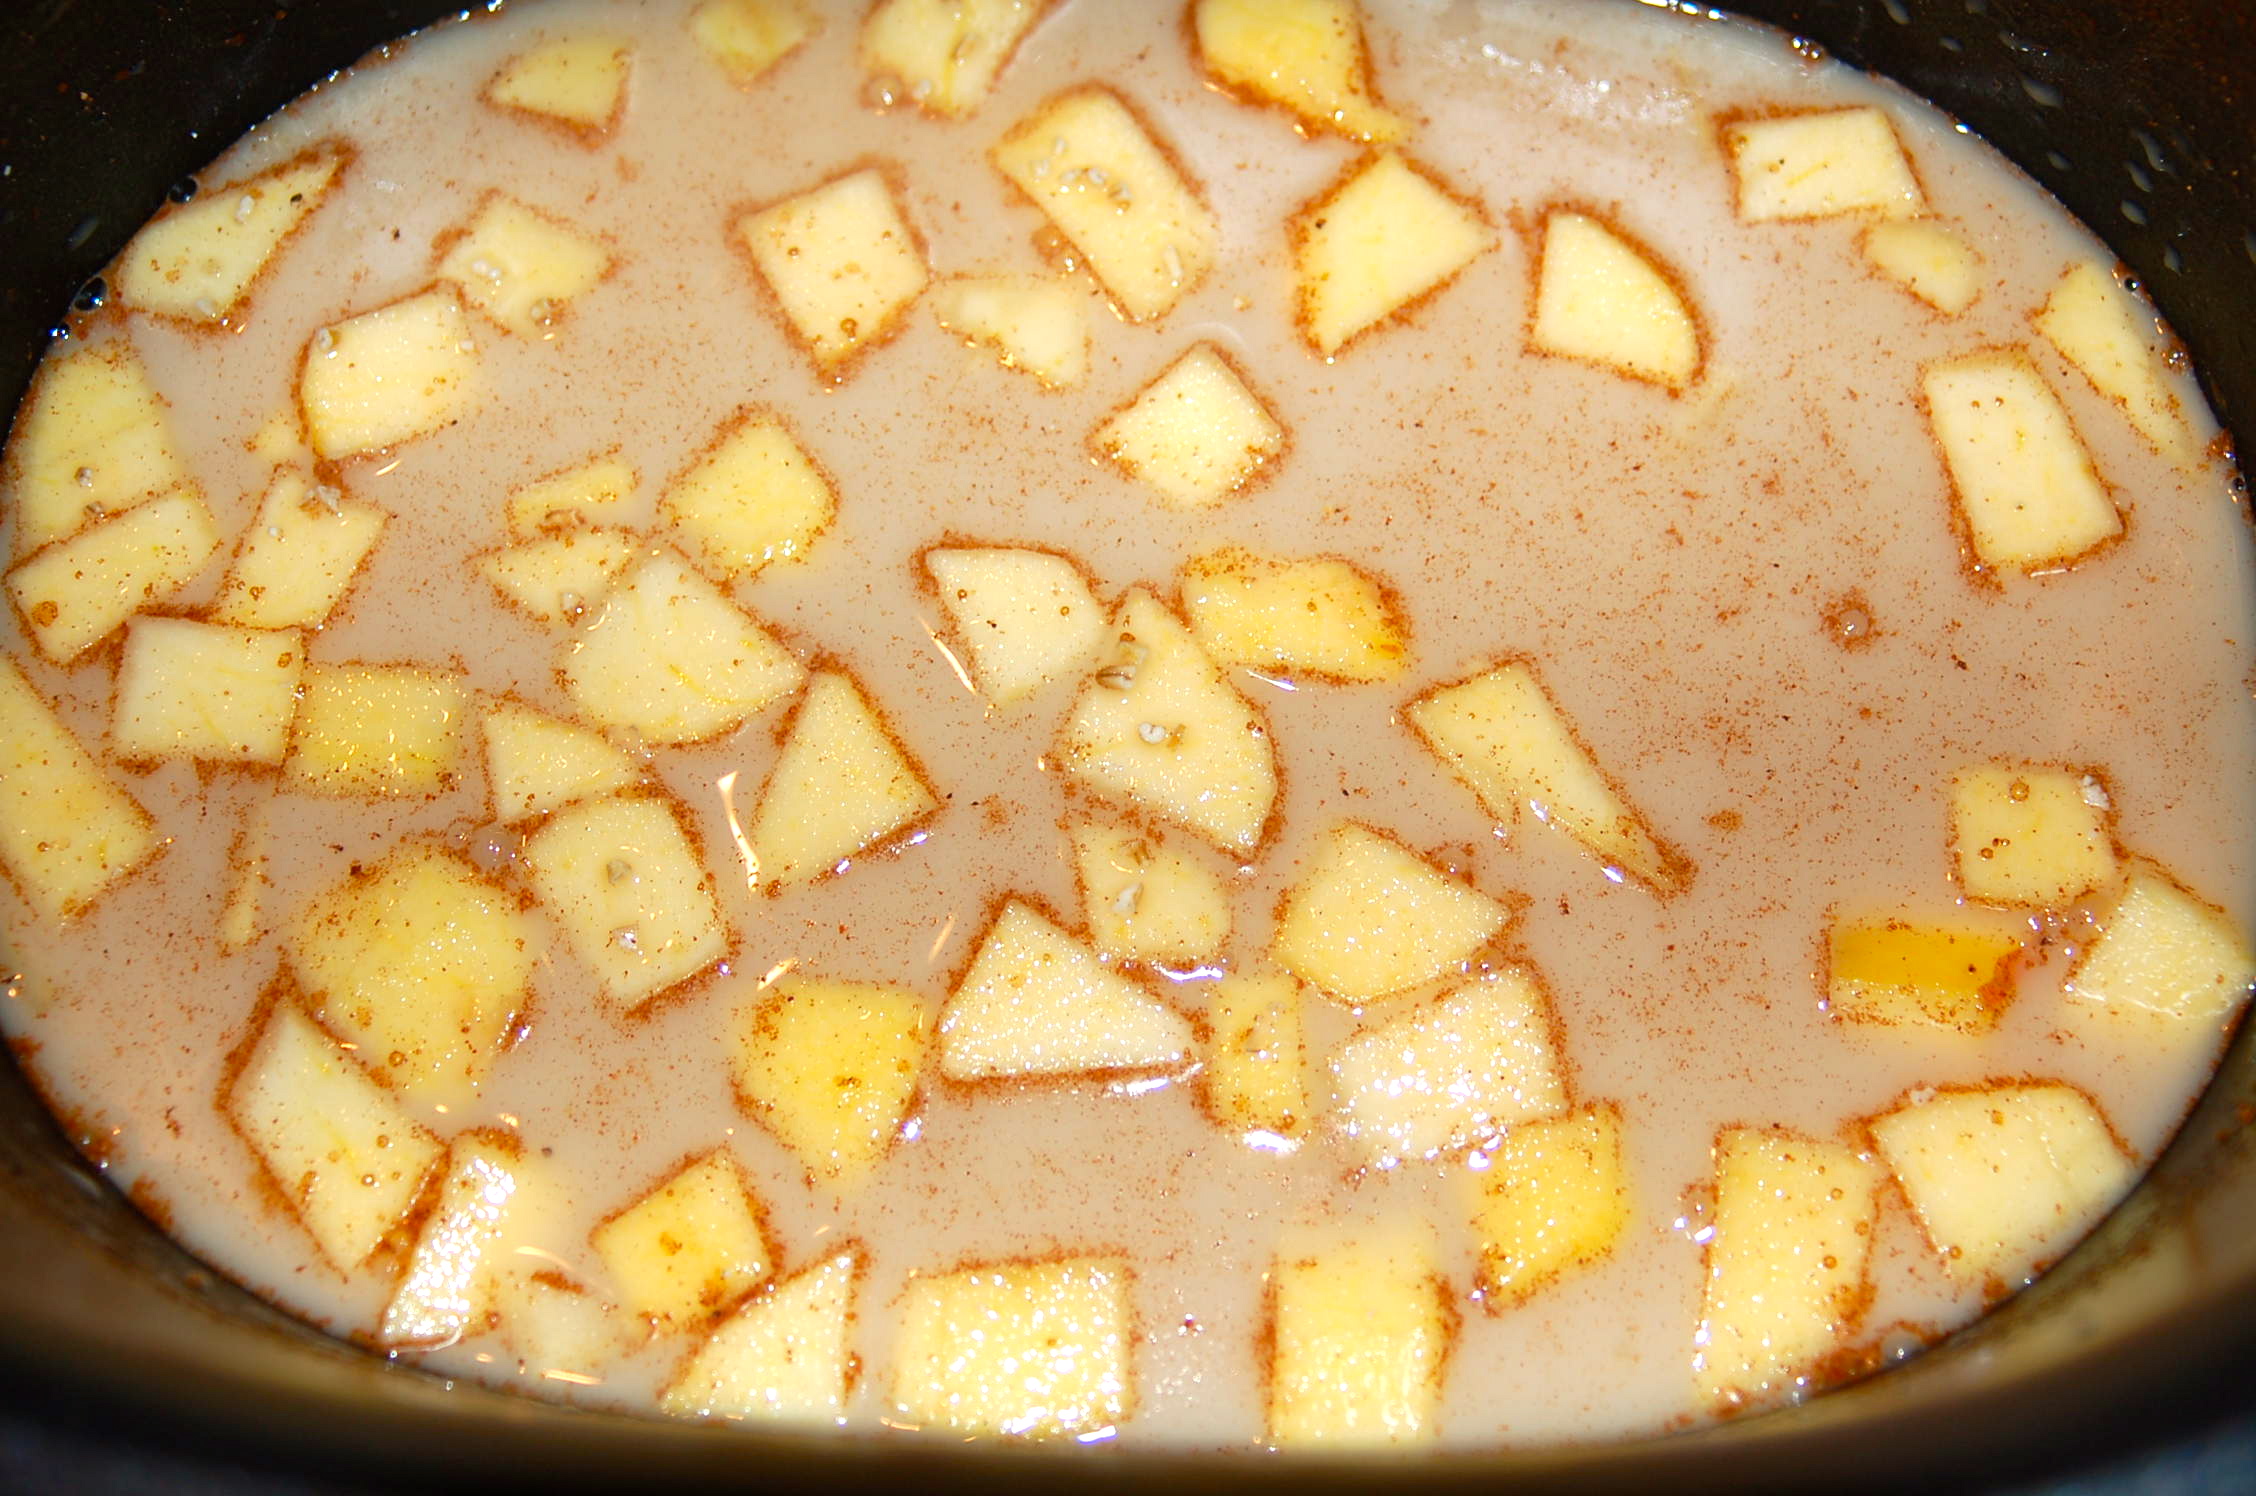
Mix all of the ingredients and pour into crockpot.
I used a 6.5 quart slow cooker with a non-stick insert but a smaller 4 quart slow cooker is all you need. If the insert is not a non-stick surface, you will want to spray it with oil.
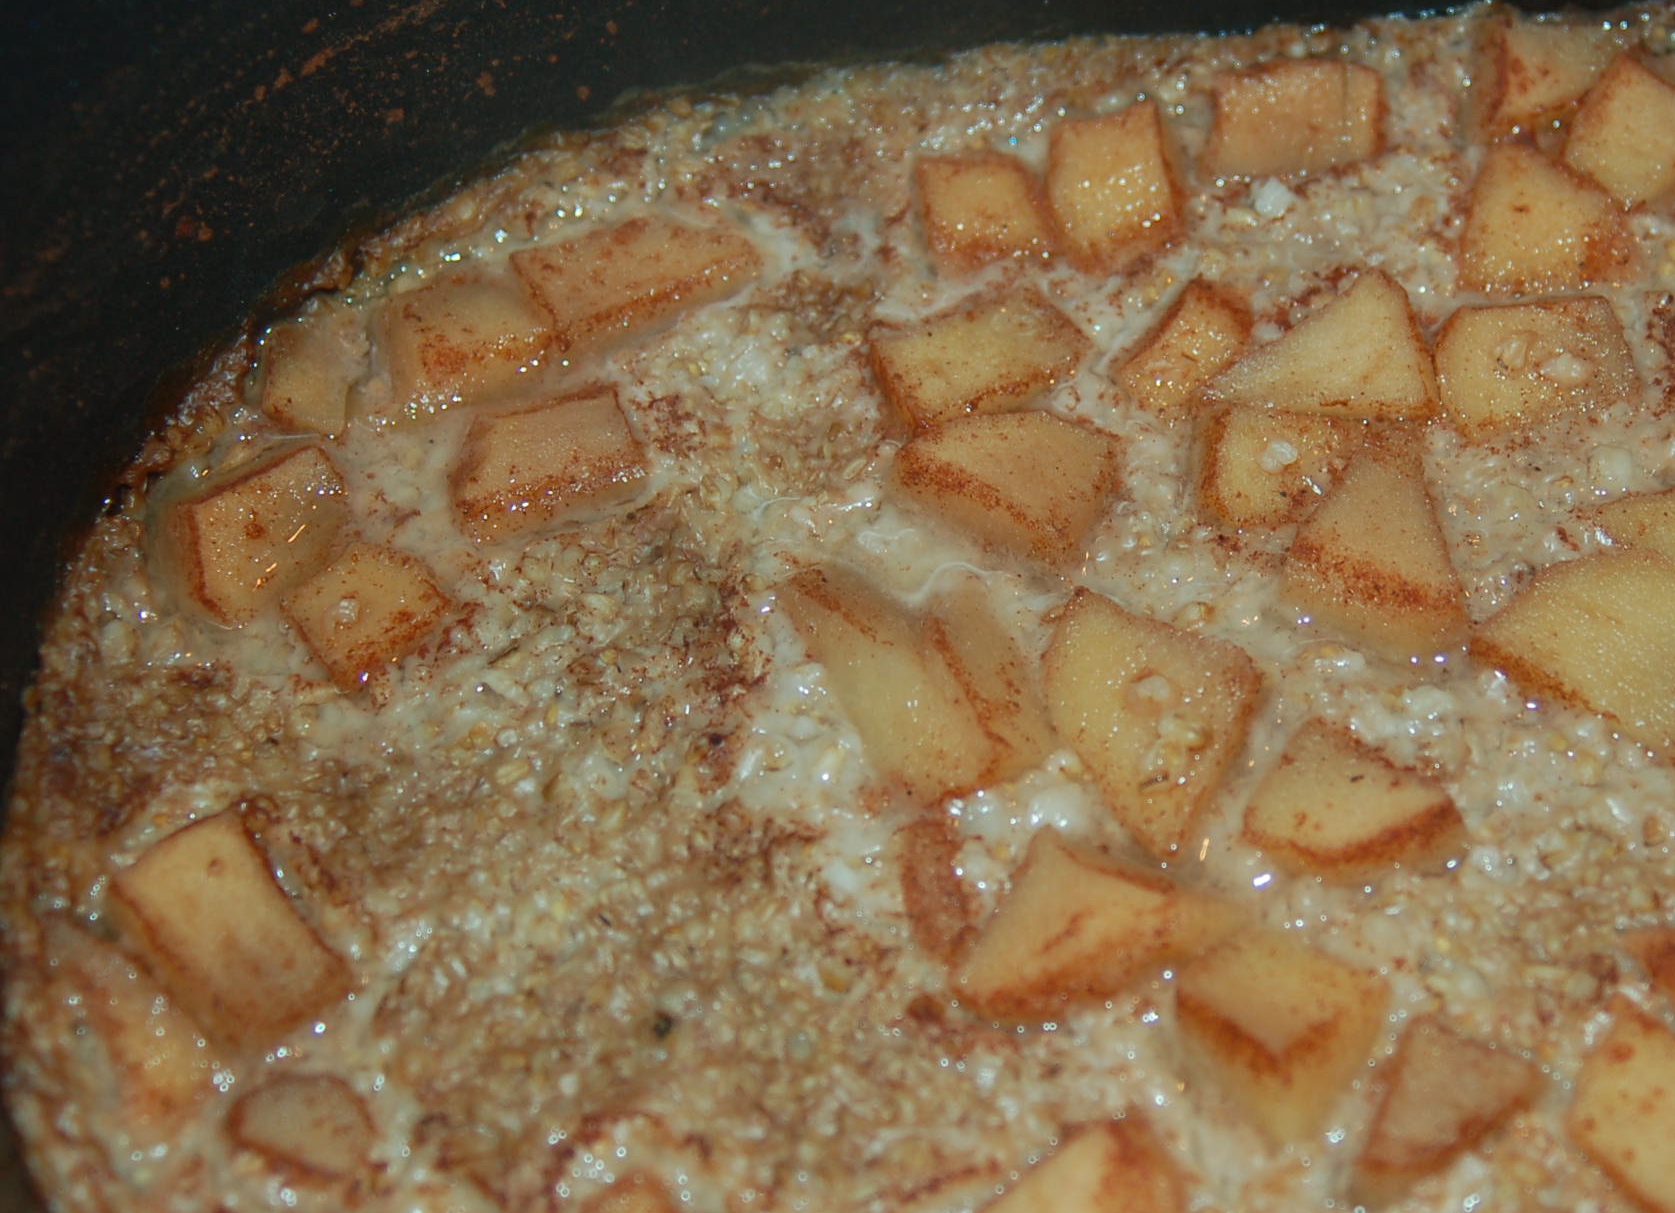
Cover and cook on a low temperature for 7 hours. If you prefer, serve with chopped walnuts or almonds.
I recommend you test this recipe out during the daytime, to determine if you can achieve the desired results with your slow cooker. If the oatmeal is too dry, you may need to add more liquid at the beginning. You may also want to experiment plugging your slow cooker into a timer and cooking the oatmeal for fewer hours. My slow cooker does not work with a timer, so I need to leave it on for at least 7 hours.
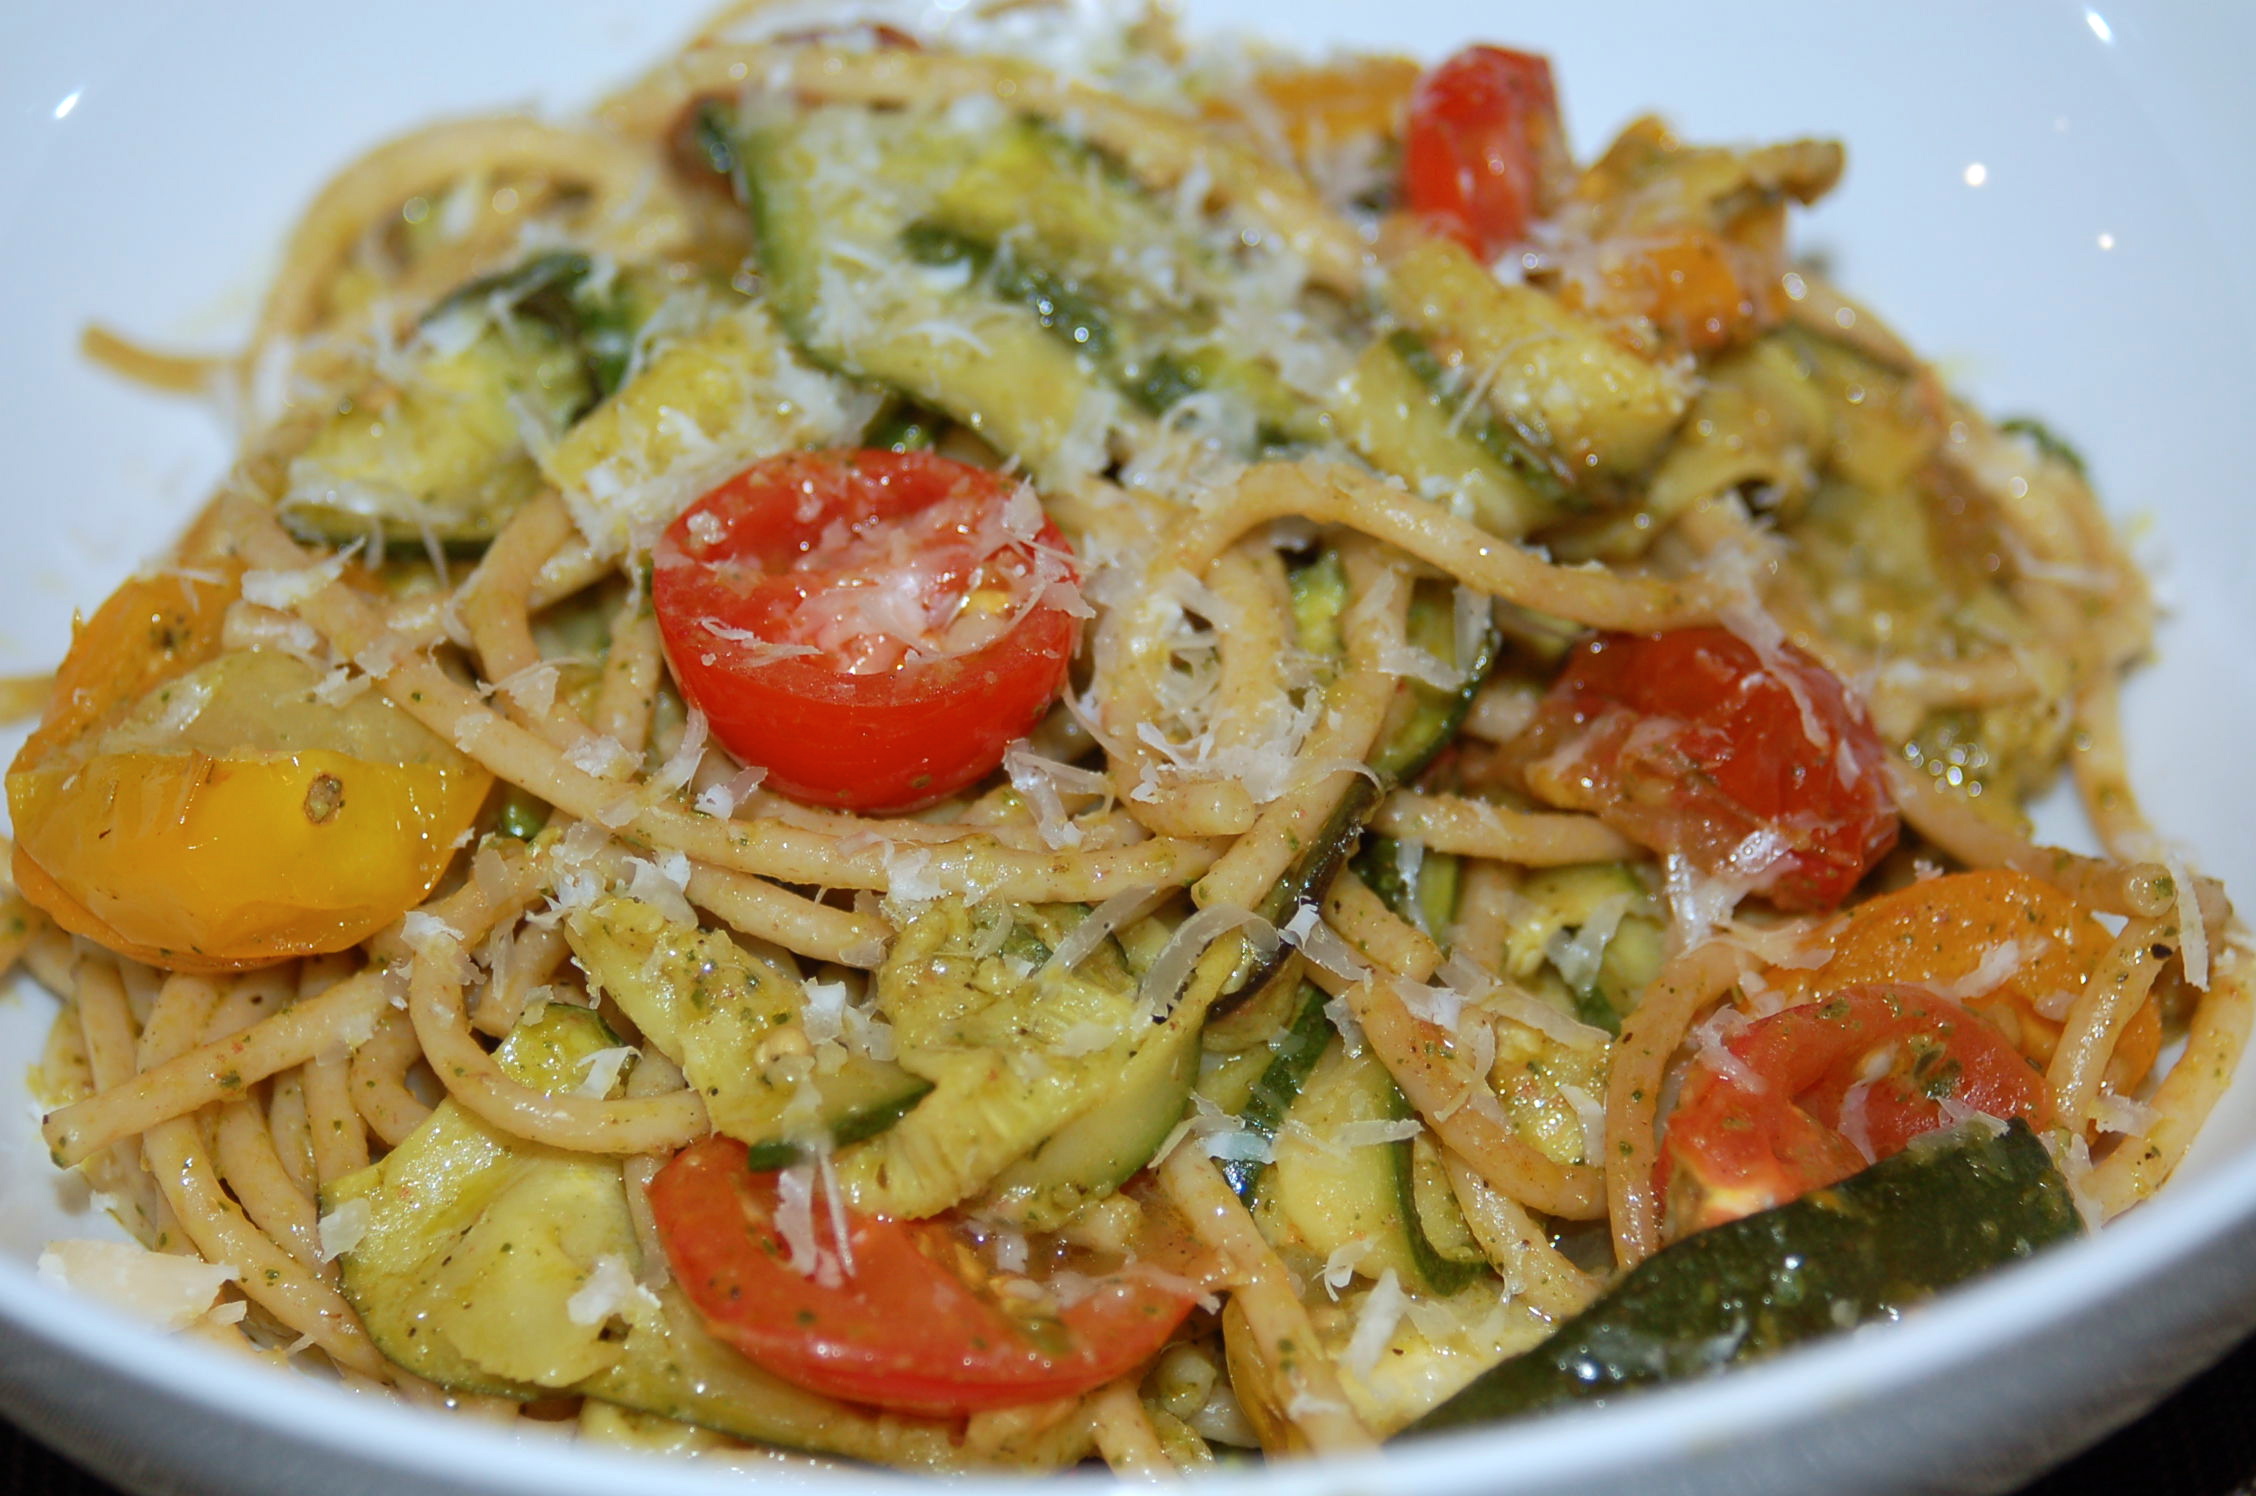
Leftover roasted vegetables are great ingredients to have in the refrigerator when you need to cook a fast and healthy weeknight meal. I had extra roasted zucchini and bell peppers left over after making my Vegetable Lasagna. The day after I made the lasagna, I used some of the roasted vegetables as a topping for homemade pizza. A couple days later, I used the remaining roasted vegetables in this Garlicky Roasted Vegetable Pasta with Pesto. The basil pesto used in this recipe can also be made in advance and stored frozen up to 3 months. I am not ashamed to admit that I used store bought basil pesto; in addition, I used store bought garlic paste since I like my pesto garlicky. This healthy and delicious dinner was ready in 20 minutes.
Serving size: 2
Ingredients for Basil Pesto:
2 cups packed fresh basil leaves
3-4 cloves garlic (I like mine garlicky)
1/4 cup pine nuts
1/2 cup extra-virgin olive oil, divided
1/2 cup grated Parmigiano-Reggiano cheese
Kosher salt and freshly ground black pepper, to taste
Ingredients for Pasta:
2 cups of cooked pasta (use your favorite pasta; gluten-free if you pefer; I used whole wheat)
1/4 teaspoon garlic paste (optional and used only because the store bought pesto was not garlicky enough)
pinch of red chili flakes
1/4 cup roasted bell peppers, sliced*
1/2 cup roasted zucchini slices*
1 cup miniature heirloom tomatoes, sliced
3 tablespoons basil pesto
2 tablespoons of freshly grated Parmigiano-Reggiano cheese
* Note: For directions on how to roast bell peppers and zucchini, follow the instructions on the Vegetable Lasagna recipe.
Directions:
In a food processor, pulse basil, garlic and pine nuts a few times until just combined. Then, while the food processor is running, slowly drizzle in olive oil. It’s important to do this slowly to ensure it will emulsify. Season to taste with salt and black pepper. If you are using the pesto immediately, stir in the cheese. Otherwise, store and freeze without the cheese. You can add freshly grated cheese once you are ready to thaw out and use the pesto.
Cook pasta in salted water and drain. Add the pasta back to the same pot. On medium heat, add the garlic paste, red chili pepper flakes, roasted peppers, roasted zucchini and tomatoes. Stir together and heat until vegetables are warmed through. Combine pesto and heat for 2 additional minutes. Just before serving, sprinkle freshly grated Parmigiano-Reggiano cheese.
Left over roasted zucchini and bell peppers were also used to make pizza.
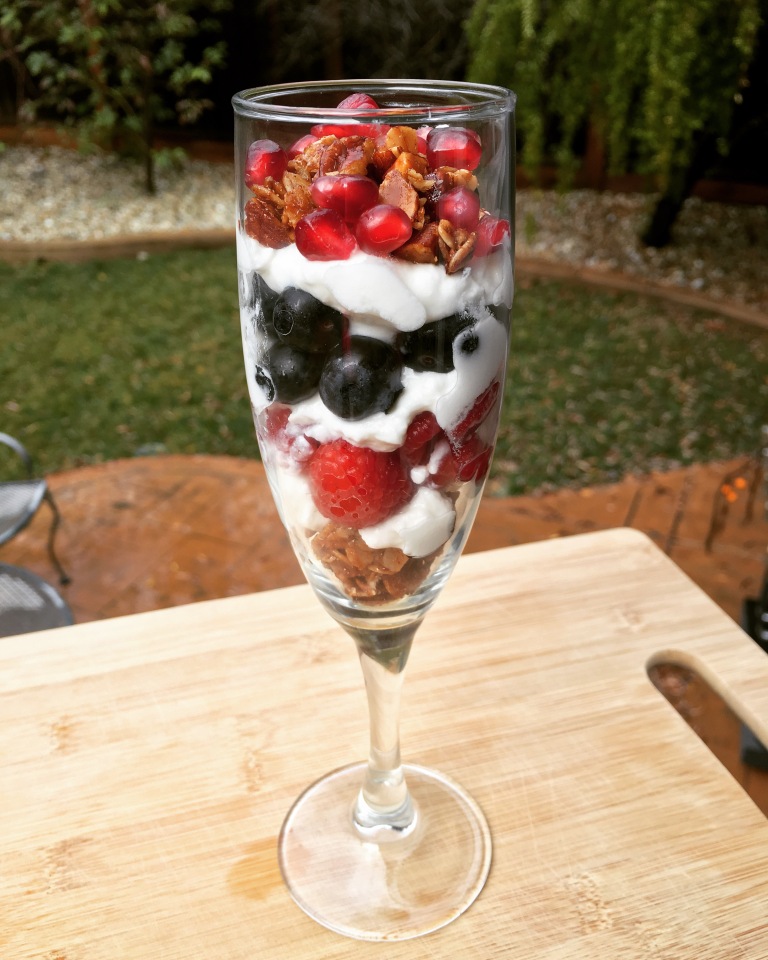
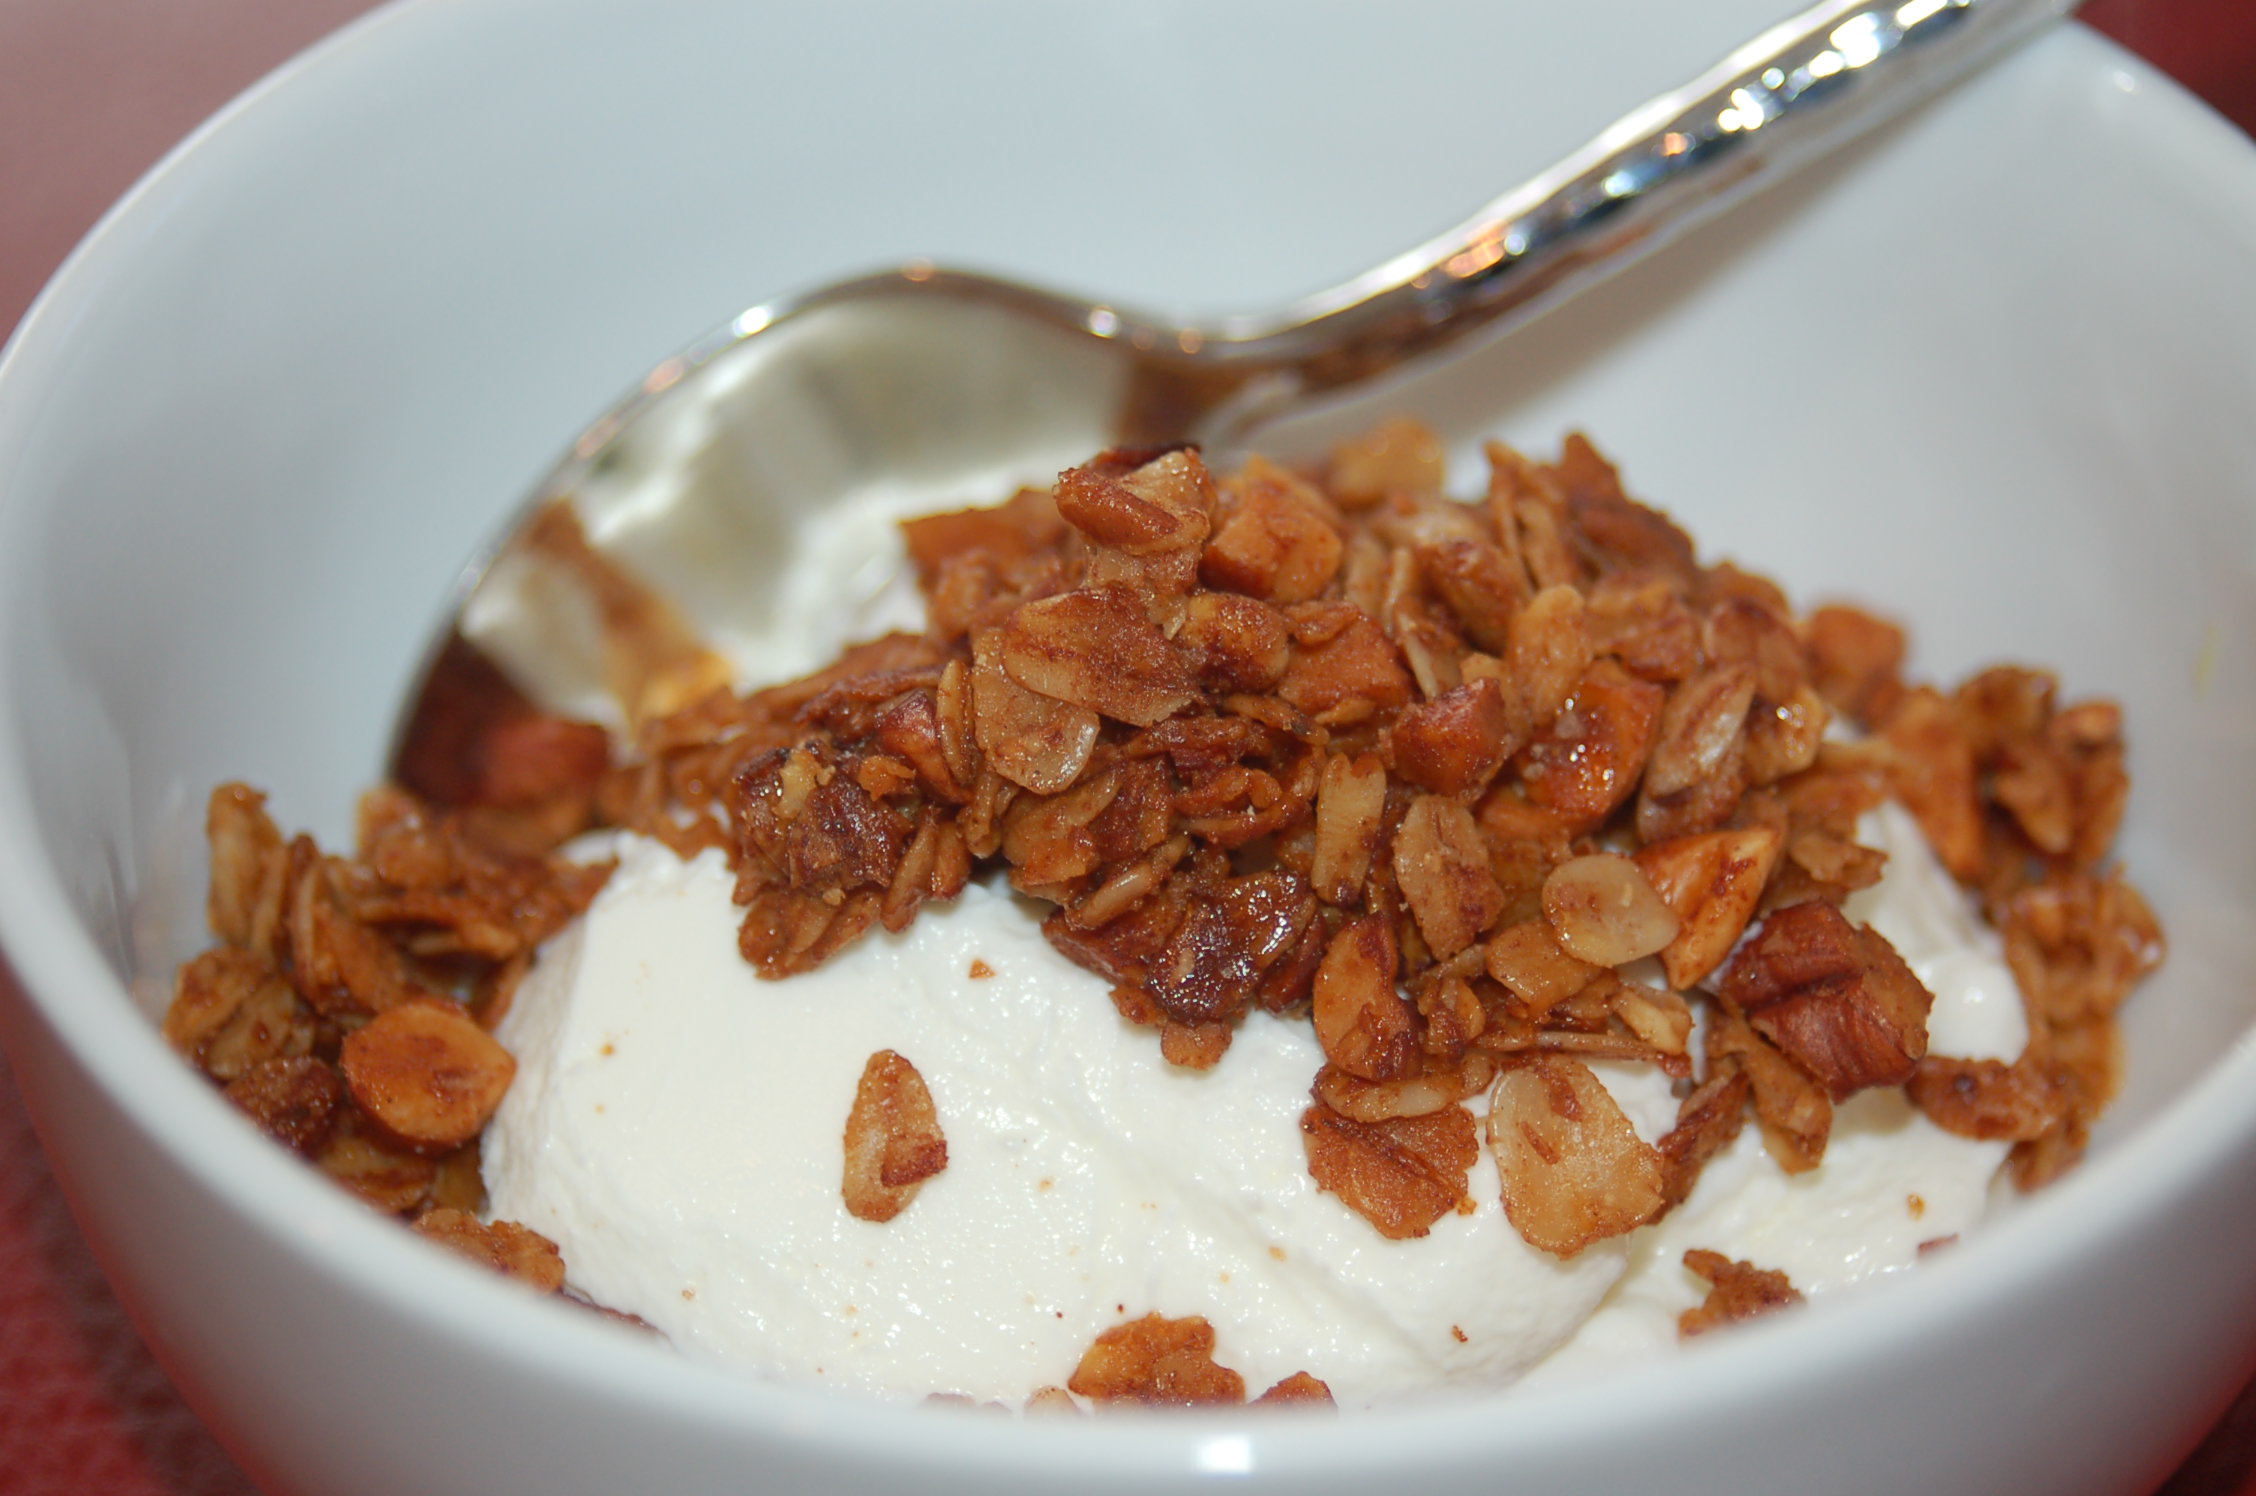
Who doesn’t like granola? My favorite way to enjoy granola is over Greek yogurt for breakfast. Sometimes I’ll add milk to a bowl of granola for a great alternative to cereal; sprinkle it over ice cream as a yummy crunchy topping; or add 1/3 cup of dried fruit, such as cranberries, cherries, raisins, dates or apricots, and eat it by the handful as a snack. The type of nuts or seeds can be swapped out. I sometimes use more walnuts and omit the pecans or use pepitas (pumpkin seeds) instead of sunflower seeds. Choose your favorite nuts. Just make sure the nuts are unsalted. The granola can be stored up to 1 week in an airtight container. Placed into a mason jar wrapped with a bow, fresh homemade granola makes a nice little gift. Who doesn’t like granola?
Ingredients:
3 cups old-fashioned oats (not instant or quick oats)
1/3 cup unsalted sunflower seeds
1/2 cup chopped, unsalted & roasted cashews
1/2 cup chopped, unsalted & roasted pecans
1/2 cup chopped, unsalted & roasted almonds
1/2 cup chopped, unsalted & roasted walnuts
1 teaspoon ground cinnamon
1 teaspoon Kosher salt
1/2 cup canola oil
1/2 cup honey
1/4 cup maple syrup
2 teaspoon vanilla extract
1/3 cup dried cranberries (optional)
Directions:
Preheat oven to 350F
Combine oats, sunflower seeds, chopped nuts, cinnamon and salt in large bowl. In separate small bowl, whisk together oil, honey, maple syrup and vanilla extract. Pour over oat mixture and combine thoroughly. Spread out evenly over parchment lined baking sheet. Bake for 30-35 minutes until golden brown, stirring granola every 12-14 minutes to ensure even browning. Allow granola to cool on pan completely unless you forgot to line the pan with parchment paper. Clean up might be easier if the granola is transferred from an unlined baking sheet to a glass casserole dish to cool. Otherwise, the granola will cool to crisp little chunks and slide right off the parchment paper. I prefer to leave the granola in some smaller chunks to store.
Cool and store in airtight container up to 1 week, if it lasts that long.
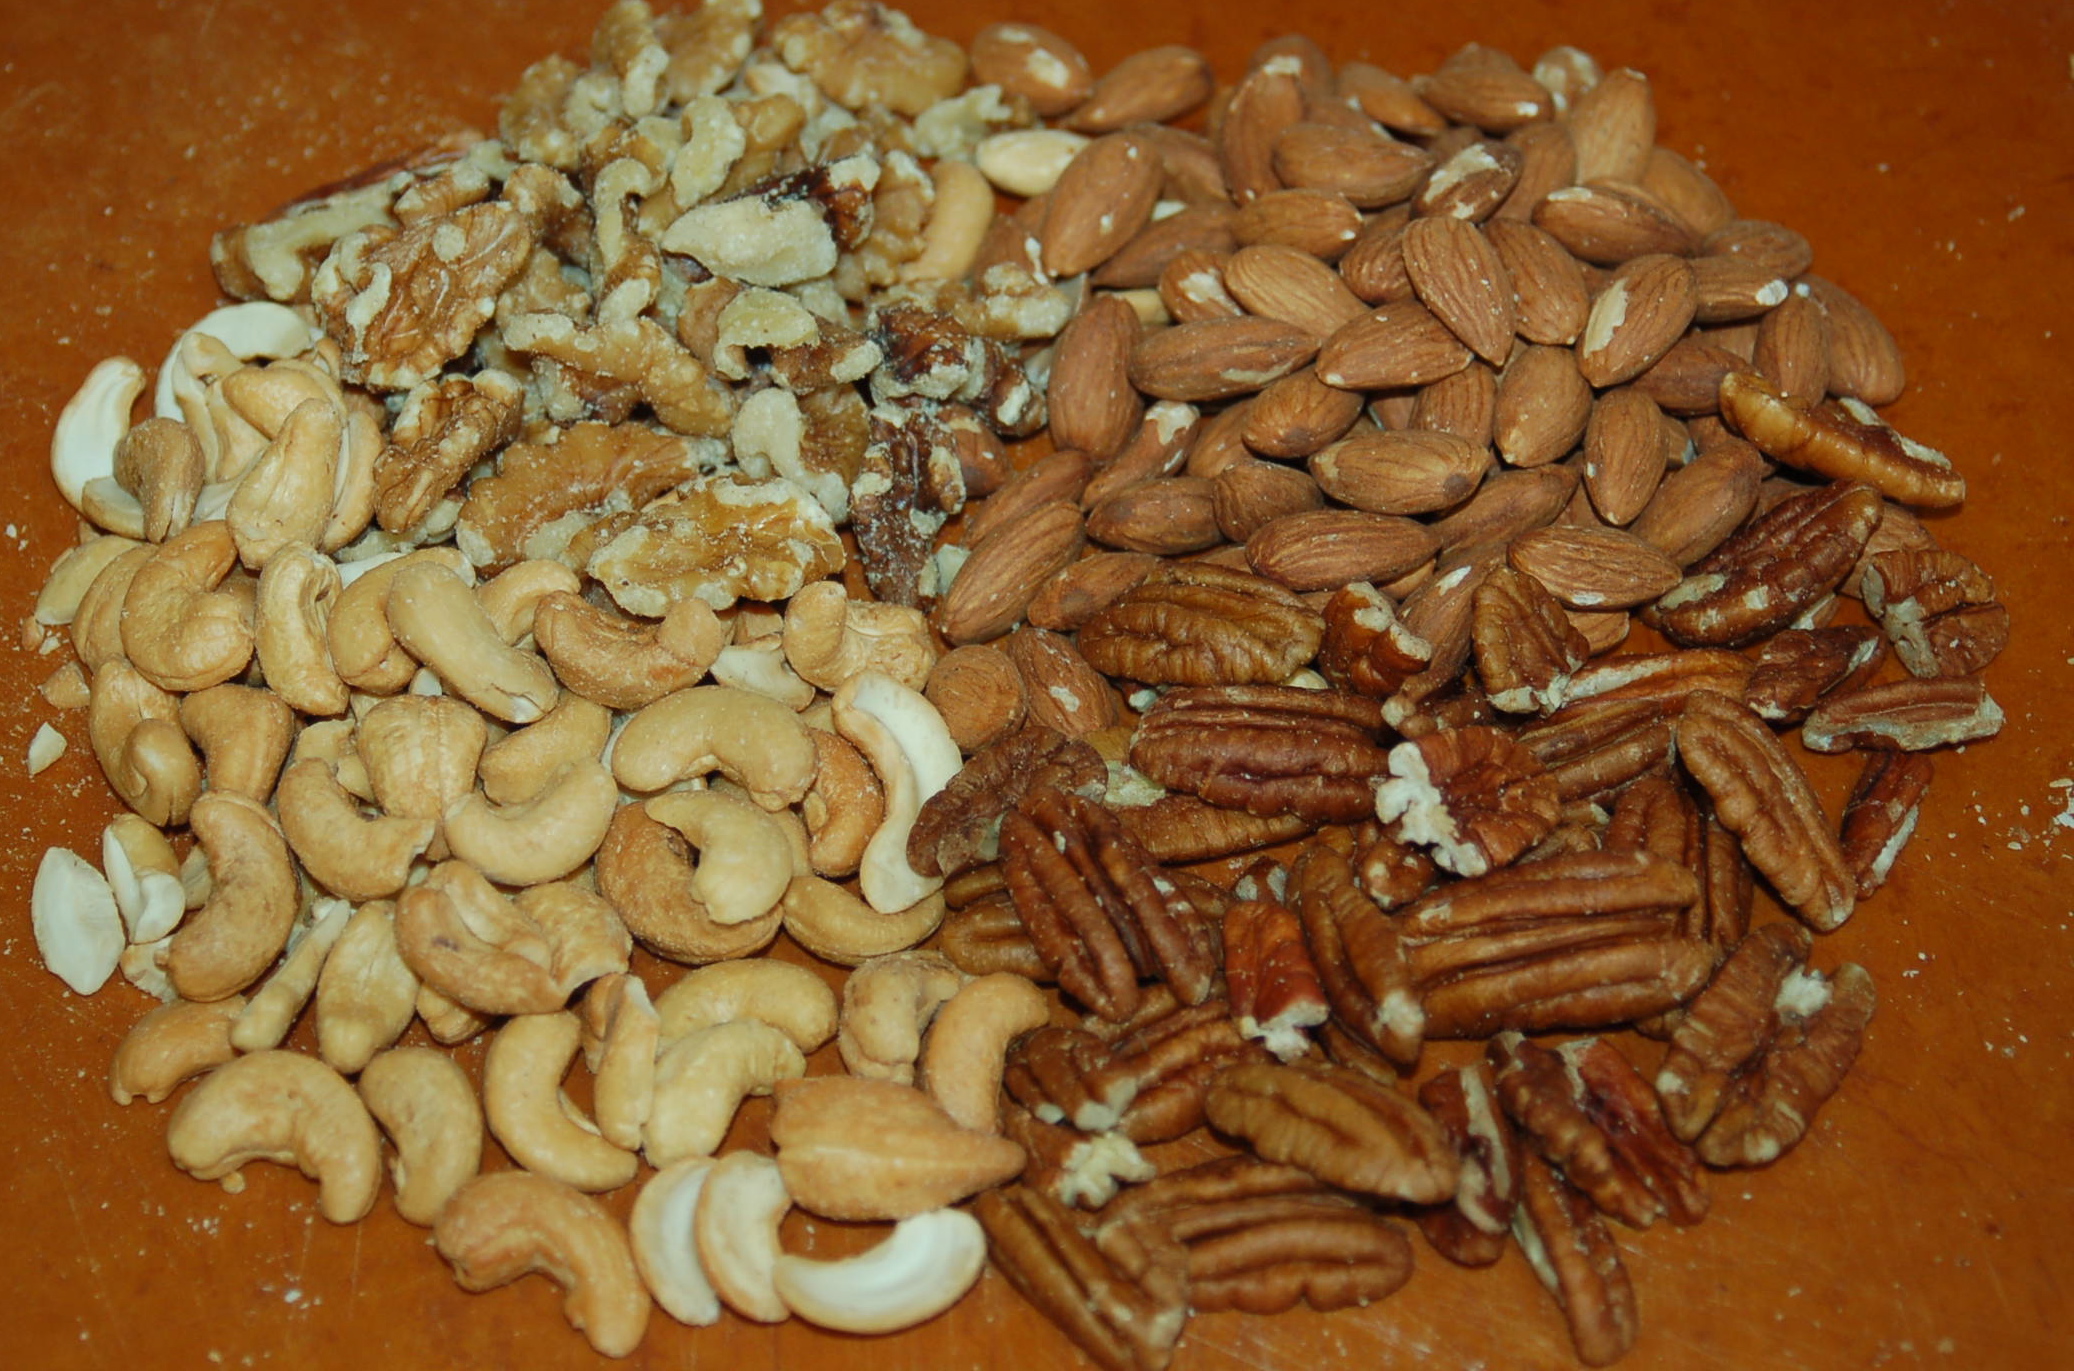
I like a variety of nuts, including walnuts, almonds, pecans and cashews, in my granola. Choose the combination of you enjoy most.
The granola can be stored up to a week in an airtight container. They also make nice gifts.
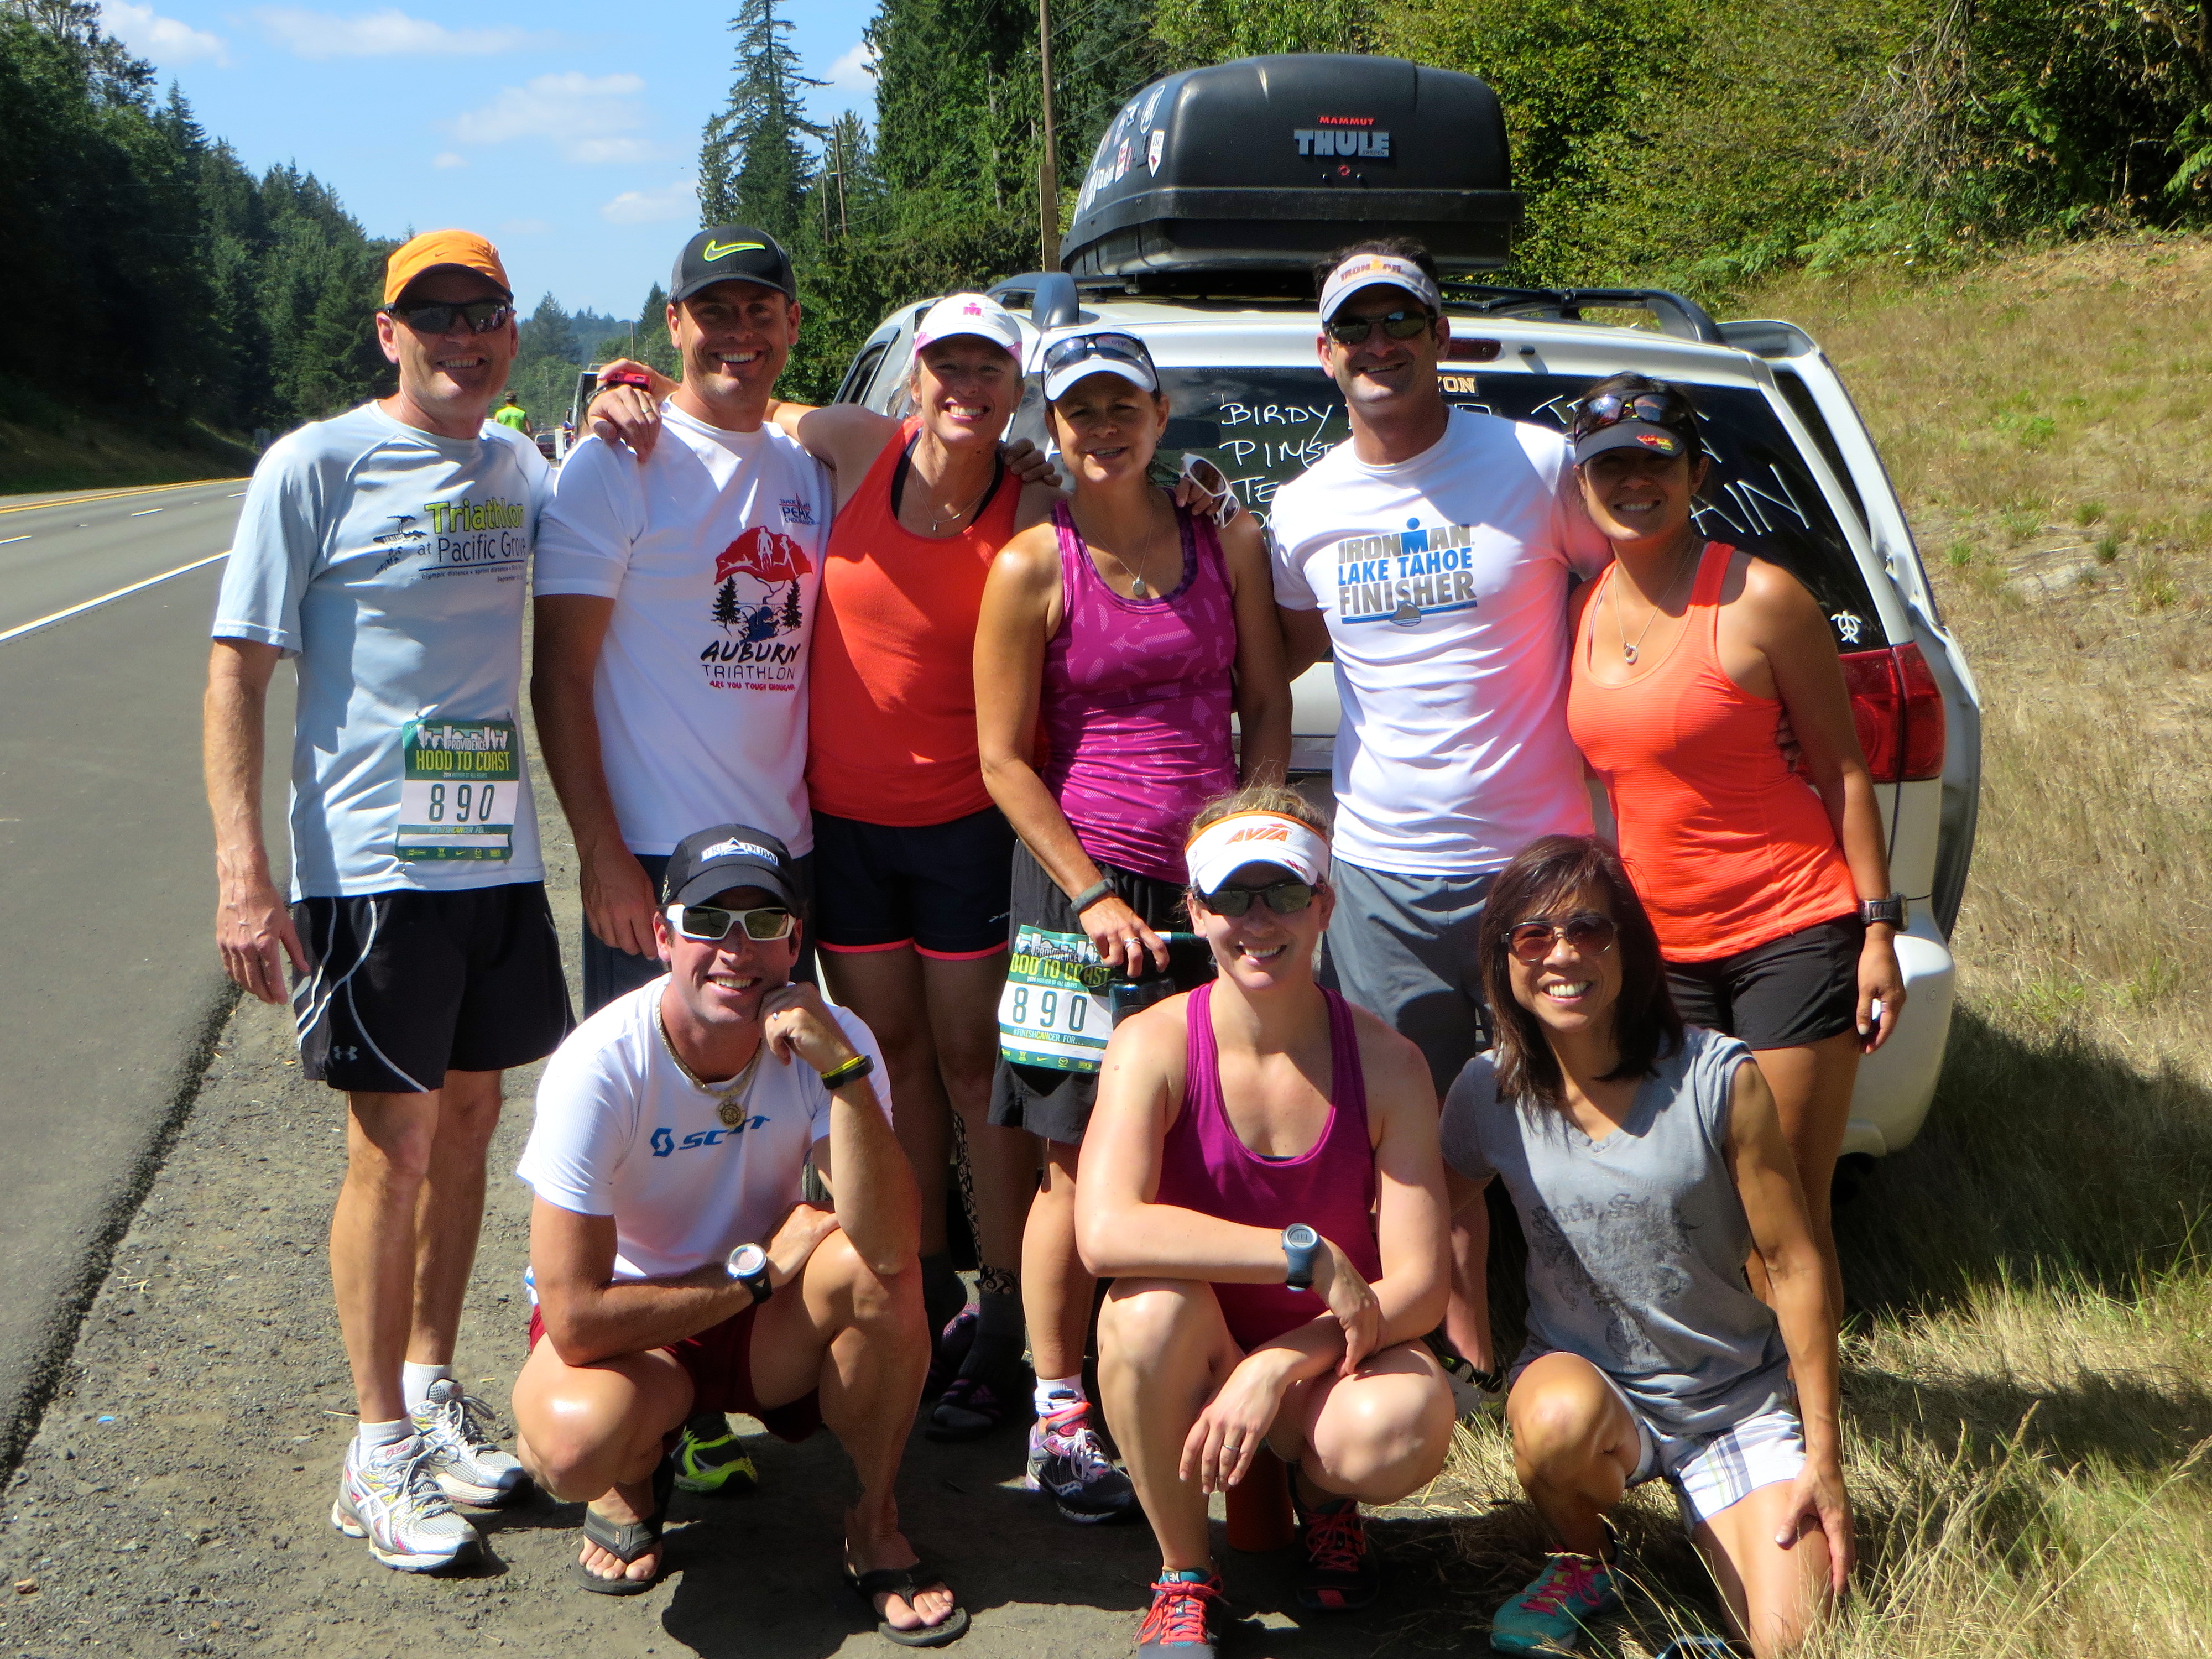
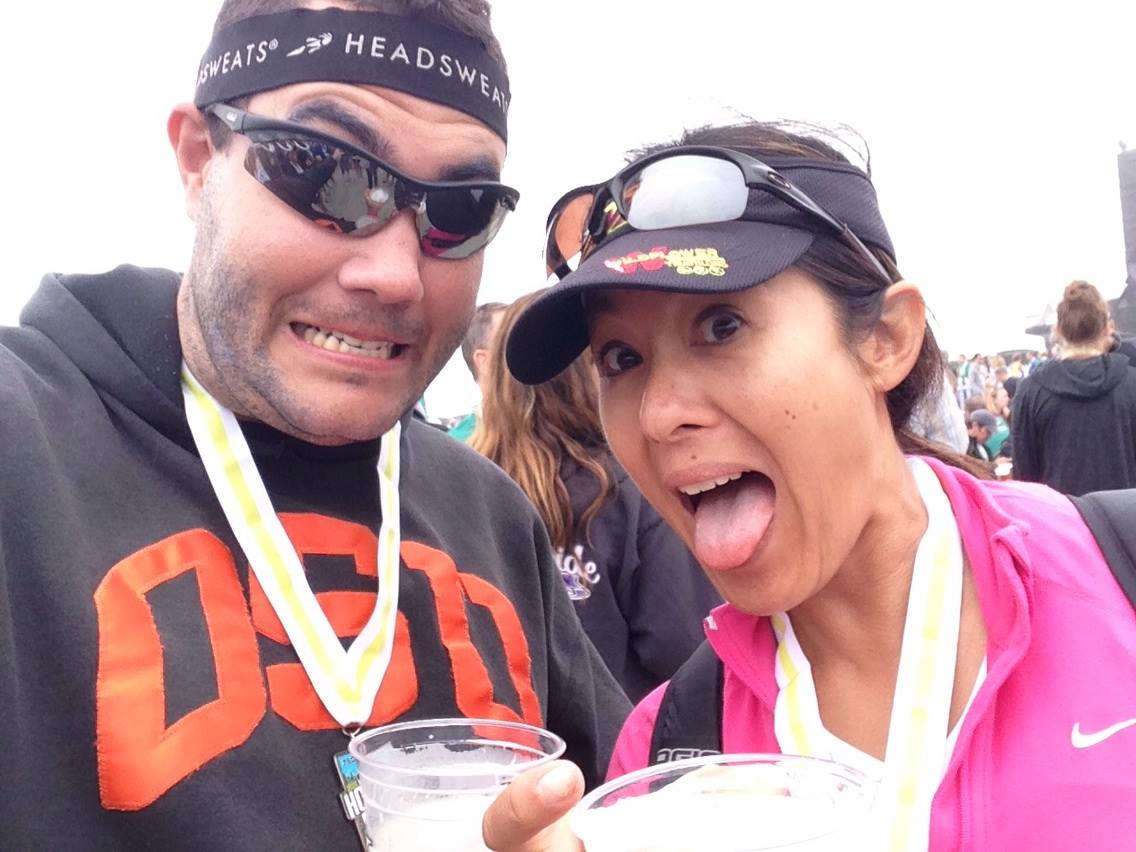
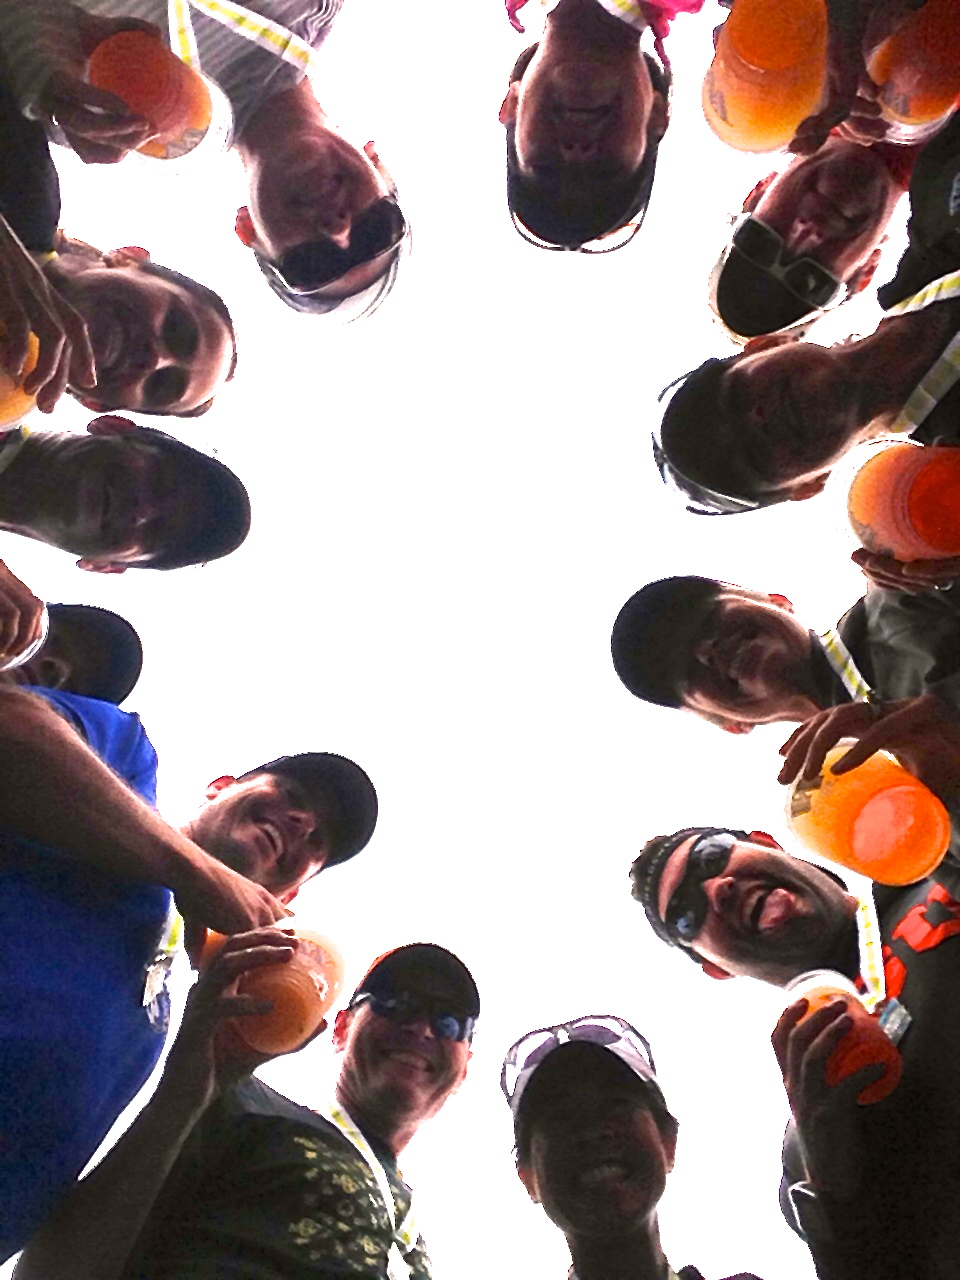
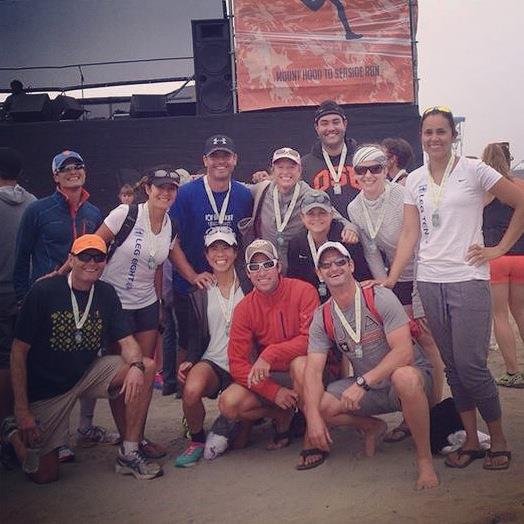
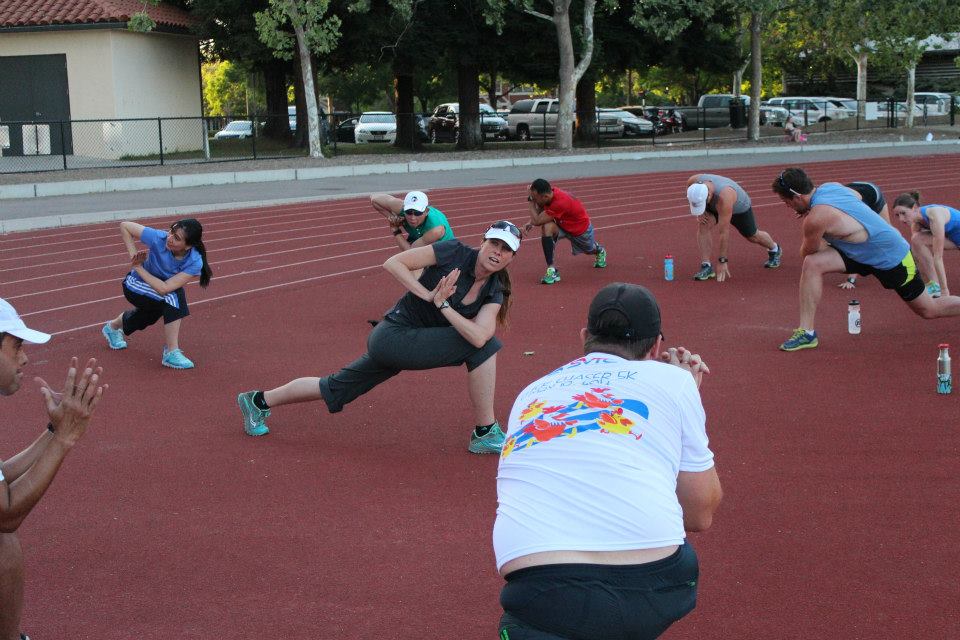
In August I was lucky to have the opportunity to participate in the world’s largest relay race, Hood to Coast (HTC). It’s dubbed “The Mother of All Relays” holding the world’s record as the largest relay race with 12,600 participants. Starting from Mount Hood in Oregon, the relay travels 197 miles through Portland and finishes on the coast of Oregon.
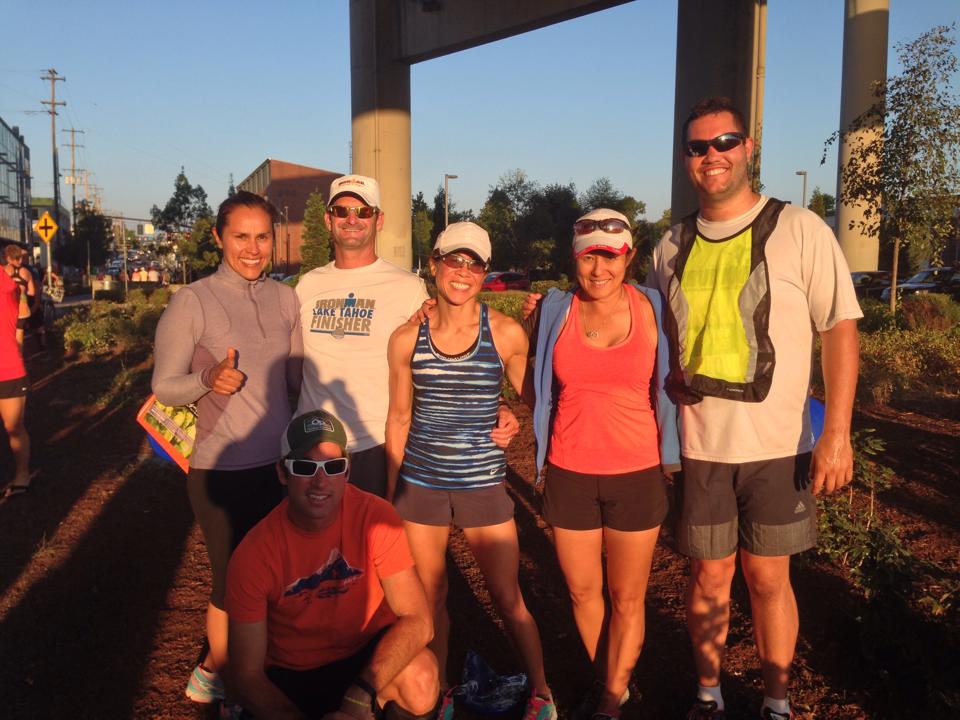
We called ourselves the “Pain Train” and our carriage was twelve people strong. Our engine included a few Boston qualifiers. I’m certain I was invited not for my speed but because my friends thought they could tolerate me for 50 hours in the car (about 20 hours round trip to Oregon plus another 30 hours racing). Or was it because they thought I could tolerate a close confinement with intensely competitive, sweaty, athletes who have not showered for more than 24 hours? In either case, I’m flattered.
This race requires a bit of planning. There are 2 vans, with 6 people in each van, and each person runs 3 legs, about 4-8 miles each, in a specific sequence each time. We also had to coordinate eating and sleeping while the race was in process. This level of organization is easy to do for some of us anal, type A triathletes. I was not surprised to receive detailed instructions from our team captain five months prior to our race.
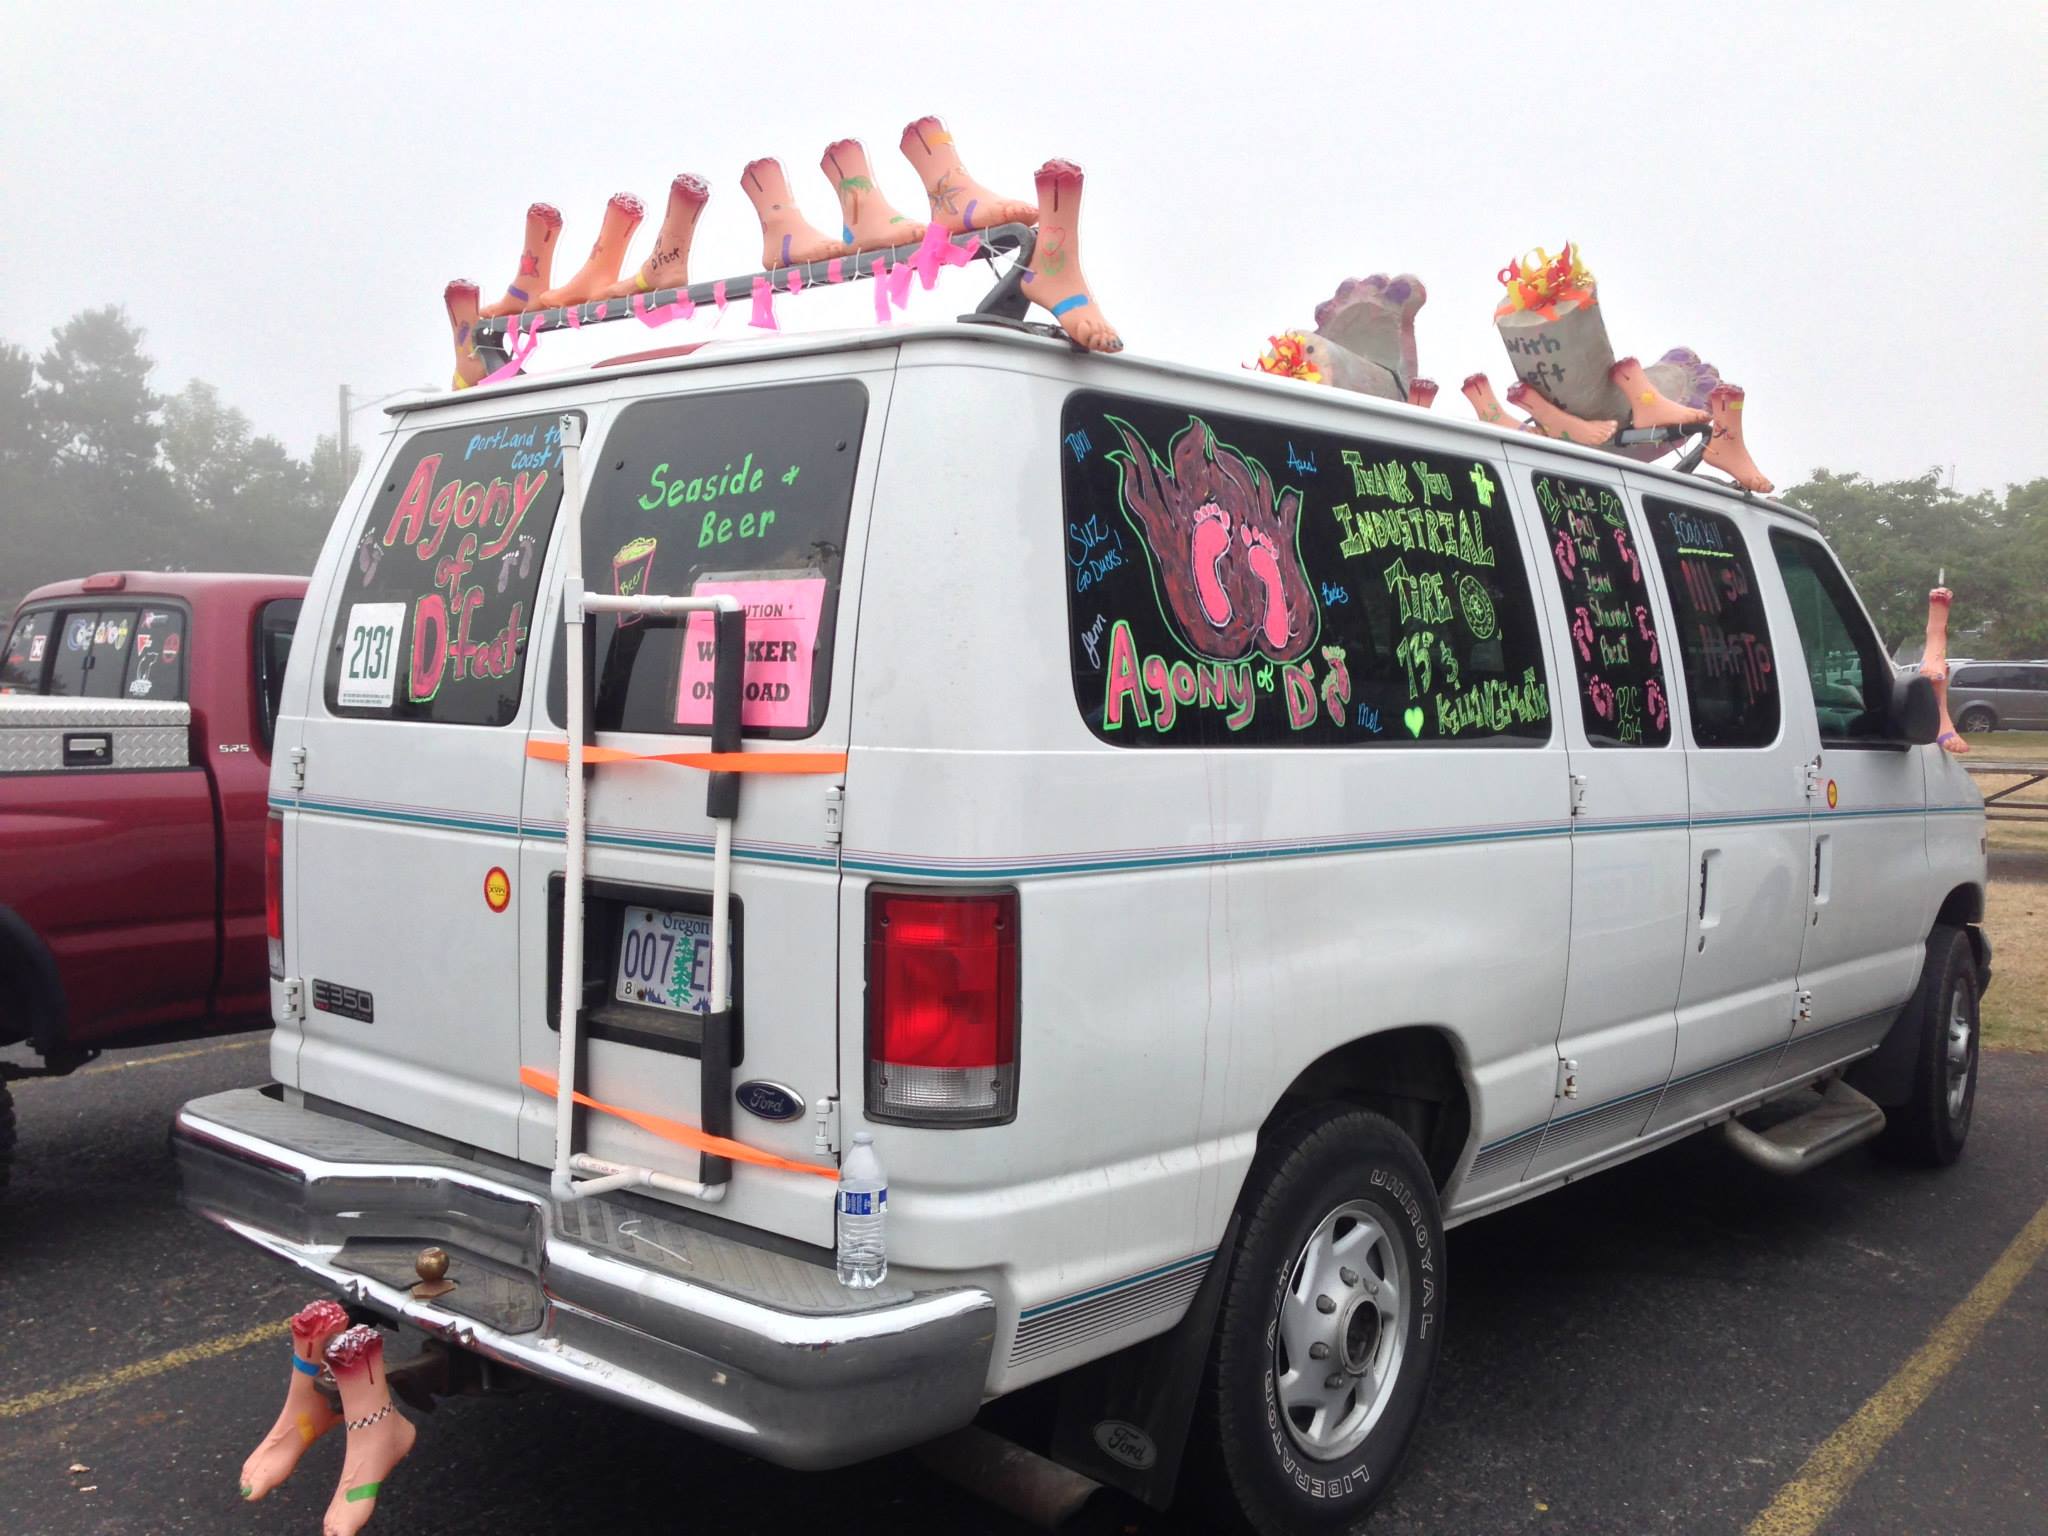
This team won for best decorated van.
Eating on the Run
The Hungry Athlete was assigned the responsibility of providing nutrition for the team during the race. The best type of food to pack are healthy, ready to eat and portable. Here’s some of the food I packed:
Boiled eggs
Salted boiled potatoes
Quick oats
Instant cup of chicken noodle soup
Pop tarts
Bananas
Bread
Peanut butter
Jelly
Sliced turkey
Mustard
Tomato
Lettuce
Potato Chips
The Race
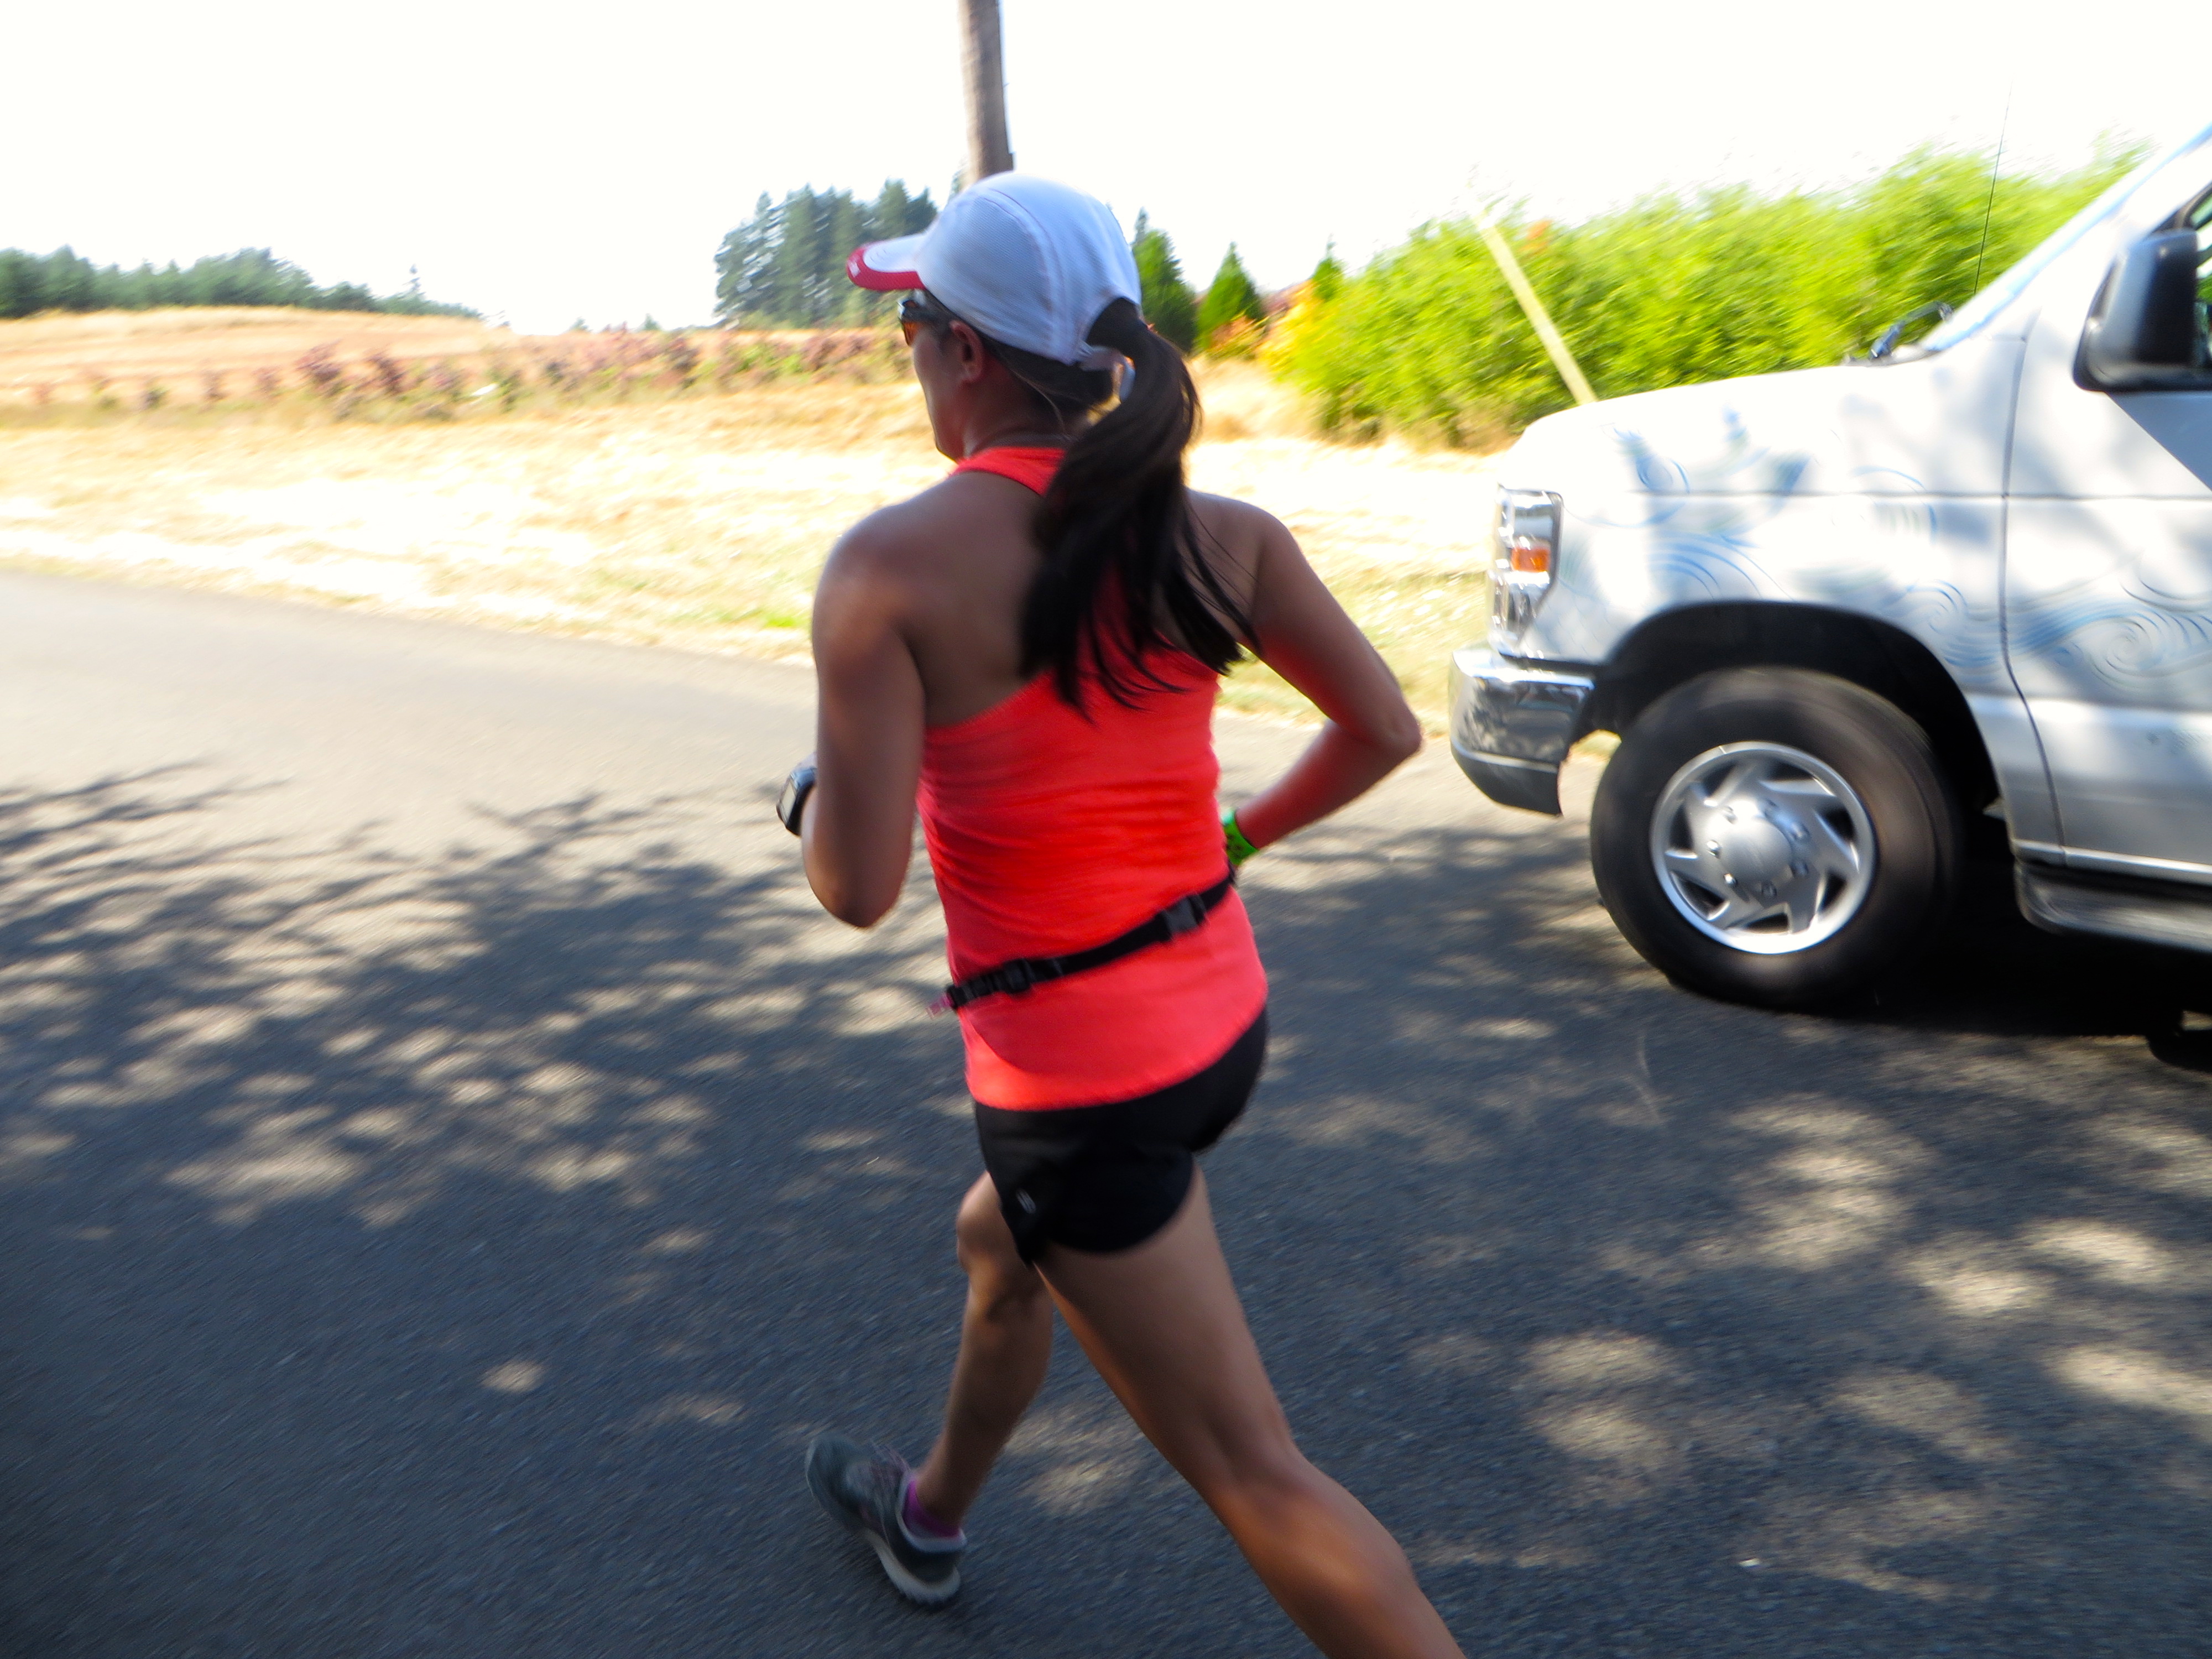
I was assigned to be runner #8. I almost missed my first leg. We had misread the driving instructions and ended up at the wrong exchange. Once we realized our error, we quickly drove to the correct exchange where our #7 runner had been waiting and looking all over for me. Once we found each other, I grabbed the wristband/baton and took off. I had never run a 24-hour relay race before so I was not sure if it was necessary to pace myself. After all, I would have hours to recover before my next segment. I decided to run conservatively and save it for the last leg. It was a warm but fun run.
I was on a mission to rack up some “road kills”, an HTC tradition of tracking the number of people you passed less the number of people who passed you back. Unfortunately, while I had as many as 12 road kills on one run, I ended up being the road kill almost as frequently. The net result was an unimpressive couple of road kills. Some vans proudly tallied their road kills on their windows.
My second leg started around 1 am and it was cold. I had to change from shorts and a tank top into warmer capris, gloves, a long sleeved top layered over a run shirt and a headlamp. This part of the run was on a steep uphill dirt trail. I made the mistake of foregoing the handkerchief/bandana/bluff and left it in our vehicle. I desperately needed one to cover my nose and mouth. Chase vehicles driving by were kicking up a lot of dirt. I could feel the grit on my teeth while I was running. Although I wasn’t the fastest runner on our team, I think I was one of the best prepared to run on a steep trail in darkness. I had completed my first trail marathon several months before and was use to running up and down steep terrain. This gave me added confidence pacing up the hills and running fast downhill with limited visibility. The air was cool and the sky was full of stars. I had never run under so many stars before. It was amazing and I loved every minute of that dirt eating run.
Things were going smoothly until highway patrol decided to shut down one of the main roads leading to an exchange because it was clogged with too many vehicles. Realizing that our two teams were not going to make it to that exchange on time, we desperately tried to communicate with one another. There was no cellular coverage. We also had a couple runners standing around in the cold waiting for our warm cars to pick them up. Somehow, our runner, Mark, found us. We were rolling slowly in traffic when he came flying out of the dark and bear hugged our vehicle. We were worried and so happy to see him. Judging from the big smile on his face, he was happy to see us. Poor Mark. We’re so proud of how he took it in stride. Mark has a wonderful, mellow, go with the flow personality. It’s this positive attitude that turned a sucky situation into one that we can sort of laugh about now.
Key to this race is going with the flow and just enjoying the camaraderie of your team. Beer helps too.
I got really sleepy after my second run. It was the wee hour of the morning. I curled up in the car and managed a little catnap while my car mates played the closest thing to a lullaby from our playlist for me. Good thing I got some rest. Later, when I took over the helm, I found myself driving a bunch of sleeping runners.
The last leg started out quite warm. After a little shut-eye, our team was full of energy and excited to run to the finish. As we got closer to the coast, the temperature had dropped and sunny skies were replaced with grey skies.
Pain train finished 541 out of 1049 teams in 30 hours and 15 minutes. The first place team finished in 17 hours and 32 minutes with an average pace of 5:18 min/mile. How they achieved that pace with traffic, I have no idea. Somehow they were able to get their runners to each of the exchanges on time.
Overall, it was a fun event to check off my bucket list. We had a great group of people who I enjoyed getting to know. It’s not for everyone though. If you know what to expect, have a good group of runners and have the right attitude, it is totally worth it. Organize your teams early though. It took our team captain two attempts before he got the lucky draw of the lottery to enter our team.
Tips
Plan far in advance. Hotels get booked up in Oregon very quickly. If you have any “locals” on your team, you will need to provide 3 volunteers for each local racer.
Encourage your teammates to pack efficiently. One of our cars drove up with 7 people, our luggage, sleeping bags and food. Determine in advance if a few bigger bags work better than lots of smaller bags per person? There are pros and cons to both.
Portable Kettle Pots are a must have for heating up water quickly.
Have a contingency plan in case your van is unable to locate your runner. There is no cell phone coverage for much of the course and you will be unable to communicate with your other team’s van or your runner. Consider using long ranged Walkie Talkies.
It wasn’t an issue for our group, but you may consider bringing a portable shower. At one of the exchanges on day two, another van drove by our vehicle slowly with its windows and sliding door wide open. We caught a whiff of the ripe odor that exuded from that van. We were immediately grateful for our teammates’ much lighter scent. That van decided not to park near us. Thank gawd!
Plan out the food.
Bring enough food for the entire race. We only planned to bring enough to be consumed between midnight and 4 am. We thought we would be able to stop to buy a meal at least a couple times. It turns out that we were only able to stop for one meal in Portland. During the race, we were often in rural areas with no restaurants or had no time in between exchanges to get food.
Let your team know what food you have for them. I volunteered to provide sustenance and updated our team spreadsheet with the food list but apparently I should have made a big announcement about the Pop Tarts. (Sorry Birdy!). Yes we had Pop Tarts.
Bring plenty of water and Wet Wipes.
Bring markers to write on the outside of your vehicle and if you are so inclined, decorate your vehicle or consider a team costume.
Don’t expect to sleep much but bring a little pillow to help you catch a little snooze in the car.
Come with a fun playlist.
Go with the flow and just have fun with your team.
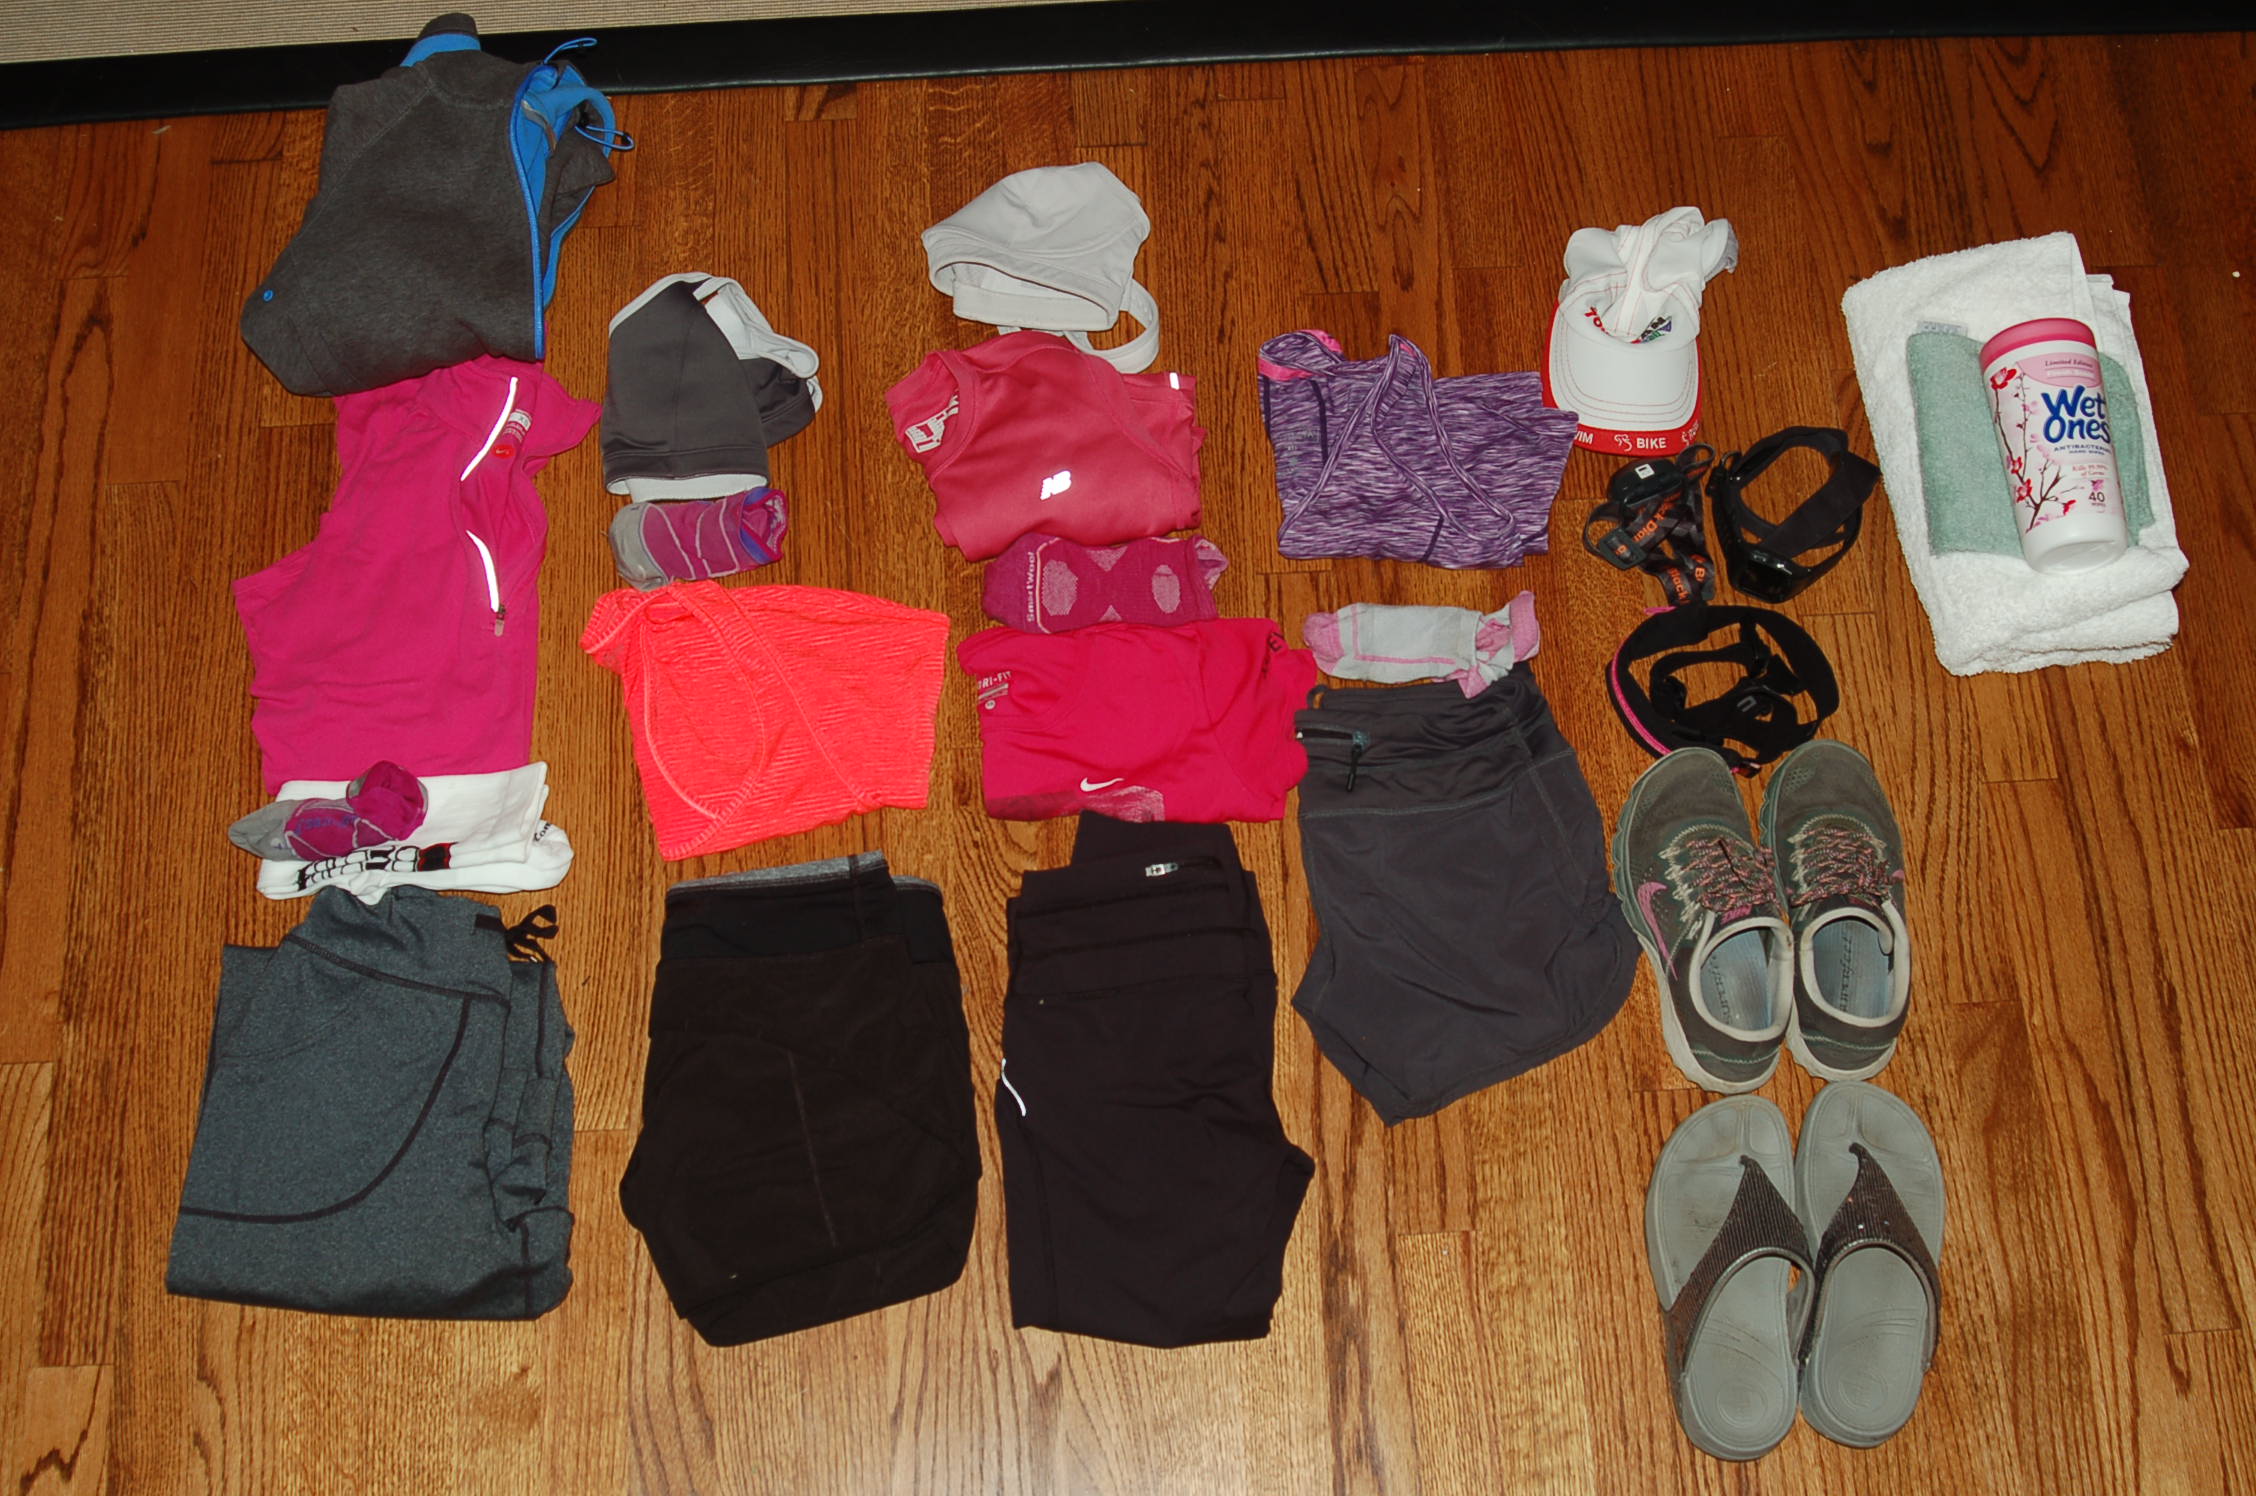
Pack well. Be minimal yet thoughtful about what you bring. I packed everything into a traditional triathlon bag that had one big main compartment and a few small outside compartments. If I had to do it again, I would bring the Story38 Alliance Carrier* (http://story38alliance.com)
*Packing your Personal Gear and the Story38 Alliance Carrier
Here’s the run gear I packed. Be prepared for changes in temperature and to sleep in what you are wearing. Wet wipes and a big towel are a must.
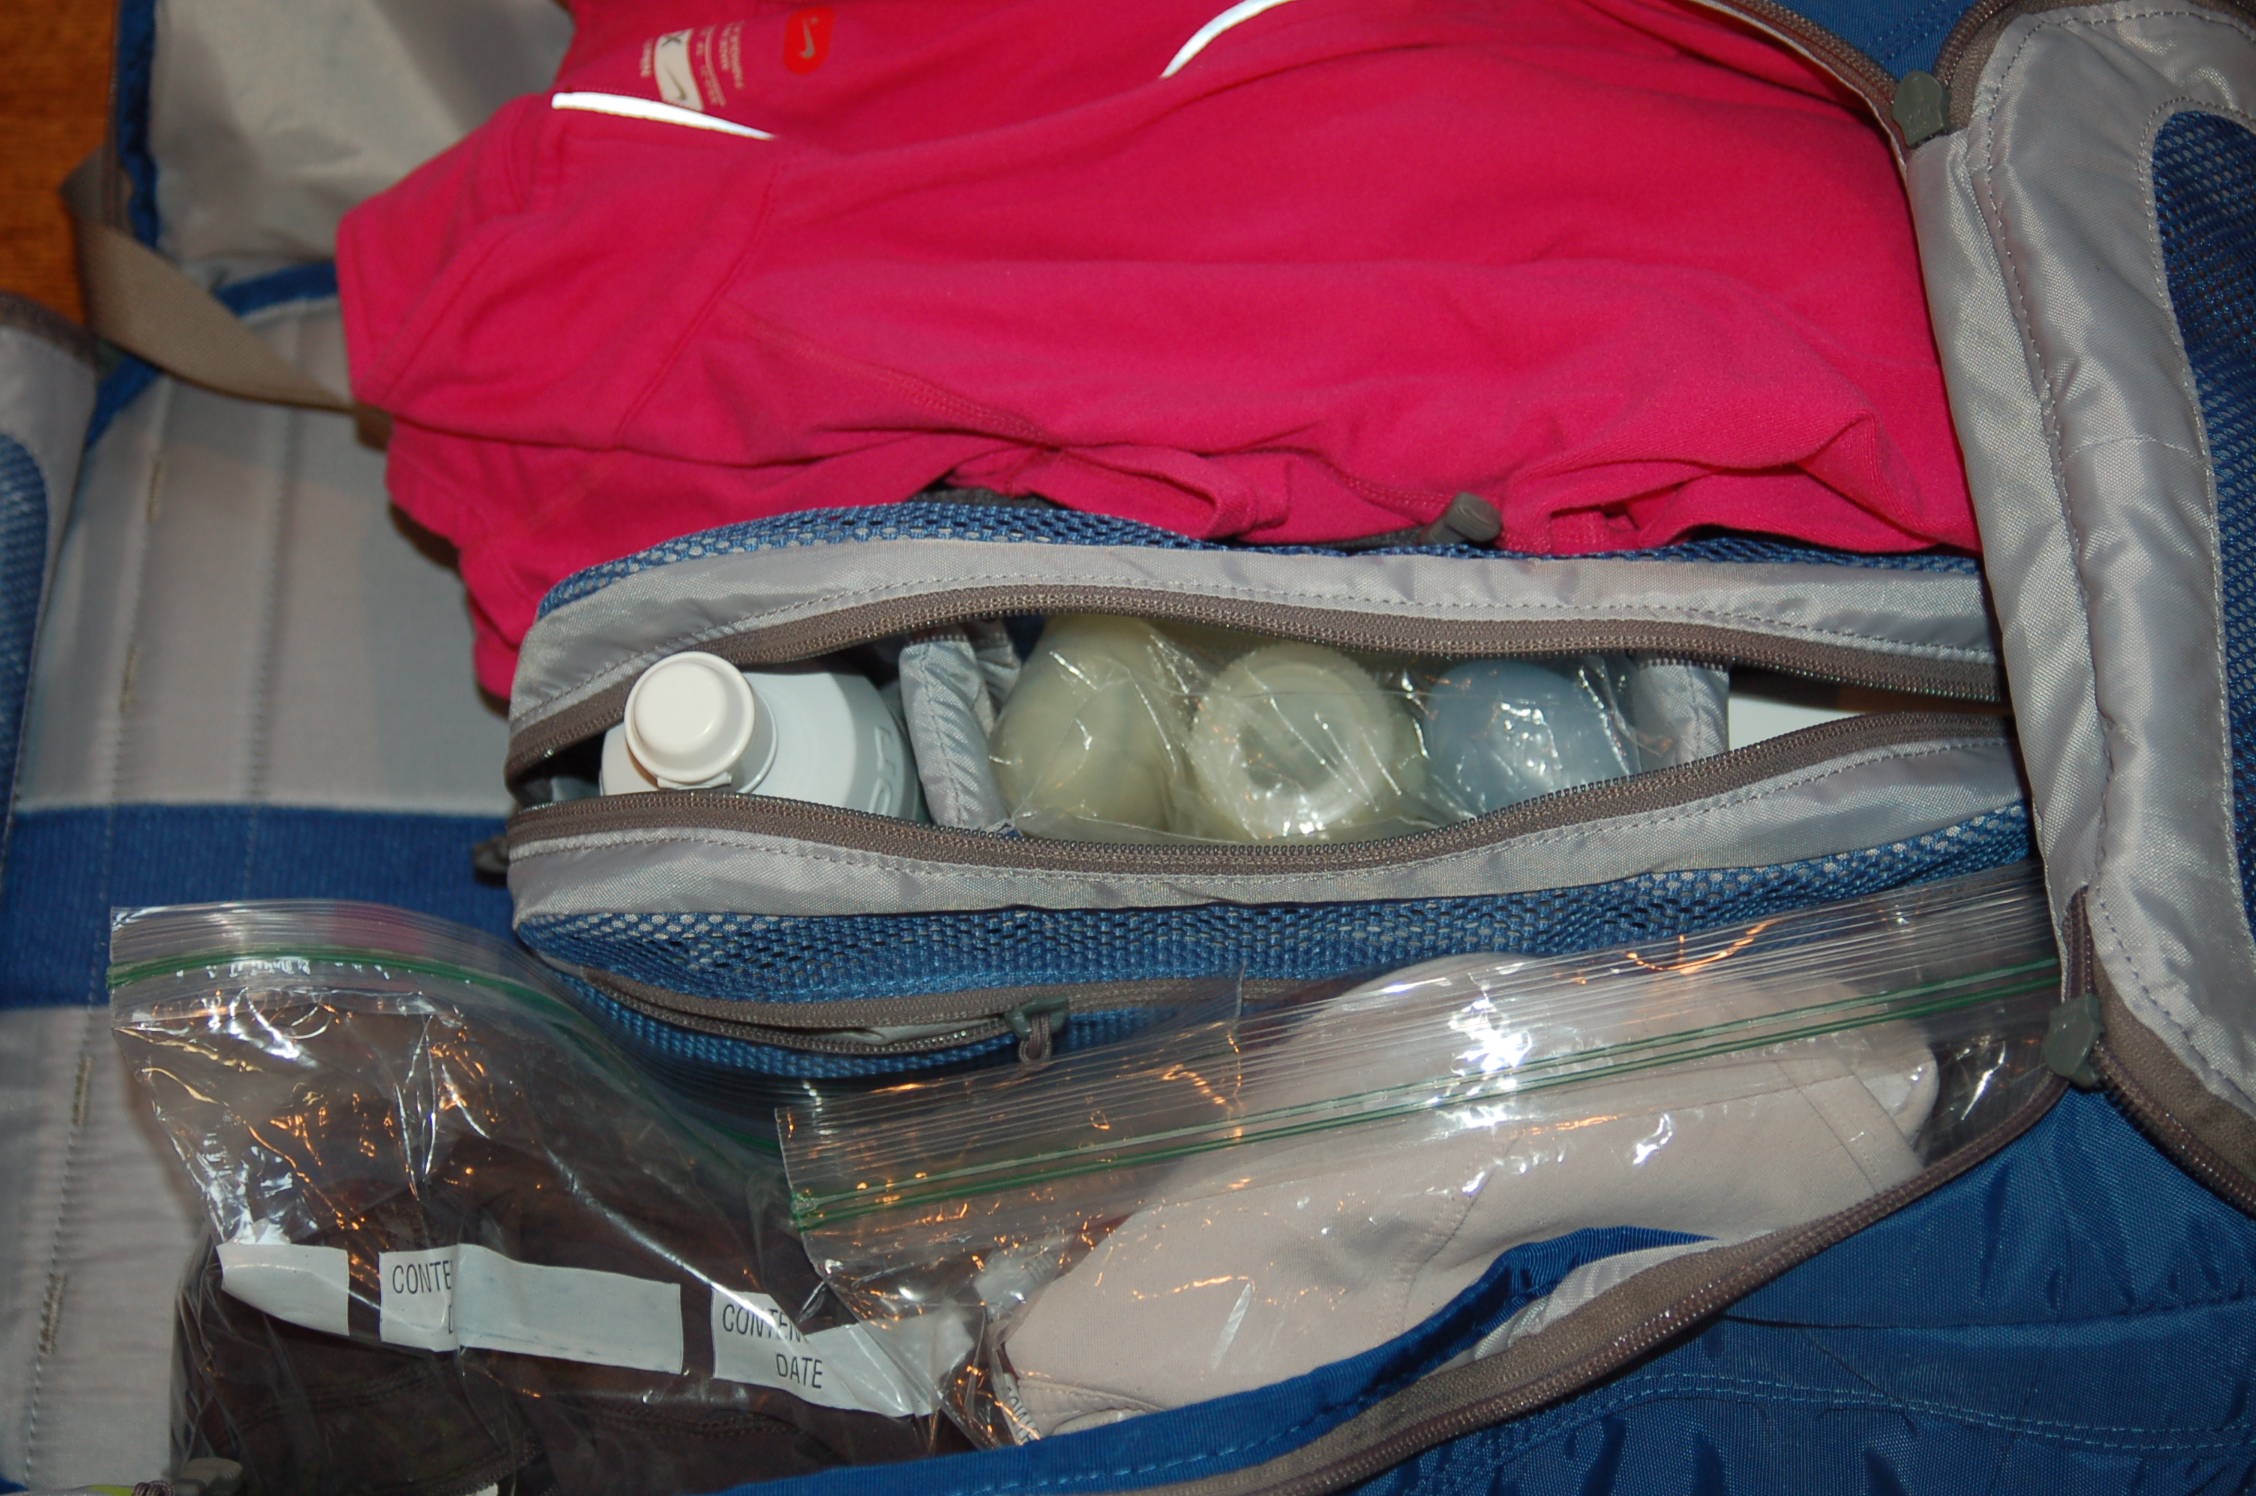
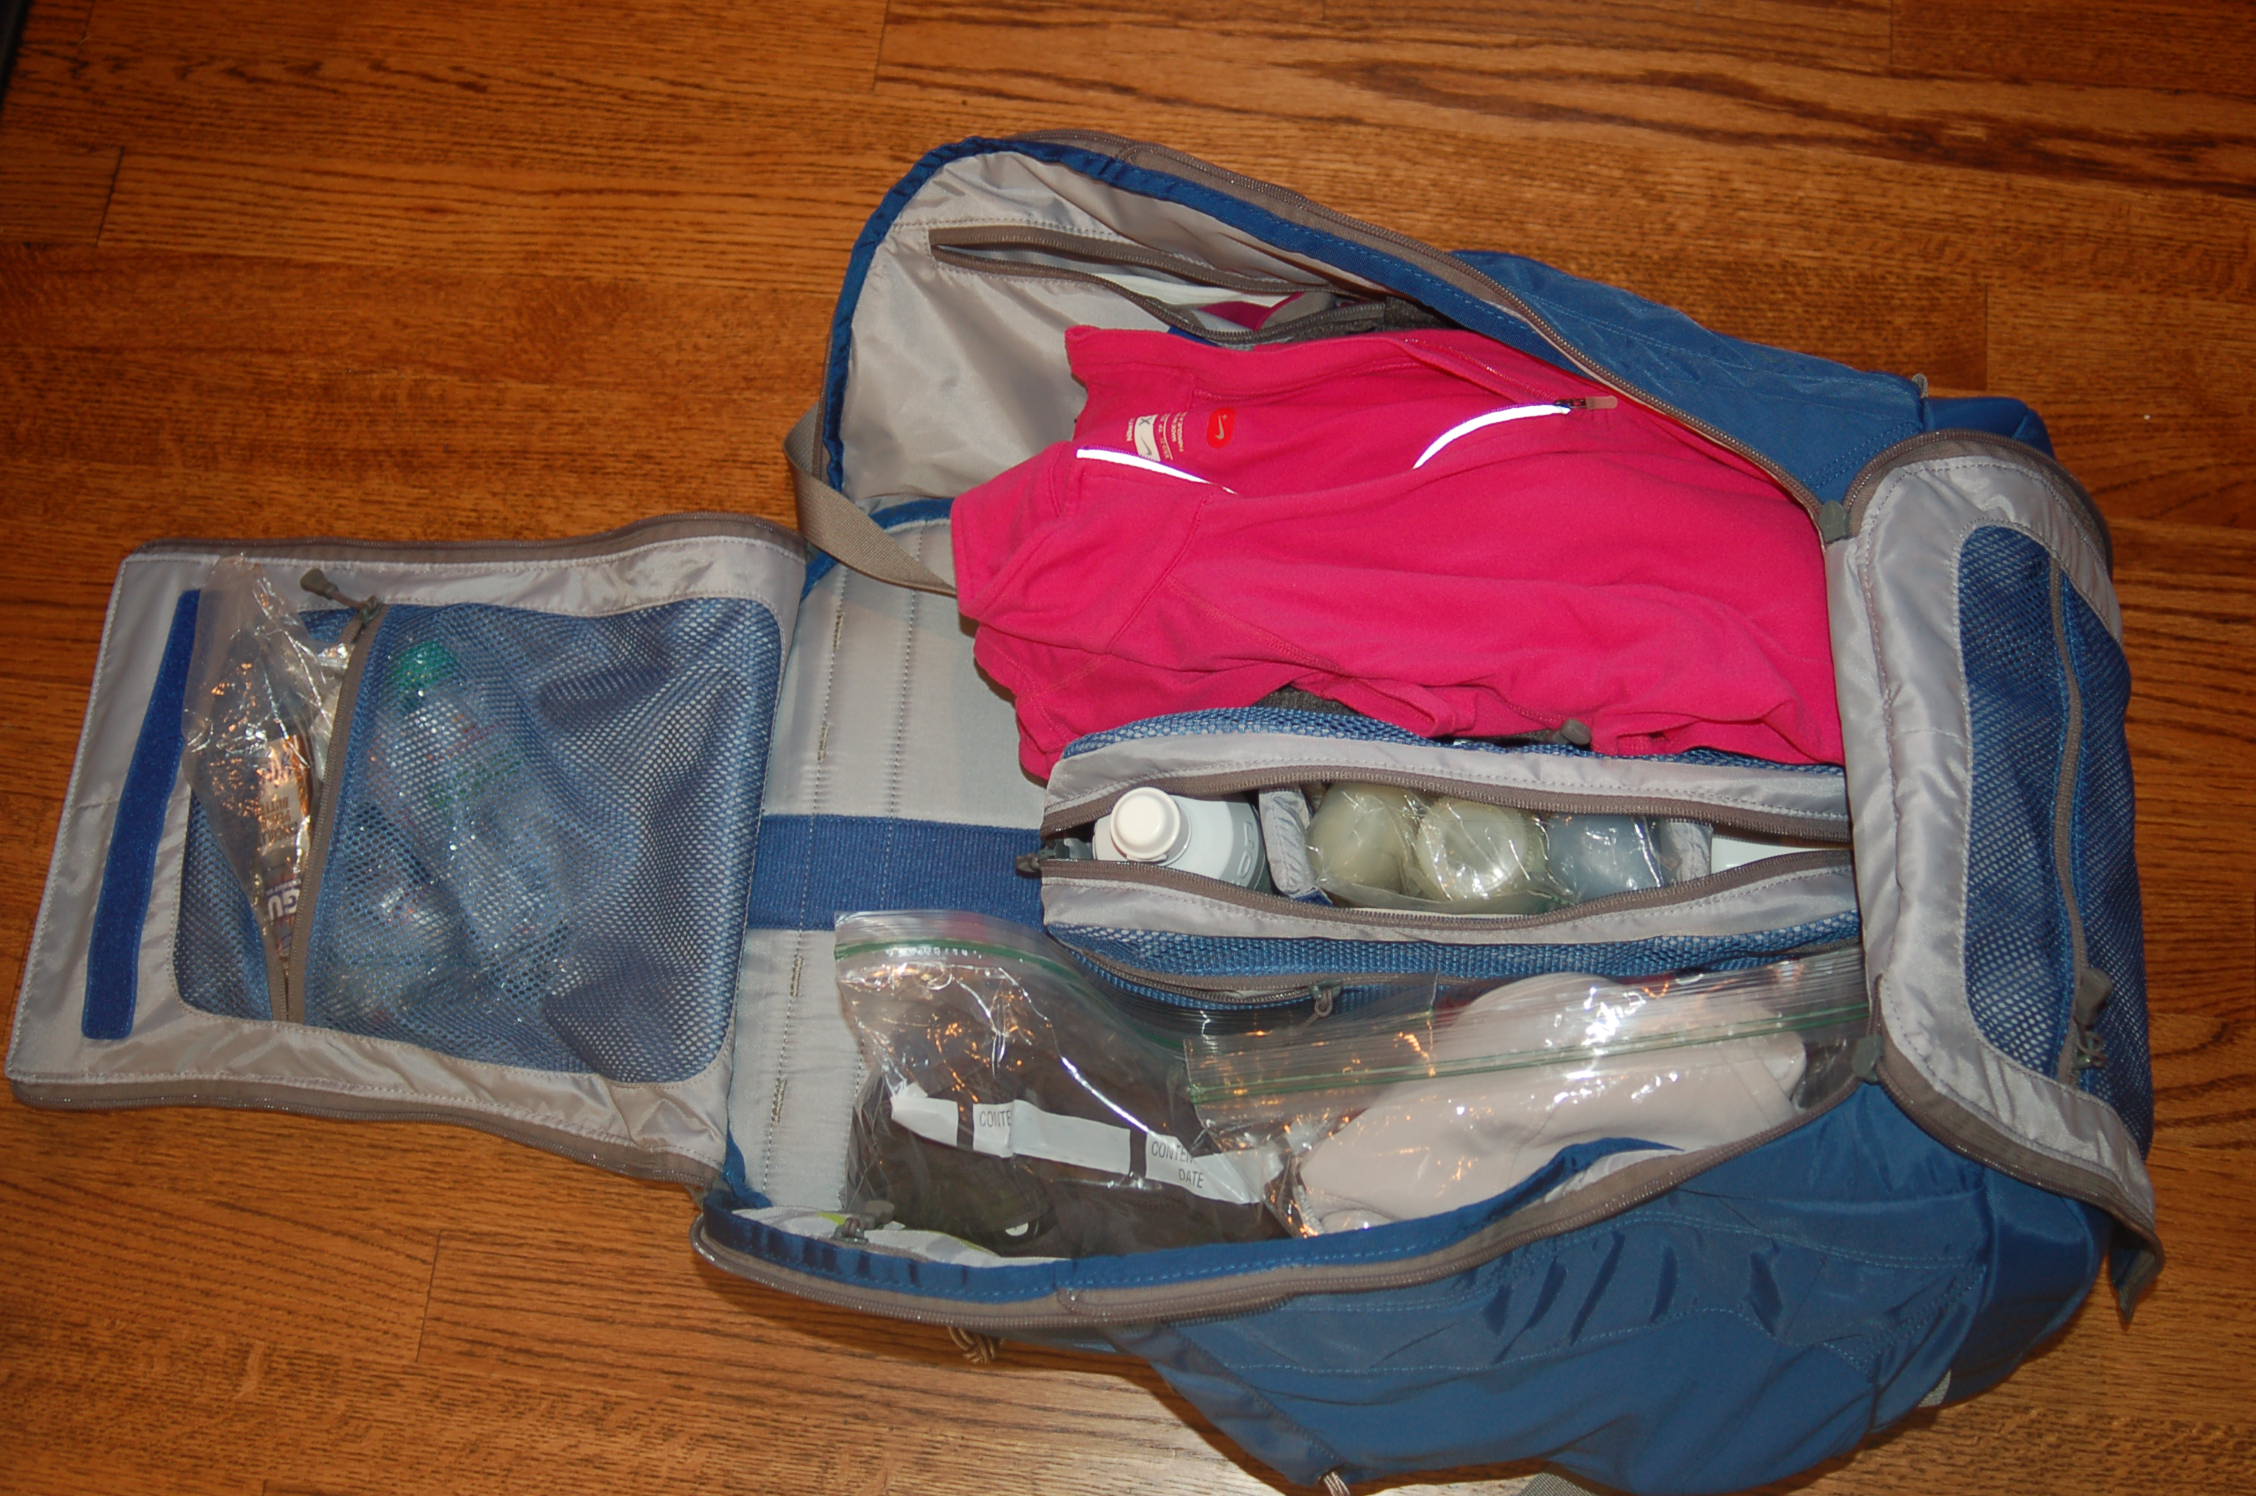
I found that the “Carrier” made by Story38 Alliance is designed well for this type of trip and event. Multiple compartments, a detachable pouch and a separate bag within the bag makes this triathlon bag very versatile. All of my toiletries fit into a pouch that was easily detached and carried into the bathroom.
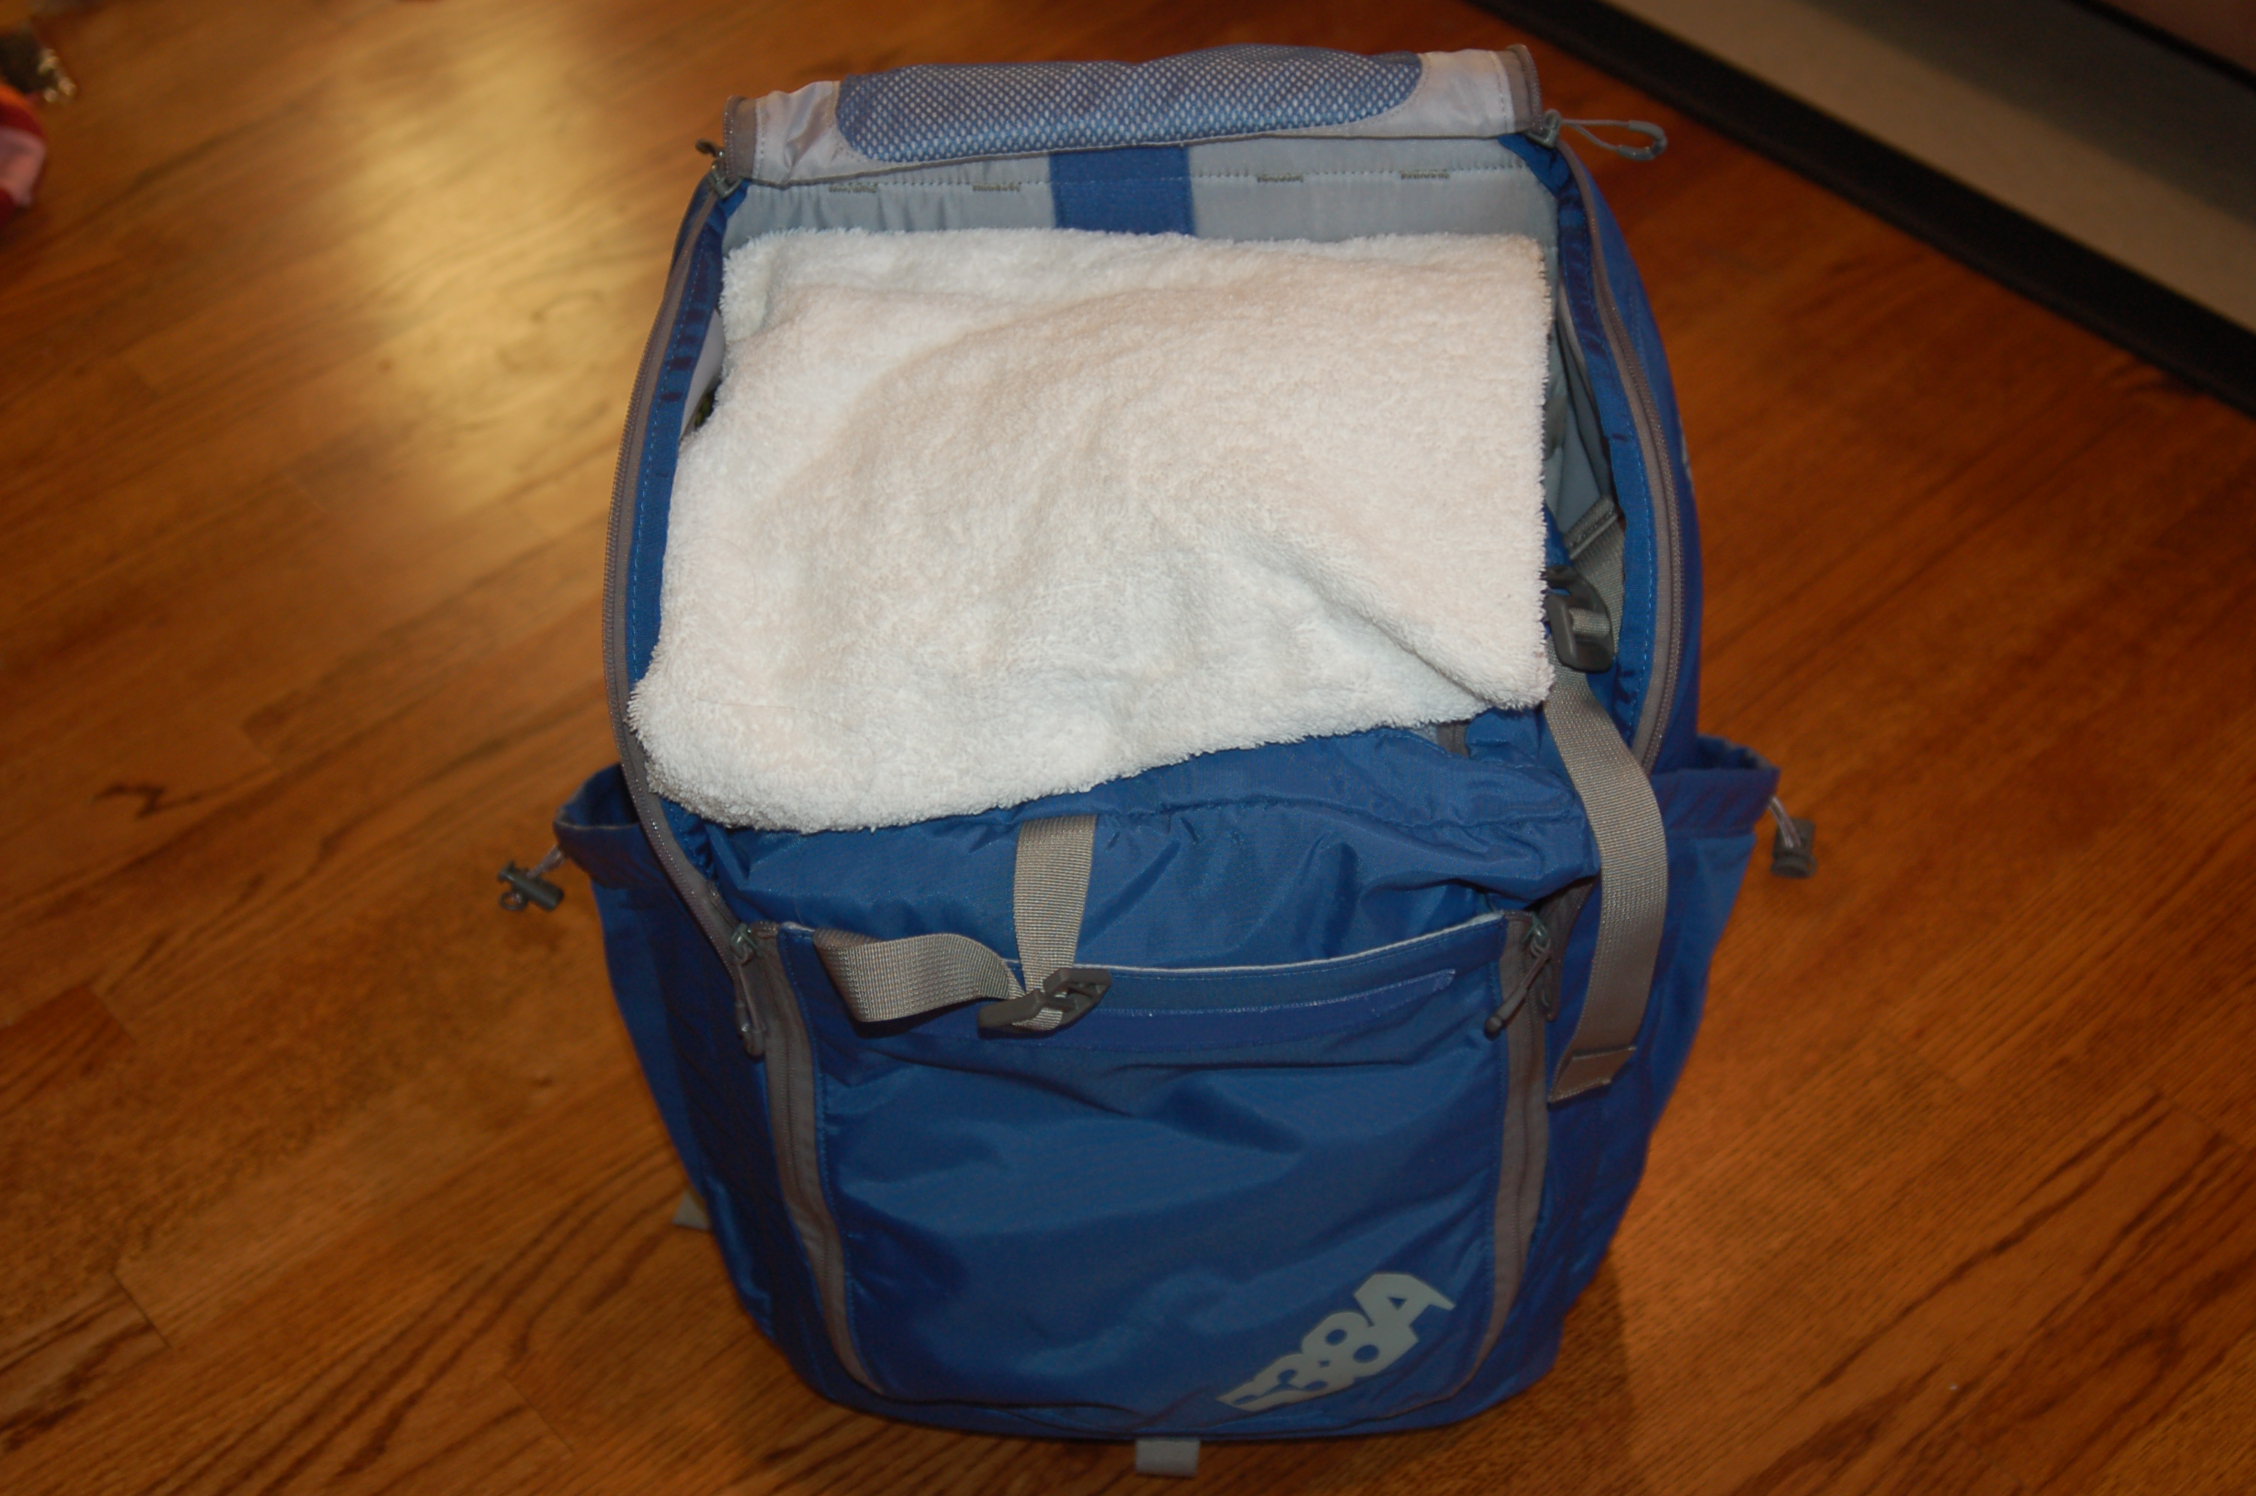
The pouch is held securely inside the Carrier by velcro. In this position, it created two separate compartments within the Carrier. This helped to keep the contents organized. Inside the top flap compartment, I stored run nutrition. This location made it easy to find and quickly grab whatever nutrition I wanted without fumbling through the bottom of the bag.
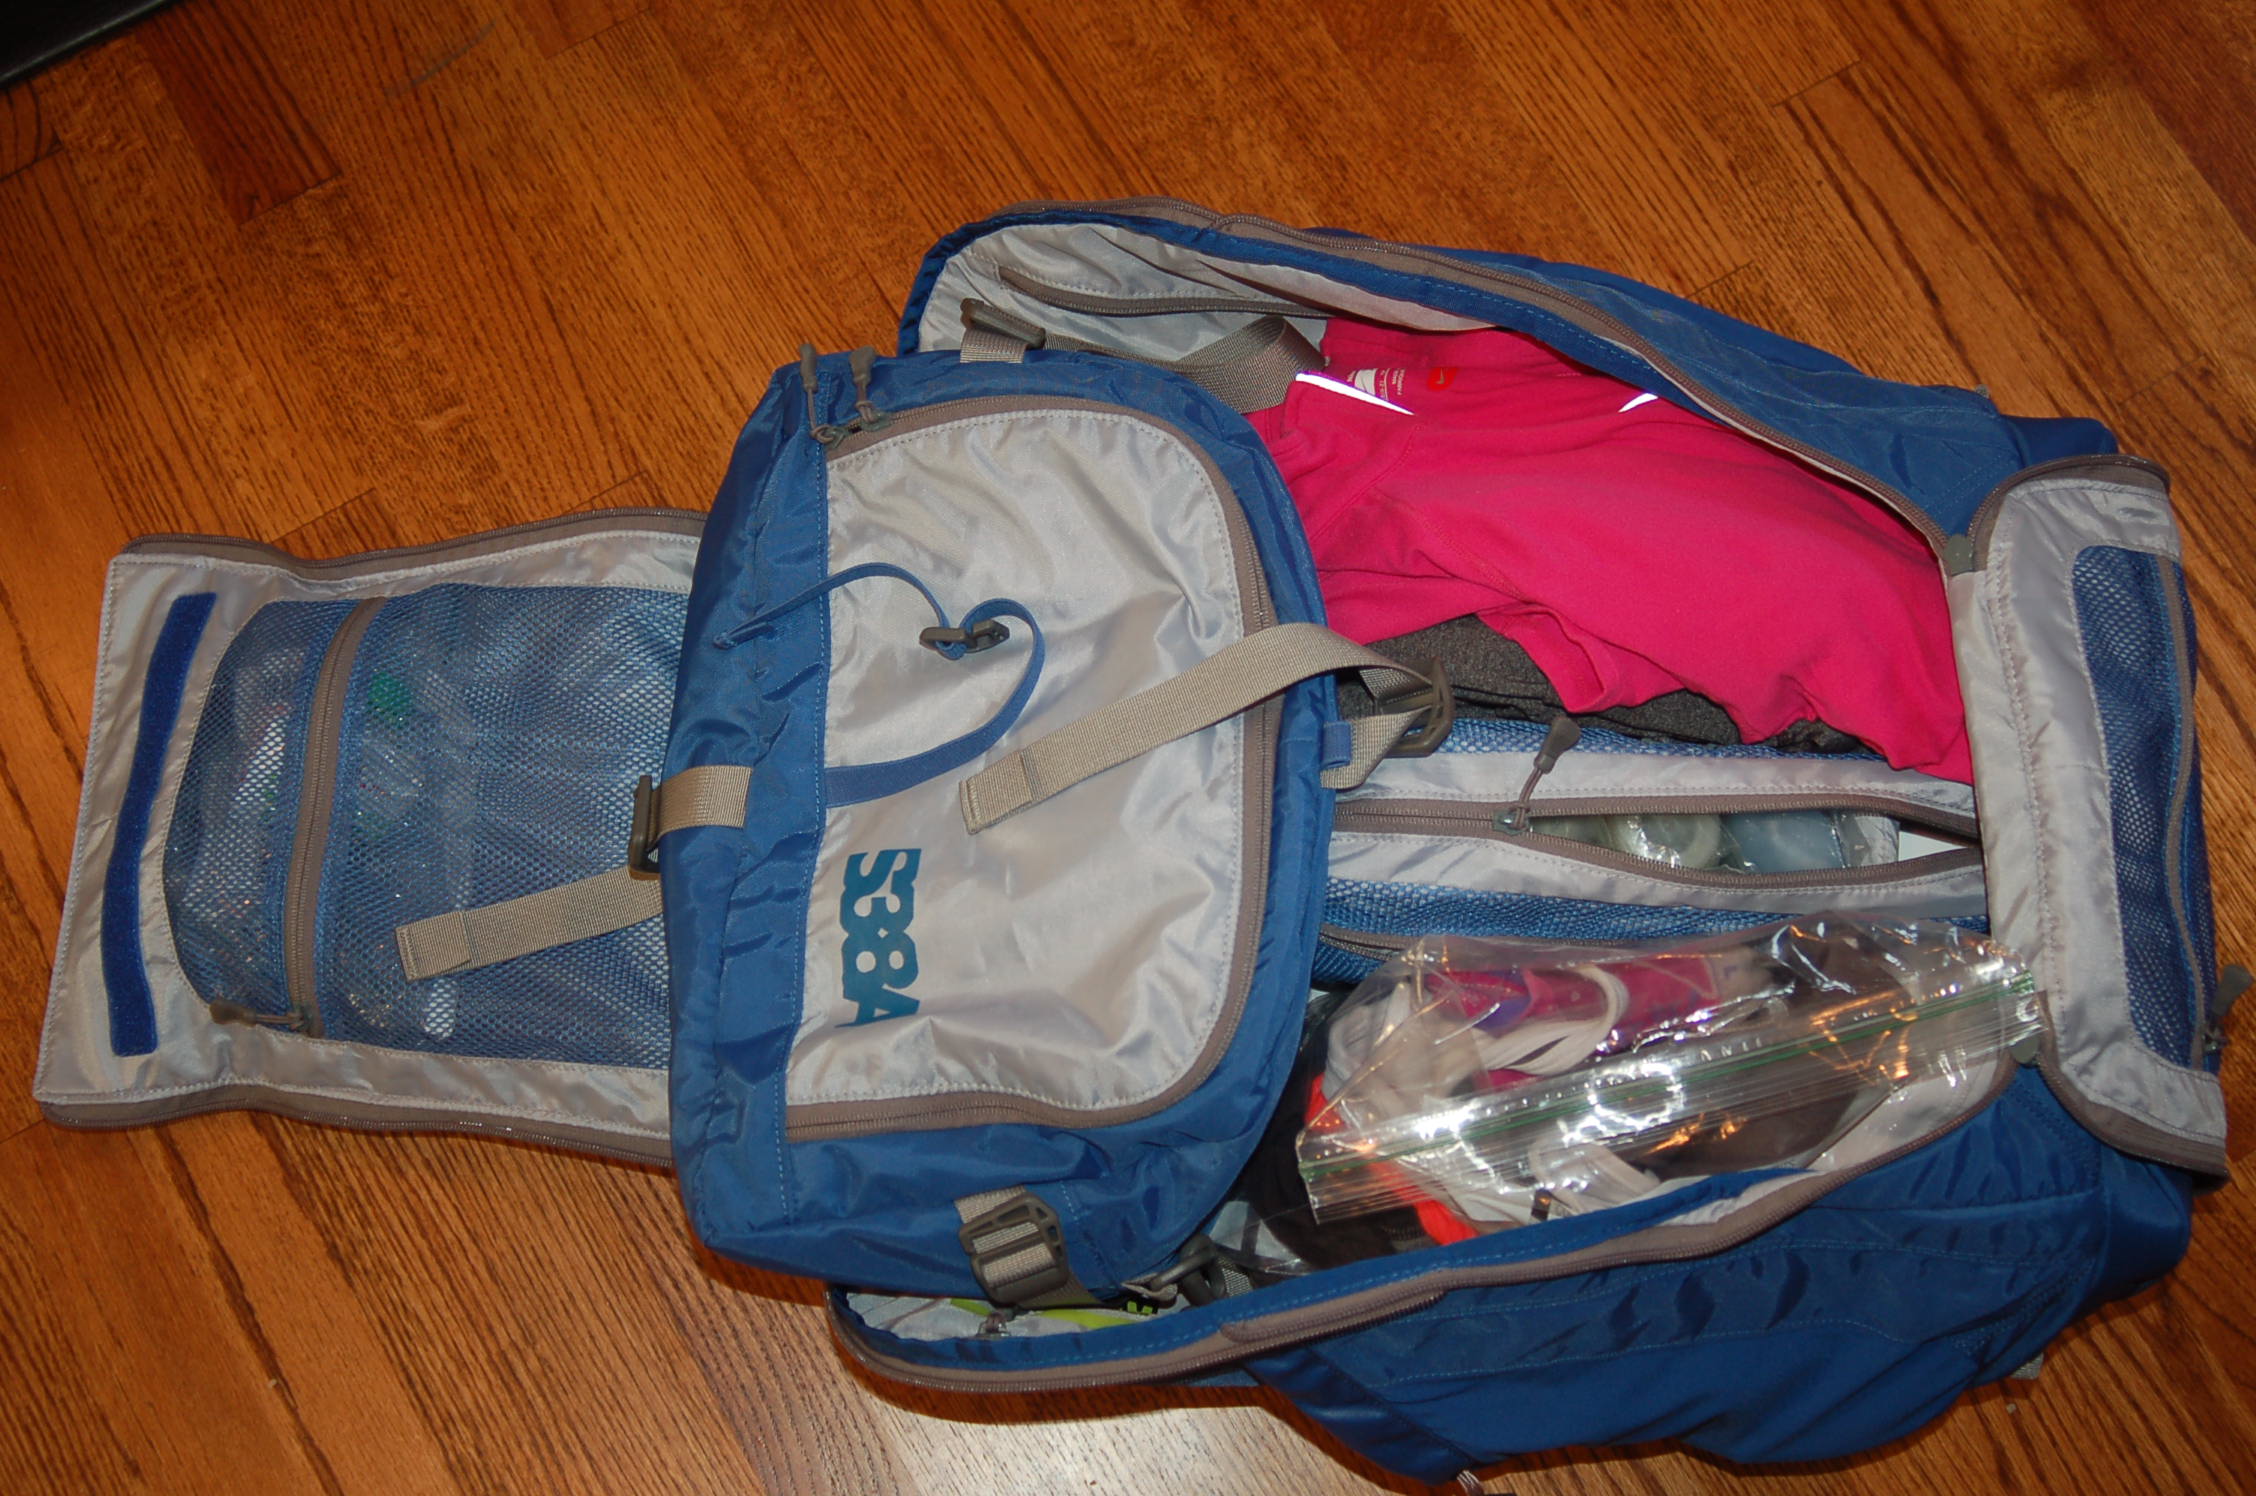
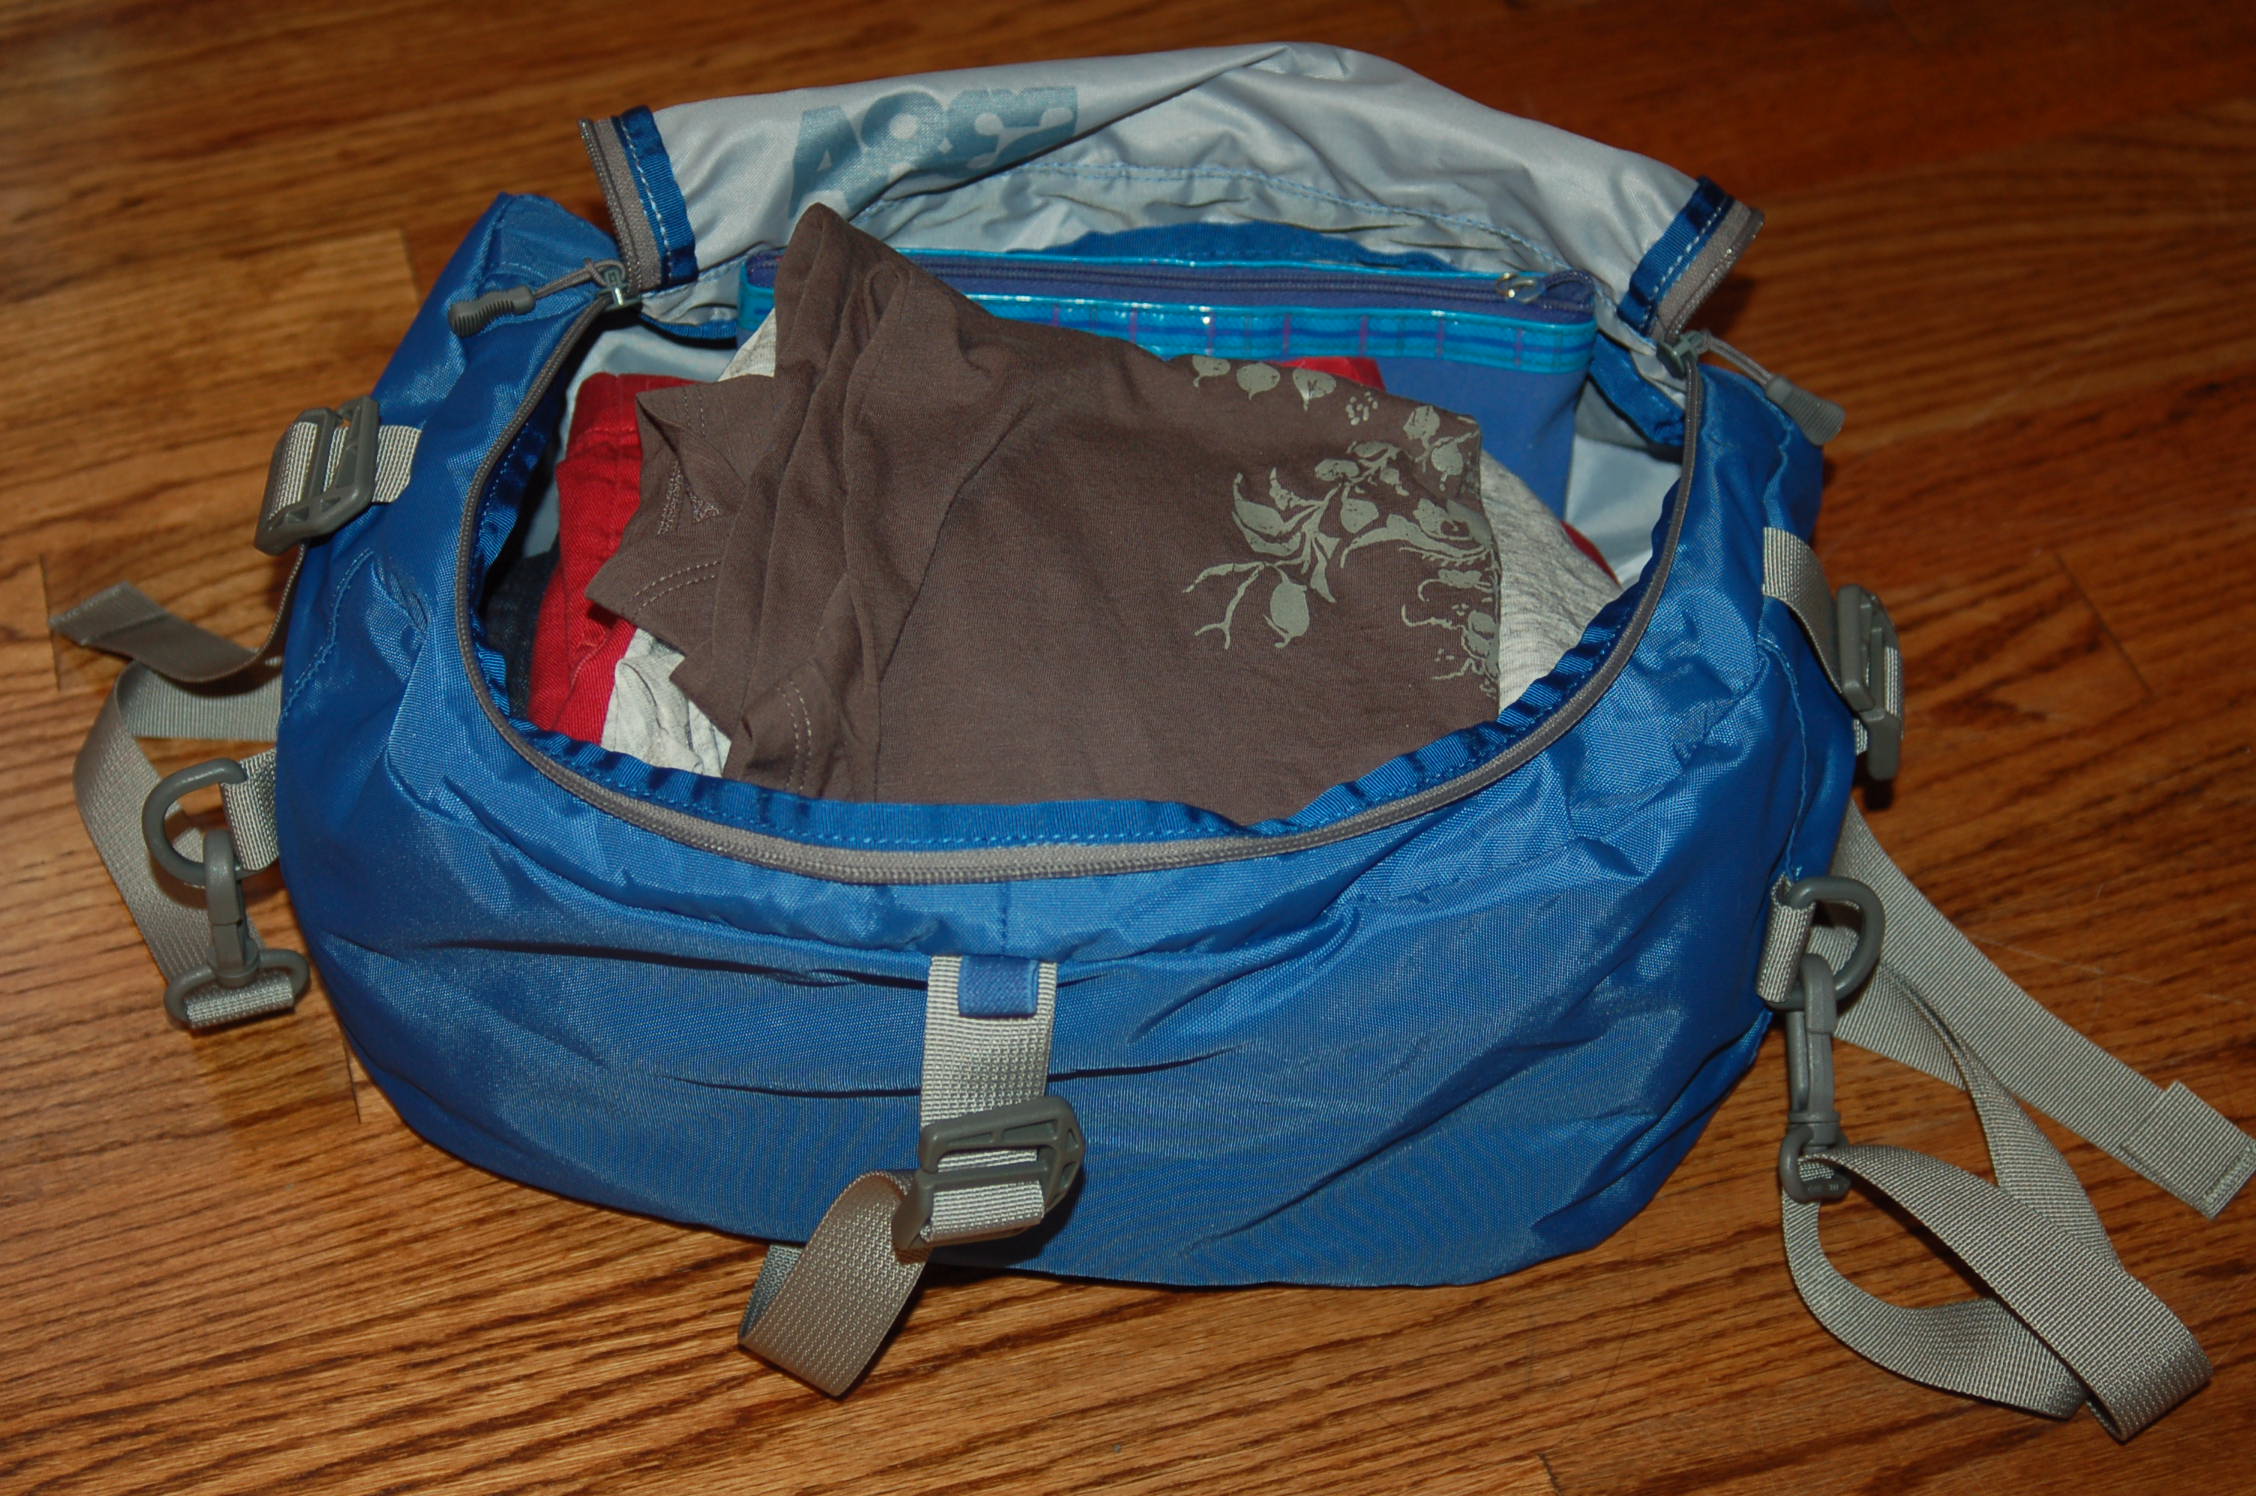
There is a separate small bag that fits inside the Carrier.
This small bag, which is meant to hold a wetsuit, is big enough to pack my makeup and everyday clothes for the evening before the race and the day after the race. What a great way to separate my run clothes from my everyday clothes.
I recommend packing one of those towels that goes over your head and fits like a poncho. The poncho will make it easier to change your clothes in less than private surroundings. A big beach towel also fits nicely at the top of the Carrier with plenty of space available to pack a few more items.
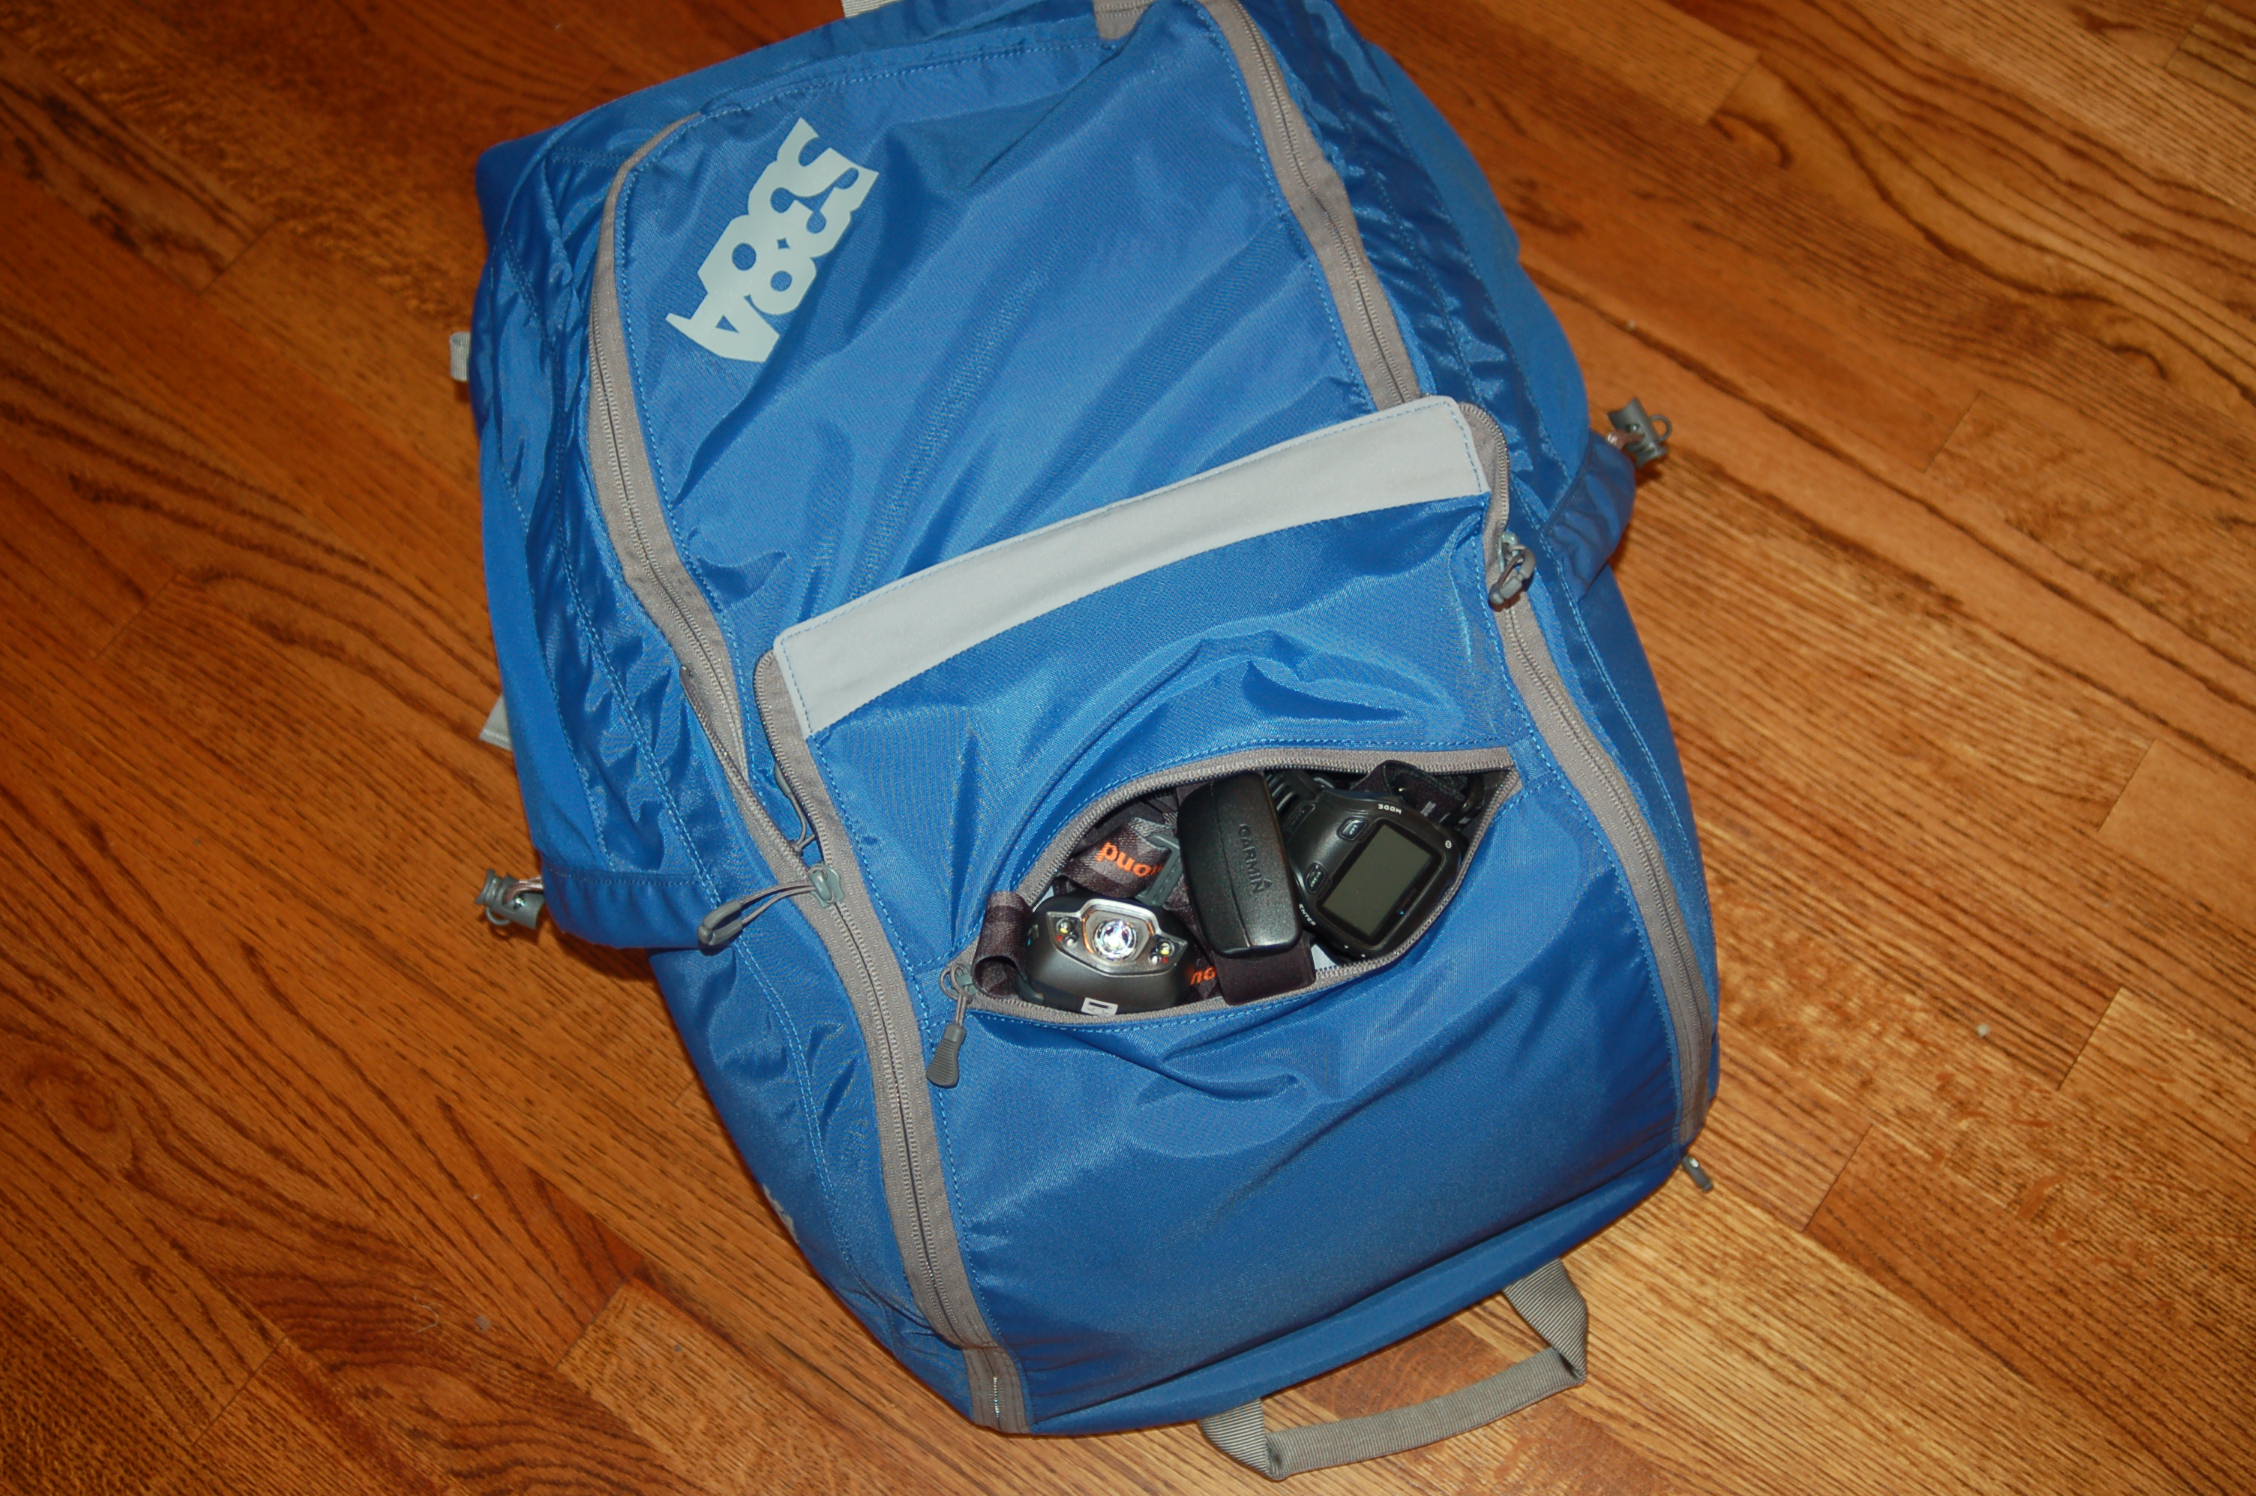
On the top outside pouch, I stored my race belt, heart rate monitor, headlamp and GPS watch. The location guaranteed I’d find these items quickly.
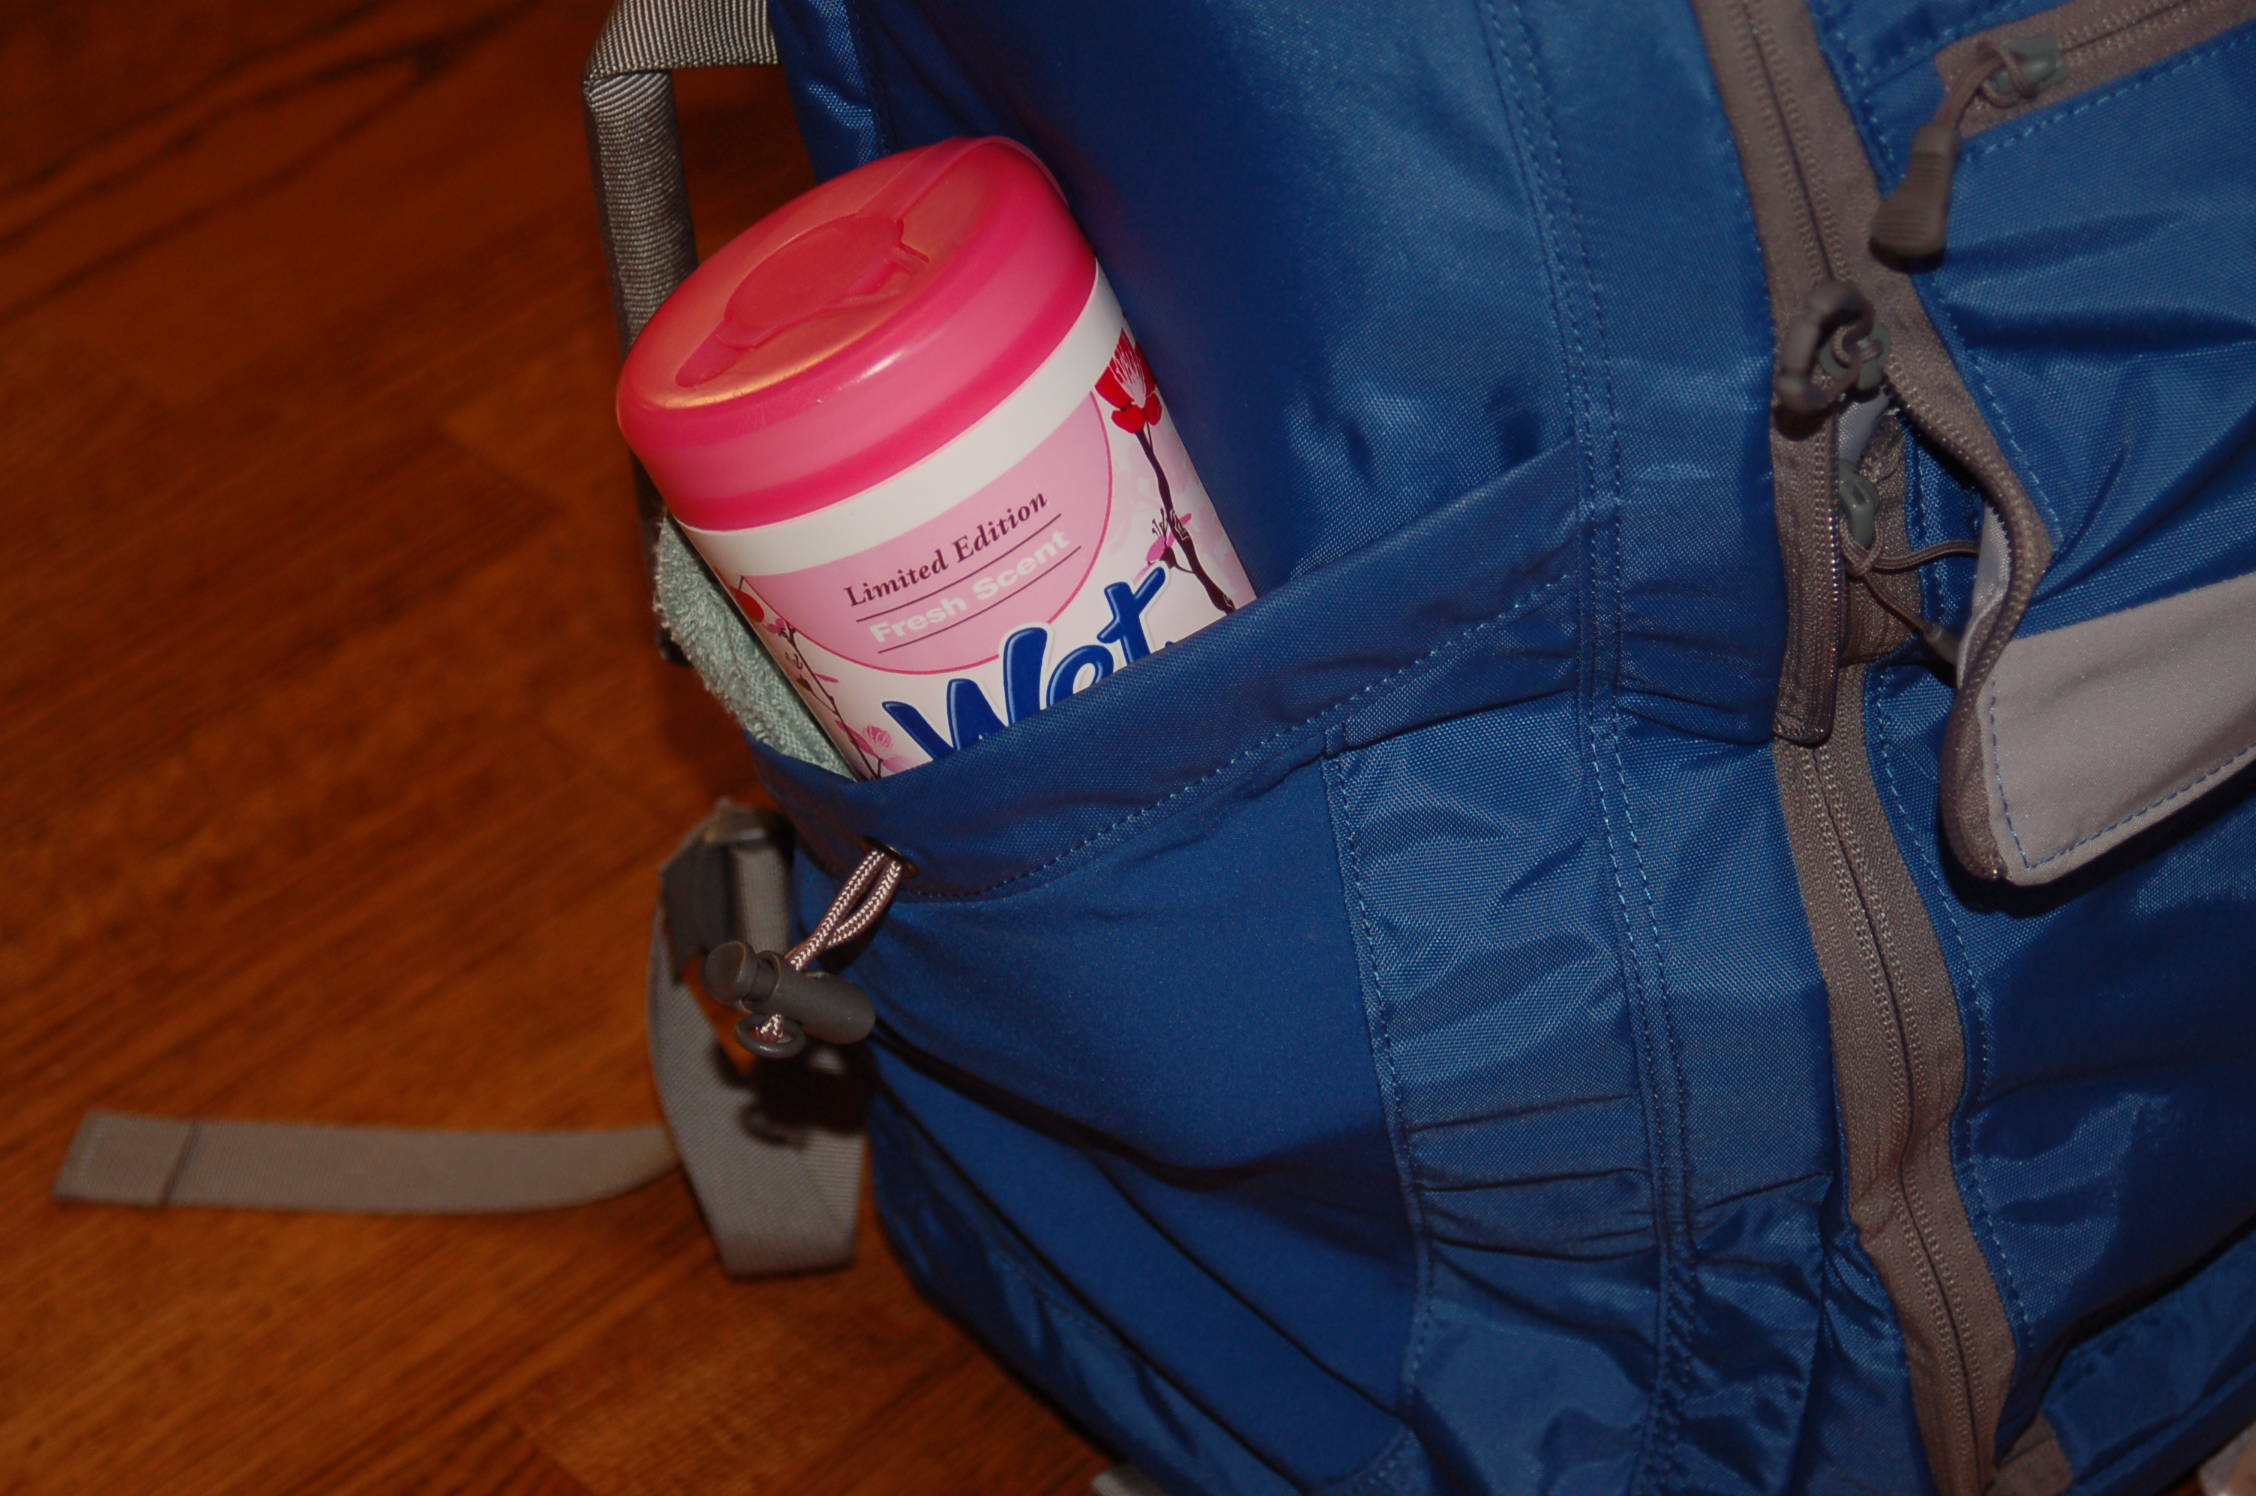
There is room to hold a total of 4 water bottles, 2 on each side of the Carrier. I would store 1 large water bottle inside the Carrier’s side pocket since we had a big jug of water that we carried for the team. On the other side pocket, I would store a small face towel, a garbage bag and Wet Wipes.
I was challenged this holiday to come up with festive meals that would satisfy both vegetarian and carnivore hungry athletes at the same table. When I developed the menus, I had 3 requirements: 1) Each of the main ingredients’ attributes should stand on it’s own. For example, I’m not a fan of tofurkey, chick’n or any food being doctored up to substitute real meat. If tofu is an ingredient, then it should be prepared in a way that it can be savored; 2) The dish should be worthy of special occasions, requiring a little labor of love and; 3) The dish should be comforting.
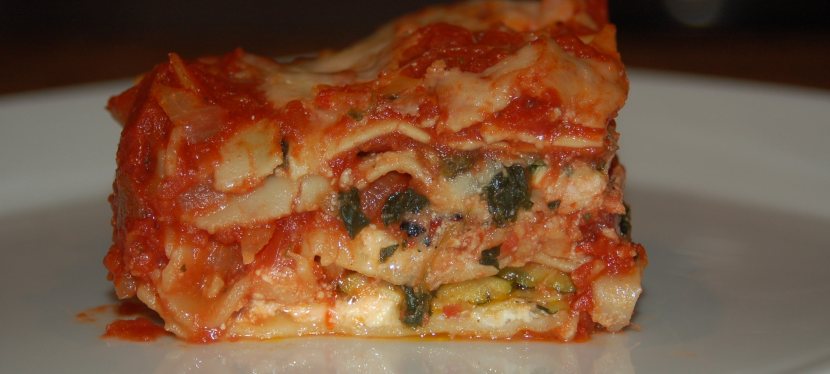
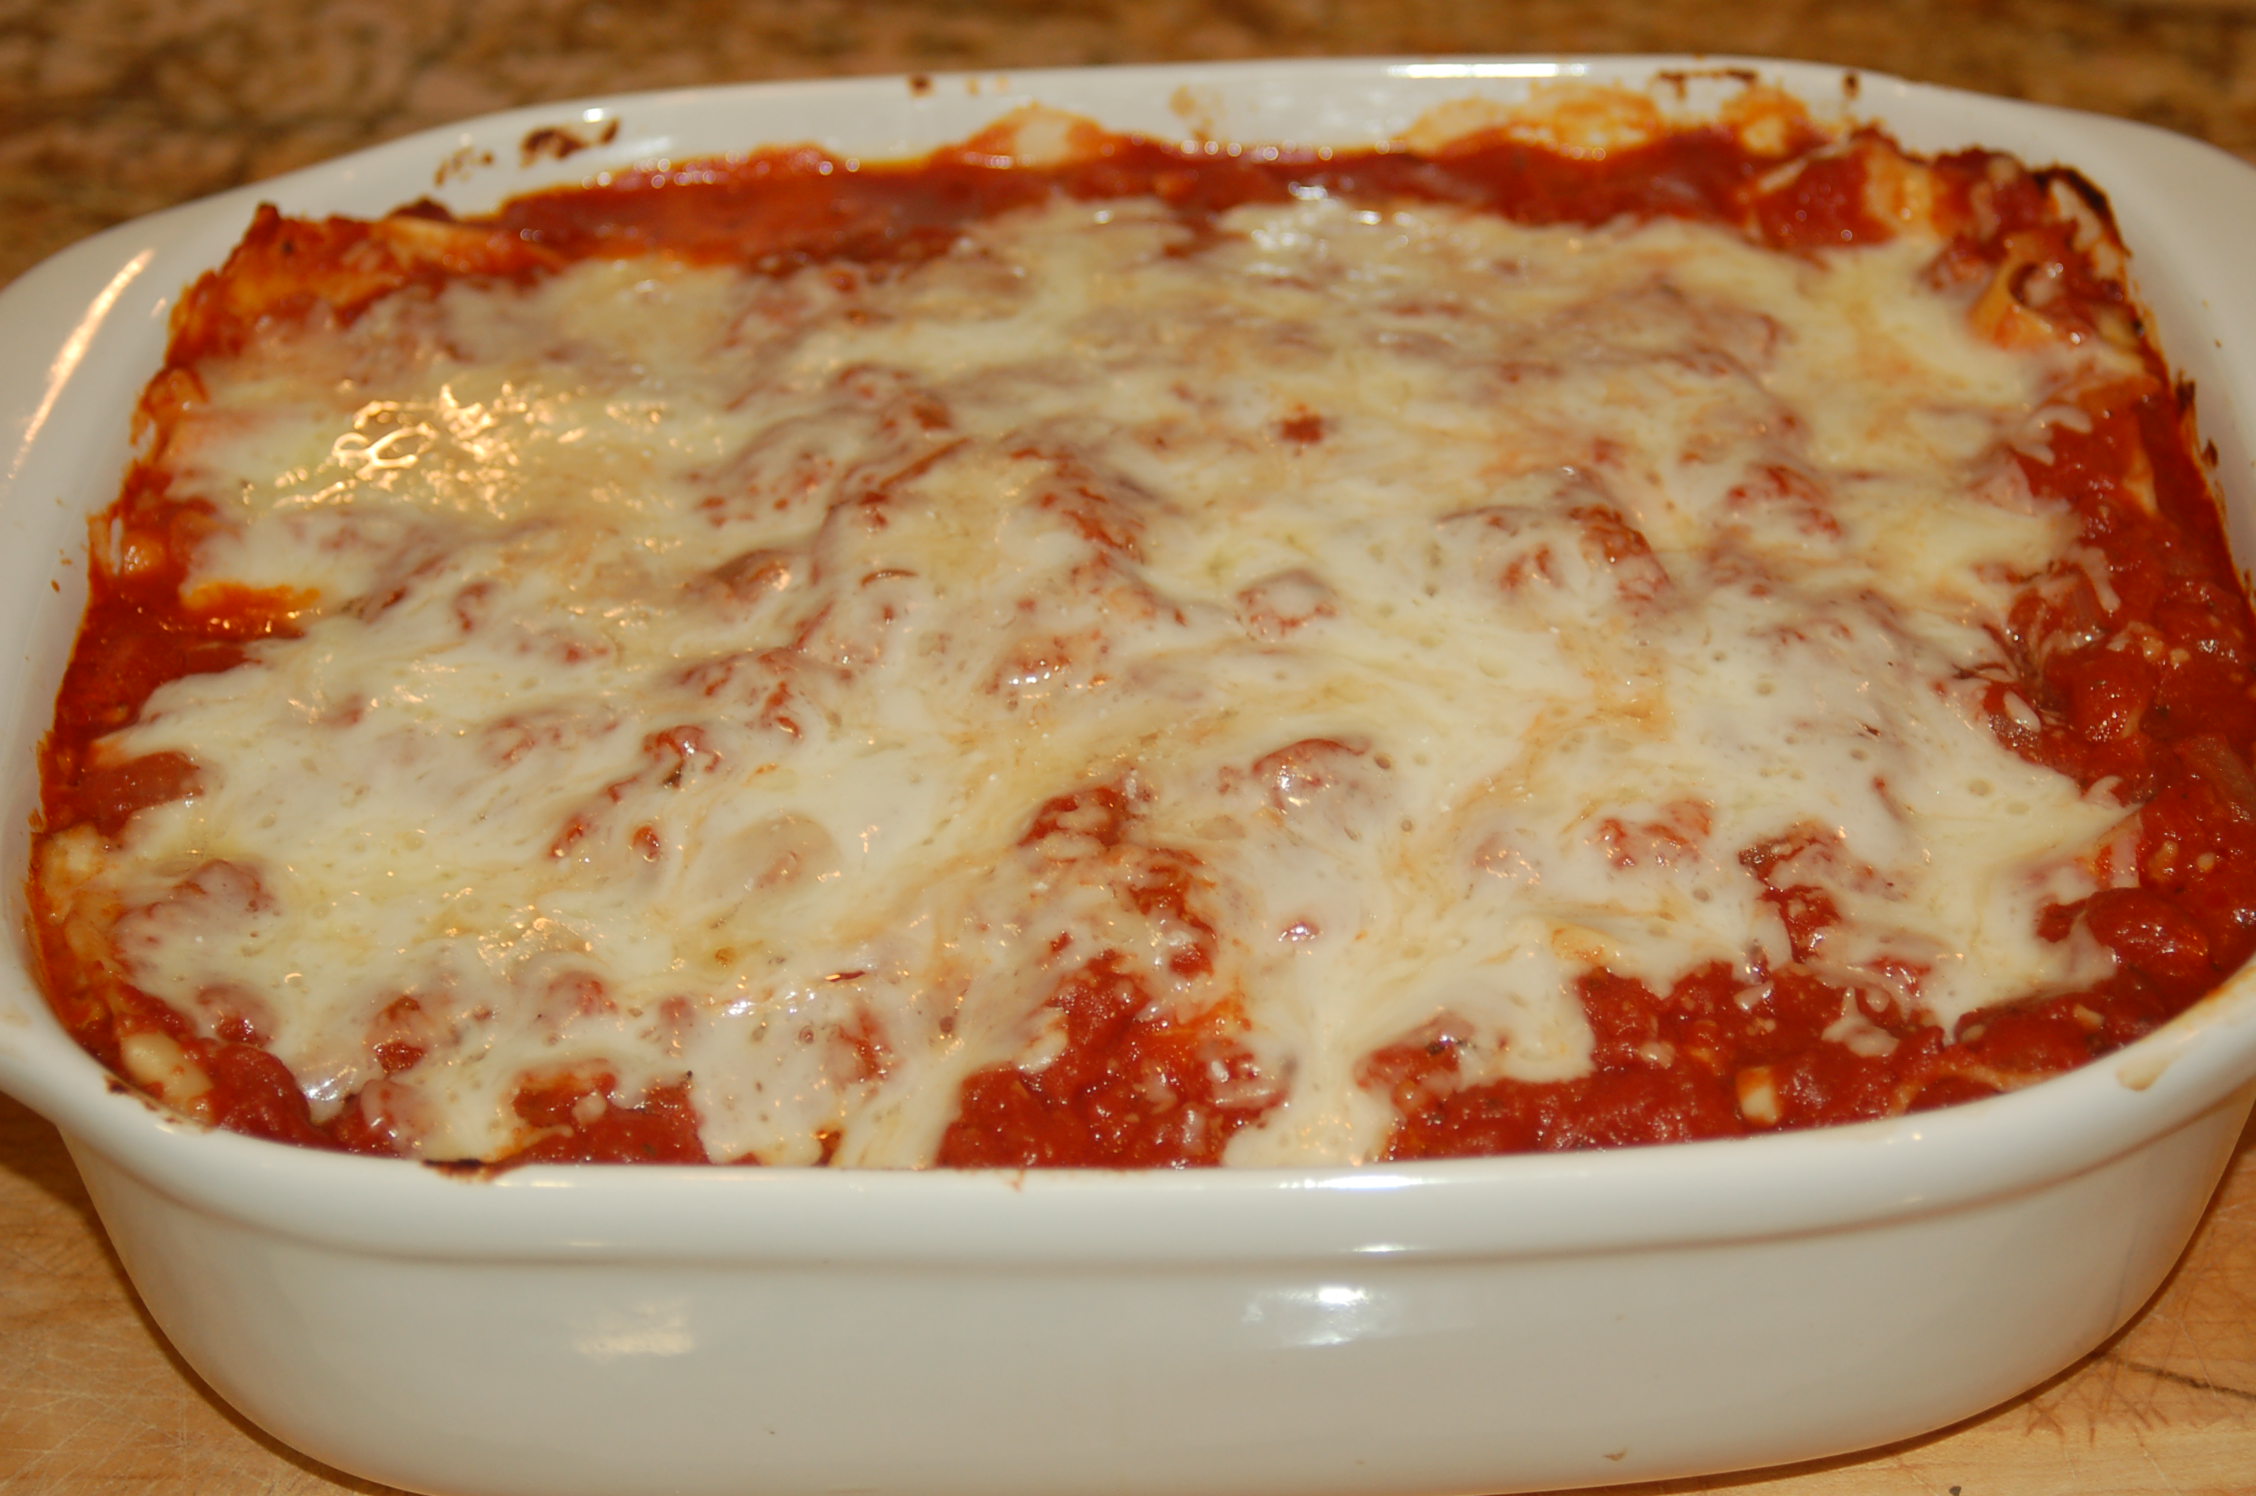
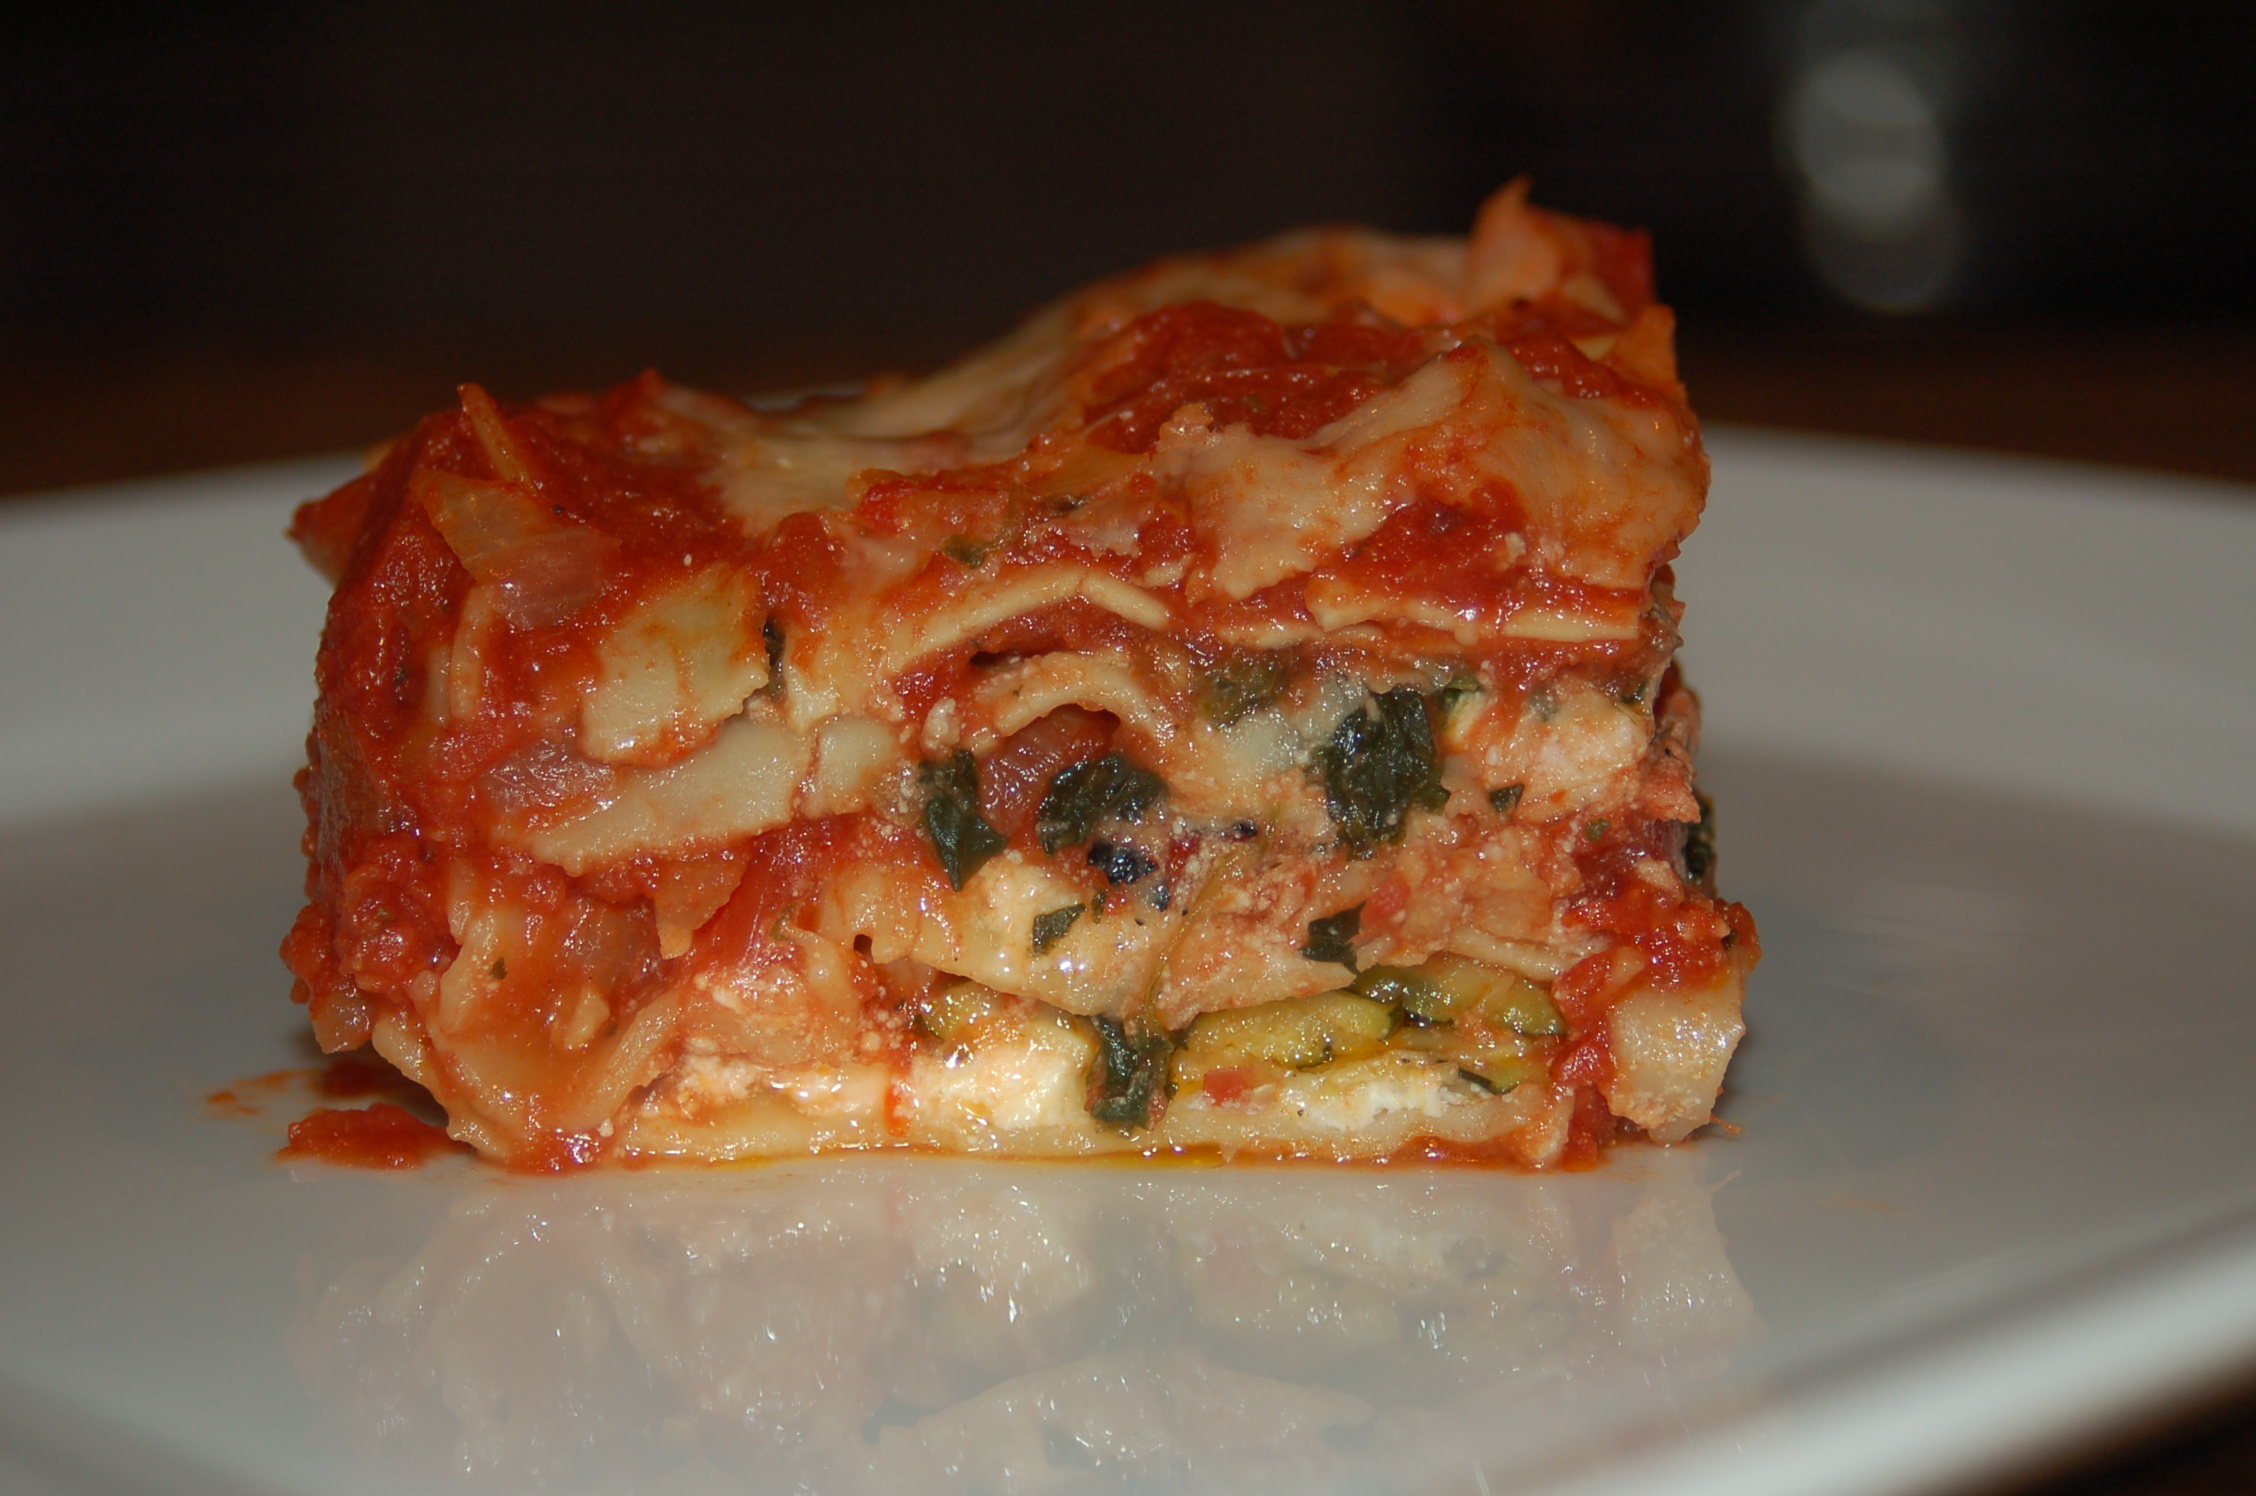
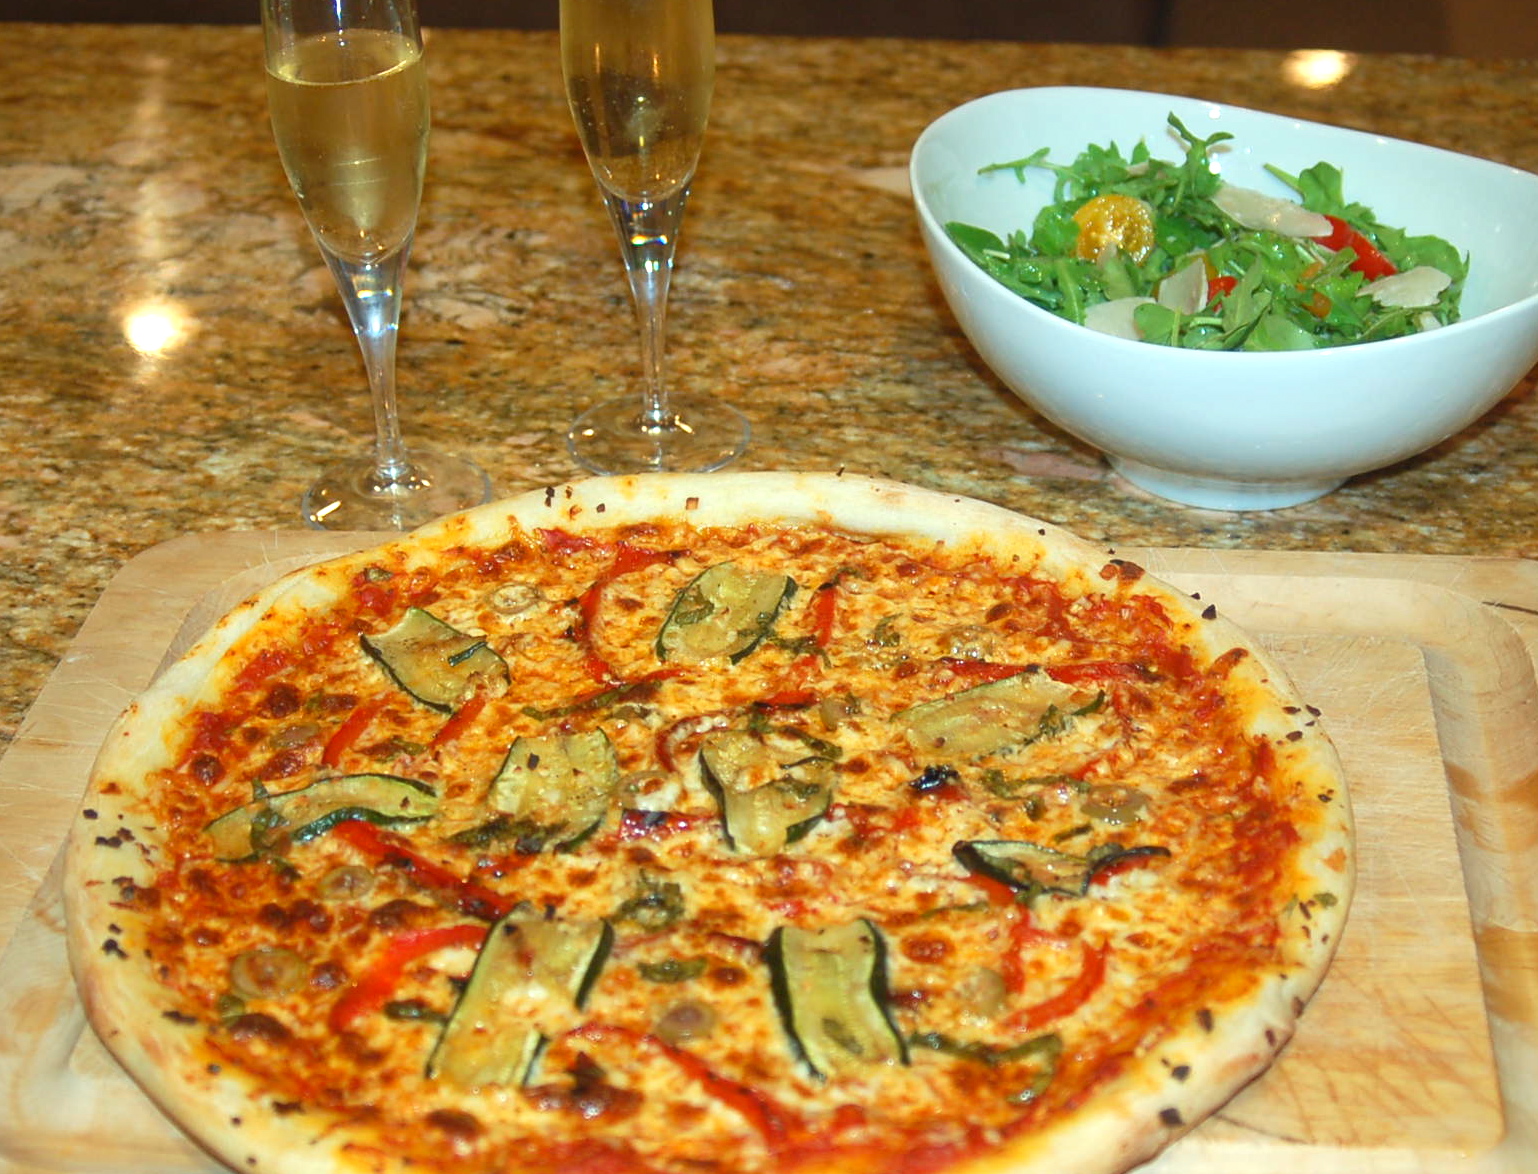
Voila. For Christmas eve, the main dish was Vegetable Pot Pie and for Christmas day, the main course was Vegetable Lasagna. Each of these recipes can be modified to include protein, such as meat or tofu. The lasagna freezes well and is a fast and nutritious meal that heats up quickly after a workout or for a busy weekday dinner. If you have extra mozzarella and Parmesan cheeses, make a little extra tomato sauce and roast a little extra zucchini and roasted peppers. You can use these ingredients to make a nice pizza the next day.
Here’s how I made the lasagna.
Serving size: 8-10
Ingredients:
2 tablespoons olive oil
1/2 of large onion, diced (about 2 cups)
8 cloves garlic, minced (about 2 tablespoons)
1 28-ounce can petite diced tomatoes
1 28-ounce can tomato puree
1 6-ounce can tomato paste
1 bay leaf
1 teaspoon sugar
1/2 teaspoon dried basil
1/2 teaspoon dried oregano
1/2 teaspoon dried thyme
1/2 teaspoon red pepper flakes
1/4 cup freshly grated Parmesan-Reggiano cheese
15 ounces ricotta cheese
16 ounces shredded mozzarella
2 small zucchini, sliced 1/4 inch thick and roasted
1 cup frozen spinach, thawed and squeezed dry
2 roasted red peppers, cut into strips
8 ounce package oven-ready, no boil lasagna noodle
Directions:
Preheat to 375F
Sauce:
In 3.5 quart French oven, sauté diced onion in olive oil over medium heat until soft and translucent. Add garlic and sauté for about 2 minutes more. Add diced tomatoes, tomato puree, tomato paste, bay leaf, sugar, basil, oregano, thyme and red pepper flakes. Simmer, stirring occasionally for about 30 minutes.
Roast red bell peppers:
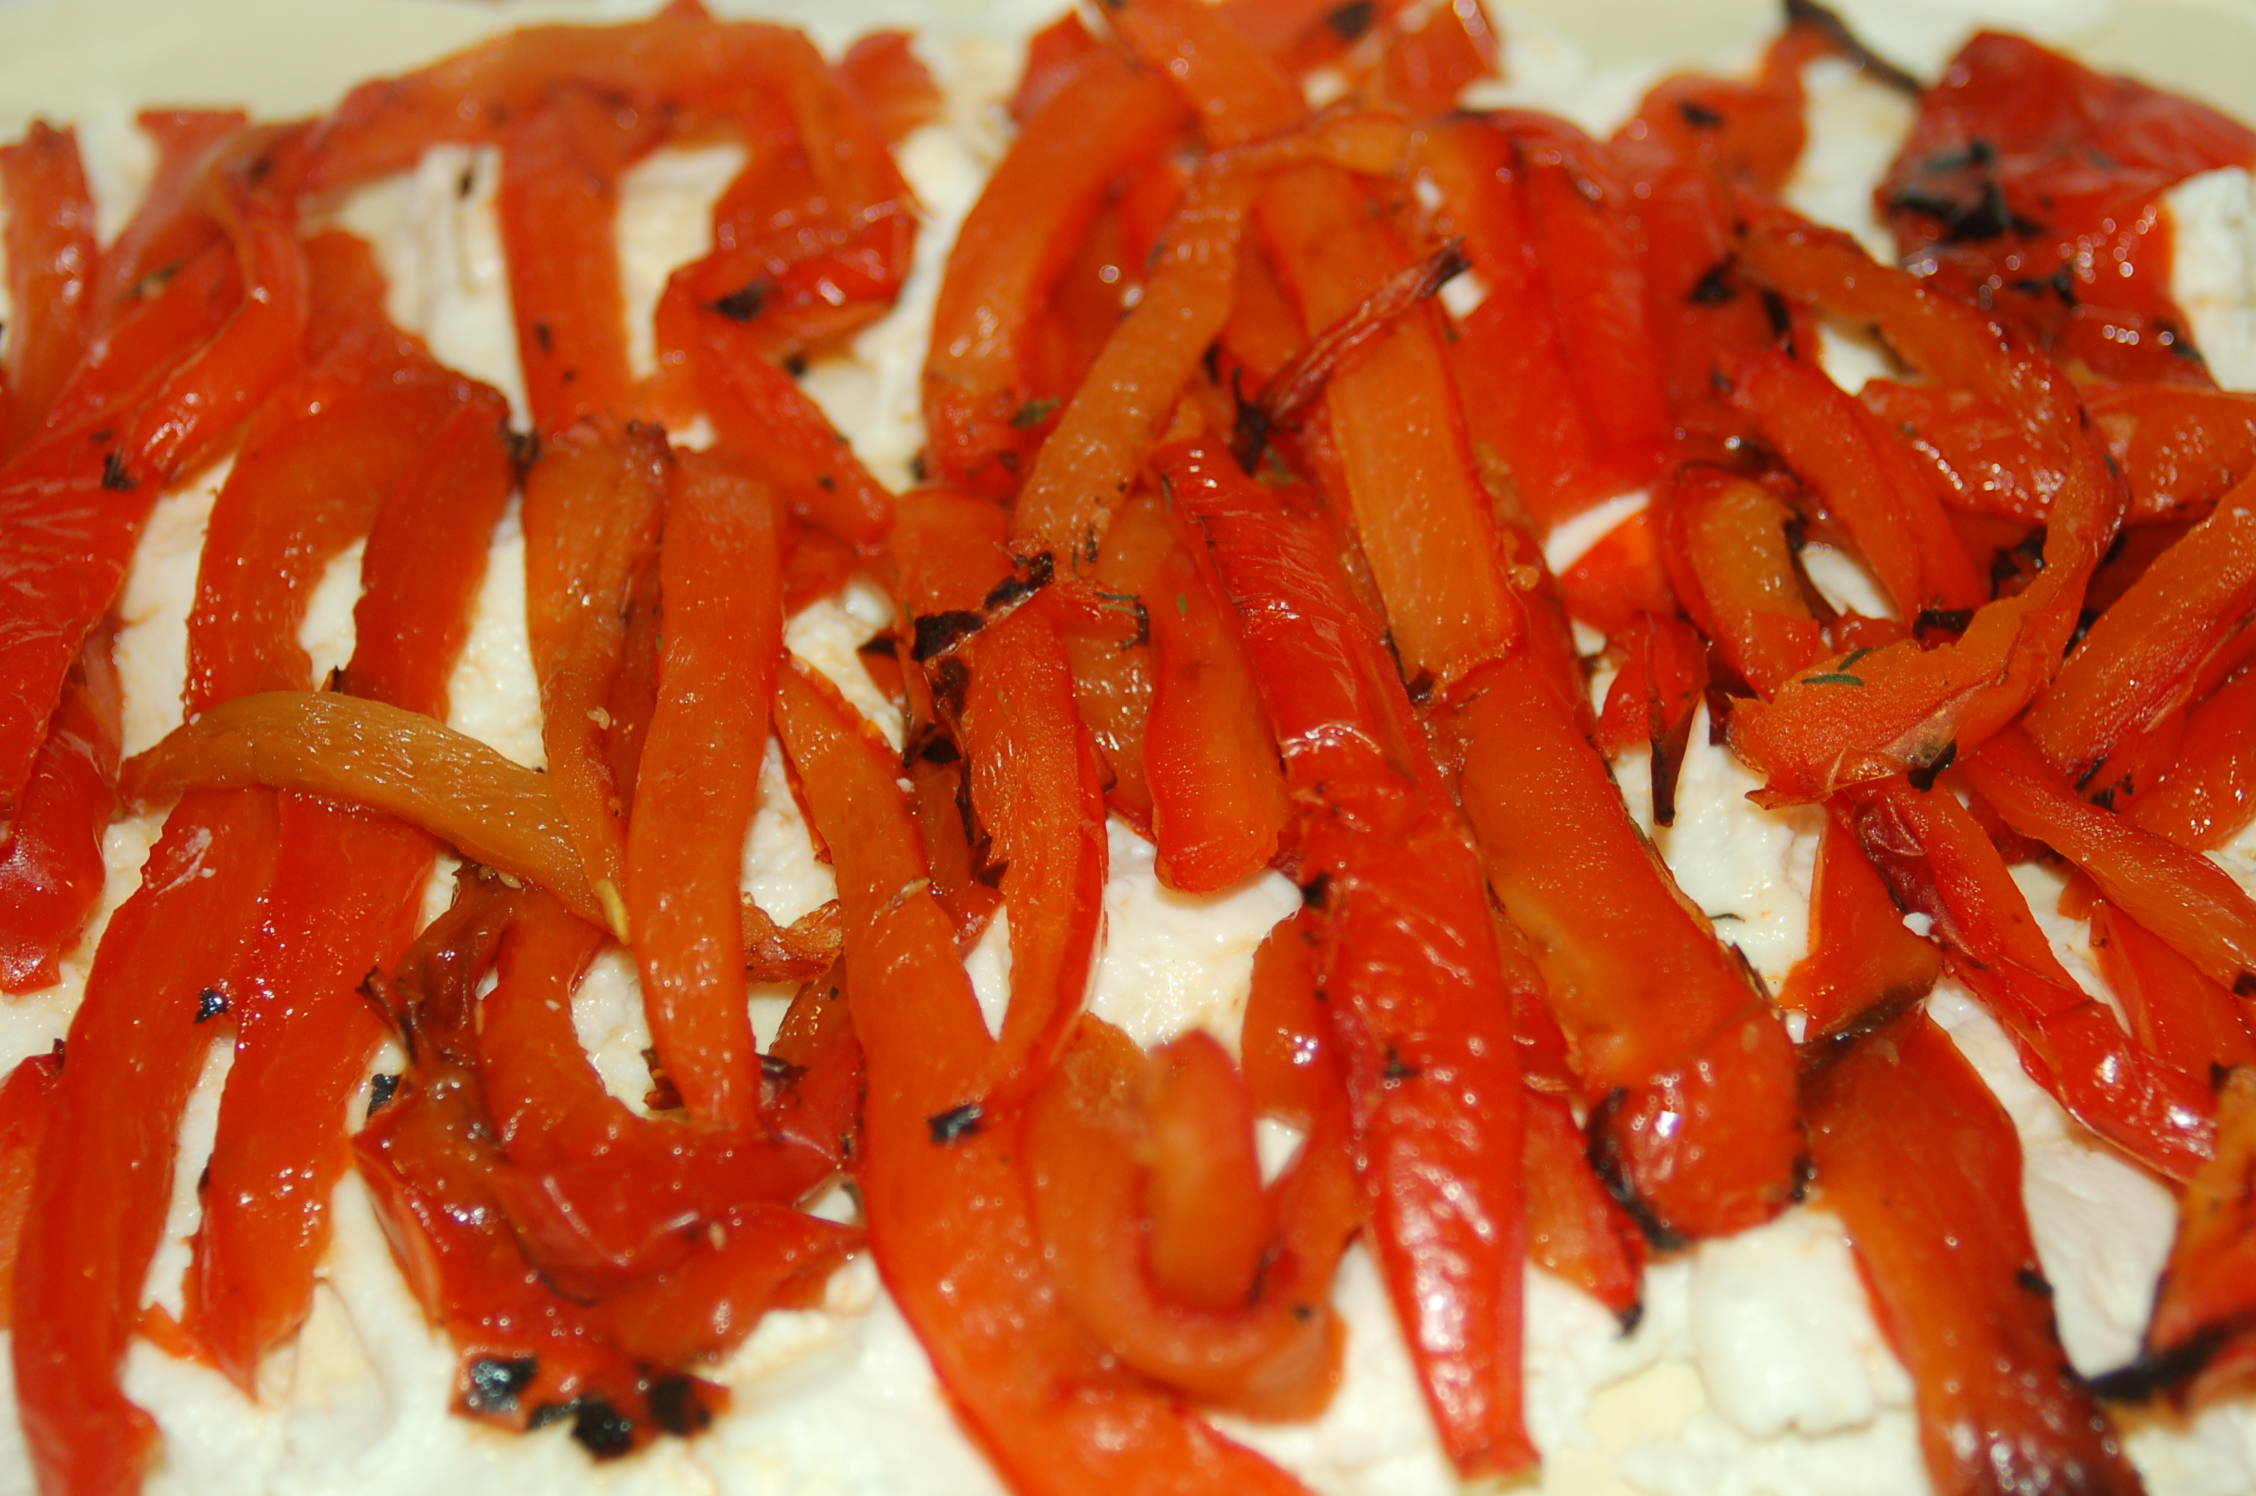
While the tomato sauce simmers, roast bell peppers. There are several ways to roast peppers. I like to blister the whole peppers over a gas flame. Allow the peppers to cool and remove the charred skin. I don’t bother to place them in a paper bag or cover with plastic wrap. It’s not necessary for this recipe to remove all of the skin.
Core the peppers and cut into quarters. On a baking sheet lined with parchment paper, place the pepper quarters skin side up and roast in oven at 375F for about 20 minutes or until softened.
Roast zucchini:
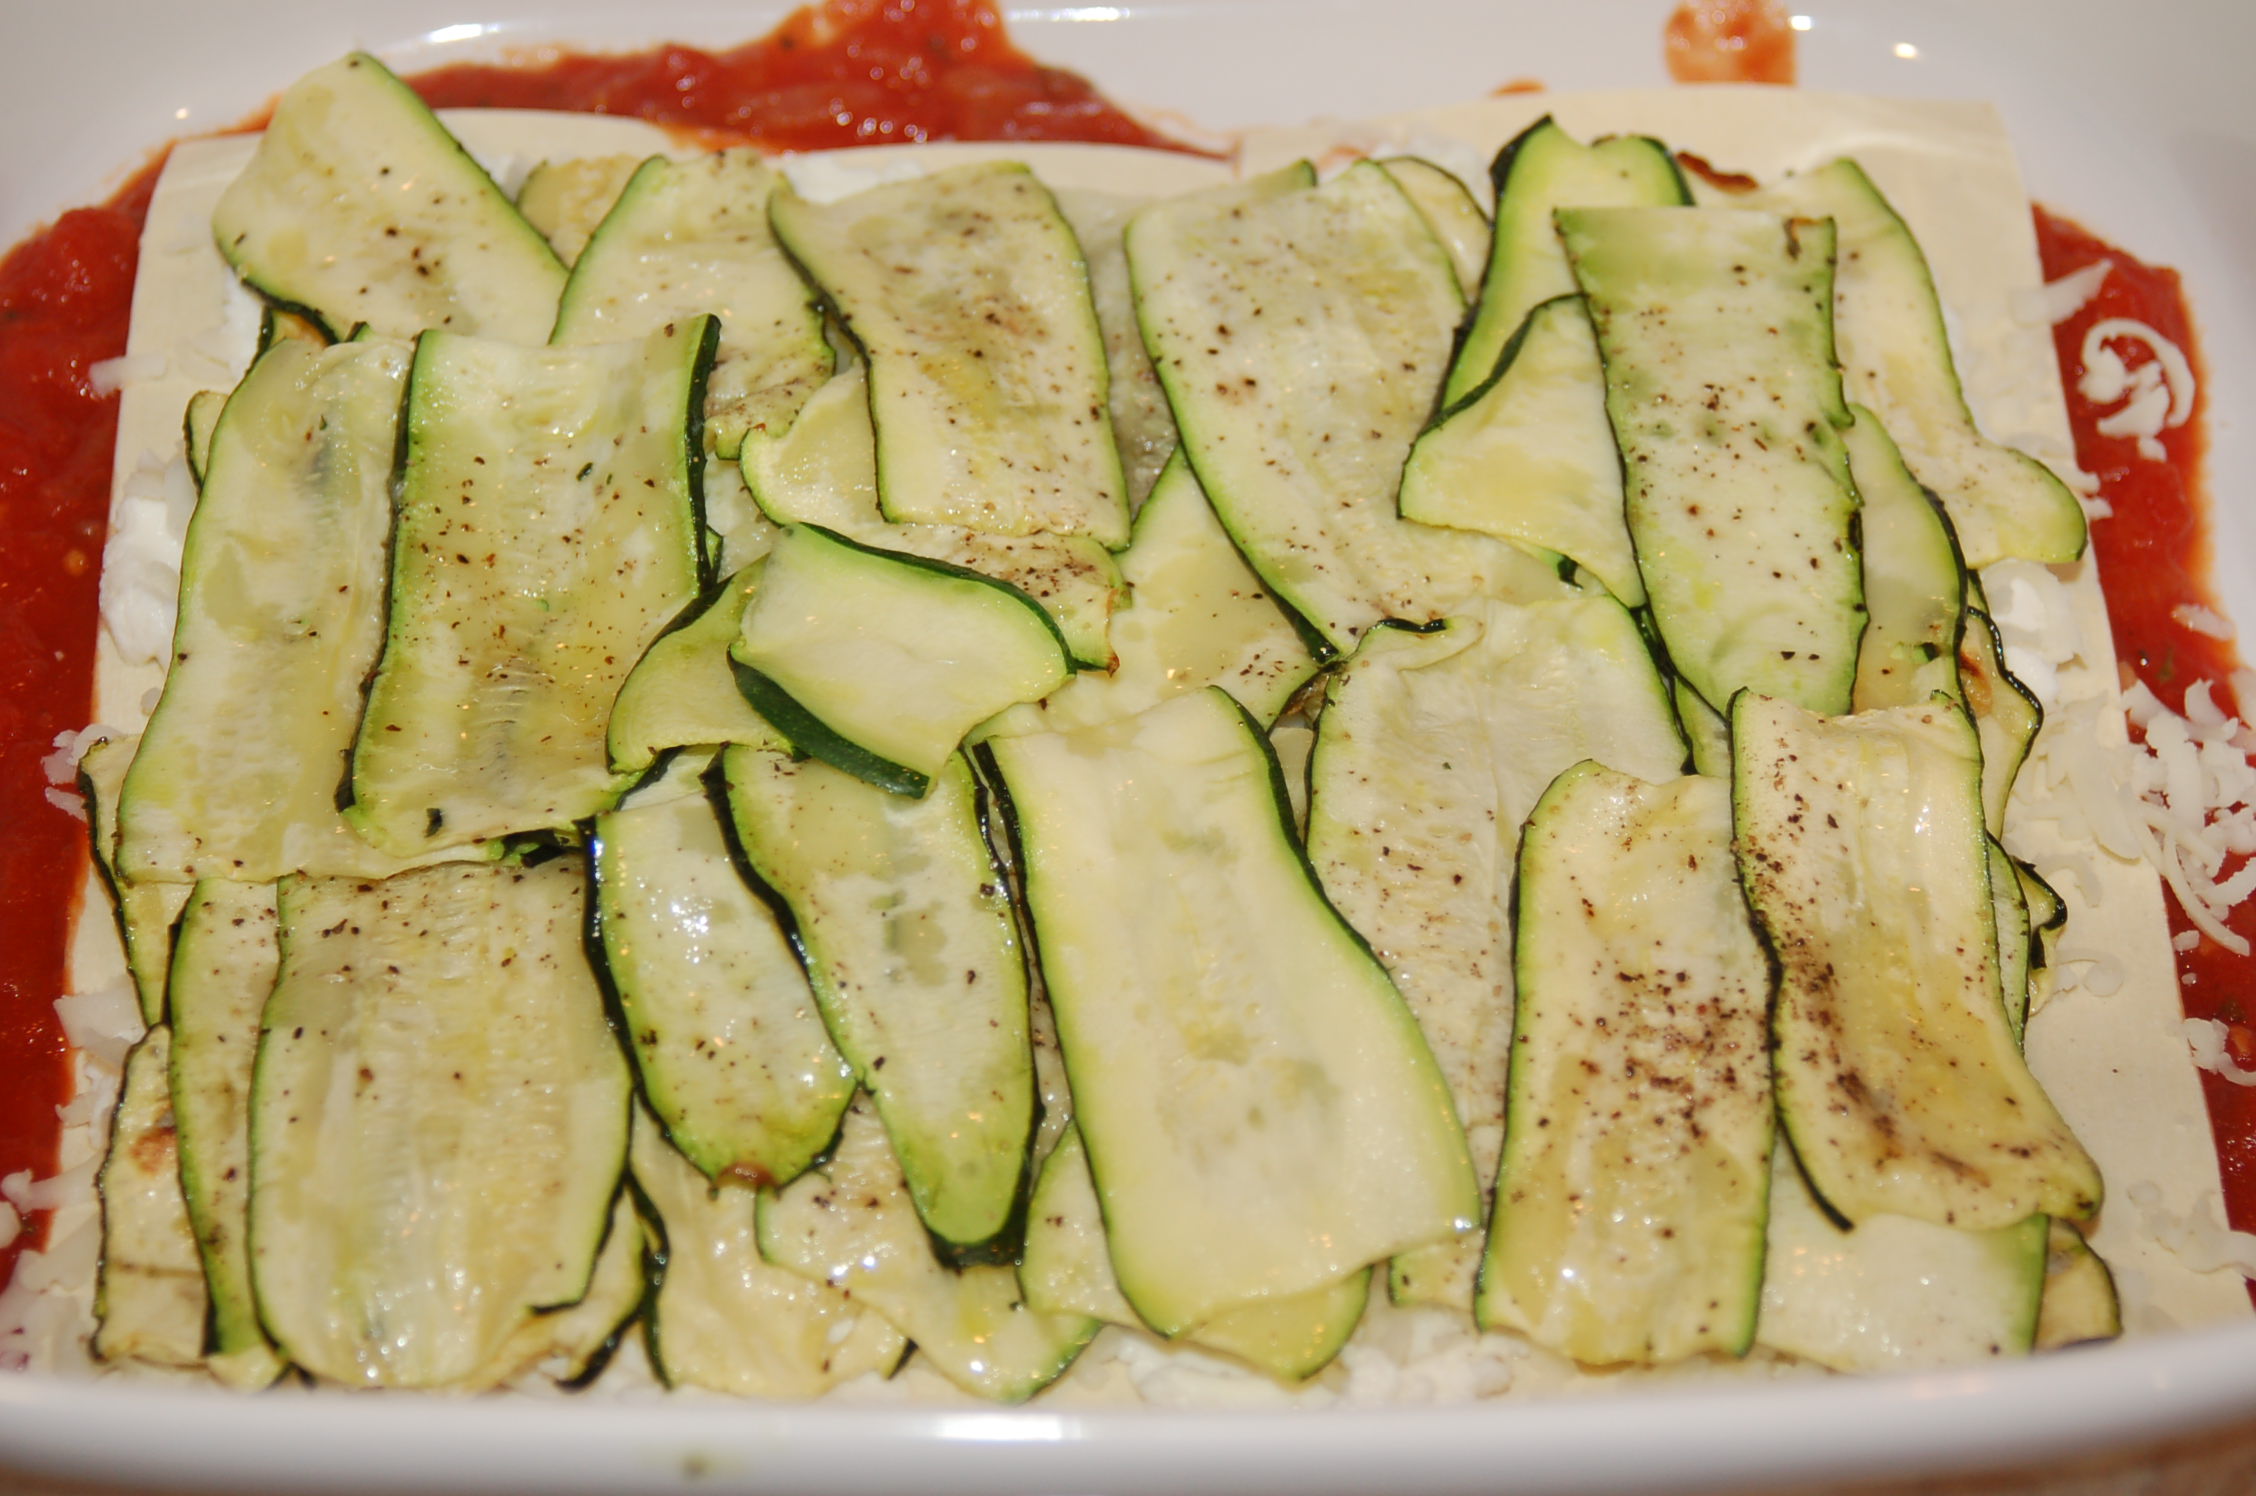
Using a mandolin, slice zucchini into 1/4 inch strips. Brush both sides with olive oil and season with salt and pepper. Place on parchment lined baking sheet and roast in over at 375F. Turn over after 10 minutes and continue to toss until softened.
Building first layer of lasagna:
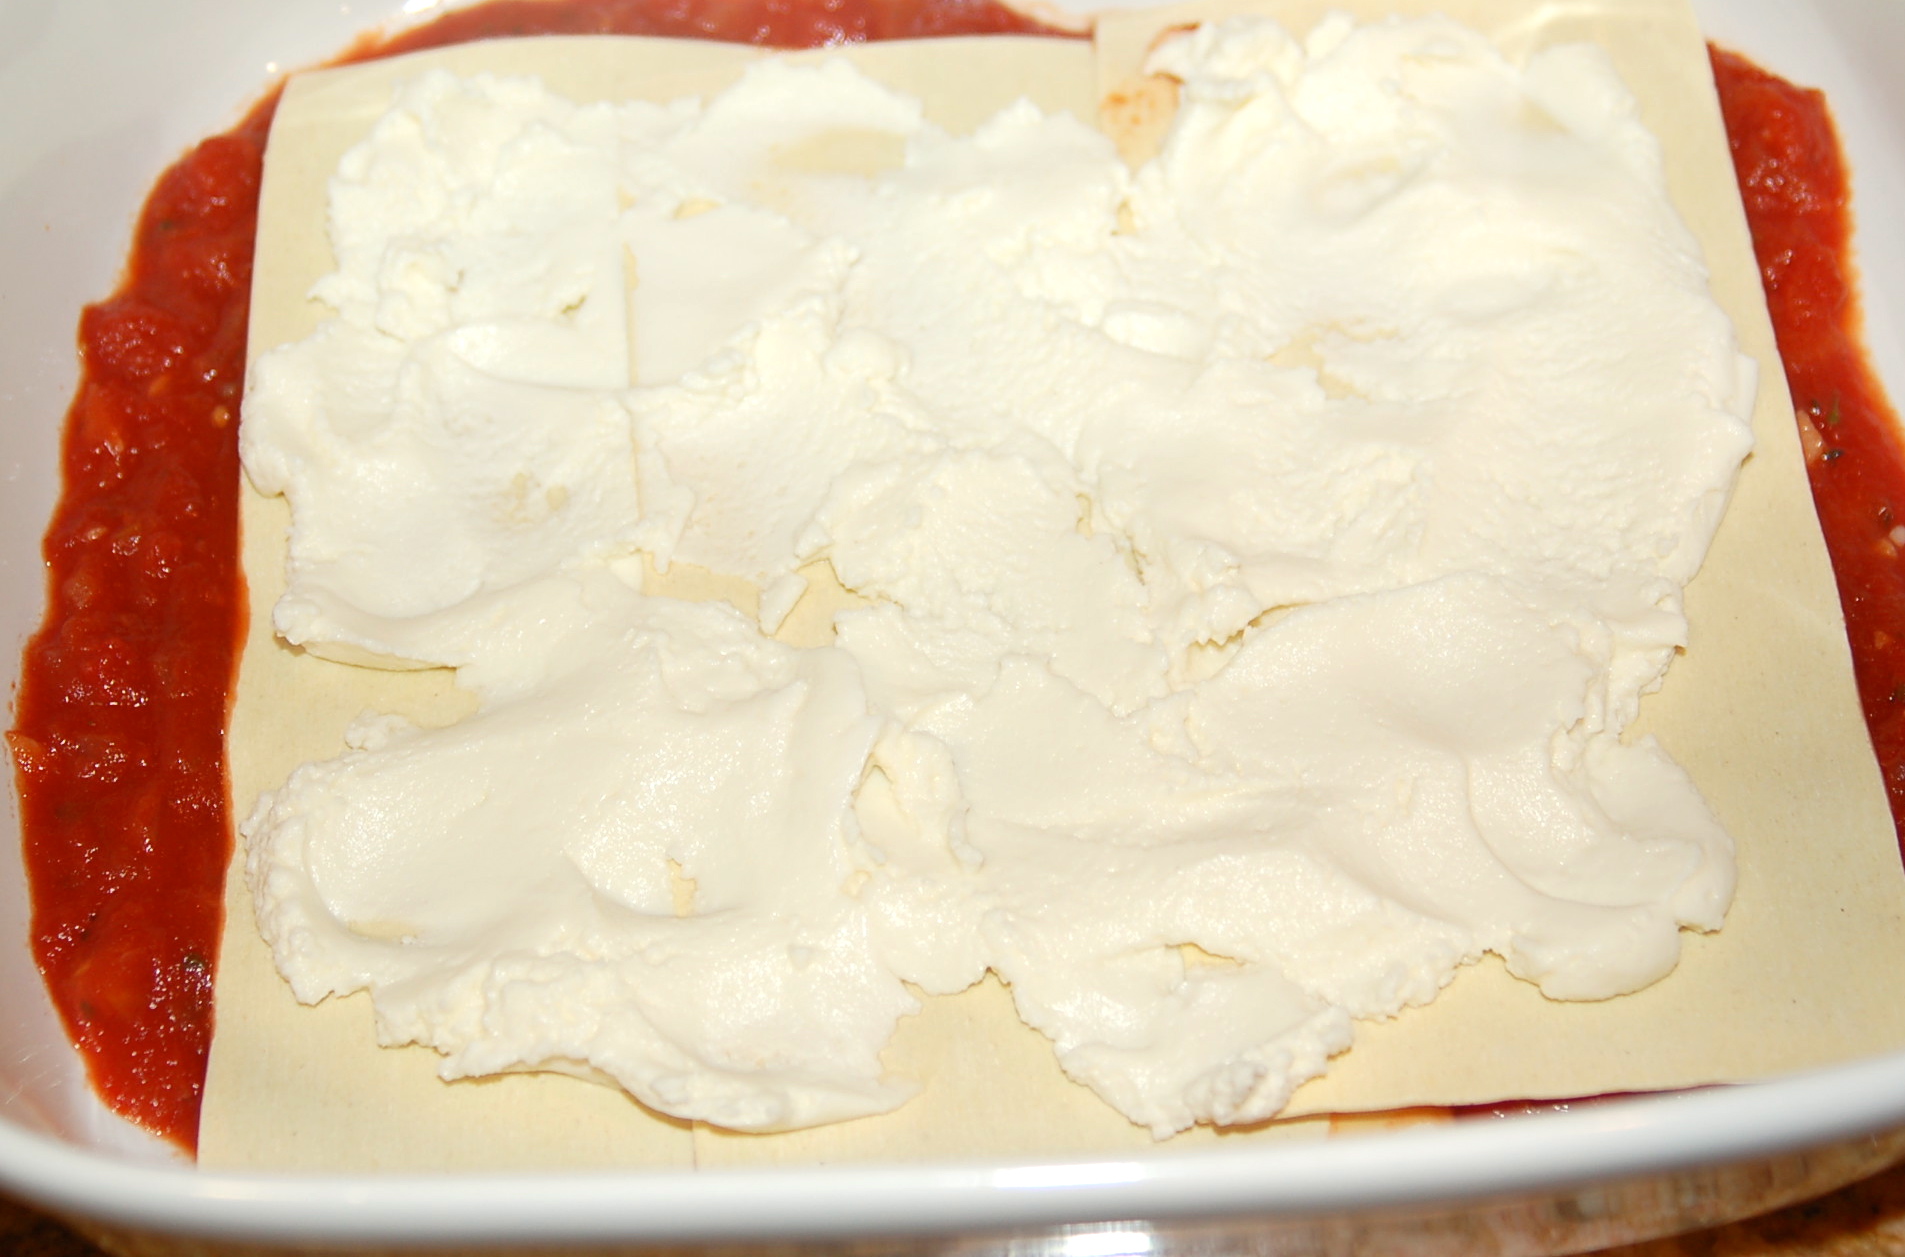
Remove bay leaf from tomato sauce. Coat the bottom of lasagna pan with tomato sauce. I used a 10.5 x 8.75 x 2.5 inch ceramic casserole dish. Place first layer of lasagna noodles over the tomato sauce, overlapping each noodle by ¼ inch. Gently spread ricotta cheese over the noodles being careful not to break noodles. Lay roasted zucchini strips. Sprinkle with mozzarella cheese and cover with thin layer of tomato sauce making sure to coat the noodles.
Gently spread a thin layer of ricotta cheese over lasagna noodles.
Second layer of lasagna:
Place next layer lasagna noodles over the zucchini and tomato sauce. Spread thin layer of ricotta cheese over the noodles, lay roasted peppers, sprinkle with mozzarella cheese and cover with another thin layer of tomato sauce.
Third layer of lasagna:
Place third layer of lasagna noodles over roasted peppers and tomato sauce. Spread with thin layer of ricotta cheese. Squeeze out all the moisture from spinach and spread evenly over ricotta and noodles. Repeat layering with mozzarella and tomato sauce.
Last layer of lasagna:
Place forth and last layer of lasagna over the spinach layer. Cover with remaining tomato sauce. Sprinkle with remaining mozzarella cheese and Parmesan-Reggiano cheese.
Cover with aluminum foil and bake at 375F for 40 minutes.
Use the extra mozzarella, parmesan, tomato sauce, roasted zucchini and roasted peppers to make a pizza the next day. Enjoy it with champagne like I did here.
How do you feed 30 athlete friends a vegetarian friendly meal, which you can prepare in advance and serve warm with minimal fuss? My Butternut Squash Chili was the winning answer, setting a PR* in my kitchen for nourishing the largest gang of hungry athletes in my house to date. Like an endurance athlete, the chili finished strong, held up to being kept warm for hours and with plenty to go around for seconds, thirds and eh hem, fourths.
A variety of beans keep it interesting; frozen corn kernels add a nice contrast of texture and sweetness while cornmeal is the secret ingredient to thicken it all up.
The chili freezes well and is also vegan and gluten-free.
* In case you are not familiar with the term PR, it’s short for personal record.
Serving size: 10-12
Ingredients:
2 ½ pounds butternut squash, cut into 1 inch cubes
Peel the butternut squash with a vegetable peeler. With a very sharp knife, slice off the top and bottom of the butternut squash to create a level surface for it to stand on either end and cut crosswise into 2 halves. Cut each half lengthwise into 2 more halves. Scoop out seeds and stringy parts with a spoon. Cut into 1/2 inch cubes and place on baking sheet lined with aluminum foil. Toss in 2 tablespoons olive oil. Season with salt and freshly ground black pepper. Roast for about 20 minutes, tossing once, until tender. Remove from oven and set aside to cool.
In a large 6 quart Dutch oven, heat remaining olive oil. On medium heat, sauté chopped onion until soften.
Add ½ cup vegetable broth, onion, garlic, and chopped bell peppers. Stir over medium heat for another 5 more minutes.
Add remaining vegetable broth, diced tomatoes, tomato paste, green chili, beans, corn, beans, Worcestershire sauce and spices. Simmer for at least 1 hour but 2 hours is recommended. Even better if prepared the day before and reheated. Season with salt to taste. Serve with shredded cheddar cheese, sour cream and sliced green onion. My favorite way is with a dollop of sour cream and green onion.
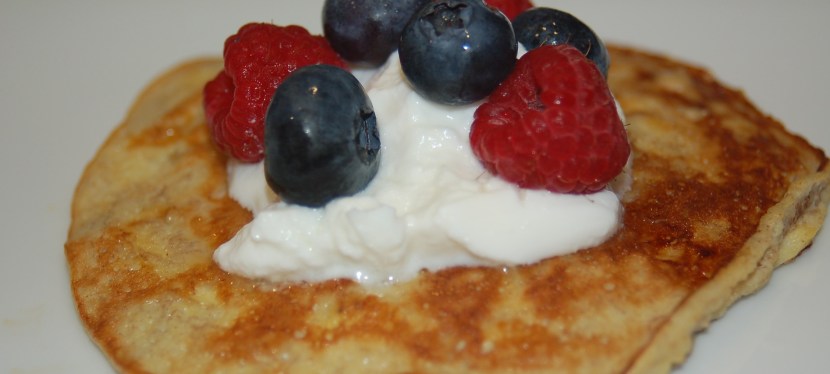
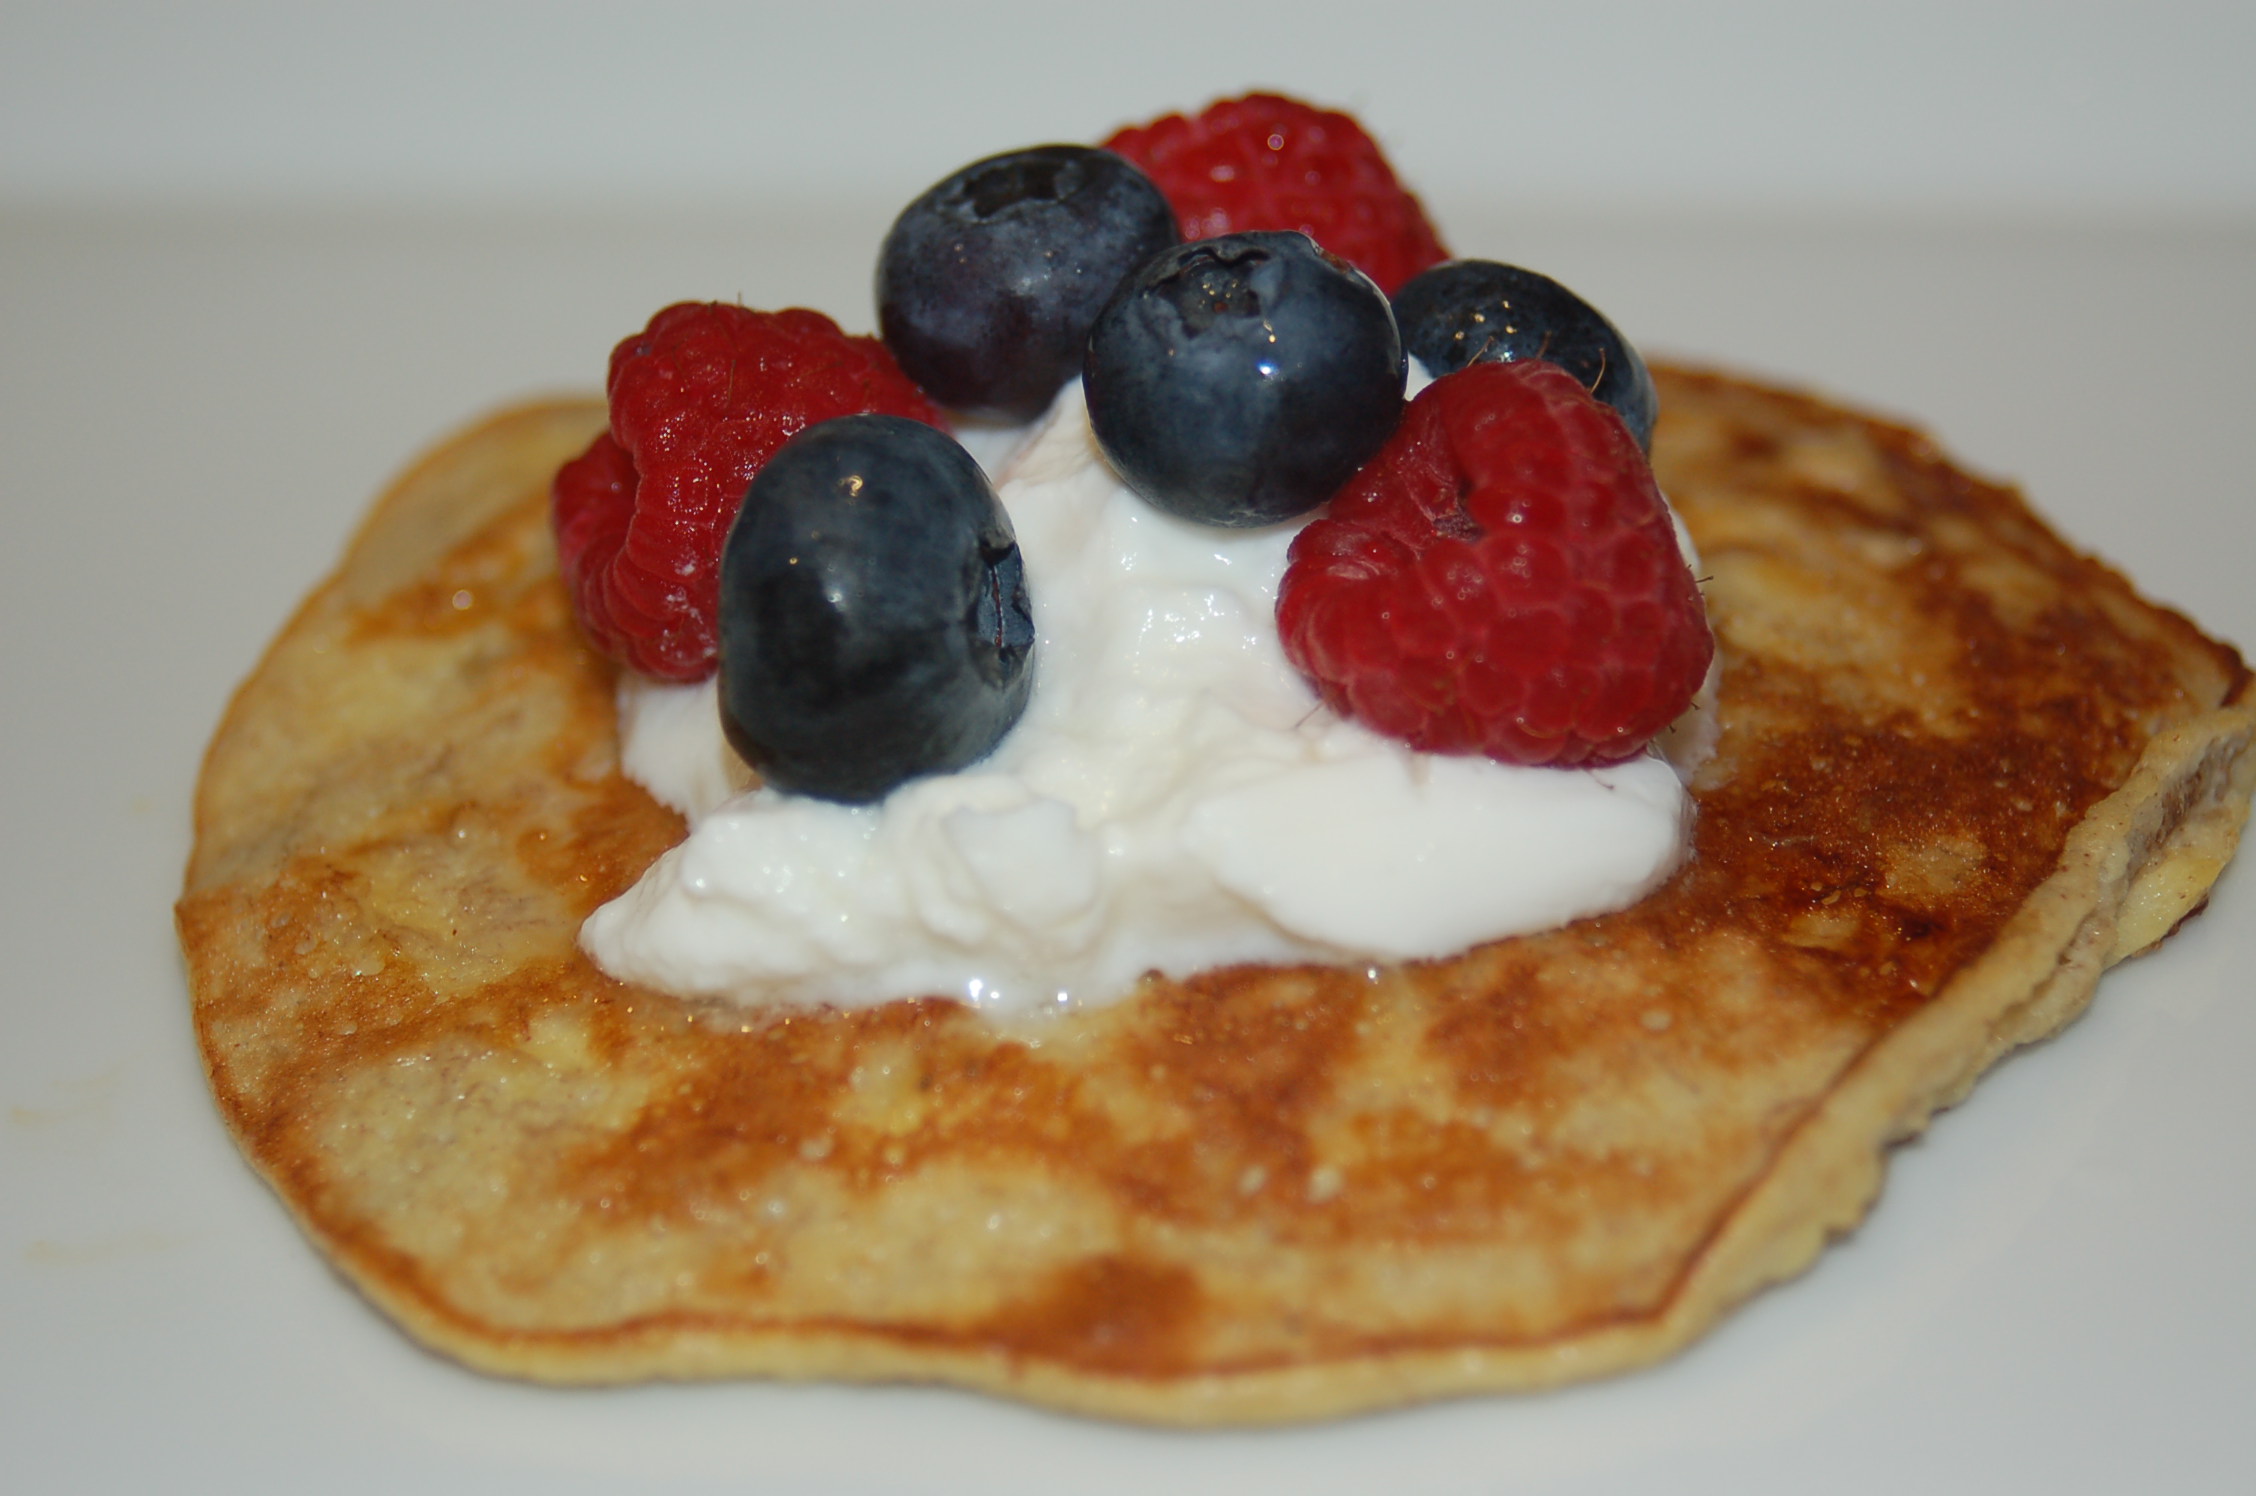
Stop the presses. This is the most awesome two ingredient pancake to hit the griddle, and my stomach. Technically it’s three ingredients, since one additional ingredient is needed to keep the pancakes from sticking to the griddle. Embellish the pancakes with cinnamon, nuts, yogurt, and berries, and now you have a few more ingredients but the pancake itself can be made with just one banana and one egg. That’s it. Our wonderful run coach, Lisa Engles shared this recipe with me while at dinner at our team’s favorite healthy post-track hangout.
A ripe banana provides enough sweetness that additional syrup or sugar is not needed. These pancakes are even sweet enough to enjoy as a healthy dessert, which is how I first savored them since I tested the recipe after dinner.
Serving size: 2 (4 small pancakes)
Ingredients:
2 ripe bananas
2 eggs
1/8 teaspoon cinnamon
1 teaspoon coconut oil
1 teaspoon toasted and finely chopped almonds (optional)
Greek yogurt (optional)
Fresh berries (optional)
Directions:
Using an electric or hand mixer, combine bananas and eggs until smooth. This can be done by hand but it’s obviously much faster and easier with a mixer. It’s not necessary to mix until completely smooth however the batter should be mostly smooth with very few lumps. If necessary, mash out lumps with a fork or the back of a spoon.
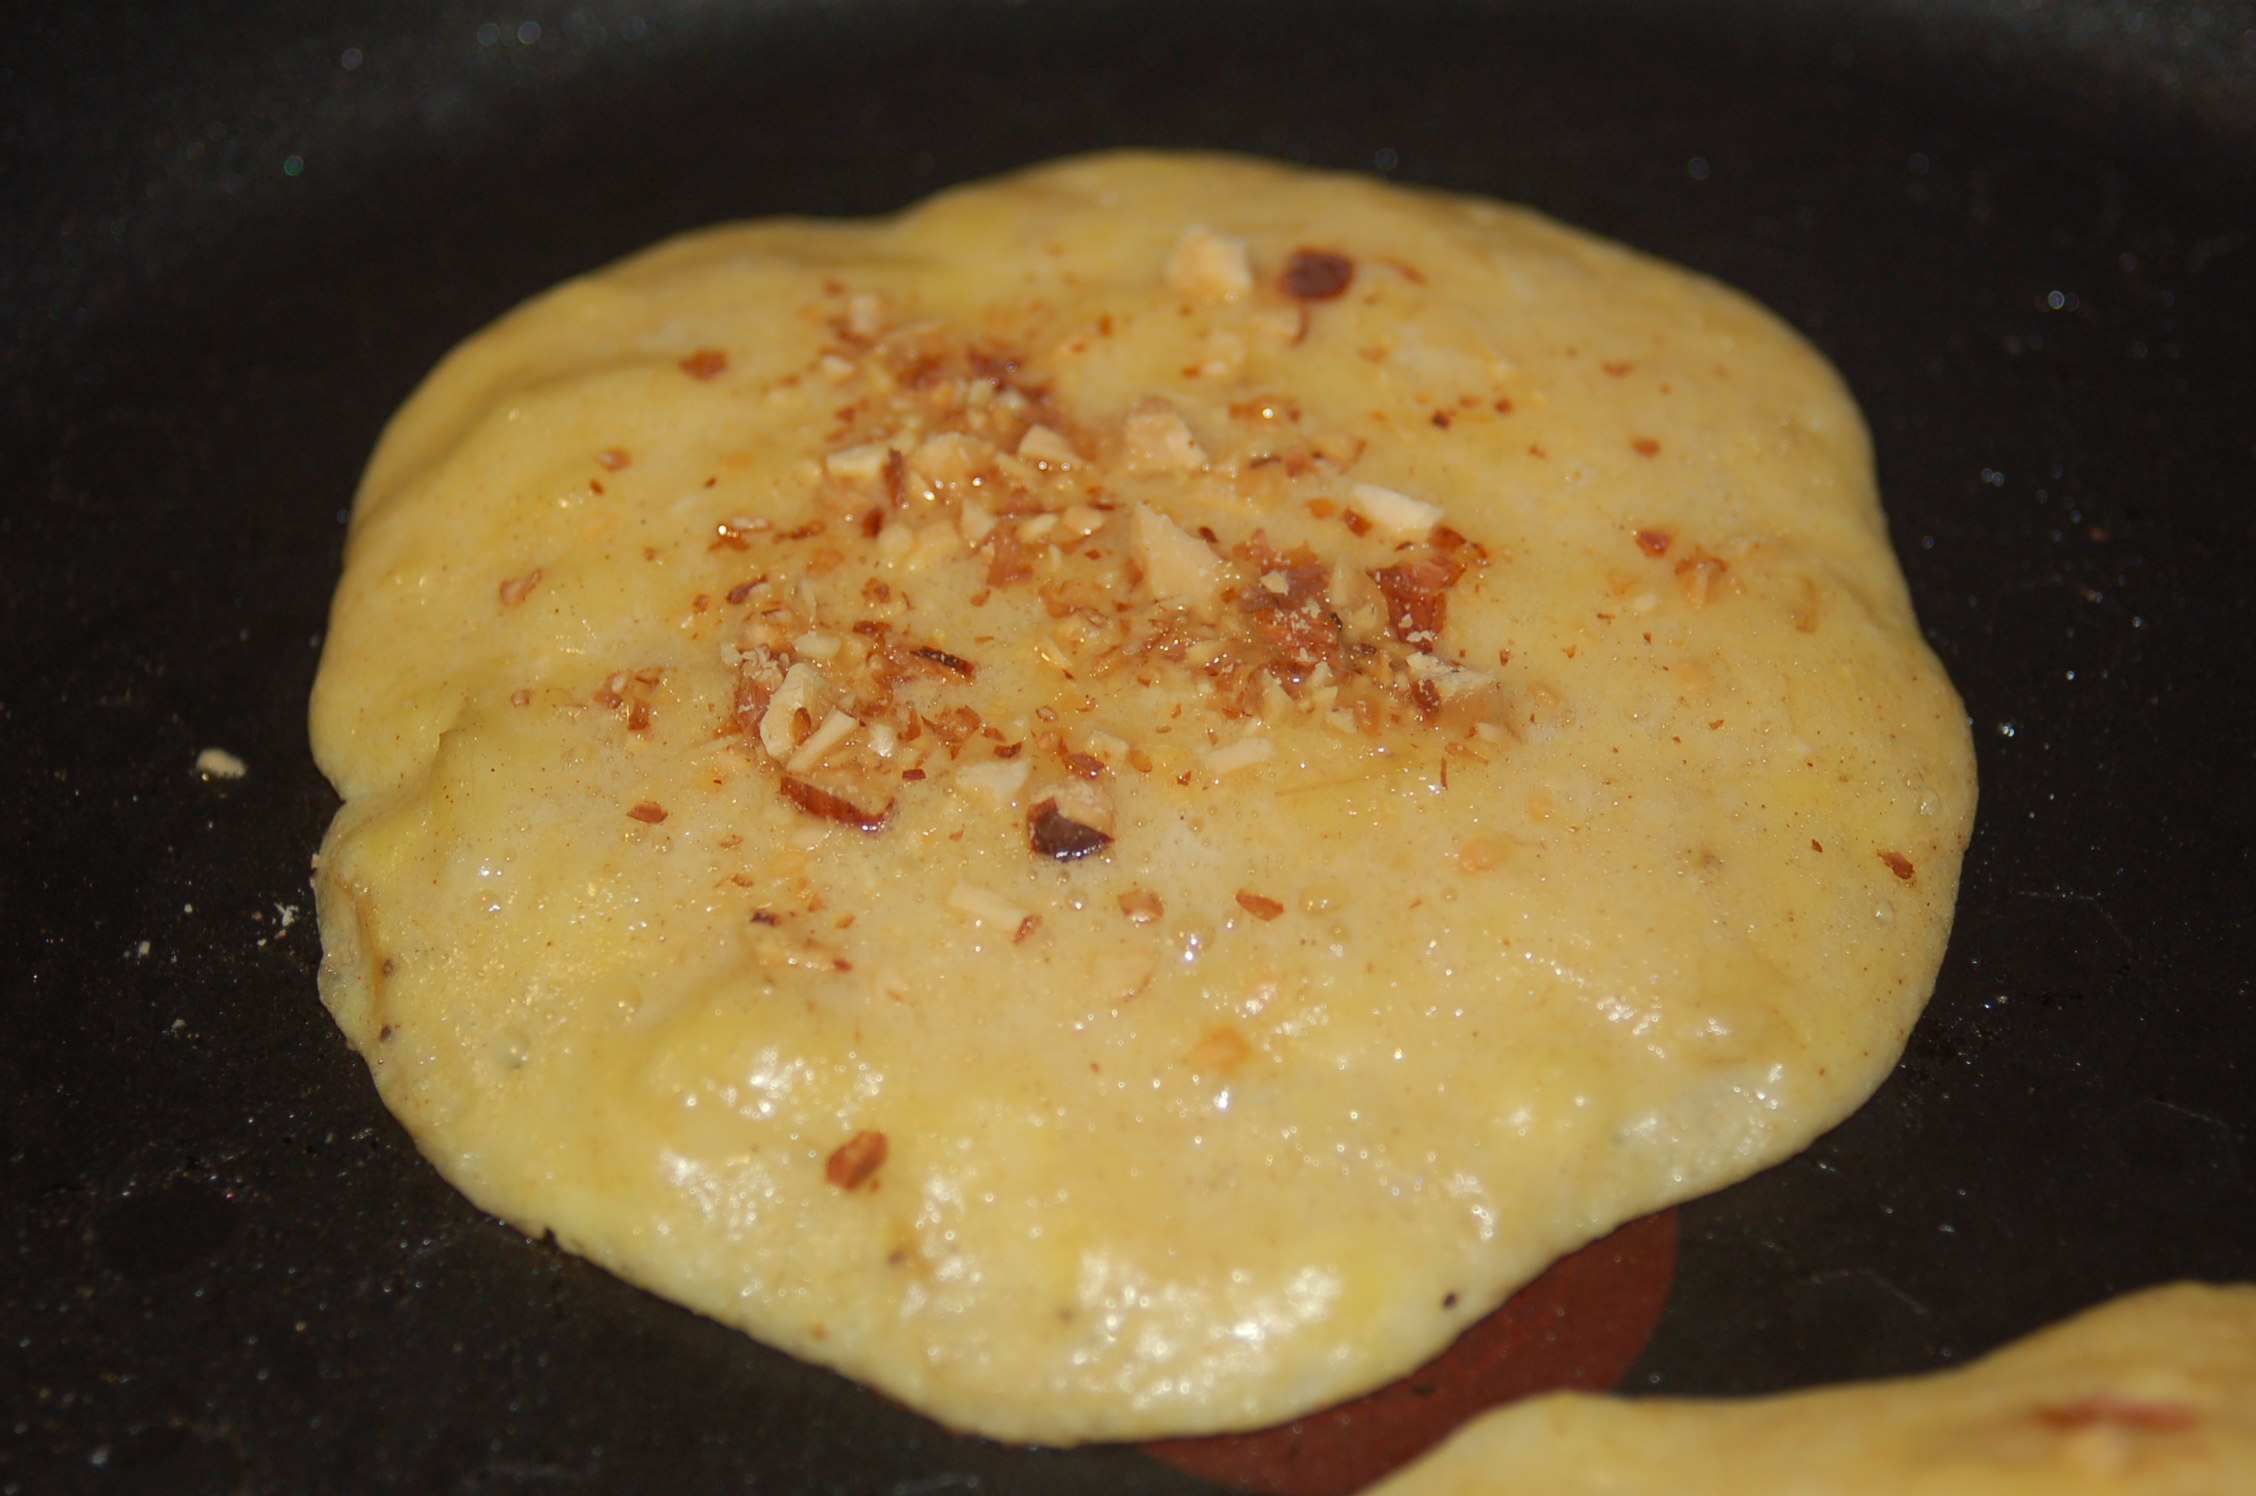
On medium high heat, add the coconut oil to the griddle or frying pan. Spoon the batter into four small pancakes on the griddle. Sprinkle finely chopped toasted almonds on top of each pancake. Cook until the top side of the pancake starts to dry out and the side down is golden brown. Flip over and cook until other side is golden brown.
Top with Greek yogurt and fresh berries.
Sprinkle toasted and finely chopped almonds to add a nice crunch to the pancake.
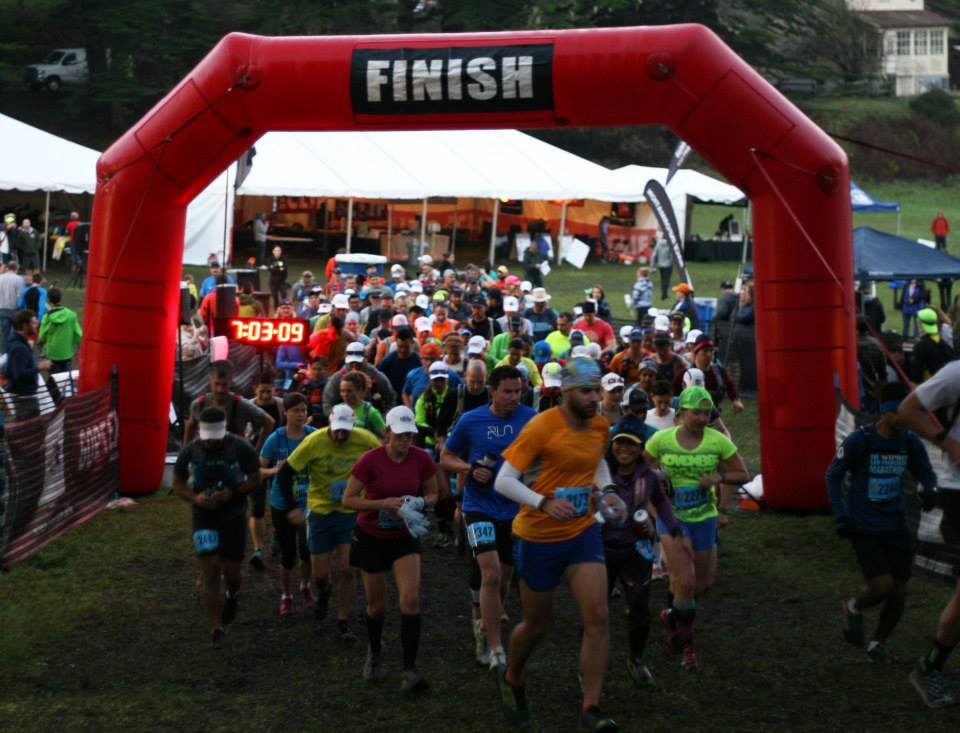
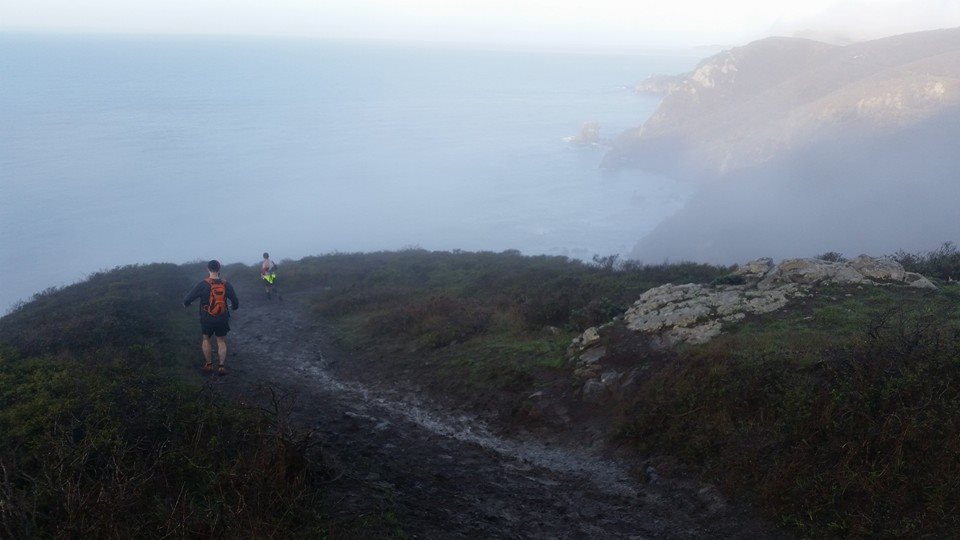
I once said I’d never do a triathlon. I am an Ironman. I once said I’d never want to run more than 26.2 miles of a marathon. I am now an ultrarunner. YES I AM. And I’m grateful for every opportunity to pursue these crazy things. Before I continue with my race report, you should watch a video made by Gus Luong, who ran his first 50 miler the same day I ran my first 50K. He graciously gave me permission to include his video, which shares his vantage of the amazingly beautiful and challenging North Face Endurance Challenge San Francisco 50 mile course.
It was a tough year physically. I was anemic, fatigued and had other health issues to deal with. I dropped out of the Wildflower Long Course triathlon in May as a result. When my health improved, I had permission to do the Vineman 70.3 half Ironman triathlon. It was my slowest of 3 appearances but I was thrilled to get through it. Then I was lucky to be invited to be a part of a 12 member team and raced Hood to Coast (HTC), a 197 mile relay race across Oregon. I was feeling better at HTC and my running was improving. This helped me feel optimistic about my first ultramarathon, the Northface Challenge 50K in the Marin Headlands.
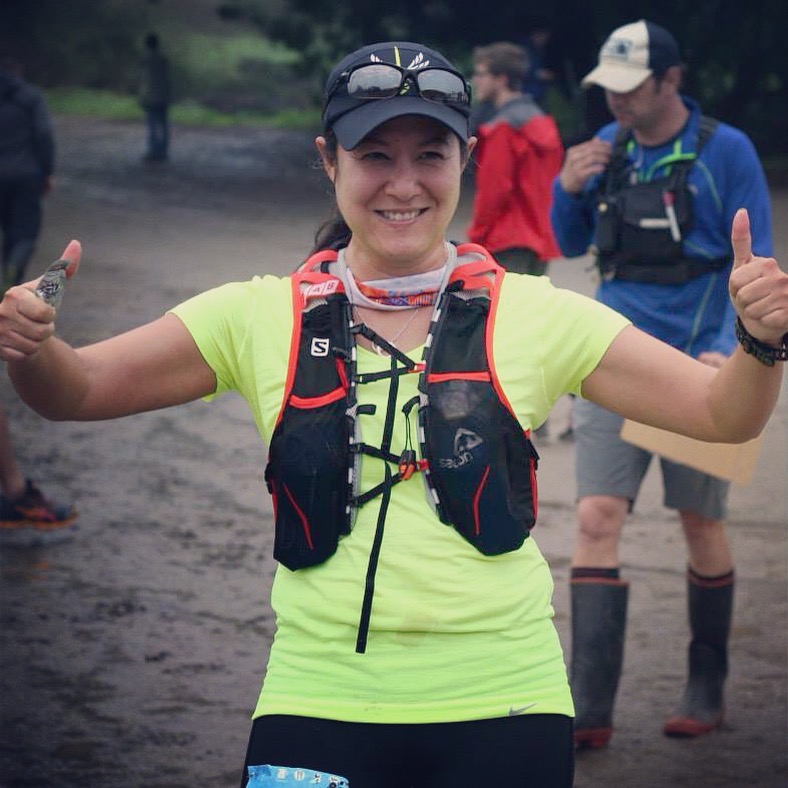
Training had been going well. Although I was not feeling like myself, I was able to train at a low heart rate and had the endurance to go long. Then, 4 weeks prior to race day, I developed a neuroma in my foot. Every step felt like I was landing on broken glass with a continuous burning sensation that extended to the tip of my third and forth toe. Over the next few weeks and up until the day before the race, I debated whether I should withdraw. Fortunately, I had a lot of encouragement from my friends and the confidence I could finish under the 10 hour time limit. When I arrived at the start, my friends greeted me with a warm welcome. I’m so lucky to have such good friends whom I met through the love of the sport. Being surrounded by them comforted me.
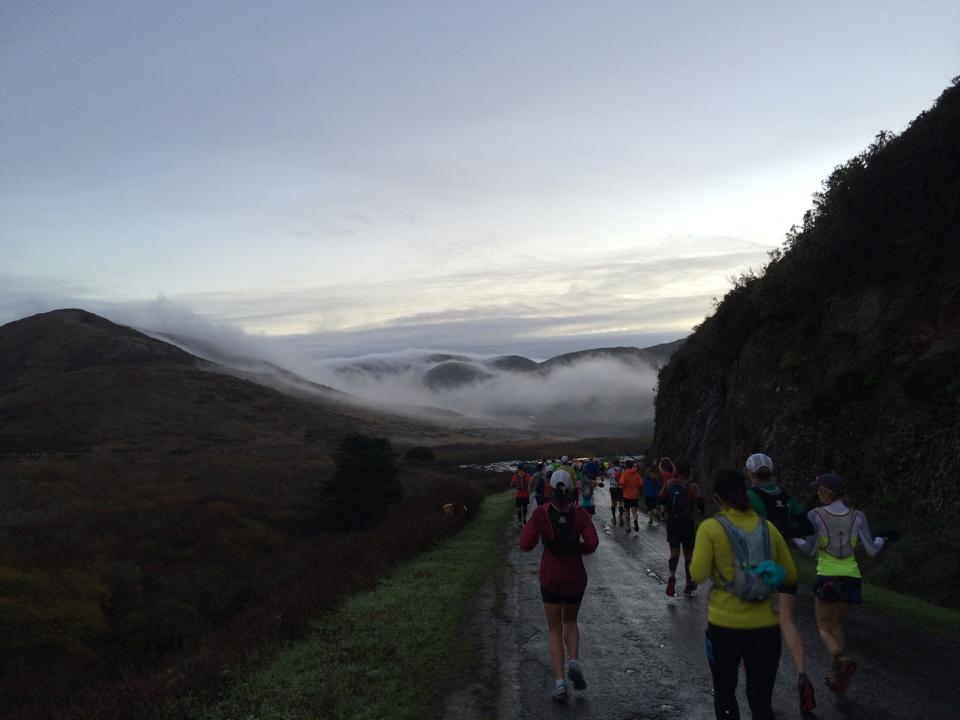
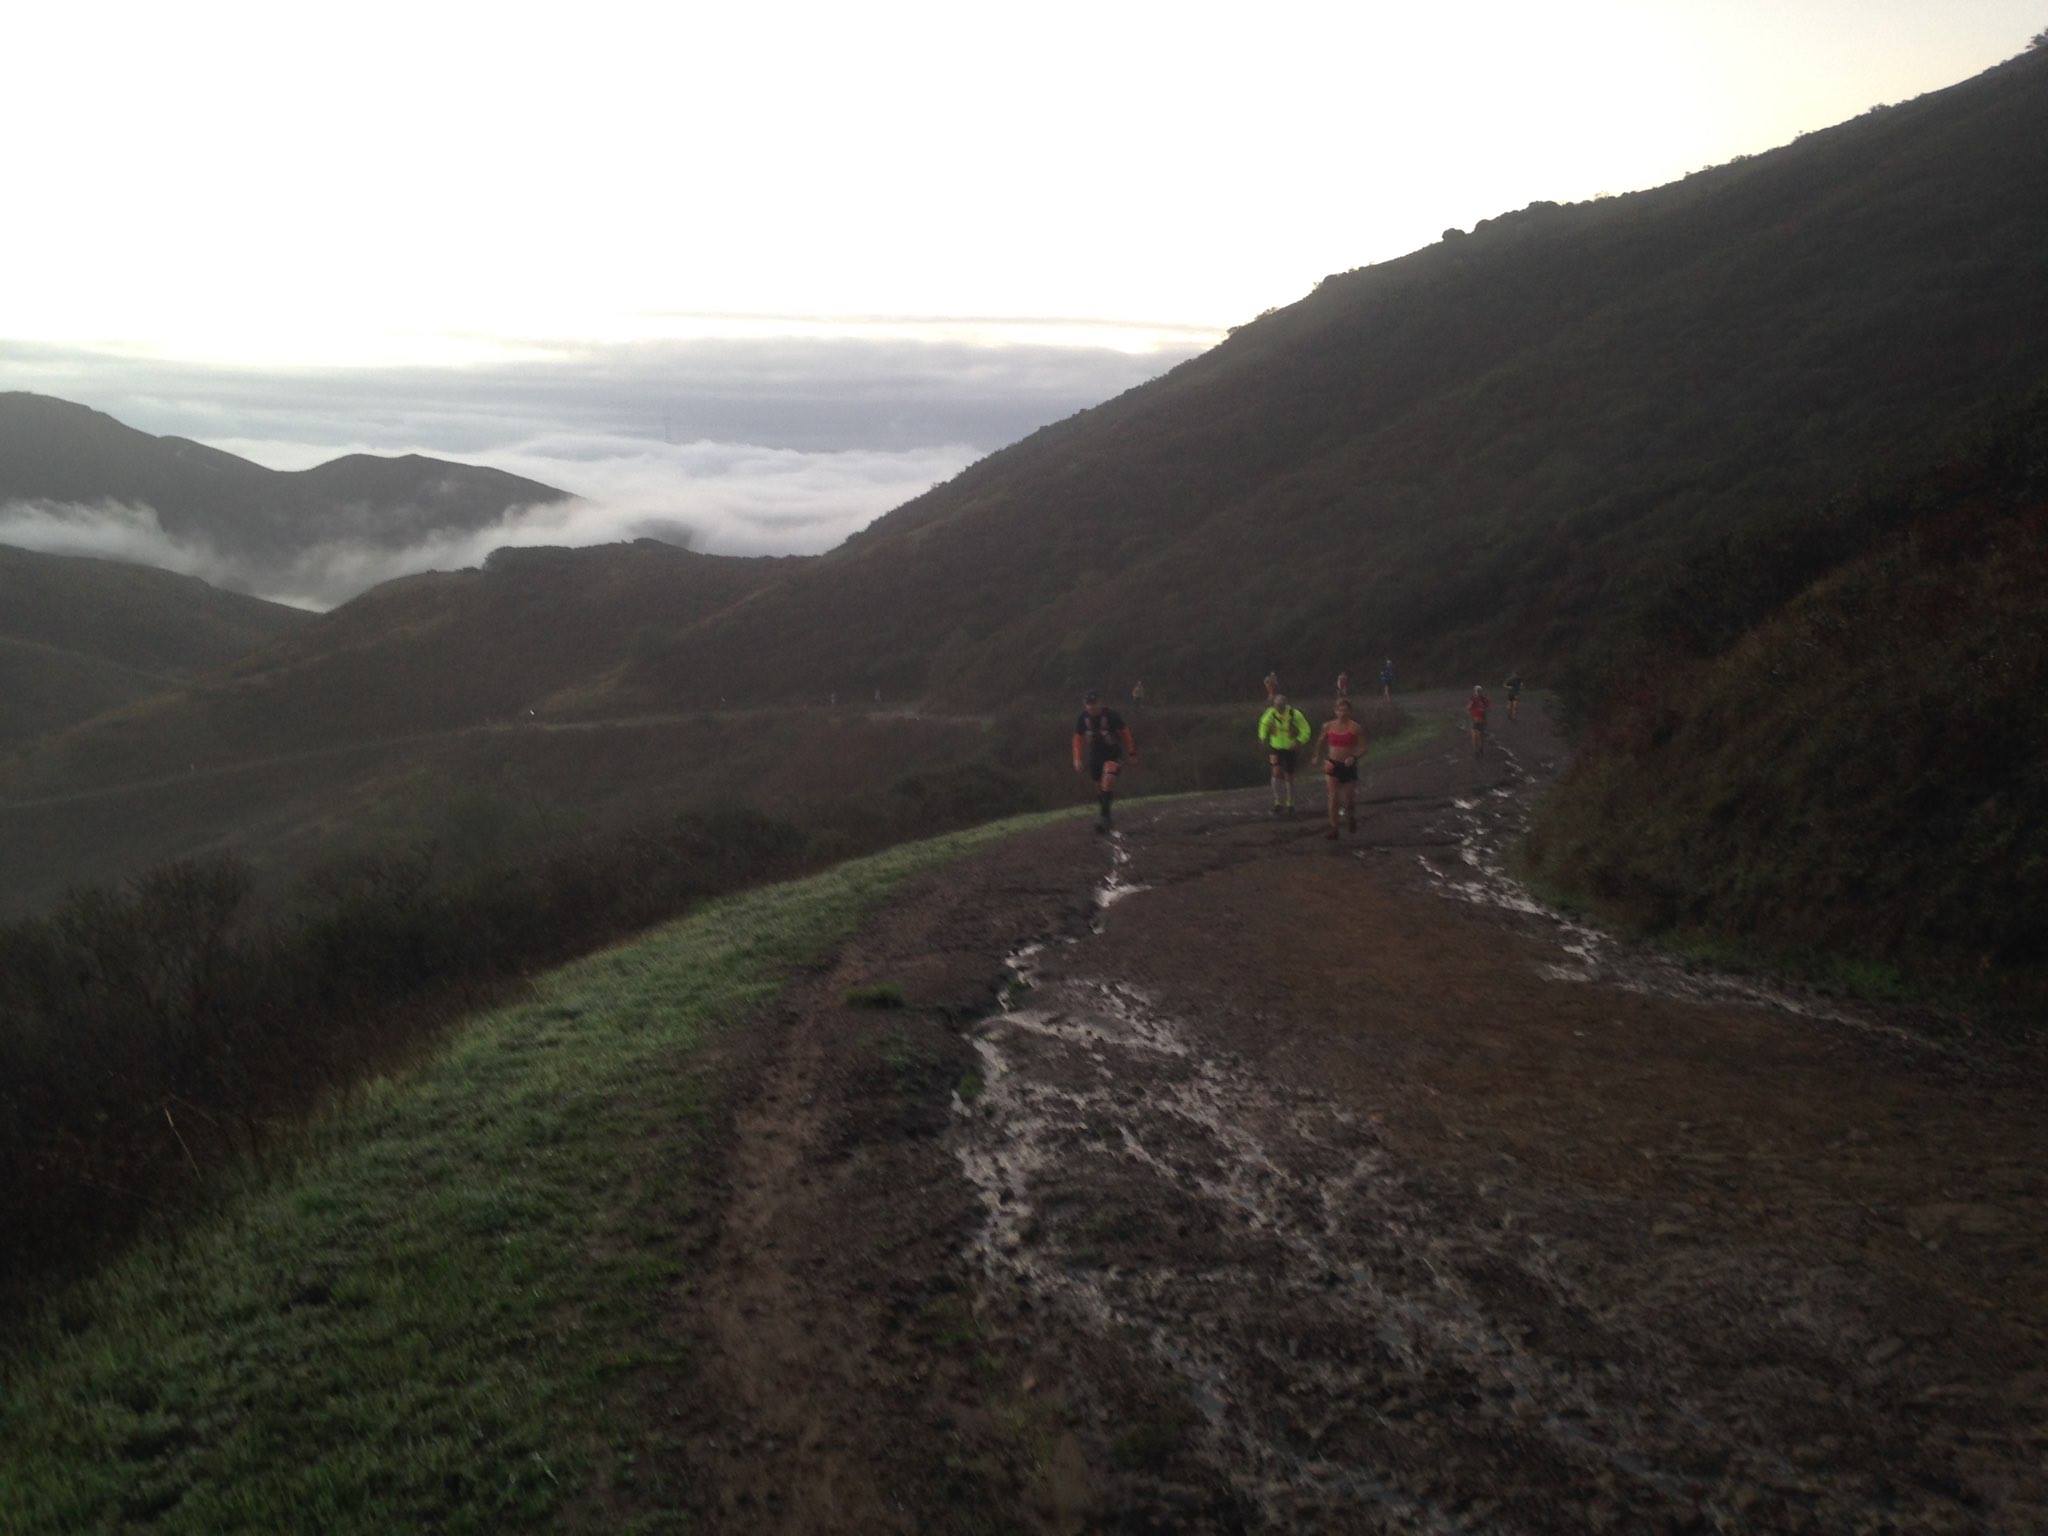
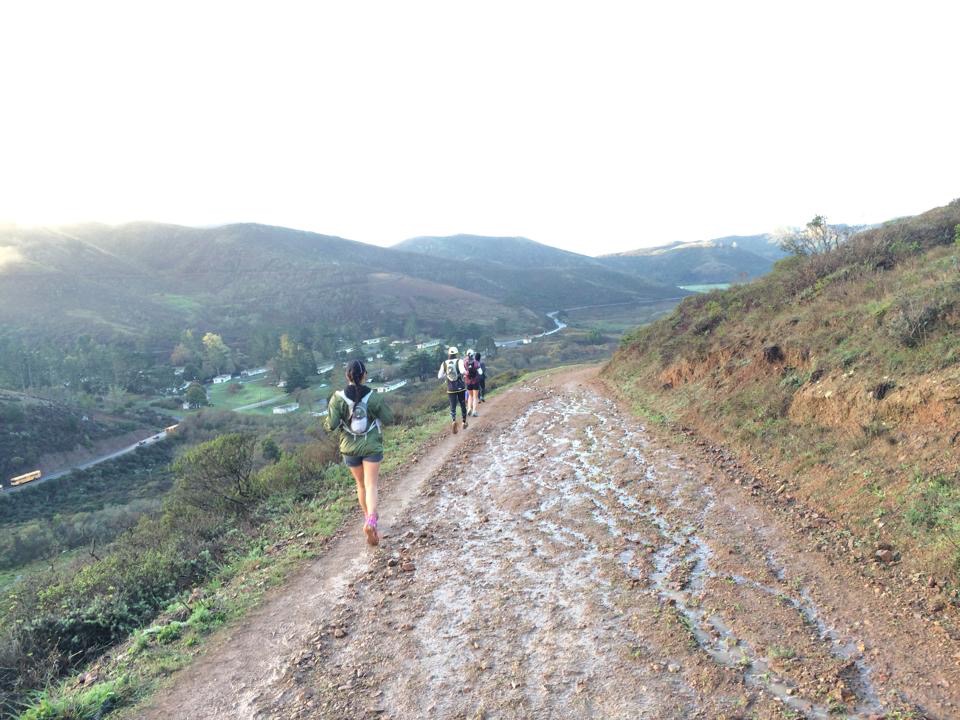
It was perfect weather for racing. At 7 am it was about 55F and overcast. Last year it was about 40F. It had rained heavily for several days prior to the race. One of the foot bridges had been washed away so the race course had to be modified at the last minute. The course ended up being 1 mile longer, 32 miles instead of 31. So I ending up running a 50K + 1 extra mile.
Photo credit: Kiyoko Ikeuchi
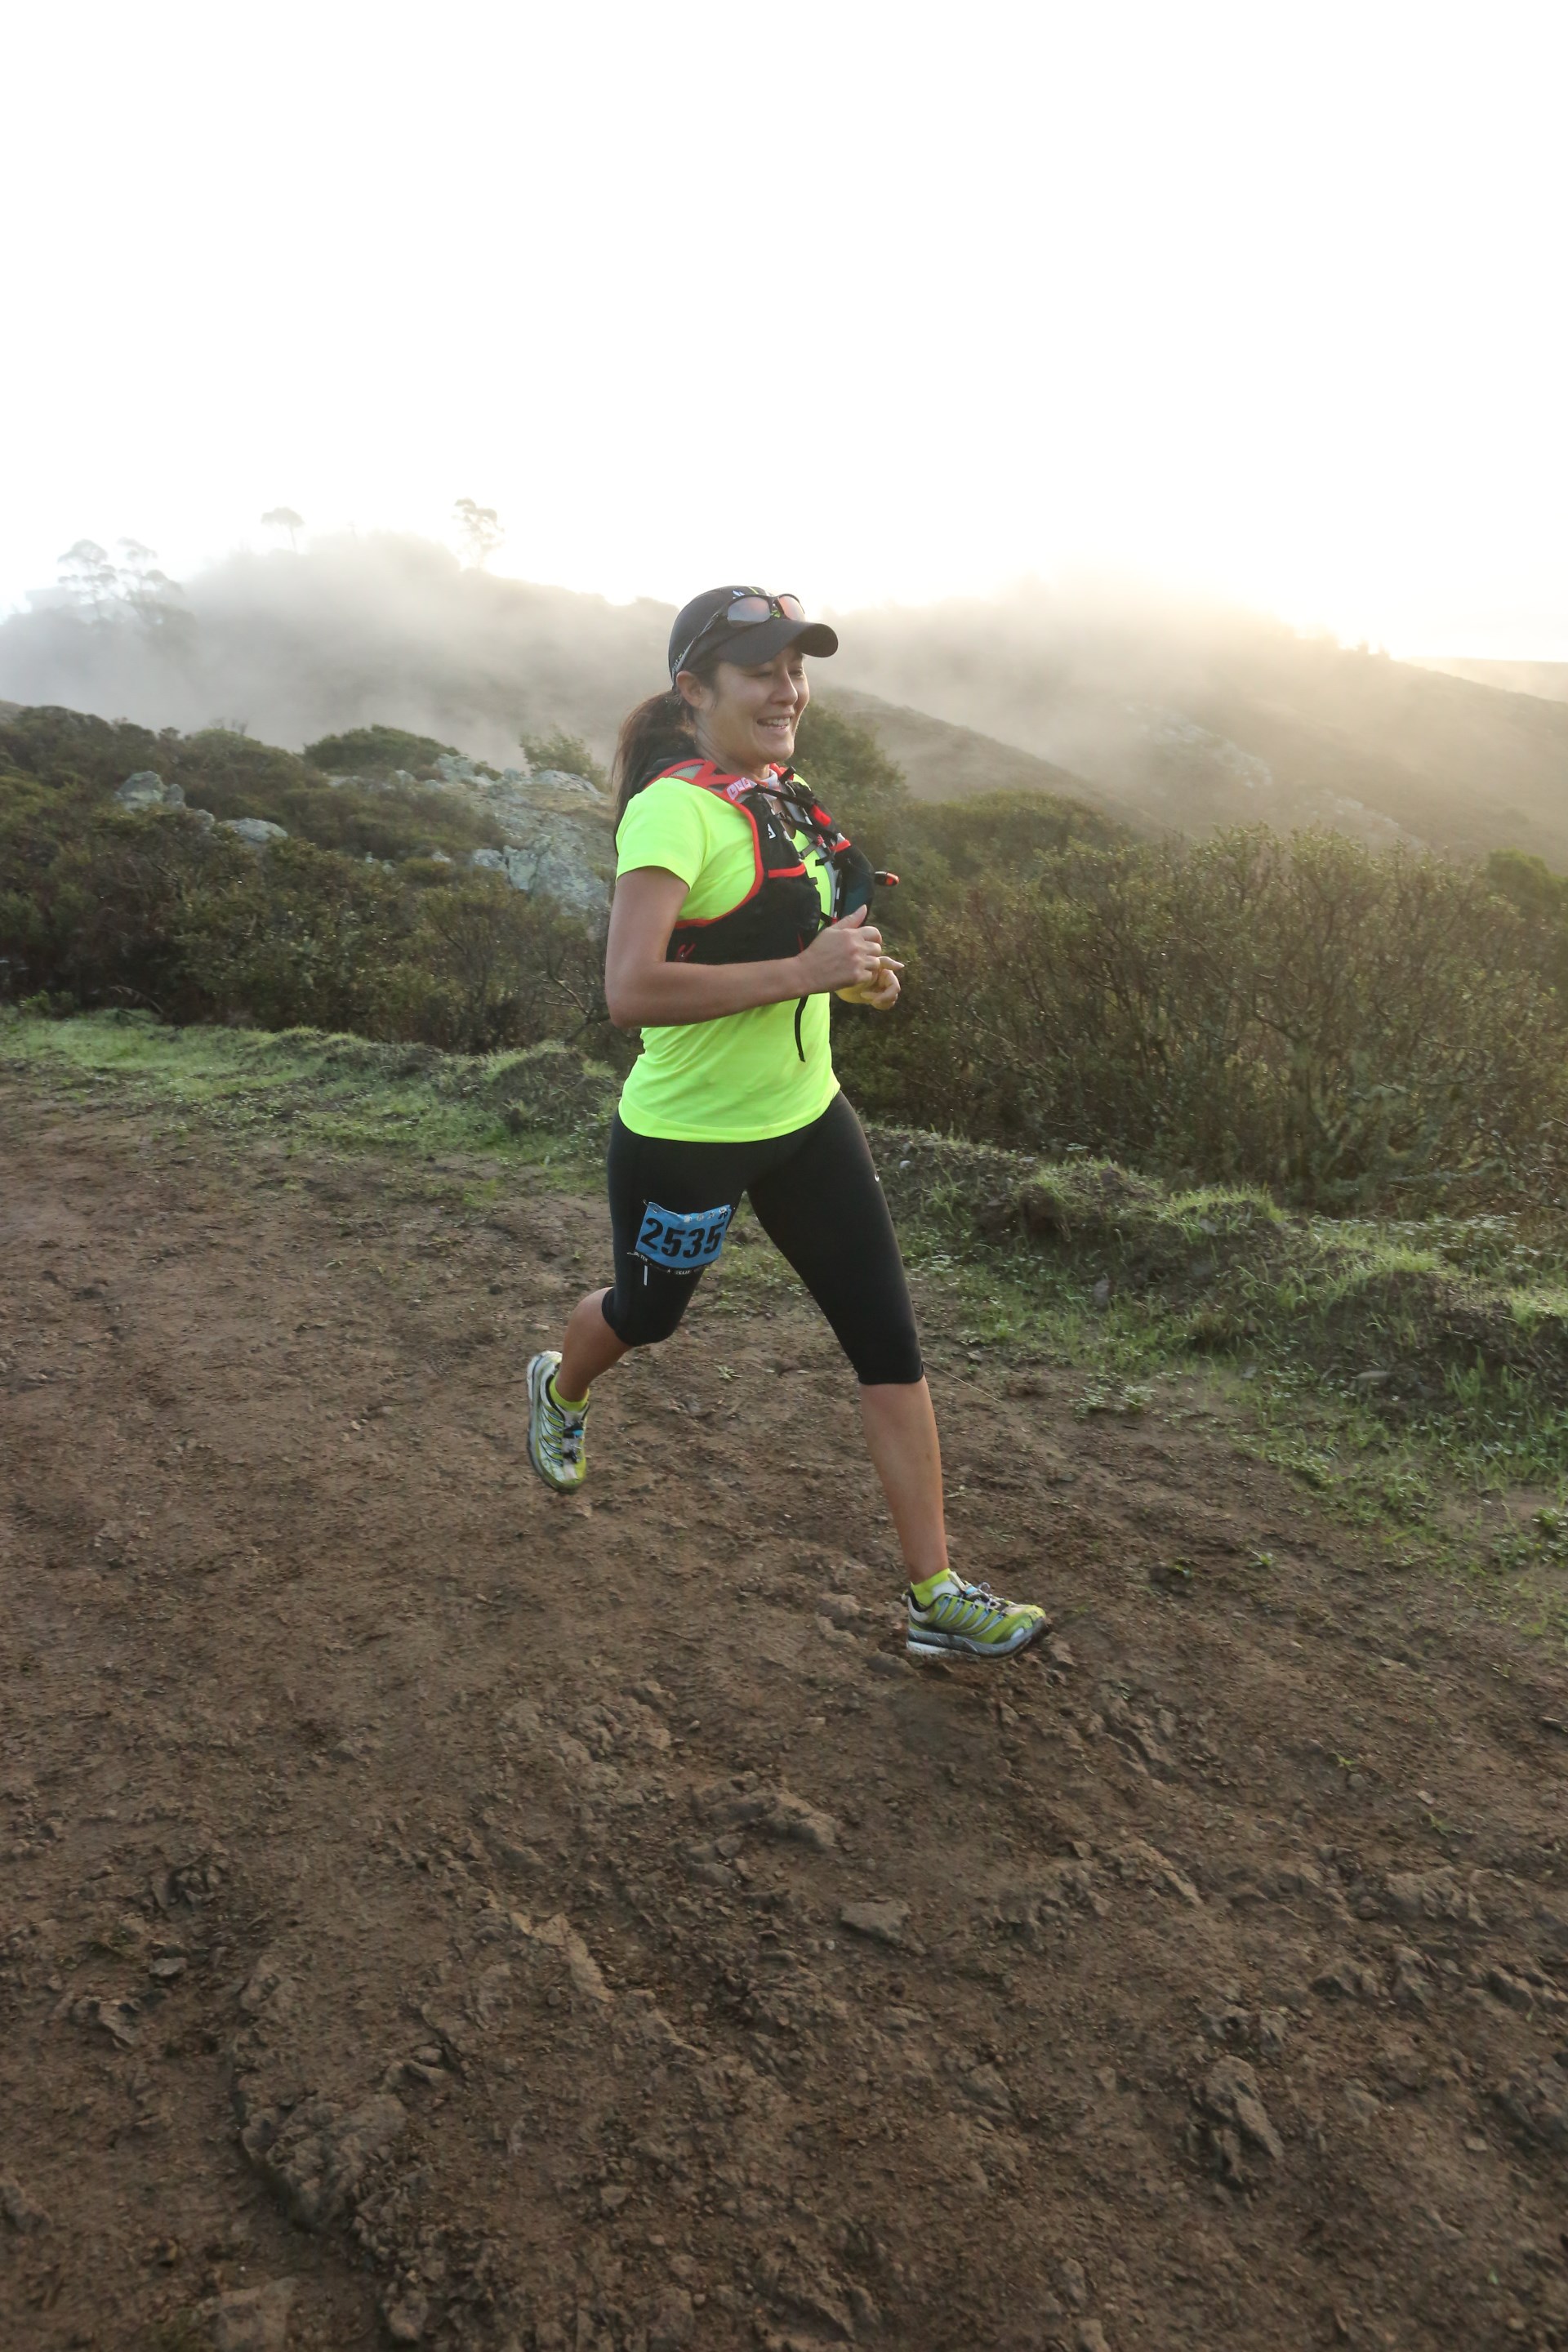
Photo credit: Michelle Sun (raced 50K)
Photo credit: Glenn Schiavo (raced 50 miles)
My original goal was to complete the 50K in about 8 hours. I had to let go of my ego and be pleased that I’d complete it in less than 10 hours. I rarely take pain medicine before or during a race but on that day, I took an Aleve, an anti-inflamatory containing Naproxen. One pill lasts all day and I heard it was gentle on the stomach. My game plan was to start out slow, hike the hills and treat the first 6 miles like a warm-up. After 6 miles, I pretended my marathon race started. These are the type of mind games I’d play with myself.
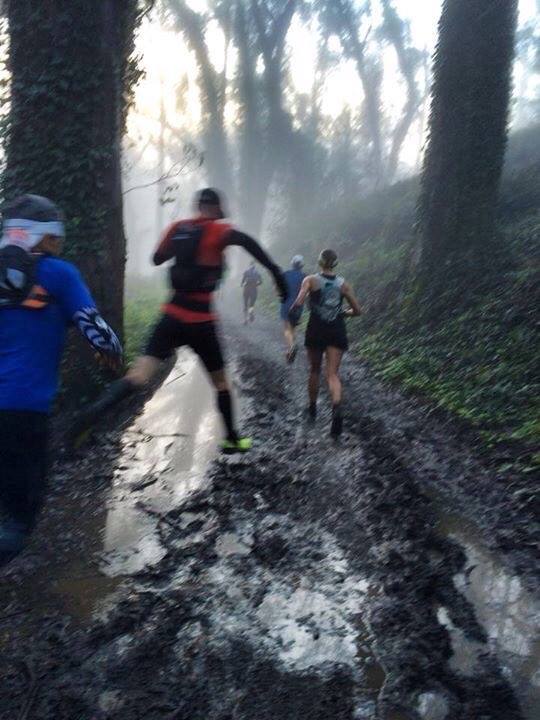
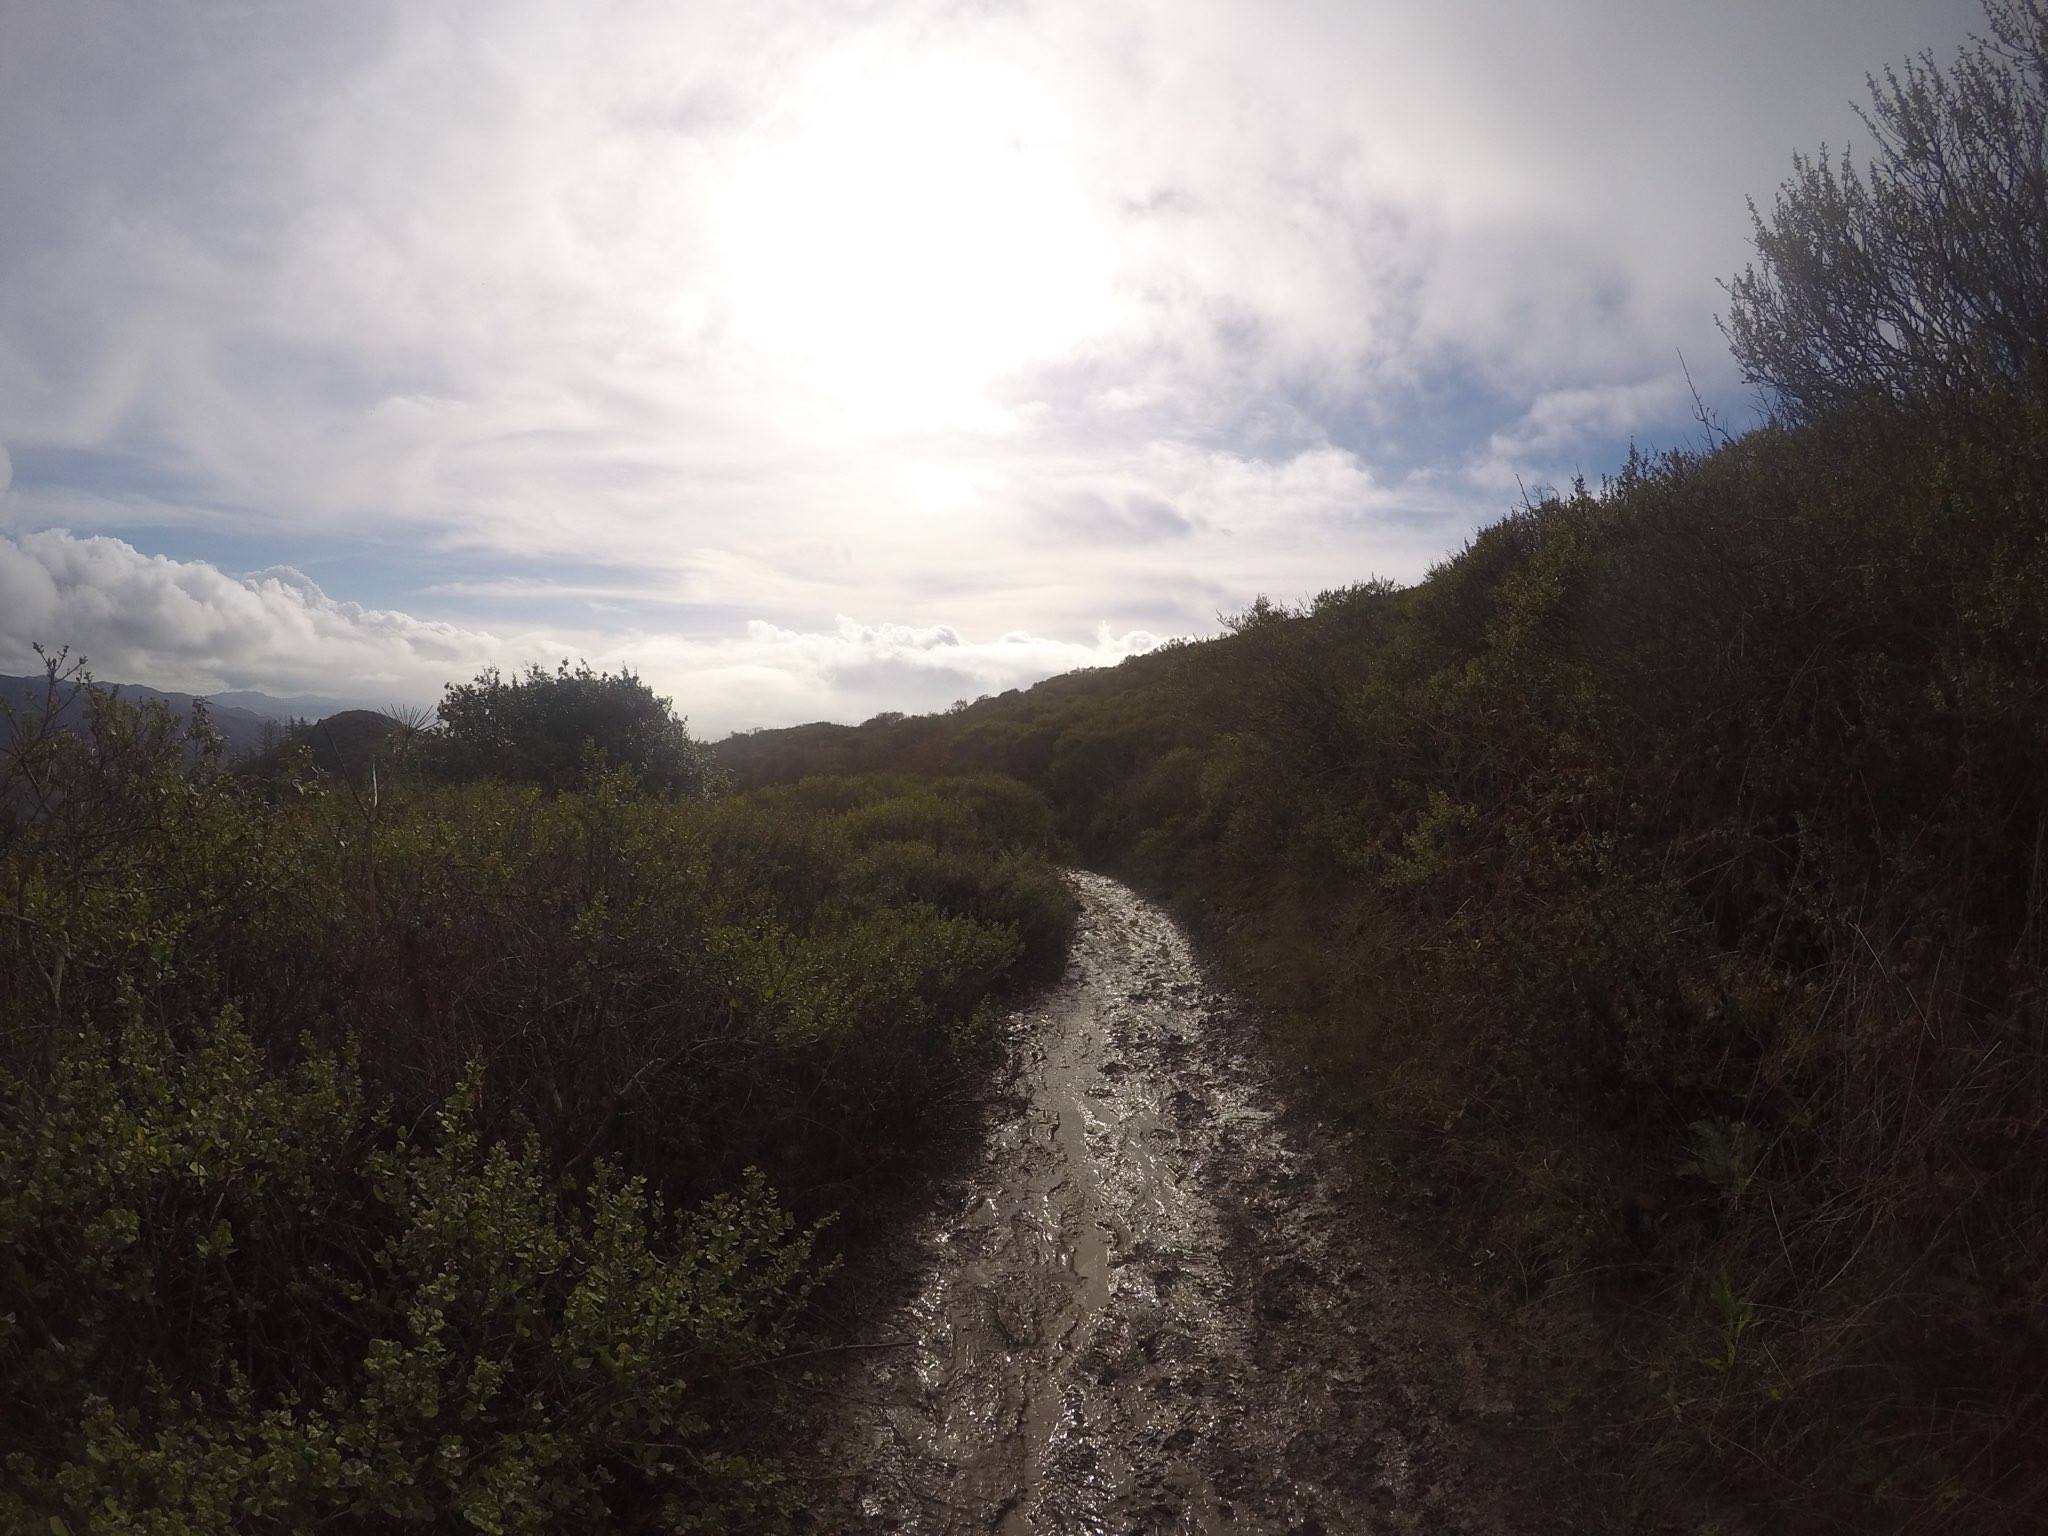
Parts of the trail were slippery with mud. The worst part was climbing up the Heather Cutoff Trail. It’s a single track, with switchbacks all the way up the mountain.
The rainfall had produced a stream of water running down it. The mud was thick. As I climbed up, the elite and fast 50 mile racers were headed towards me, in the opposite direction down the mountain. Some were sliding down and I just tried to keep out of their way. My foot was burning at that point and the idea of dropping out did enter into my mind. I had a brief thought that I could catch a ride to the finish at the next aid station. Then I heard one of our former coaches and elite athlete, Erich, say hi to me. Perfect timing. Hearing my name and having to look up and talk to him briefly woke me up from my discomfort. I continued to trot up in the mud. If it had been a training day, there would be no way I’d be running in this mess. But once I got over the fear of doing a face plant, I just embraced it like a 10 year old playing in the mud. Runners coming down gave me a lot of encouragement and updates on the condition of the course ahead. It was a big relief to get to the top. I saw 2 good friends. My pal Summer stopped to check on me. Her smile was another positive distraction. Then Amalia stopped in her tracks, called out my name and extended her arms to give me a big bear hug. Thank you ladies. I read somewhere that giving high fives or a hug helps to release endorphins.
The Heather Cutoff slip and slide was quite the ride up and back down. Photo credit: Alvin LubrinoPhoto credit: Alvin LubrinoPhoto credit: Michelle Sun (raced 50K)
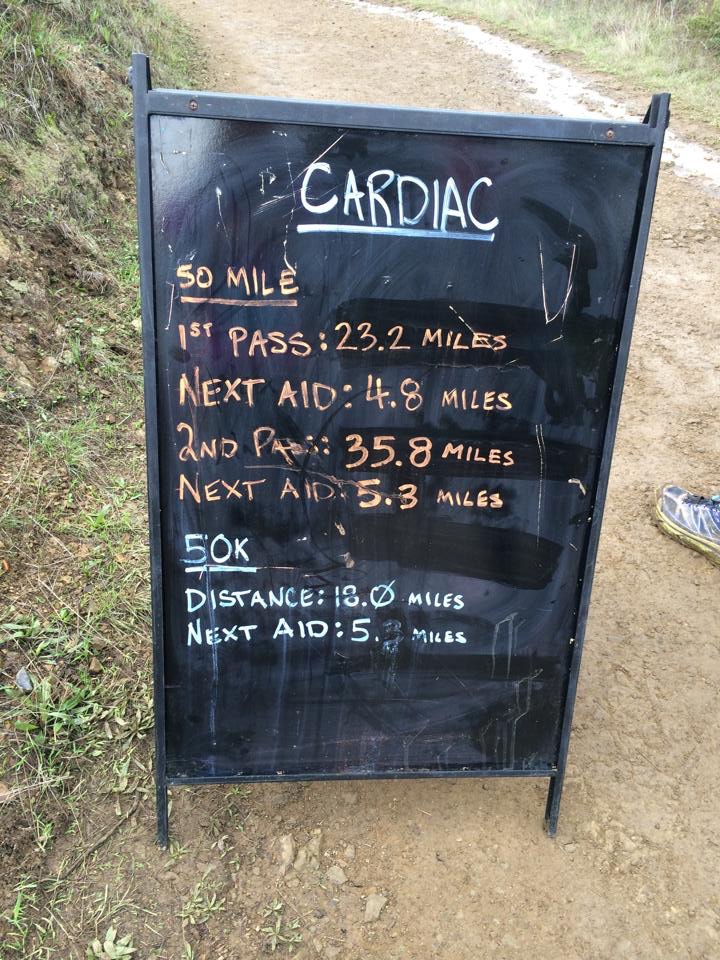
I finally made it to the Cardiac Hill aid station. I knew at this point I was going to make it to the finish line, so long as I didn’t kill myself sliding back down that same switchback. I also heard someone say that we only had about a half marathon left to run. I laughed to myself thinking how 13 miles didn’t seem like much once you’ve ran a marathon distance or more.
Photo credit: Michelle Sun (raced 50K)
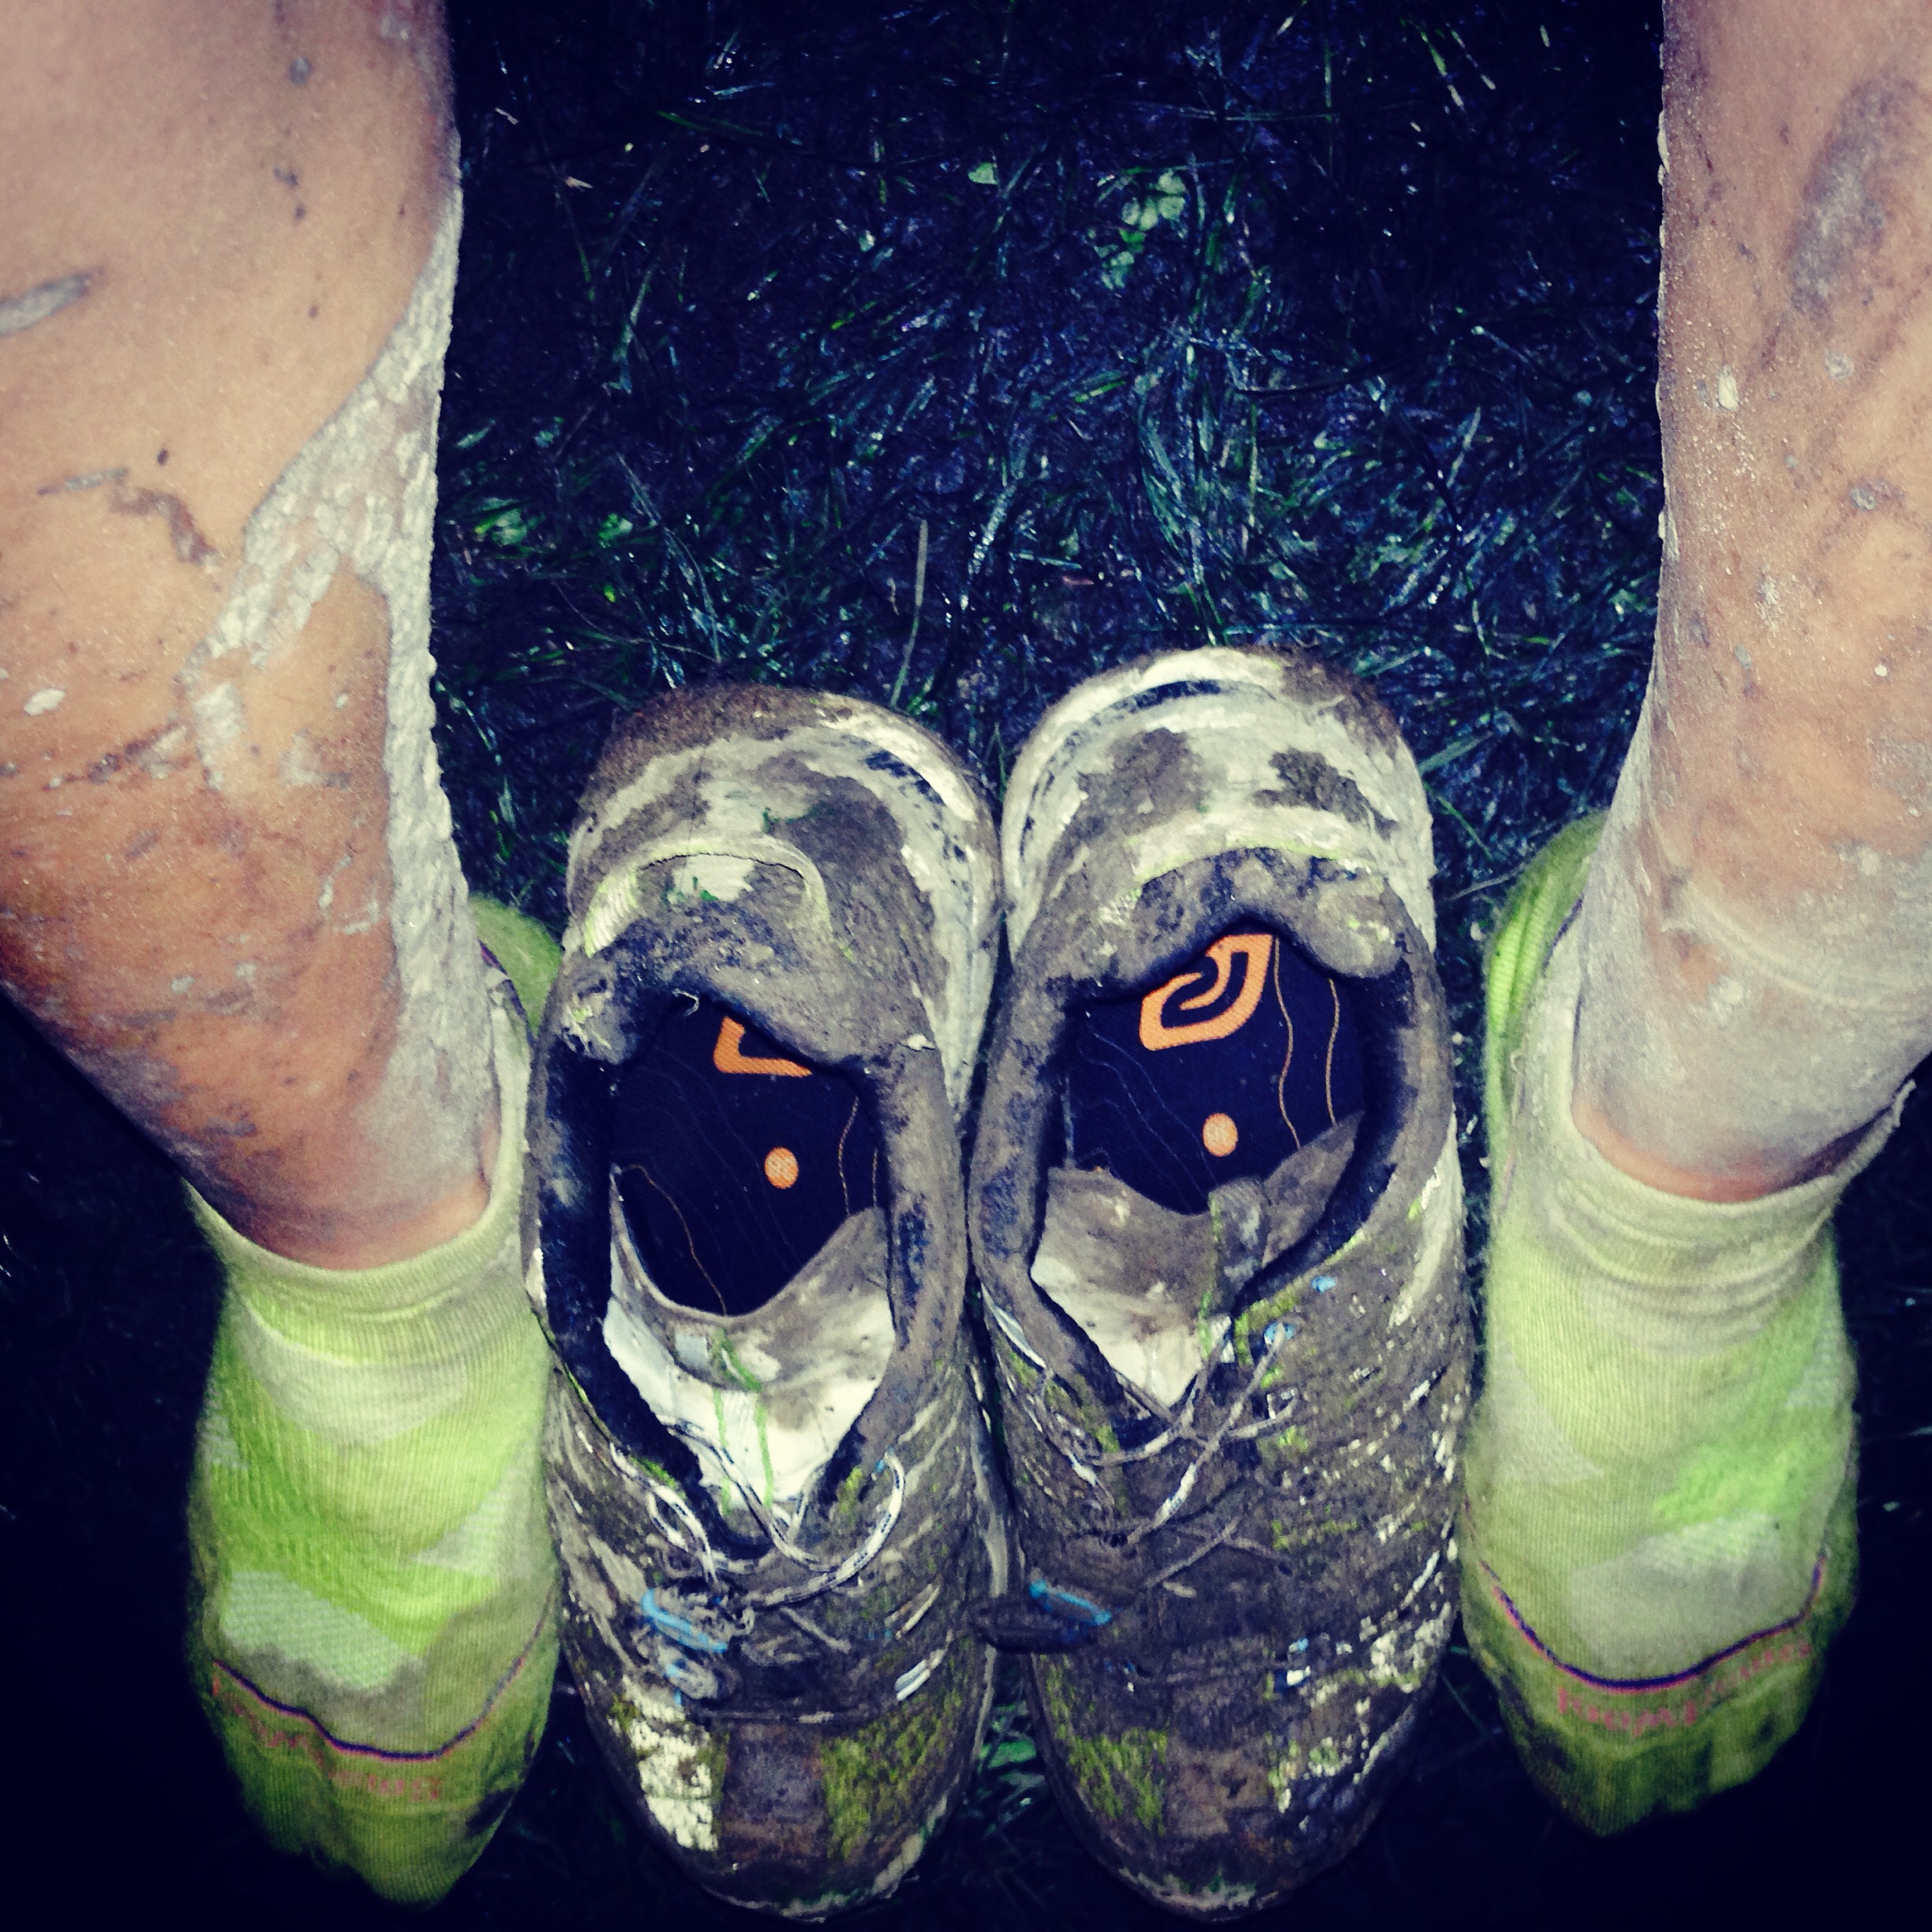
With my spirits revived, I picked up the pace and trotted back down the sloppy switchbacks. I studied how some of the fast 50 milers maneuvered in the mud. I tried to follow behind them (although briefly) and mimicked their strides. I was reminded to stay on my toes and to use and see the whole trail in front of me: the rocks or mound of dirt I could push off of; the grassy spot to gain some speed; or just to simply plant my foot in a puddle. If I slid, I just embraced it and kept on going. The mud was as sticky as it was slippery. One gal had to run the rest of the race with a muddy, wet sock when the mud refused to let go of her running shoe. I passed by several runners with mud on their faces and a lady who had one nasty, bloody knee cap. I’m happy to report that I made it down without losing my front teeth.
The last 13 miles was also when I entered into the state of foggy brain. It’s the period of time when I could not run and do simple math at the same time. It took me 15 minutes to calculate what pace I should maintain in order to finish under 10 hours. I kept thinking 26 plus 5 equaled 32. Close enough. Besides, rounding down felt better.
My knees spoke to me for the first time during the last few descents. I almost never experience any discomfort in my knees but on this day, jumping over puddles, sinking and sliding in mud and the slightest change in my gait due to my sore foot must have put a strain on my knees.
At mile 29, I decided to just grit my teeth and go for it. After all, I didn’t want to come in last place and I didn’t want to take any chances of disqualifying. It was fun to pass a few people during the last two miles. I’m sure those runners did not appreciate me doing that at the very end but having fresher legs was the reward for conserving my foot.
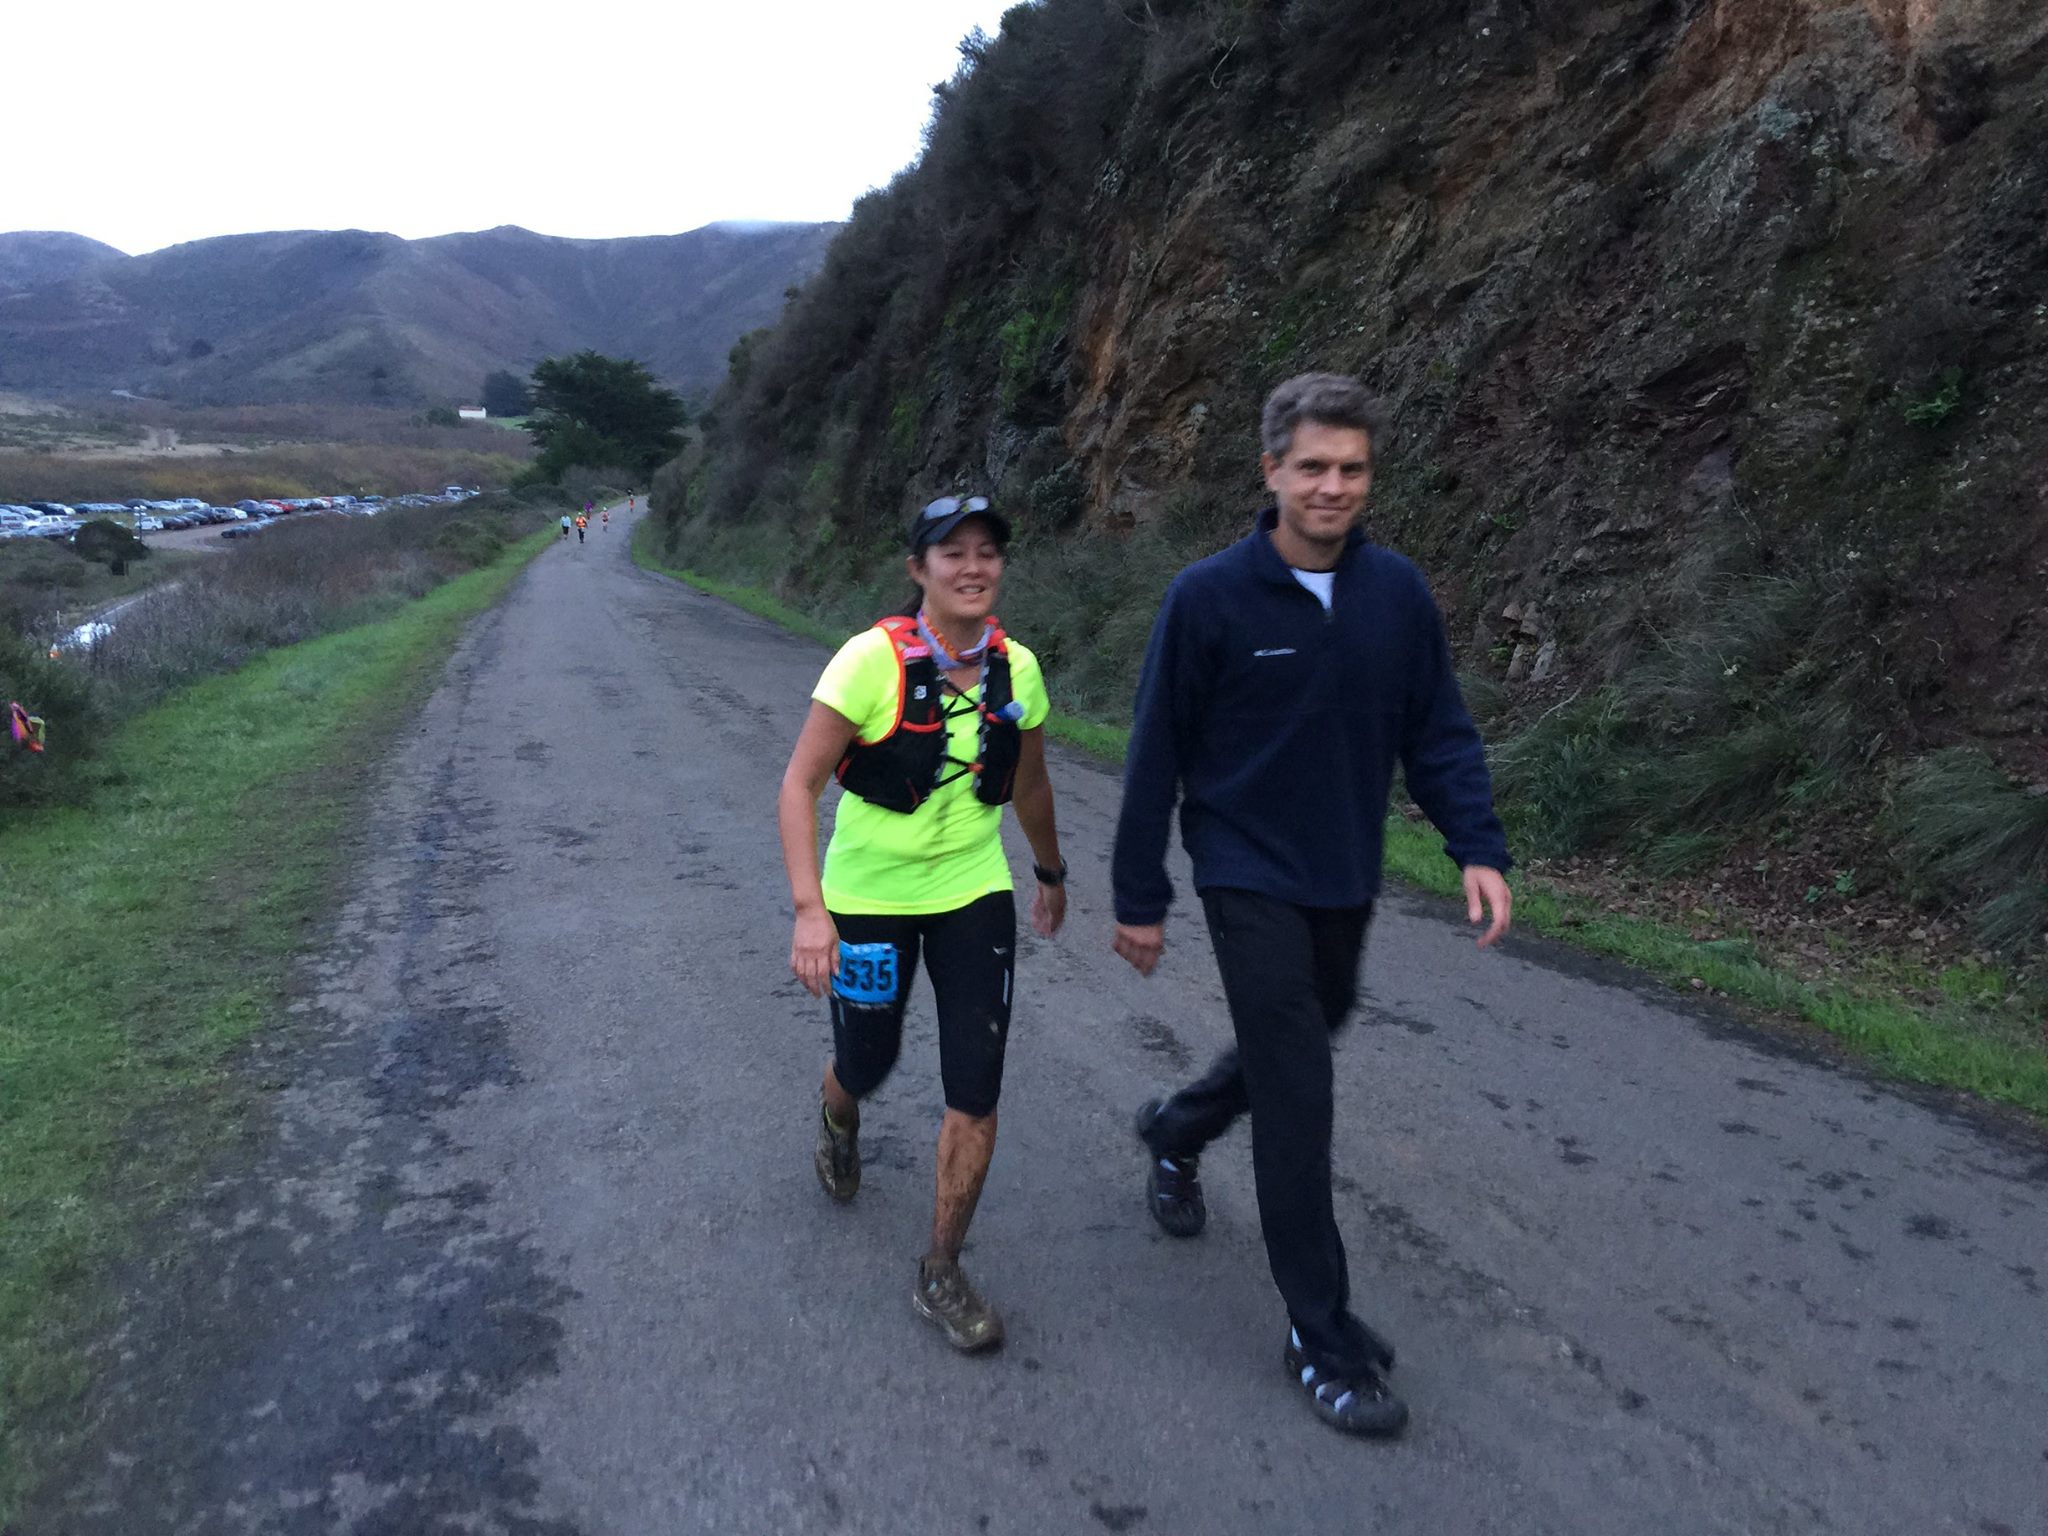
Rama surprised me by greeting me at the last mile. Knowing my foot was hurting he said to me “you know you can stop running now” since I would make it to the finish under 10 hours. I stopped running for a bit, but I didn’t want the runners I passed to pass me back with less than a mile to go, so I ran it in. Wow. What a day. After my friends congratulated me at the finish, they pointed me towards the medical tent. With a little nudging, I went in and was never happier to have my foot massaged. I think I thanked the guy at least 3 times.
Photo credit: Chad Su
The foot is still tender, about 4 days later but the legs are fine. I’m looking forward to doing this race again next year. It’s well organized, a gorgeous course and after climbing an elevation gain of about 6,700 feet, you feel like such a bass ass.
The real bad asses are my friends who raced the 50 miler that day. I don’t have the speed nor strength to pursue 50 miles on that course but maybe someday I might. Never say never!
Takeaways:
Two 16 ounce water bottles were more than enough to get me to each aid station.
I should have carried a peanut butter and jelly sandwich or a bar with protein with me. I had 4 gels and 3 cookies. It wasn’t enough. Because my pace was much slower due to my foot, it took me longer to get from aid station to aid station and I got hungry. I was lucky I did not bonk.
Carry an extra pair of dry socks if it’s raining or muddy. If it’s cold, you can wear the socks on your hands.
Do more weight training and leg strengthening early in the season.
Practice more fast hiking up hills. Because I’m a slow hiker, I am more comfortable jogging up slowly. While this works for me, I need to develop my hiking muscles. This will help to so save my running muscles.
Don’t be afraid of the mud or puddles. Sometimes you just have to run right through it.
If ever I see someone suffering during the race, I’ll be sure to give them support. Sometimes that little bit of encouragement can go a long way.
That drink offered at the aid station that almost matched the color of my shirt is Mountain Dew. It has a lot of caffeine in it and at mile 26, it’s my new favorite magical elixir.
Never give up on the things you love to do nor the people you love.
I recently responded to a New York Times Food tweet:
”@nytfood This cookie battled it out against other holiday treats in a #CookFight. What’s your go-to cookie?”
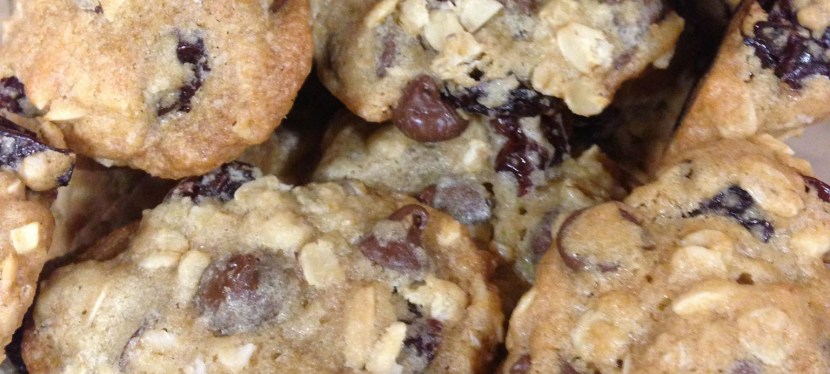
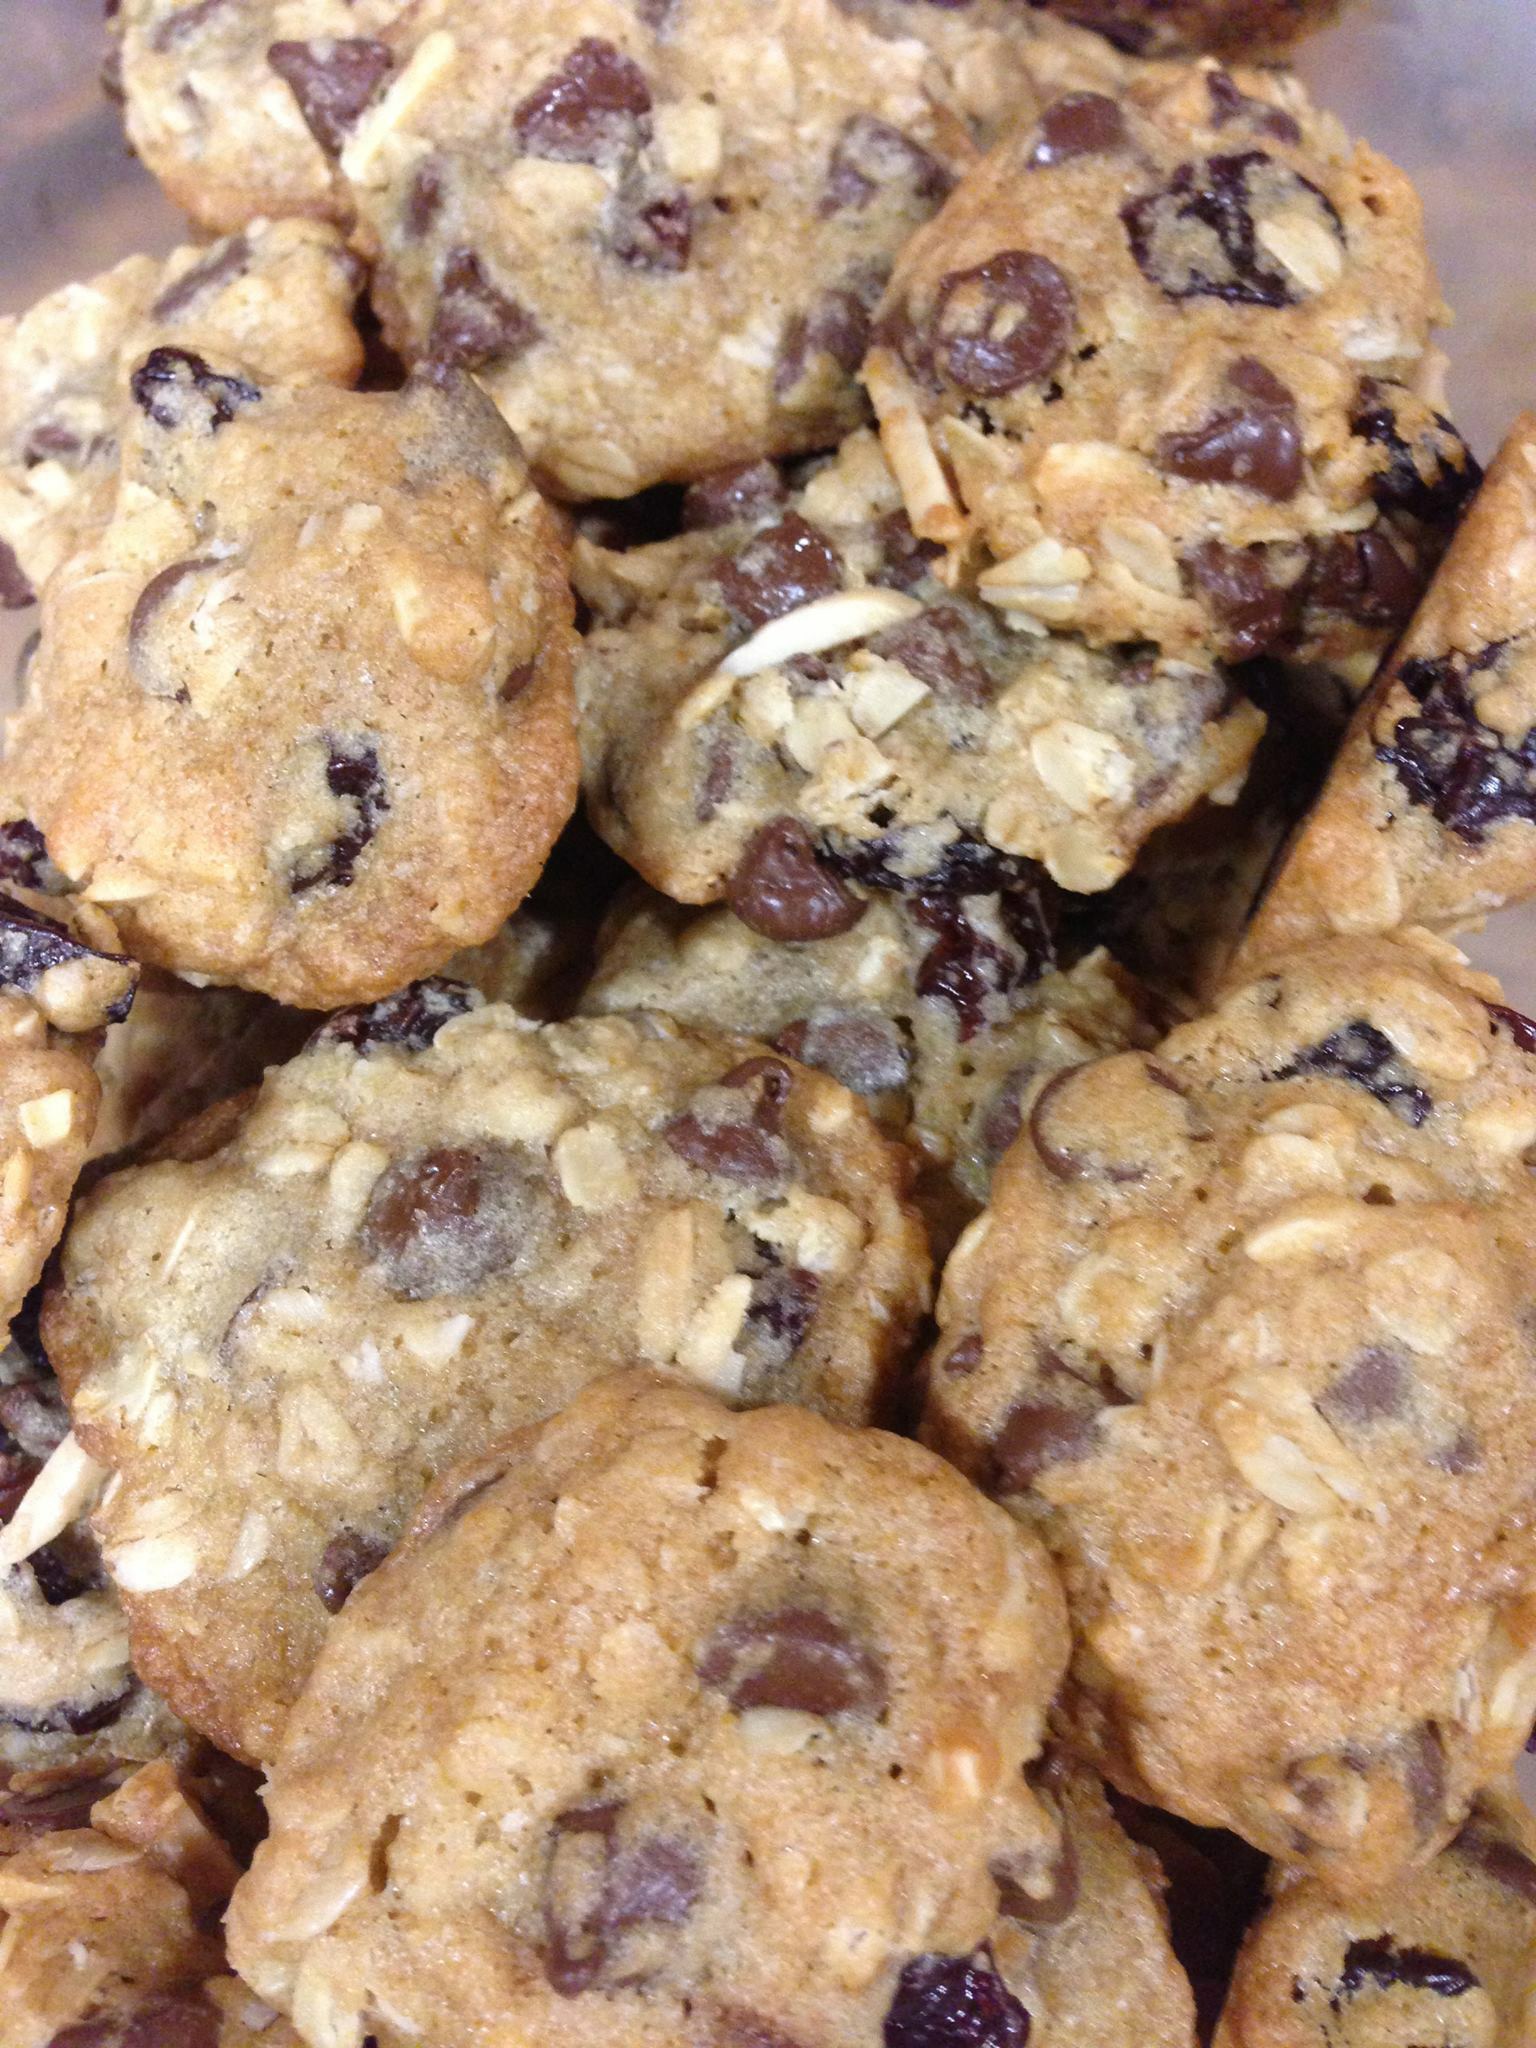
My response was the Cherry-Chocolate Chip Oatmeal Cookies, which I adapted slightly from a 1998 Bon Appétit recipe. These cookies are also known among my athlete friends as “triathlon cookies” or “pre-race / post-race” cookies. They are my go-to cookies during the holidays and to pack for out of town triathlon trainings or races. I also stashed a few cookies inside my hydration pack when I raced my first 50 km ultra marathon this past weekend. Packed with dried cherries, chocolate chips and toasted almonds, these cookies are great for refueling.
My good childhood friend Tracy, who is an accomplished 2x Ironman triathlete shared this recipe with me. Upon her advice, I eliminated the almond extract from the original recipe. I also experimented with different ratios of sugar and butter in an attempt to make it a little healthier. I found that the original dough recipe was pretty darn good as is. So instead of altering the amount of sugar and butter, I decided to load the cookie up with more dried cherries, and chocolate chips. Aside from the occasional runaway dried cherry left on the baking sheet, the cookie held all of it’s yummy stuff together. The trick is to refrigerate the dough so it firms up. The dough can be frozen up to 3 months. I like to have a few batches in the freezer to bake up a quick dozen or two.
Position one rack in the middle and the 2nd rack just above. You will be baking 2 pans of cookies at a time. Line 2 large baking sheets with parchment paper.
In a medium bowl, sift the flour, baking soda and salt together. Set aside. Using a stand mixer with a paddle attachment, handheld mixer or wooden spoon, cream together the butter, granulated sugar and brown sugar in a large mixing bowl until light and fluffy. If using an electric mixer, this will take about 4-5 minutes on medium speed or up to 10 minutes if using a wooden spoon.
Beat in the egg and vanilla extract for 2-3 minutes until thoroughly combined. Scrape the bowl at least once to ensure all of the ingredients are thoroughly incorporated.
Slowly beat in the flour mixture. Scrape the sides of the bowl a couple times to ensure the flour is incorporated.
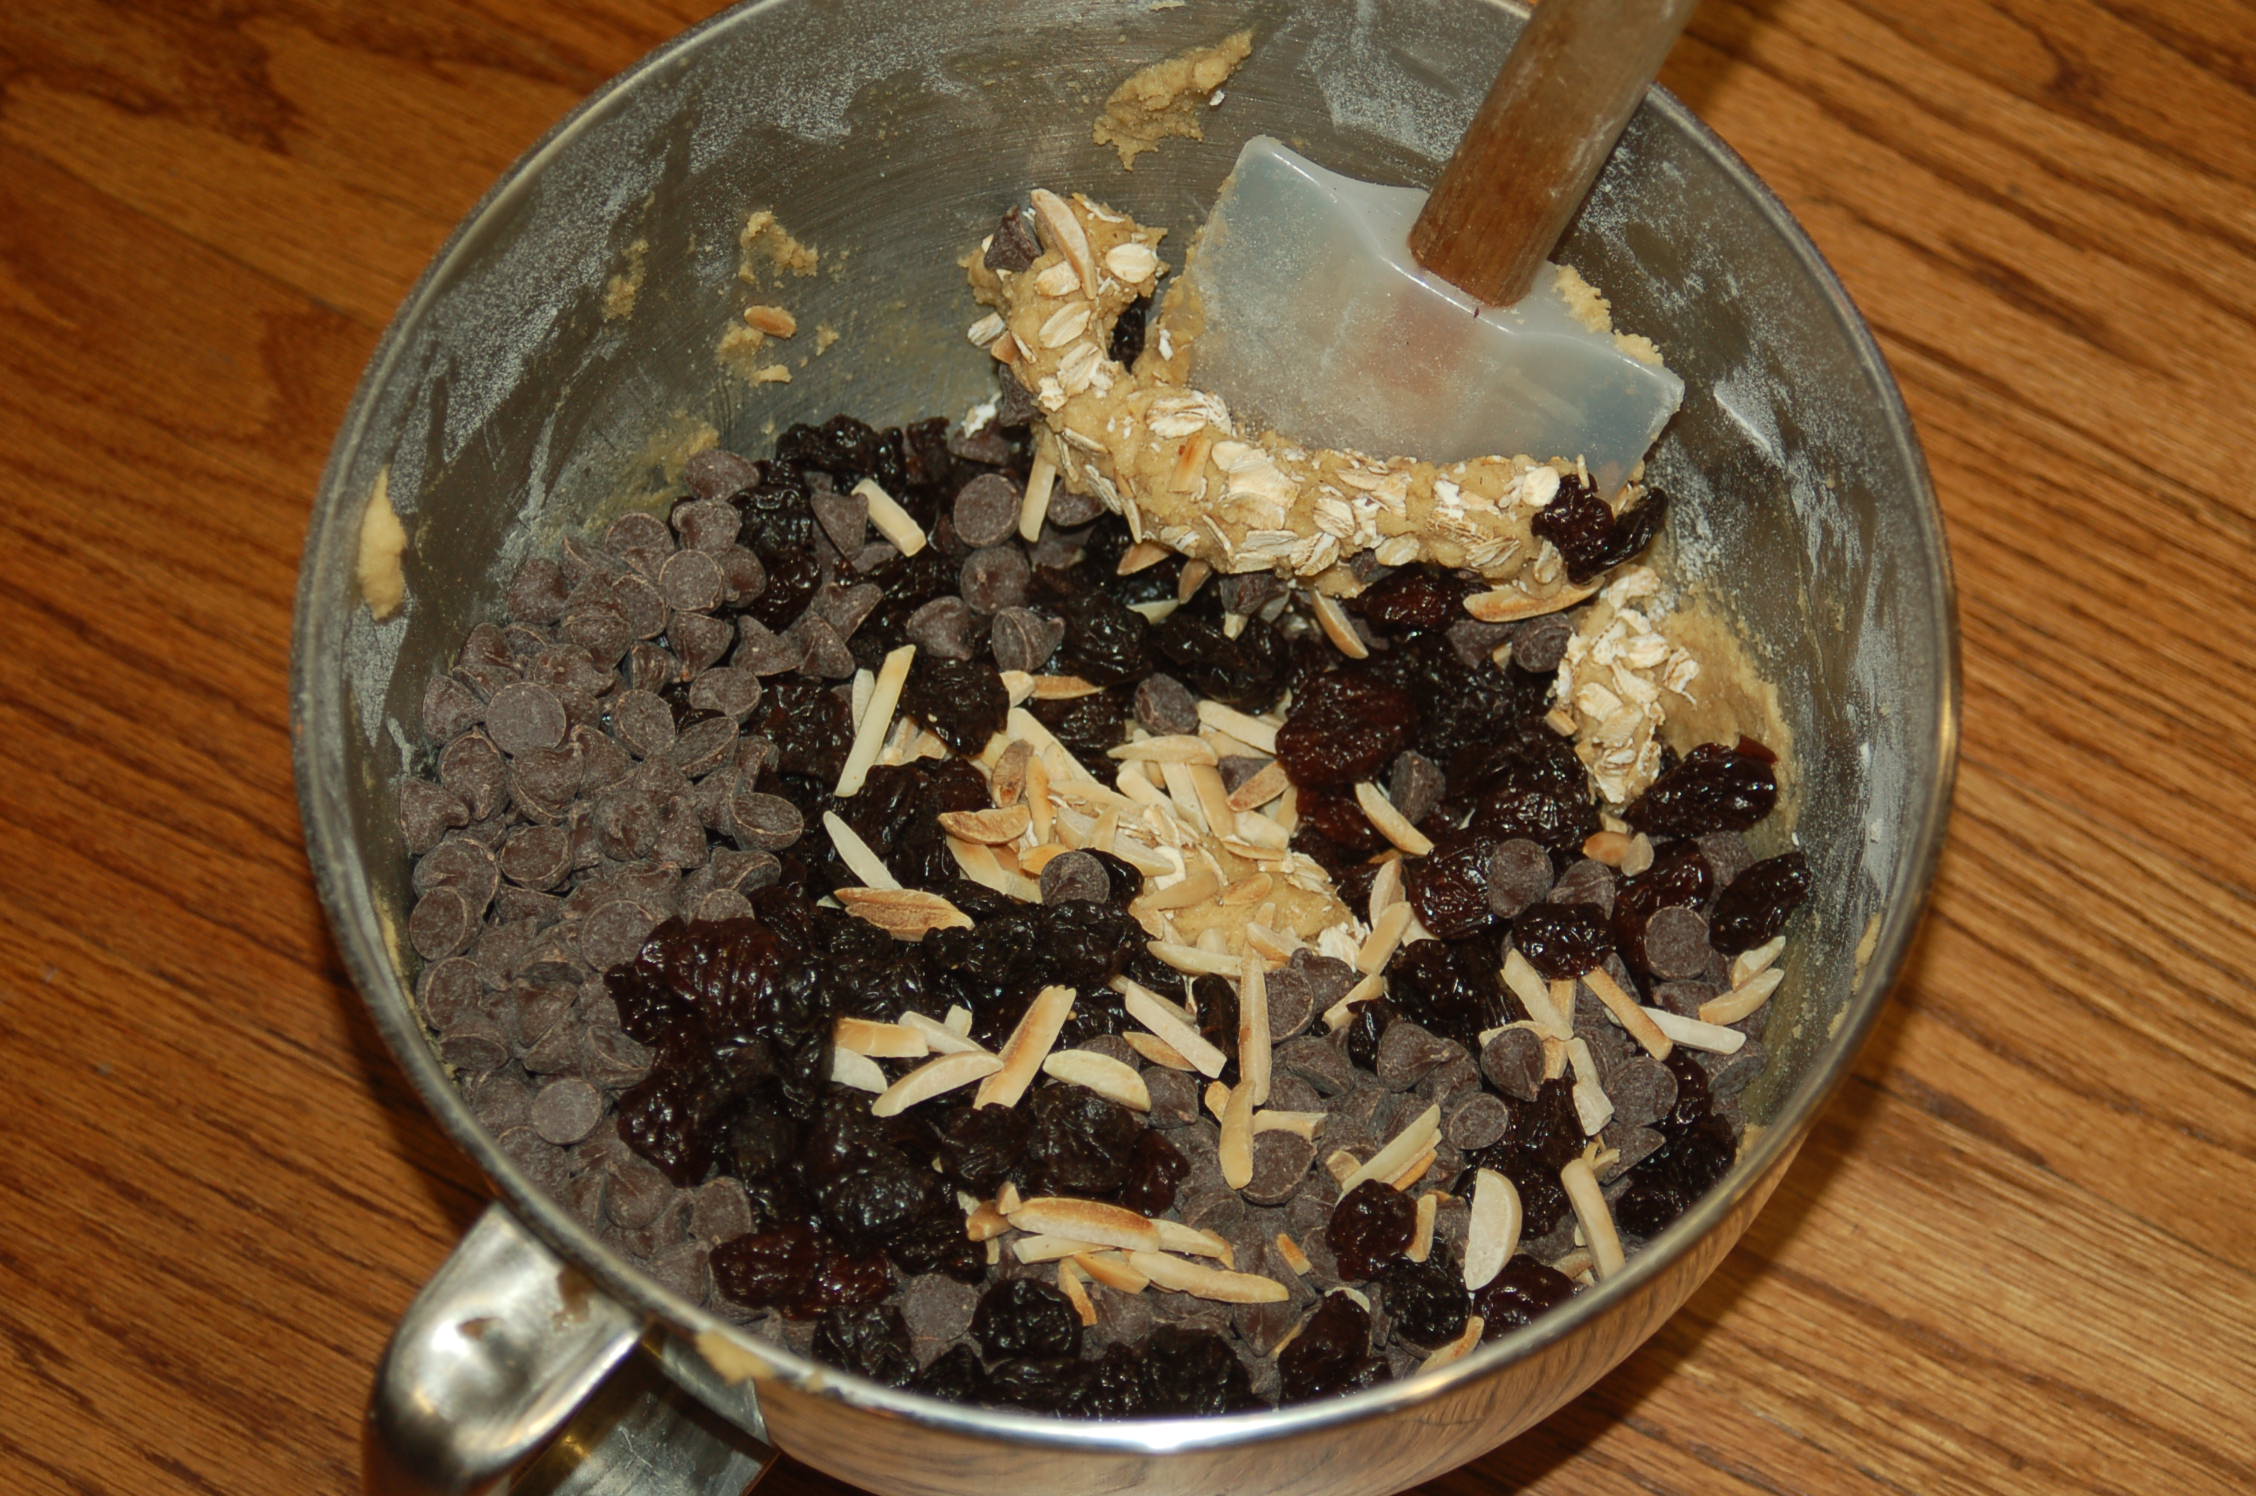
Stir in oats, chocolate chips, cherries and toasted almonds.
The dough can be baked immediately however I find that it bakes more evenly and forms into a better cookie shape if I chill the dough, covered, for at least 1 hour.
Scoop out an overflowing spoonsful amount of dough. Using your fingers, press the dough together firmly ensuring the dried cherries and chips are sticking to the dough. Shape into a slightly flatted rounds. Place onto baking sheet, about 2 inches apart.
Bake for 12 minutes, then switch and rotate baking sheets and bake for 6 minutes longer, until golden brown on edges. Either cool the cookies on the baking sheet or carefully transfer the soft cookies onto a cooling rack or plate. I like to wait a couple minutes so the cookie starts to firm up a little before handling. The cookies will firm into a crisp cookie when cooled.
Note: To freeze dough, wrap in wax paper then place inside a freezer zip lock bag. The cookie dough can be stored frozen up to 3 months.
Thanksgiving kicks off one of my favorite times of year. As immigrants, my family was slow to embrace the American tradition of Thanksgiving. We really didn’t know much about eating or cooking turkeys. My mother made Peking Duck instead. It is one of my most favorite culinary guilty pleasures. Peking Duck is quite a laborious venture in the kitchen. The chore begins with my mother meticulously rigging a duck on a wire hanger and suspending it from a kitchen cabinet. Then over 2-3 days, the duck is basted and dried before it is roasted. The end result is the crispiest and tastiest skin that covers moist duck meat. However, one year, on day 2 of project Peking Duck, my mother went into labor with my sister. After giving birth, my mother asked my father what he did with the duck. He fried it. The story always makes me smile thinking how my mother went through all that effort to prepare the duck, only to have it deep fried. I suppose it’s no different than frying a turkey.
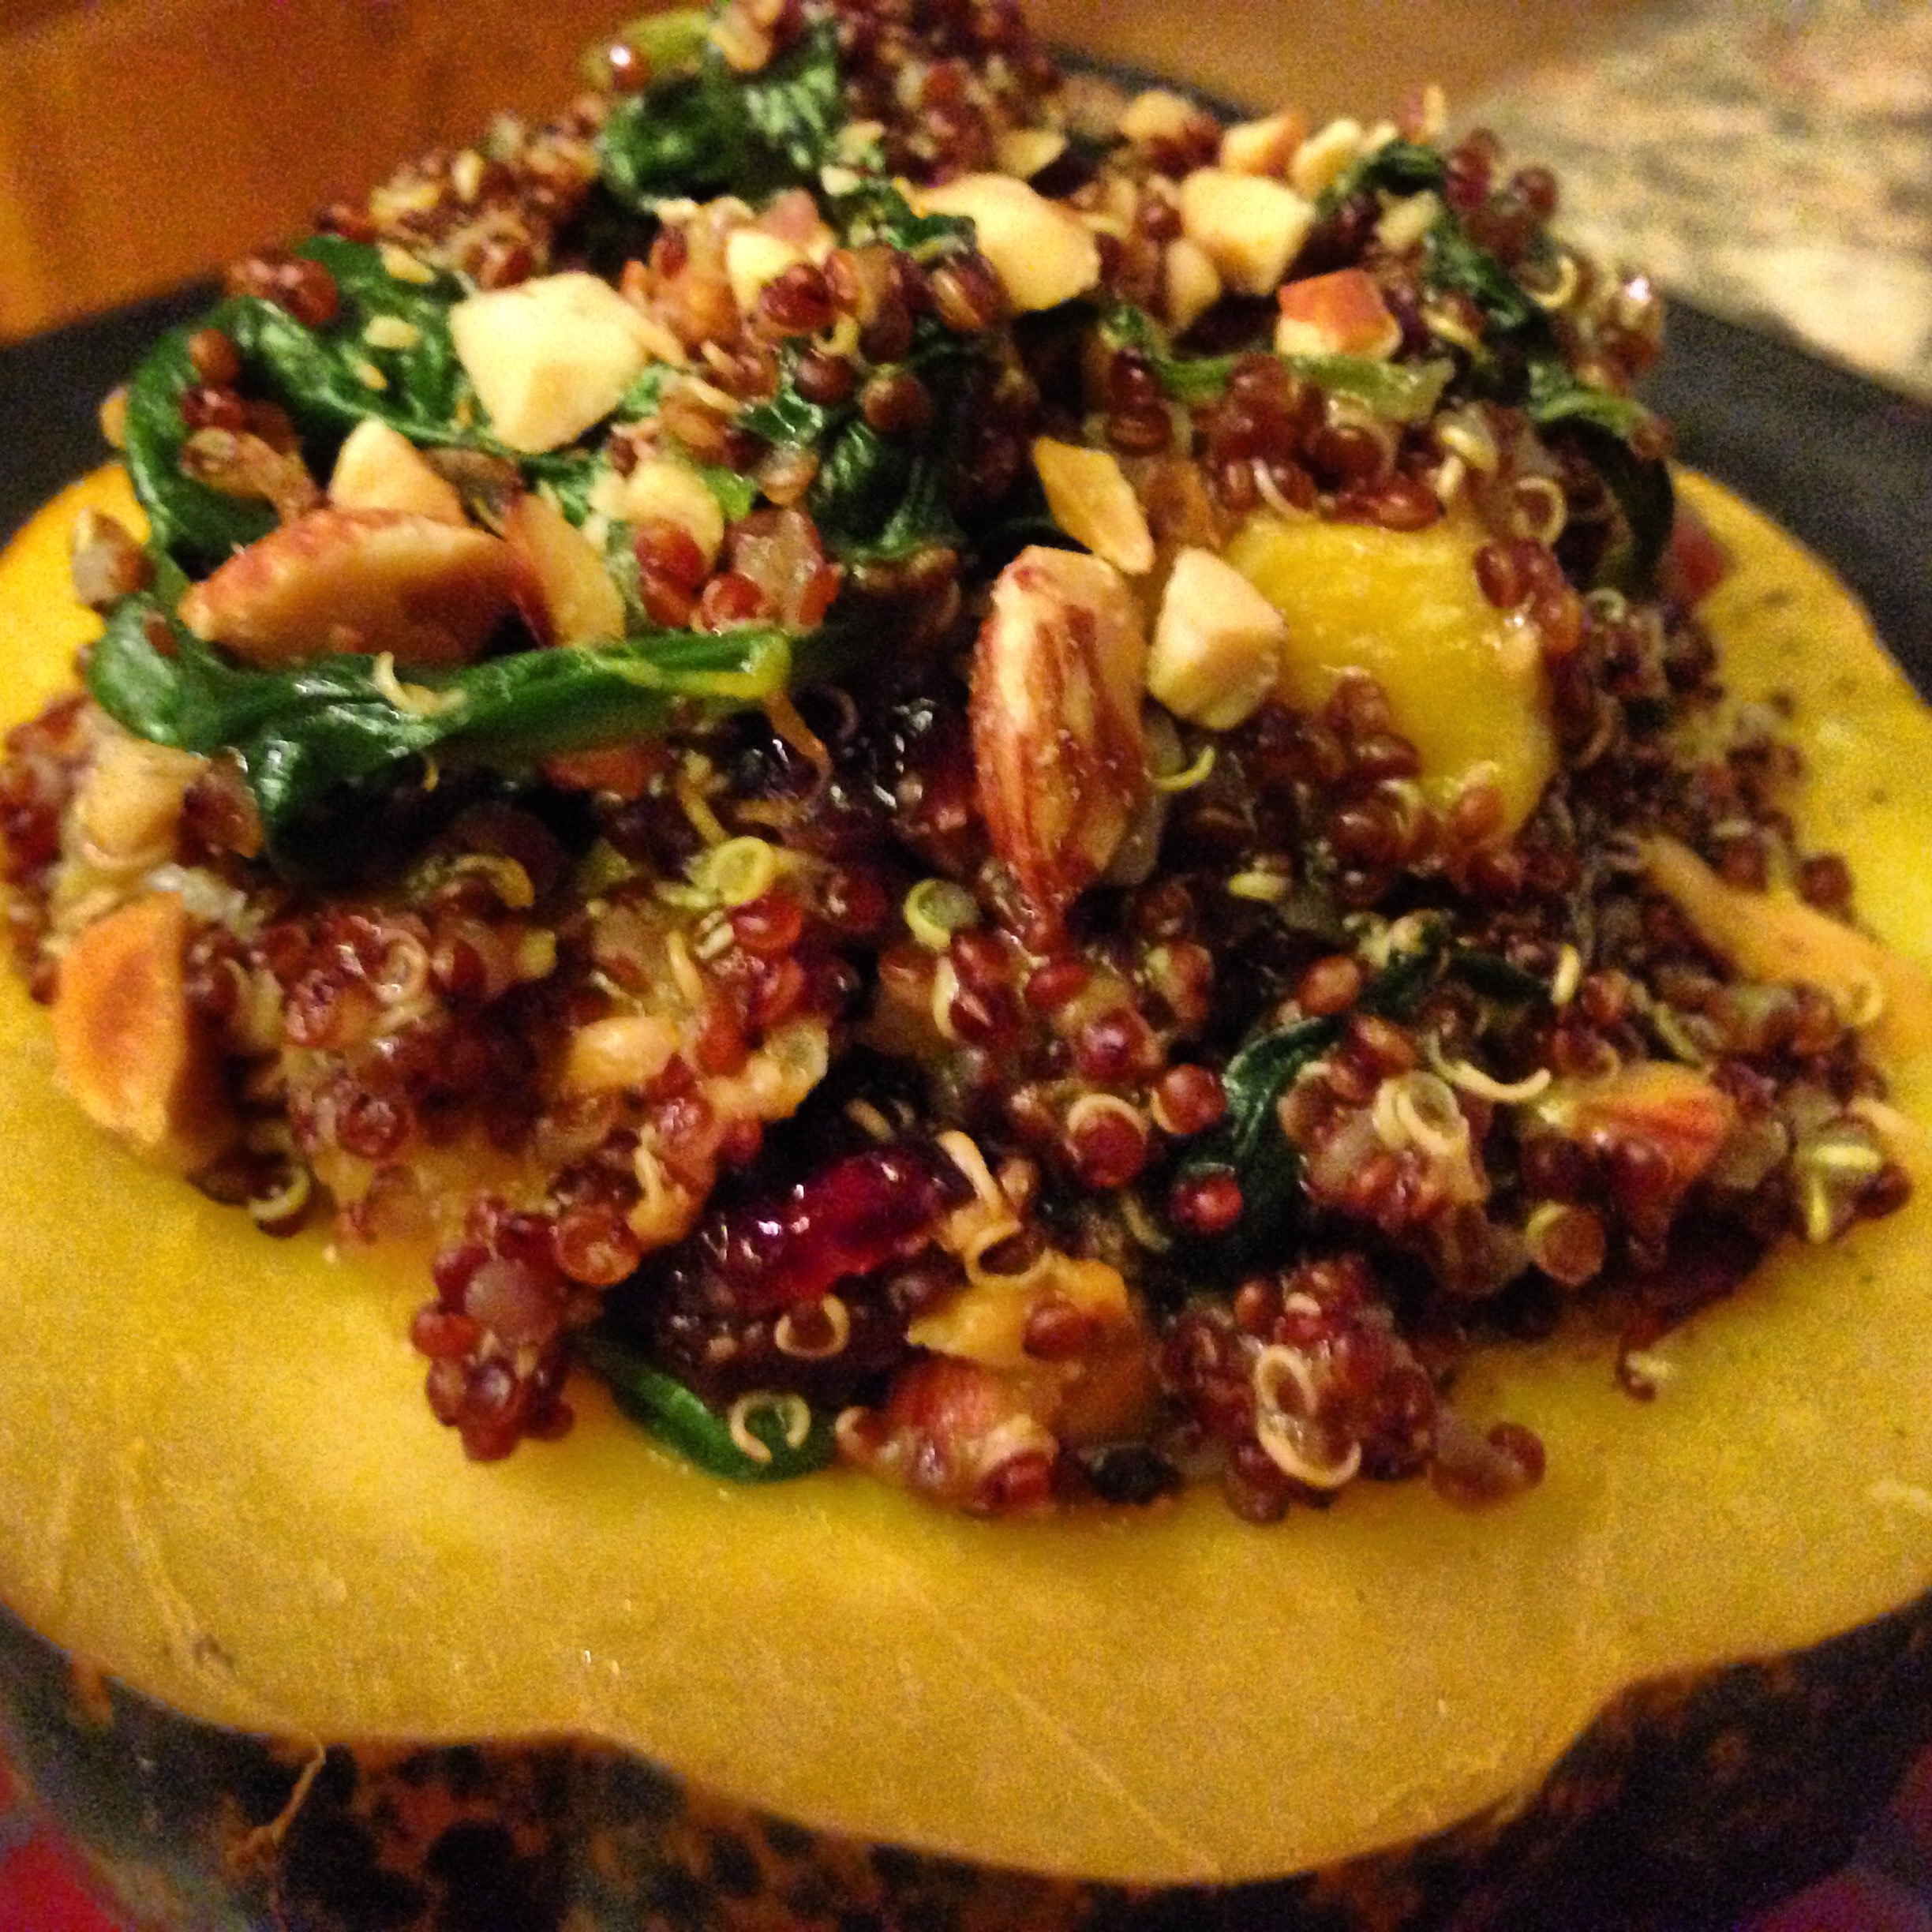
Fast forward to 2014, and now I’m in a relationship with someone who also has never had a traditional Thanksgiving turkey dinner. He’s a vegetarian athlete and his only request was that I not prepare Tofurky. I wanted to create something nutritious, packed with protein (like a turkey) and Thanksgiving-y. Like my sister, my Acorn Squash stuffed with Quinoa, Roasted Butternut Squash, Spinach, Cranberry & Toasted Almonds was born on Thanksgiving day. Served with vegetarian side dishes, this main course satisfied my hungry athlete.
Serving size: 6
Ingredients:
3 acorn squashes* (optional)
6 tablespoons of butter (substitute 6 teaspoons of olive oil for vegan)
3 cups of butternut squash* (about 1 ½ pounds), peeled and cut into ½ inch cubes (optional)
2 tablespoons olive oil
1/4 teaspoon kosher salt
1 cup quinoa (rinsed well according to instructions)
2 cups vegetable broth
1 teaspoon Coleman’s English mustard powder
1 teaspoon curry powder
1/2 cup dried cranberries
2/3 cup chopped toasted almonds
2 1/2 tablespoons finely chopped shallots (about 2 small shallots)
3 full packed cups baby spinach
Juice of 1/2 large lemon (about 2 tablespoon)
Salt and fresh cracked pepper
Directions:
Preheat over 400F.
Peel the butternut squash with a vegetable peeler. With a very sharp knife, slice off the top and bottom of the butternut squash to create a level surface. Then carefully cut into ½ inch cubes.
Line a baking sheet with aluminum foil. Toss the butternut squash in 1 tablespoon olive oil and season with salt & pepper. Bake for 25-30 minutes until tender, tossing once.
Microwave acorn squashes for 1 minute. Cut in half crosswise, dissecting the top and bottom. If necessary, slice a small piece off the top and bottom so that it sits level when served on a plate. Scoop out seeds and stringy parts. Spread 1 tablespoon of butter (or 1 teaspoon of olive oil) inside of each acorn squash half, then season with salt and pepper. Wrap each half in aluminum foil**.
Noting the amount of time left to bake the butternut squash, bake the acorn squashes for 50-60 minutes or until fork tender. The butternut squash will finish cooking and will need to be removed from oven while the acorn squash packets remain in the oven for it’s remaining baking time. The timing will ensure the acorn squash is still warm when served. Once the acorn squash are cooked and tender, keep them wrapped in aluminum foil to retain heat until the quinoa is ready to be served.
Bring vegetable broth to a boil then stir in quinoa. Stir in dry mustard and curry powder. Simmer covered for 15-20 minutes until water is absorbed or according to the package directions.
While quinoa is simmering, toast the almonds in the oven, on a baking sheet until lightly toasted and fragrant for about 5 minutes. Allow it to cool, chop coarsely and set aside.
Once quinoa is cooked, remove from heat and toss in cranberries and stir in lemon juice. Taste the quinoa and season with salt if needed. I find that if the quinoa is cooked in vegetable broth, no additional salt is necessary. Cover and let sit for about 5 minutes. Remove lid and fluff quinoa with a fork.
With remaining 1 tablespoon of olive oil, sauté shallots until softened. Add butternut squash, quinoa and spinach. Sauté spinach until wilted. Toss in toasted chopped toasted almonds just before serving. Spoon quinoa into acorn squash and serve.
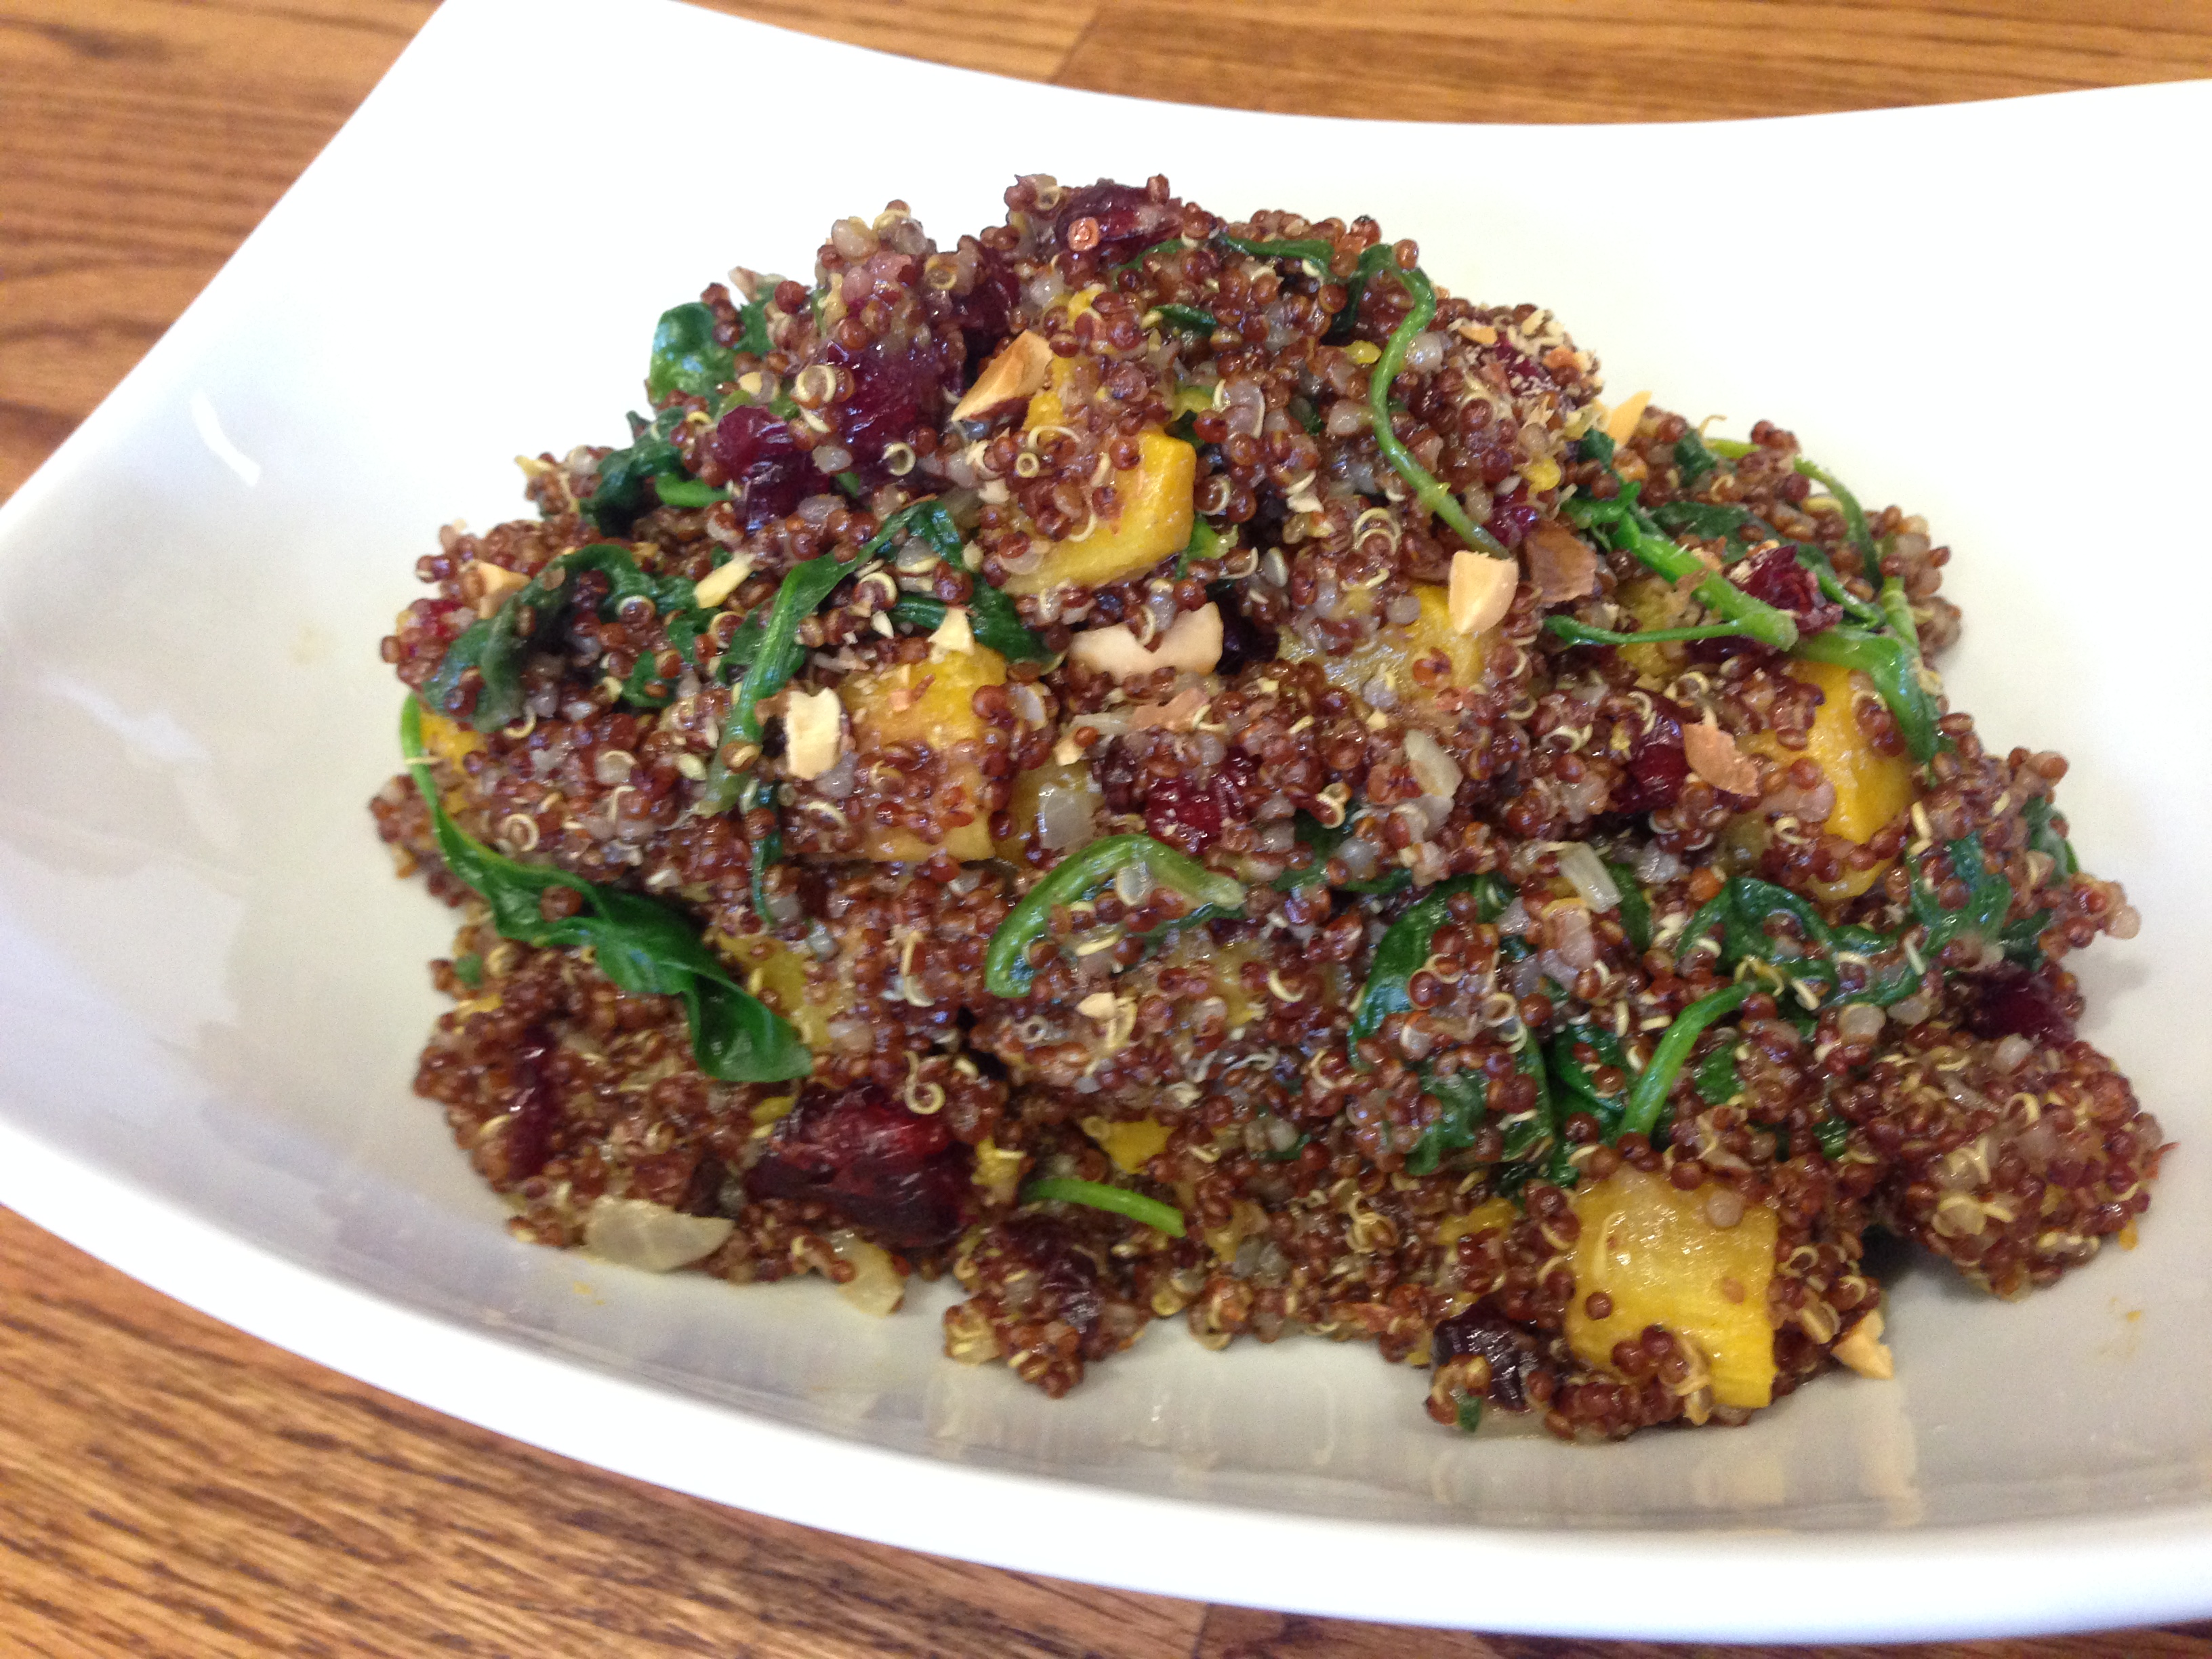
* Note: You may prefer not to include both butternut squash and acorn squash in this dish. I found there wasn’t enough flesh to enjoy inside the acorn squash I picked up. Butternut squash added nice contrast in color, flavor and texture to each bite of the red quinoa. Alternatively, this dish can be served without the acorn squash as shown in the photo below.
** Note:The acorn squash can be baked without wrapping in aluminum foil however, creating individual packets of acorn squash makes it easier to find space for them when other side dishes are competing for oven space on Thanksgiving day. Here are other alternative ways to cook acorn squash:
MICROWAVE: Lay acorn squash cut side down and microwave and cook at 5 minute intervals until fork tender, about 7-10 minutes.
BAKING UNWRAPPED: Place unbuttered and unseasoned acorn squash, cut side down on a baking sheet lined with aluminum foil. Add enough water to slightly cover the sides of the squash. Bake at 350F for about 35-40 minutes. Flip over, add butter & seasoning. Continue to bake until fork tender, 5-10 minutes longer.