A Healthy Three Course New Year’s Breakfast

Cheers to a Happy and Healthy New Year, Hungry Athlete Style!

Wishing everyone good fortune in health, family and love. While some of us celebrated the end of 2015 with joy and cheer, some of us experienced tragic personal loss. While some of us look forward to new challenges in 2016, others must bravely face daunting uncertainties. My wish to everyone is to have the strength, wisdom and support to deal with whatever 2016 brings.

“The quality of your life is in direct proportion to the amount of uncertainty you can comfortably deal with.” ~ Tony Robbins

And may we have gratitude, every day in 2016, for the things and people we are fortunate to have in our lives.

I will begin with gratitude for you, whomever you are, for taking the time to read this! I hope my blog and recipes bring a little joy to your world. I am, of course, very grateful for my family and friends.

I am also grateful and honored to be a part of Team Betty 2016! This is my second year as an ambassador for Betty Designs, a pretty rad line of stylish, functional and high quality cycling, swimming, running and athletic wear for women designed by a pretty cool athlete, mom, graphic artist and entrepreneur named Kristin Mayer who’s mottos are “Badass is Beautiful” and “Do Epic Shit”.   I was fortunate to be invited by Kristen to join a team of 200+ inspiring female athletes, mostly triathletes and ultra runners, from all over the world.

Last year I had the pleasure of meeting teammate Katherine in Arizona. Katherine happens to be the inspiration for my first post in 2016! Katherine asked me for advice on a healthy three-course breakfast she wanted to prepare for her husband on New Year’s Day. I suggested starting the first course with a Greek yogurt parfait, followed by an egg & vegetable casserole and a chocolate avocado mousse for the final course.

Here’s what Katherine made:

“We began with an acai bowl-style gluten-free Greek yogurt fruit dish, followed with an egg bake of vegetables, Gruyere and mozzarella, and sausage. Finally, a dessert of Ghirardelli avocado mousse.”

Looks and sounds amazing Katherine! Katherine is well versed in healthy eating and shared her story about how good nutrition helped her increase speed and move up in her age group, podium and qualify for USAT Nationals. Katherine’s inspiring story can be found here.

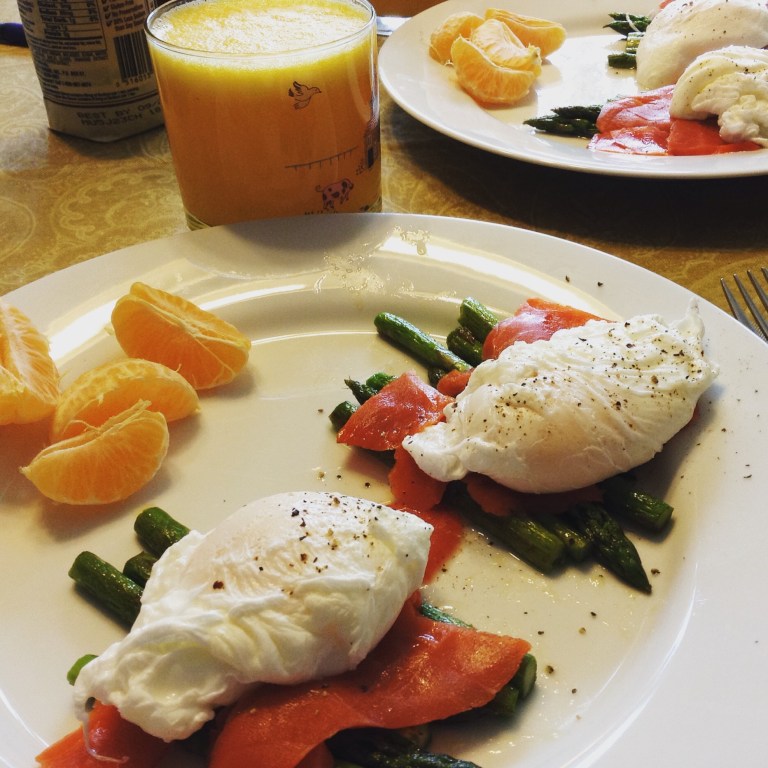
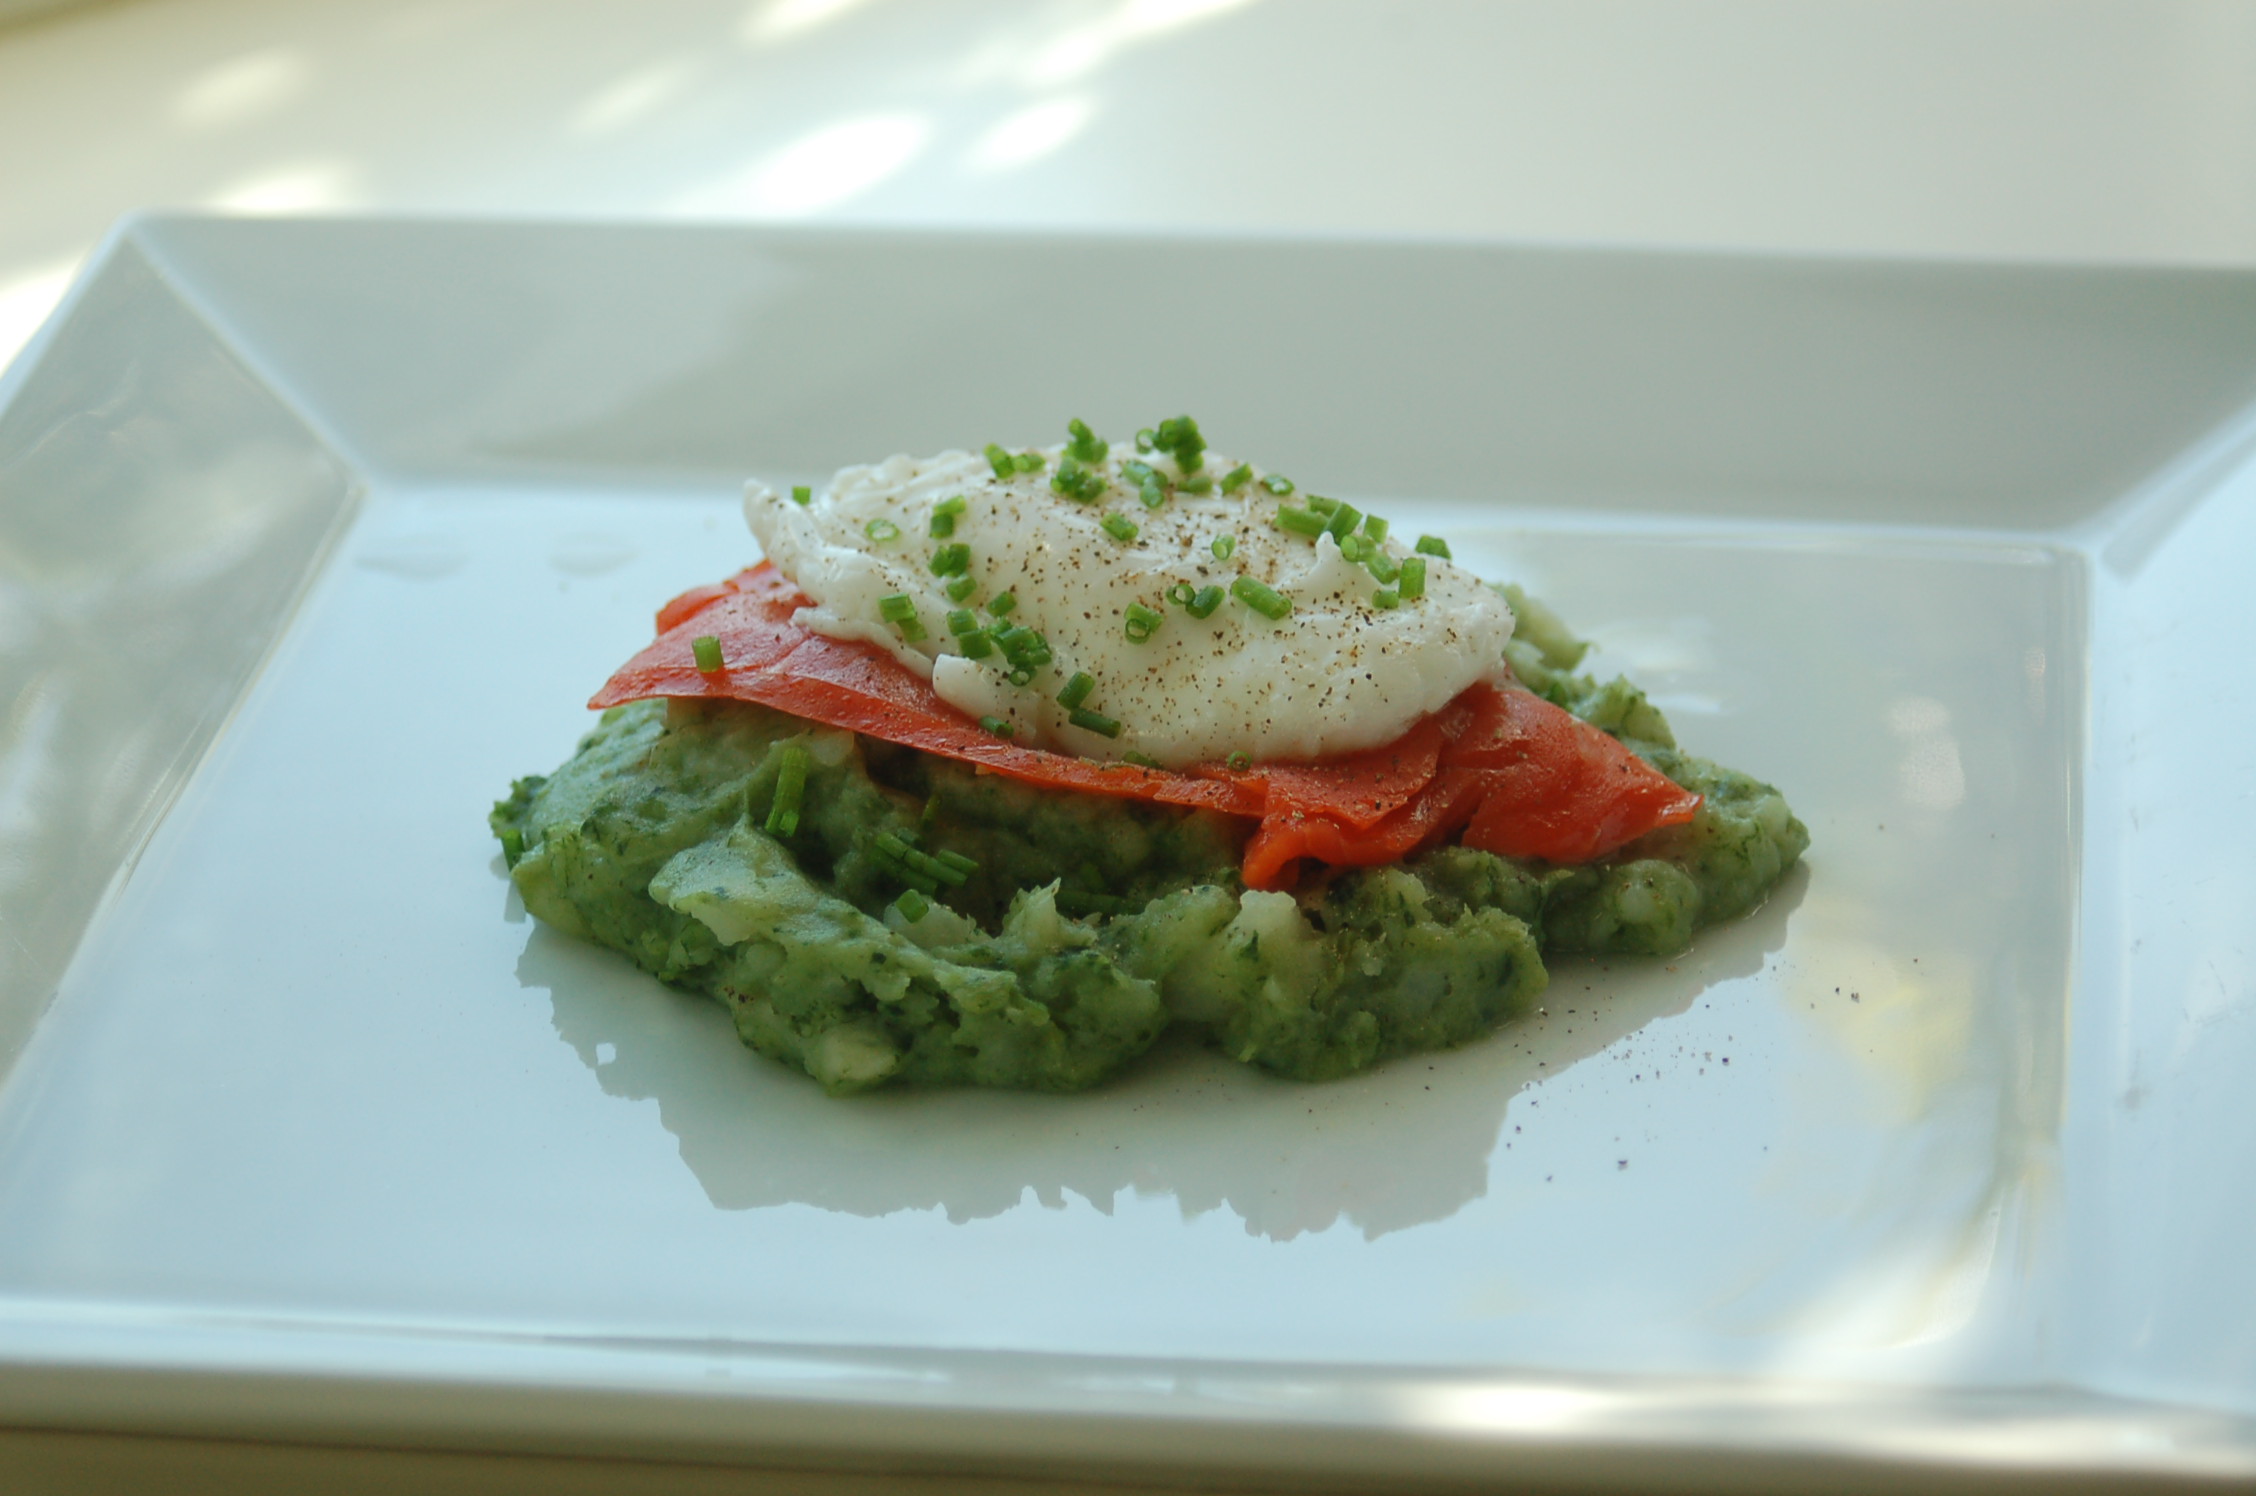
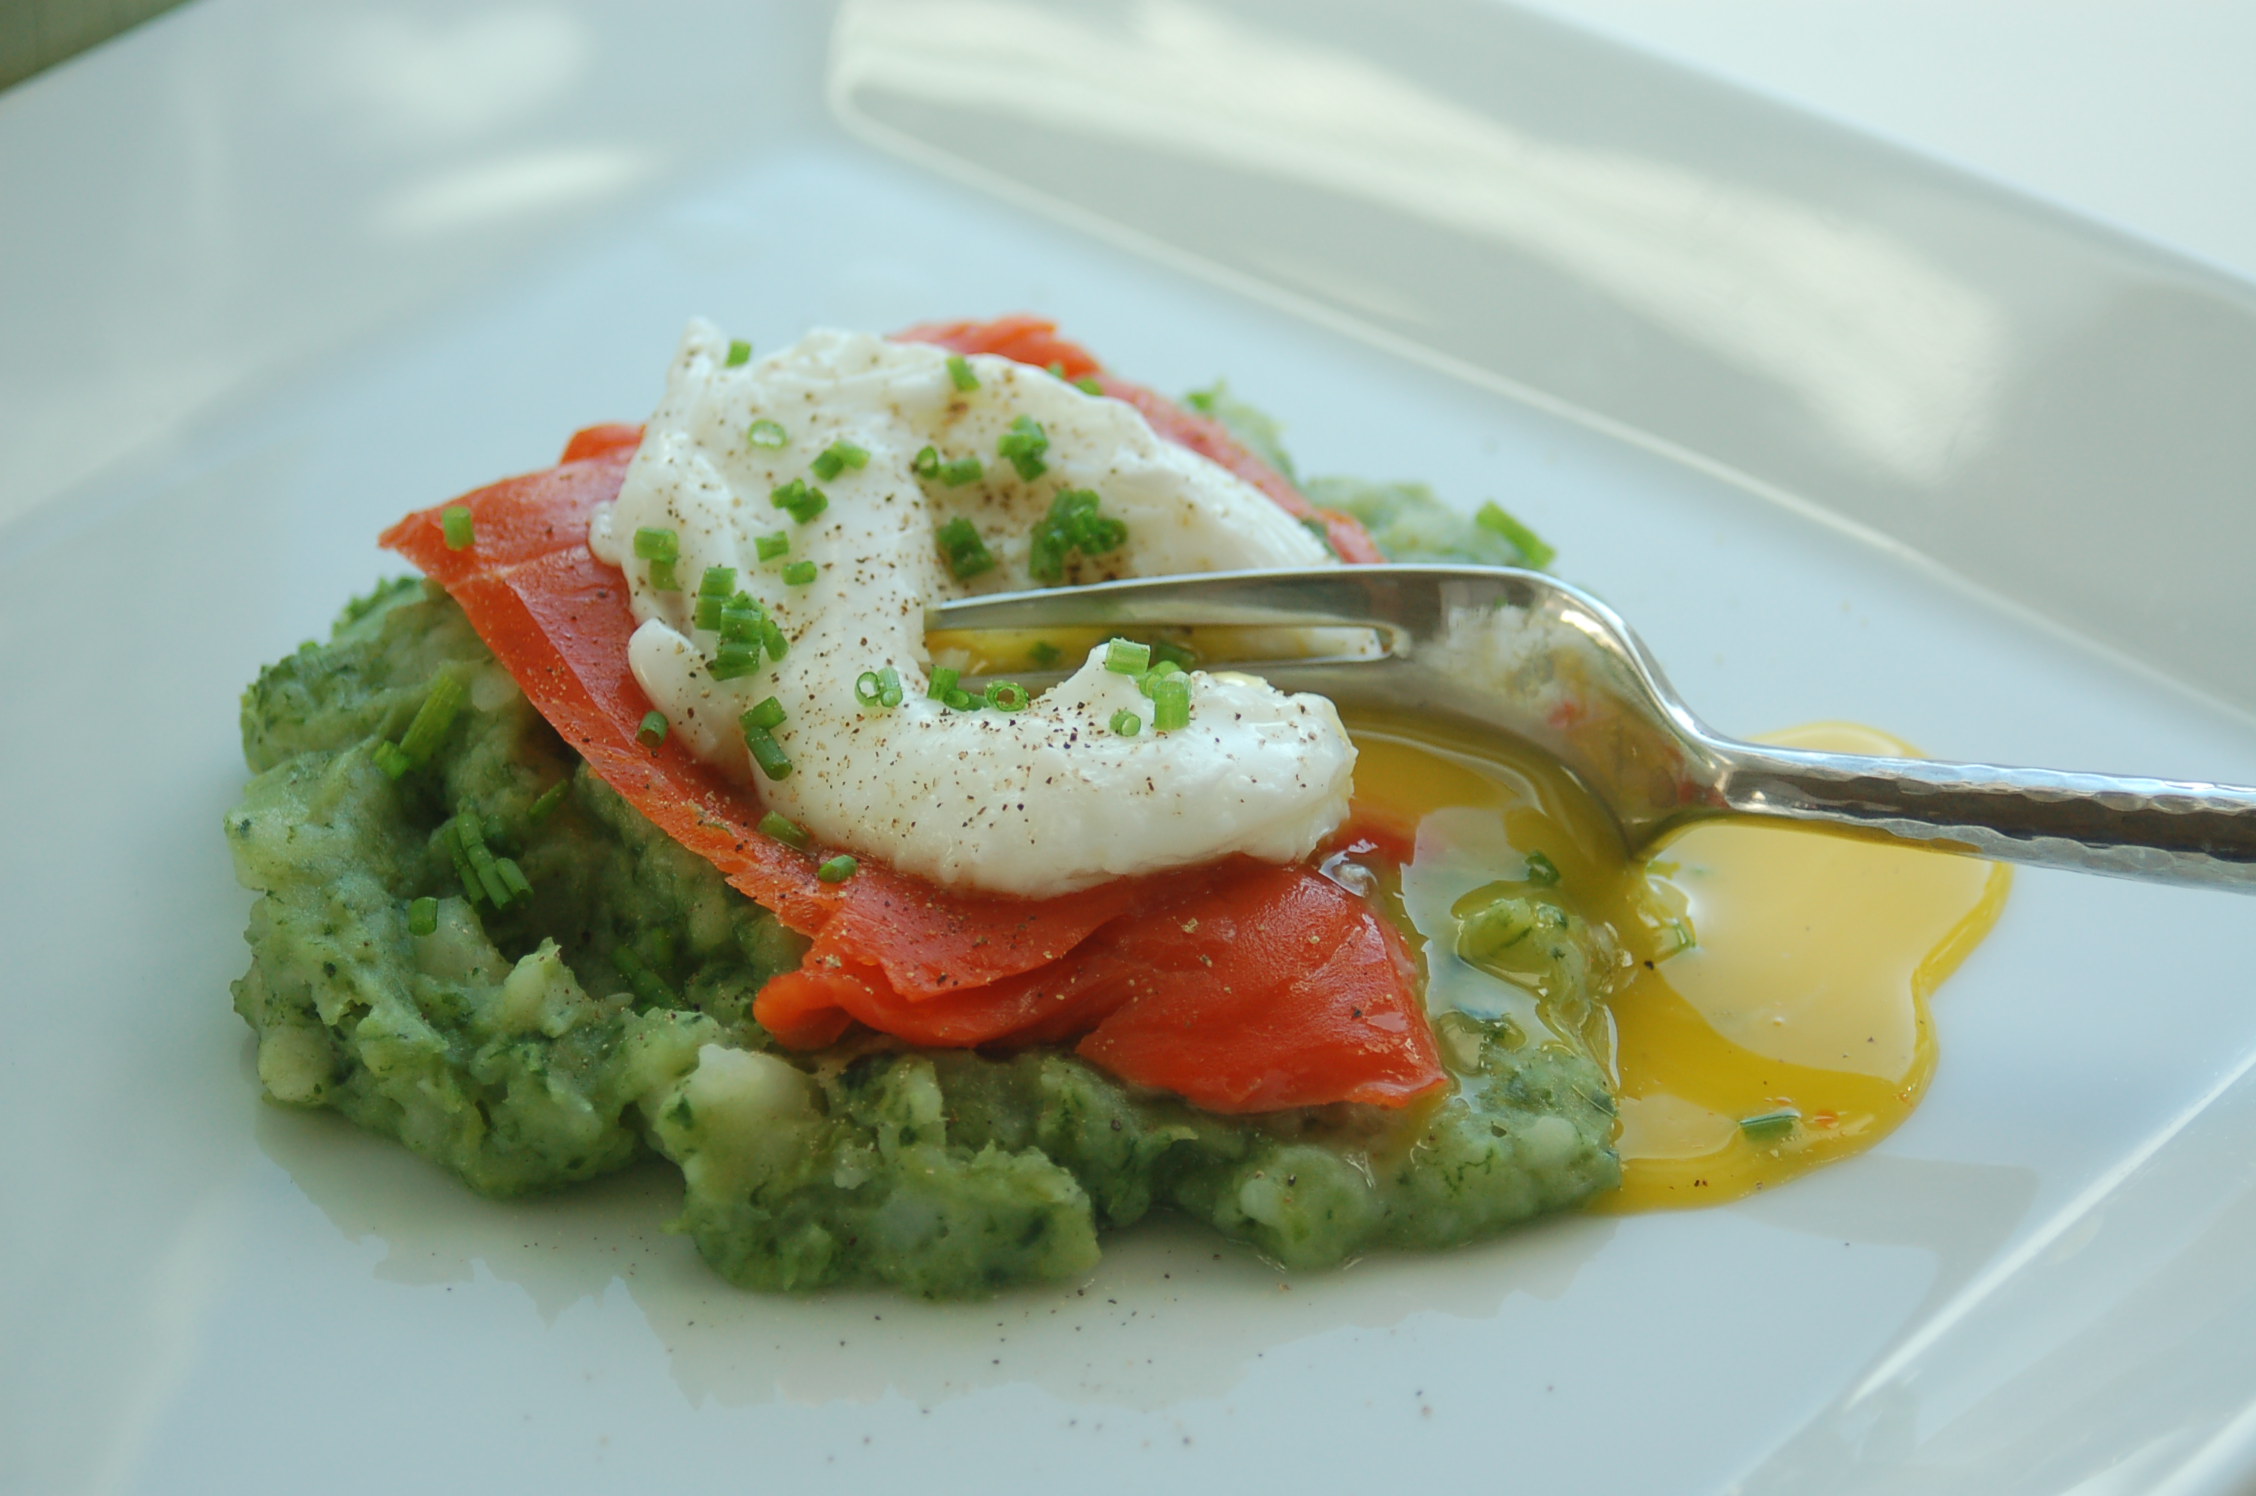
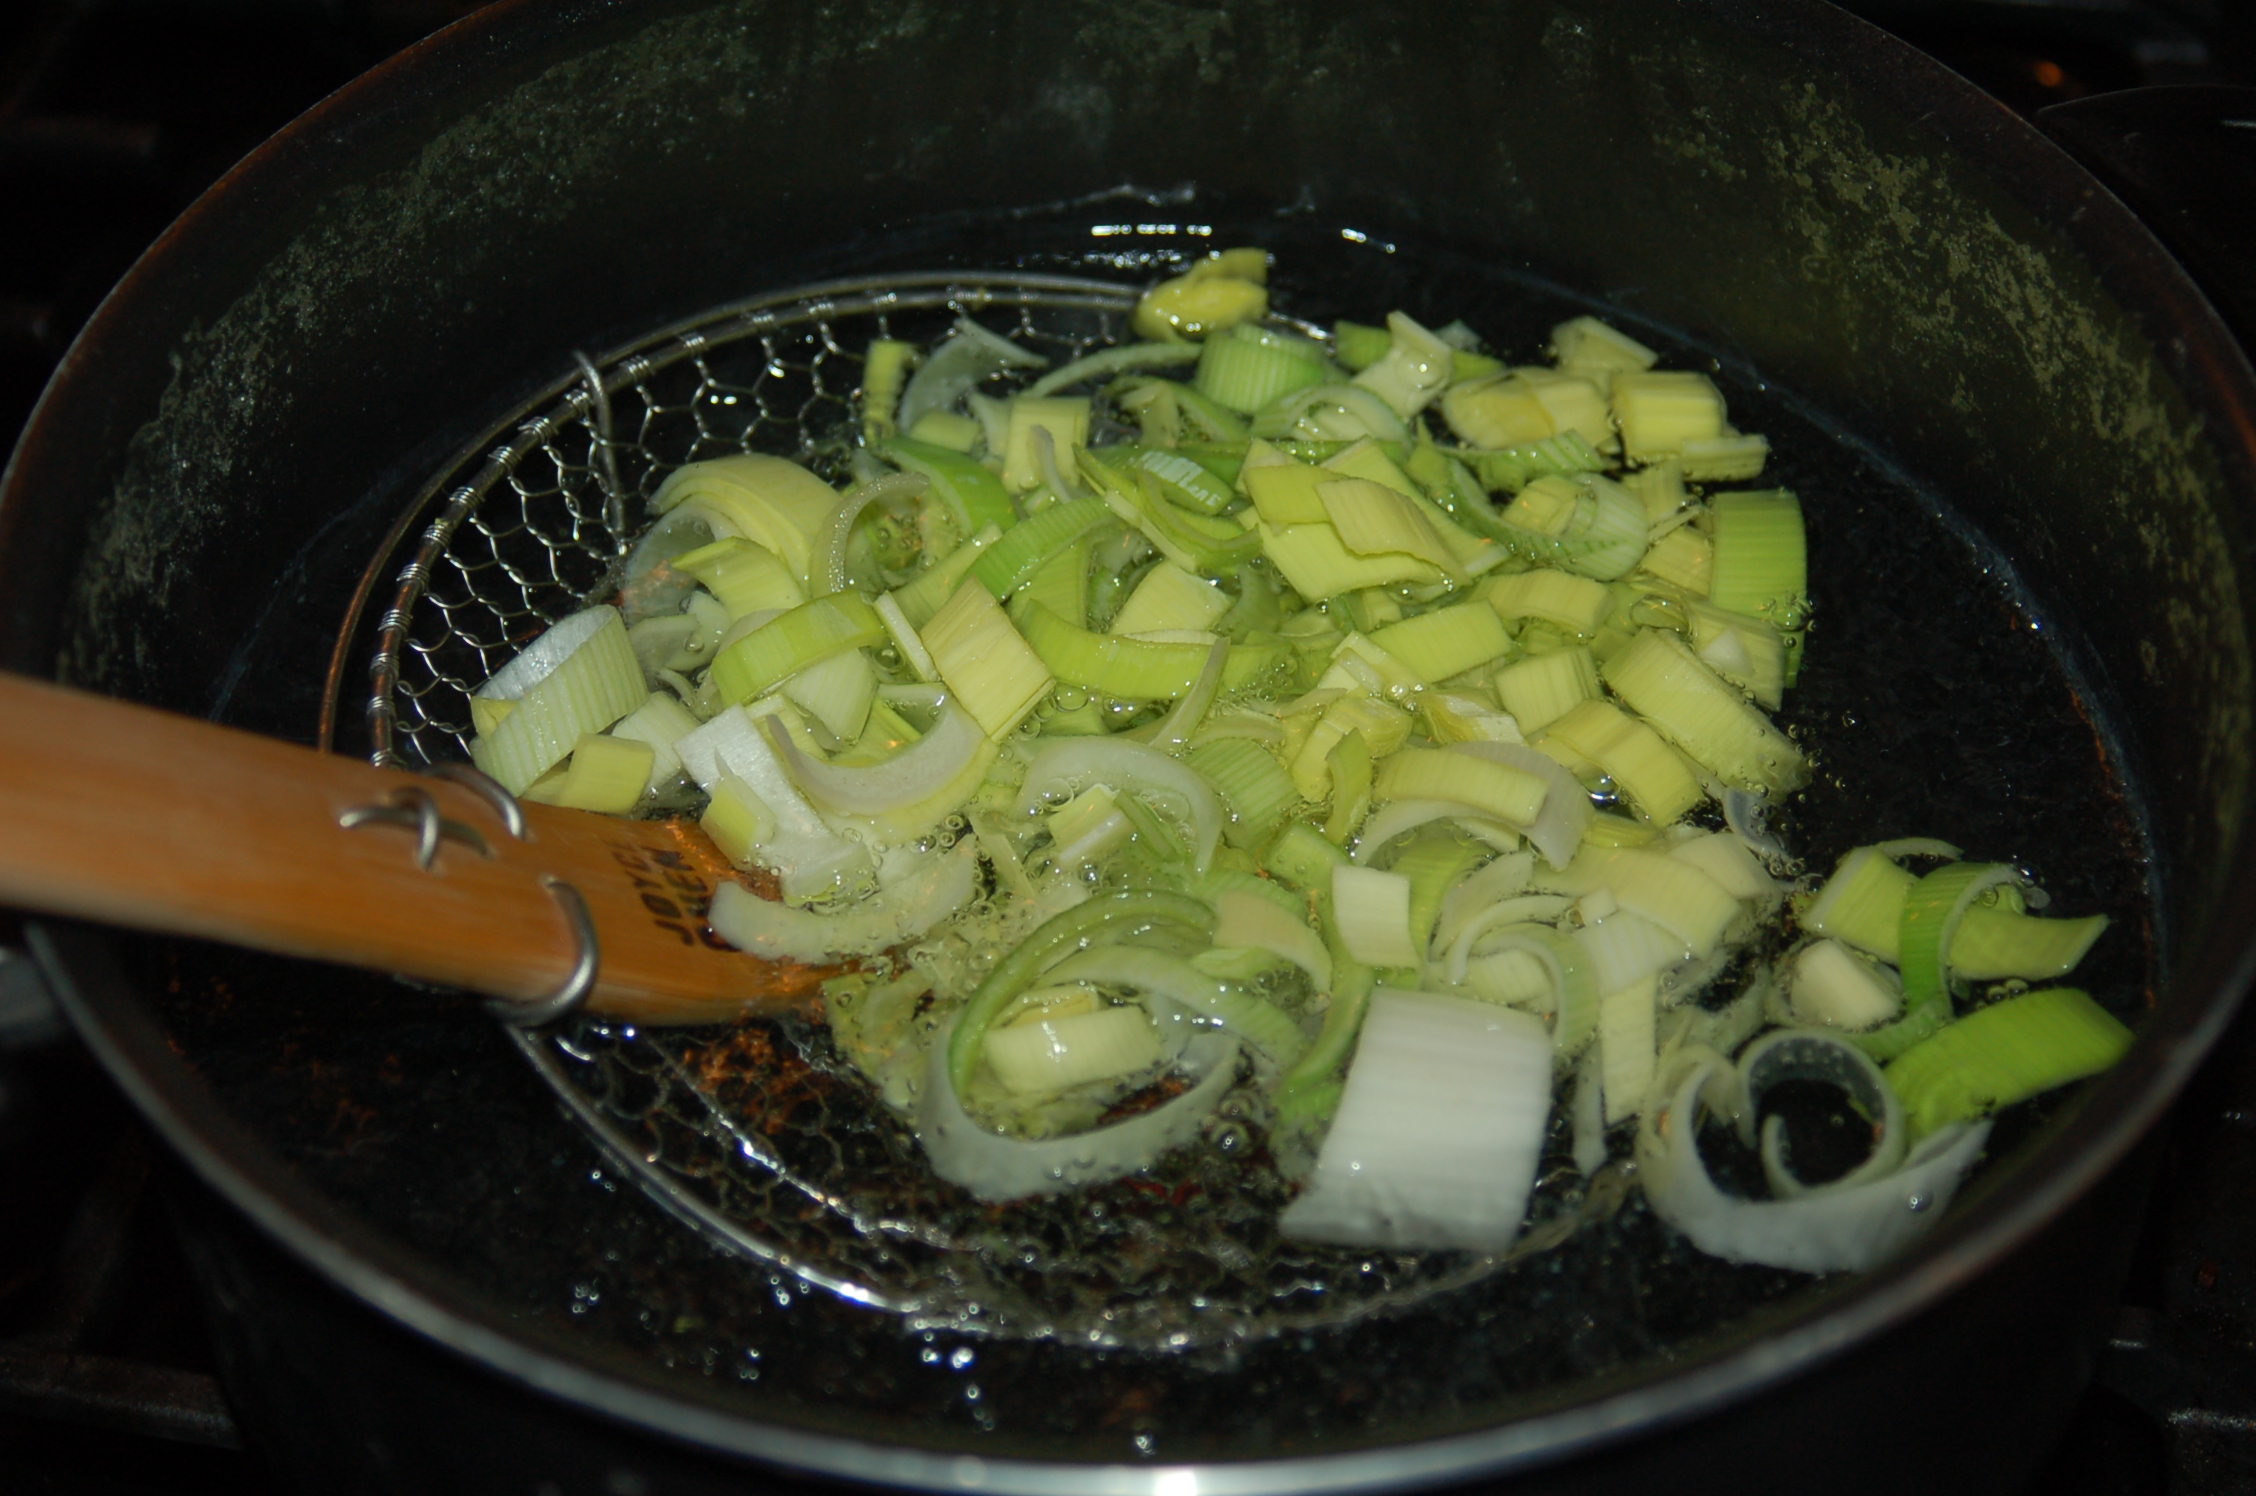
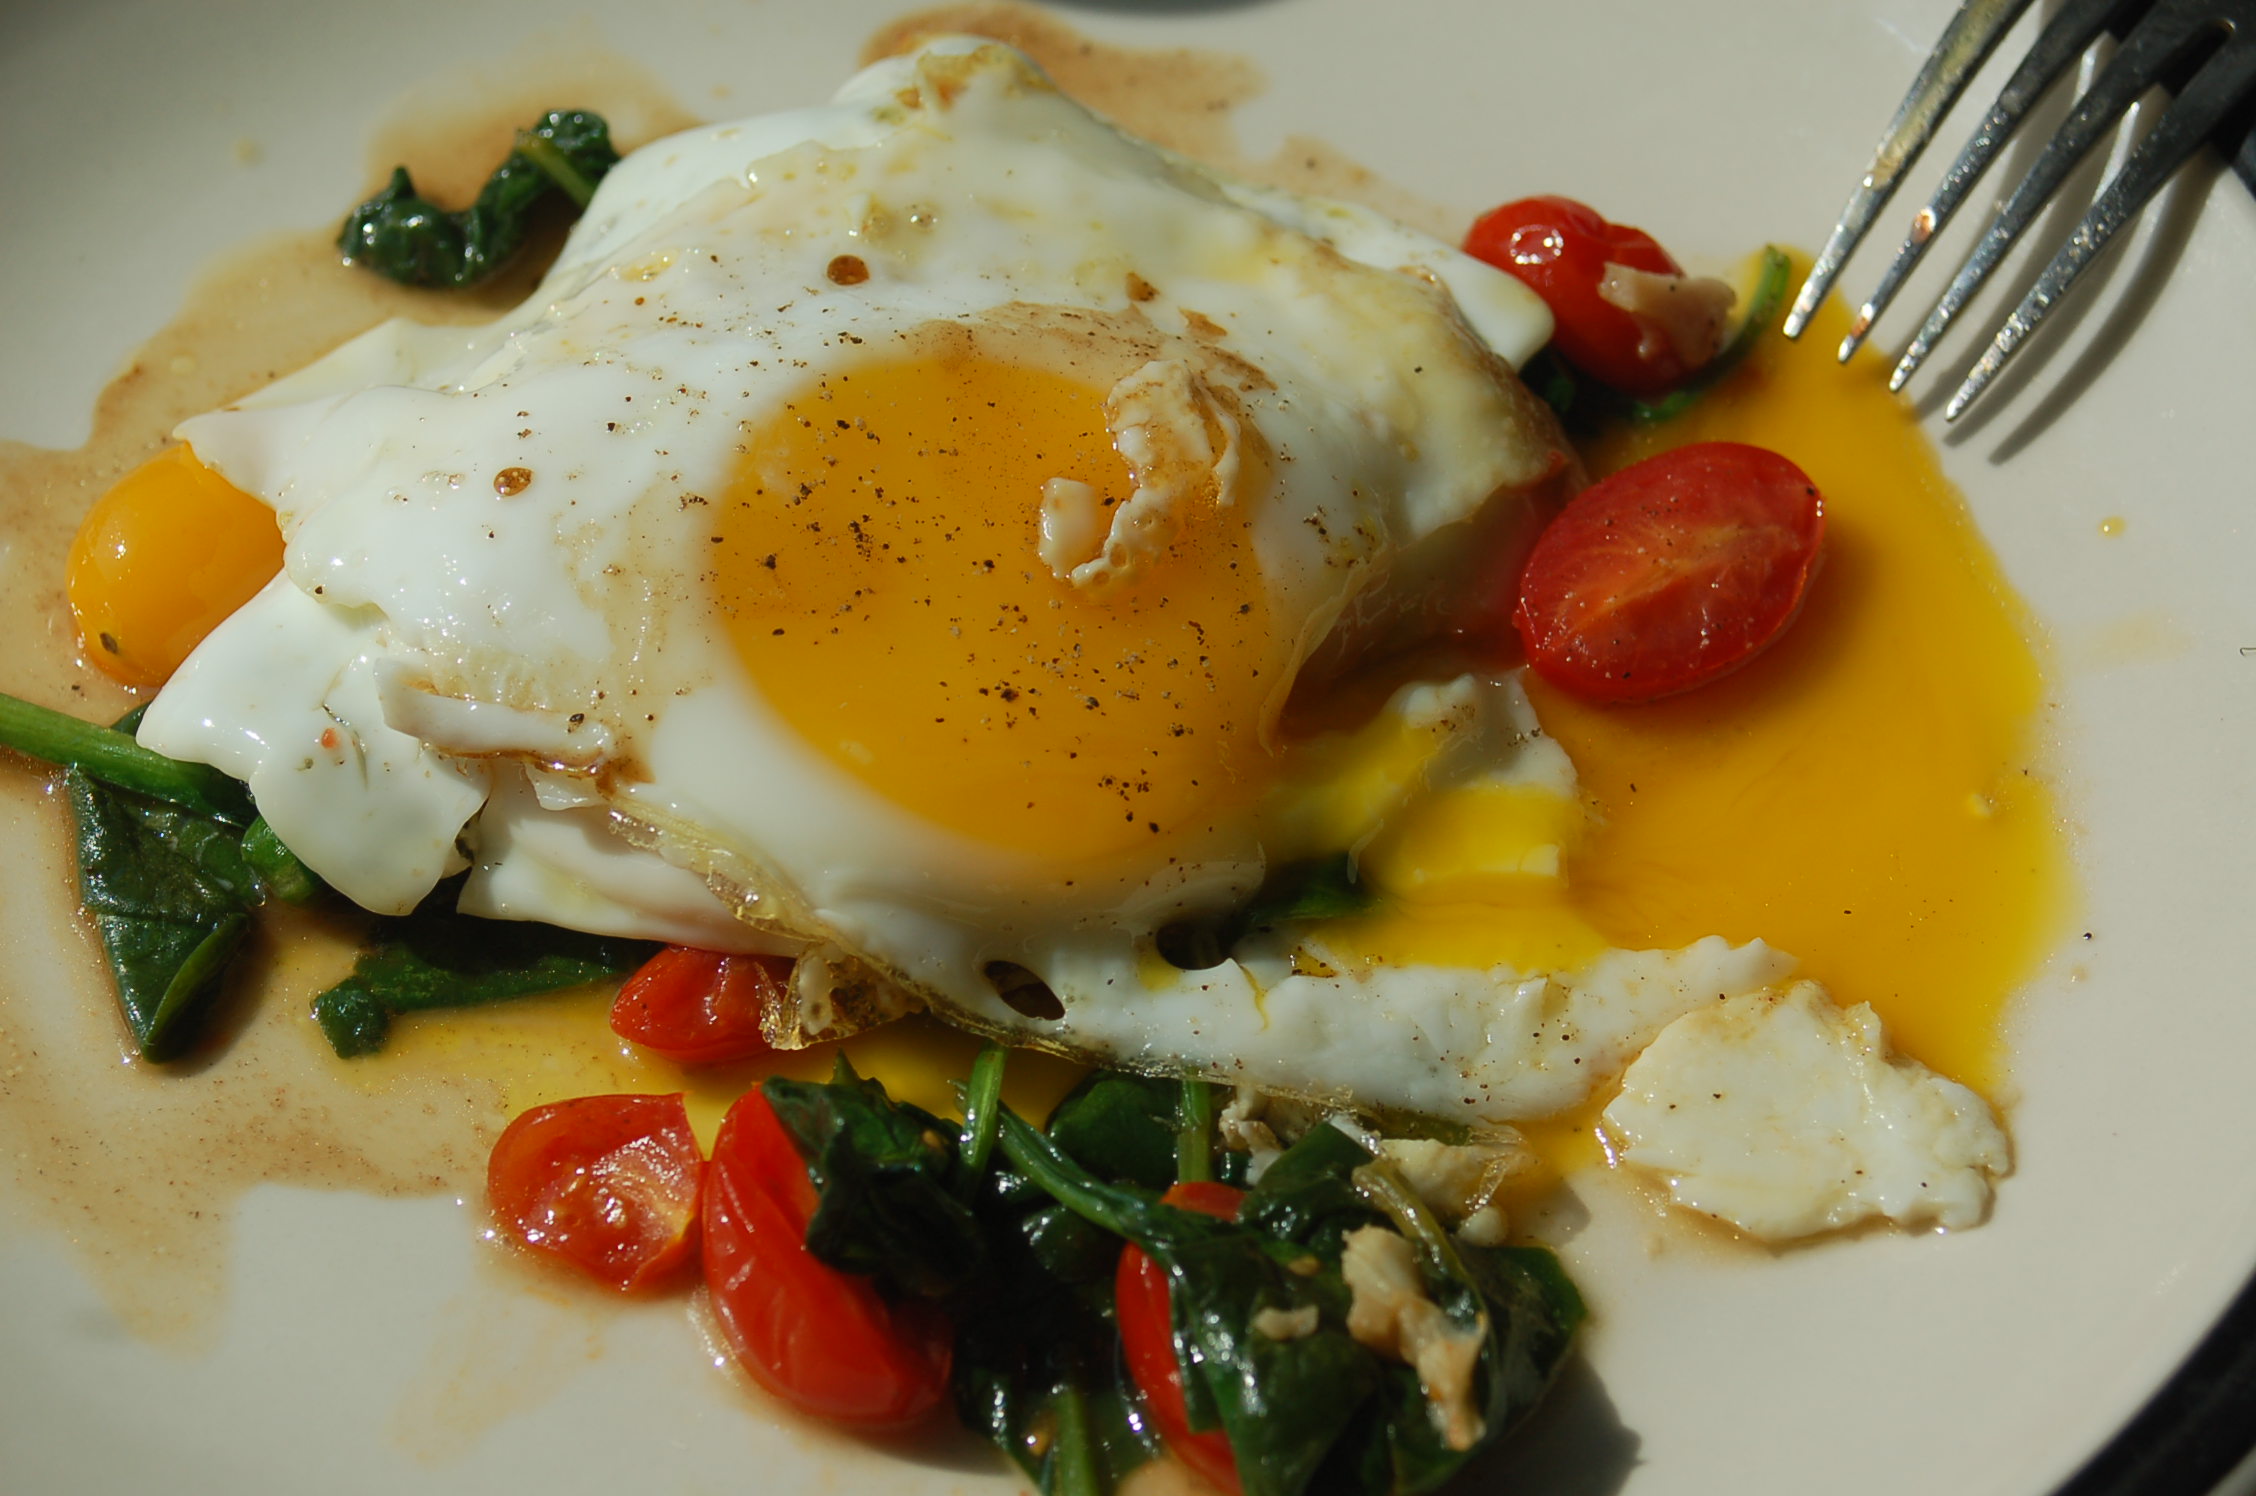
As for the Hungry Athlete, for my very first meal on New Year’s day, I prepared my Simple Granola to accompany Greek yogurt, then poached eggs served over smoked salmon and asparagus sautéed in olive oil. A clementine and mimosa were the sweet notes in this orchestra of flavors.


image

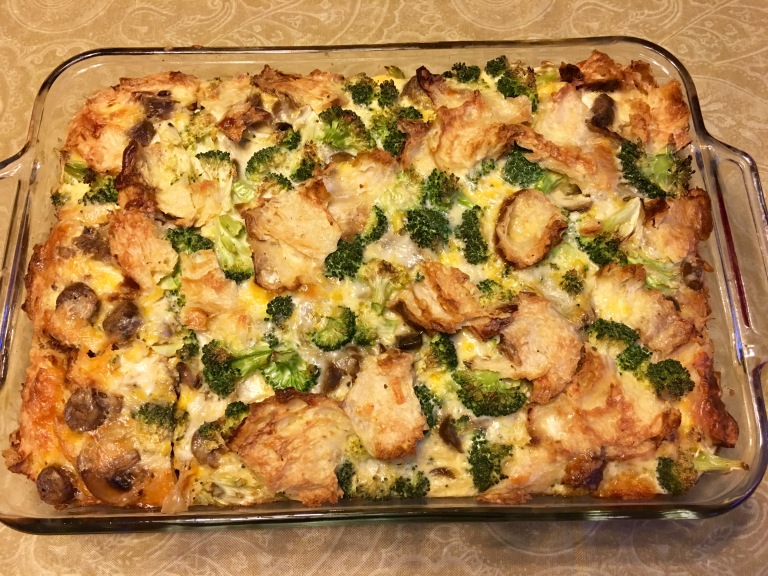
A couple days later, after my first group trail run of the year, I invited the gang over for a brunch and served my Egg, Vegetable and Croissant Breakfast Casserole, my  Simple Granola and Alton Brown’s overnight cinnamon rolls. No, the cinnamon rolls are not healthy nor do I want to try to attempt a healthy version. I believe in indulging when the time is right and after a wet, cold and hard trail run, my friends earned cinnamon buns for running that extra mile.

Want to host a healthy 3-course breakfast, most of which you can prepare, stress-free by prepping the day in advance? Here’s The Hungry Athlete’s Three-Course Healthy Breakfast:

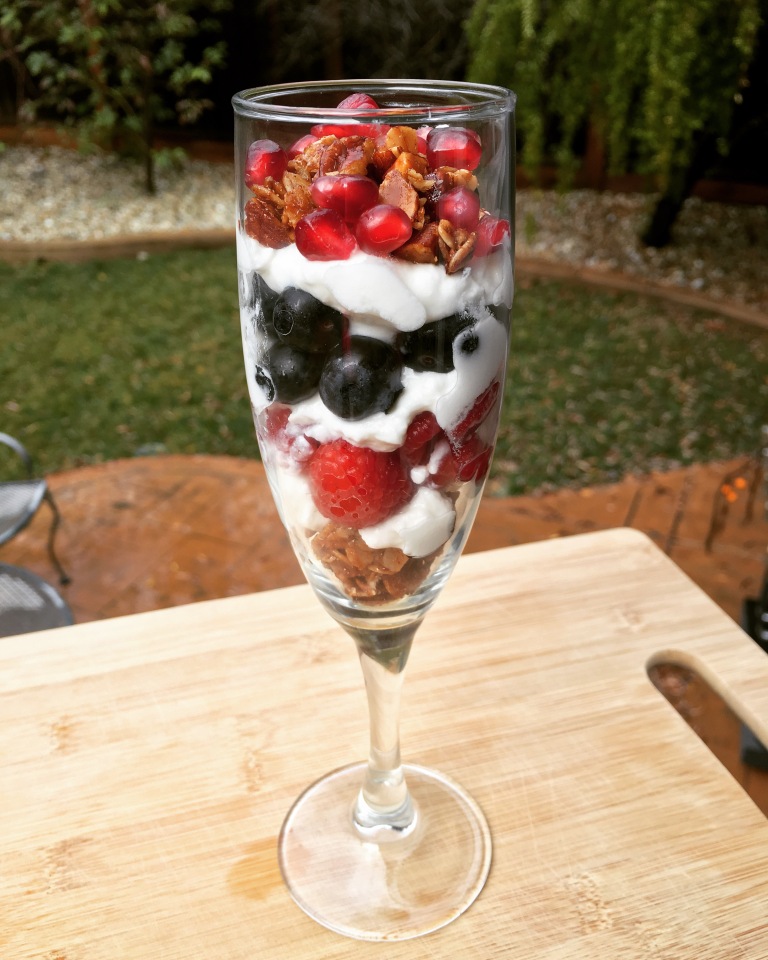
First Course: Greek Yogurt Fruit Parfait with Homemade Simple Granola, Raspberries, Blueberries and Pomegranate Seeds

Second Course: Egg, Vegetable and Croissant Breakfast Casserole

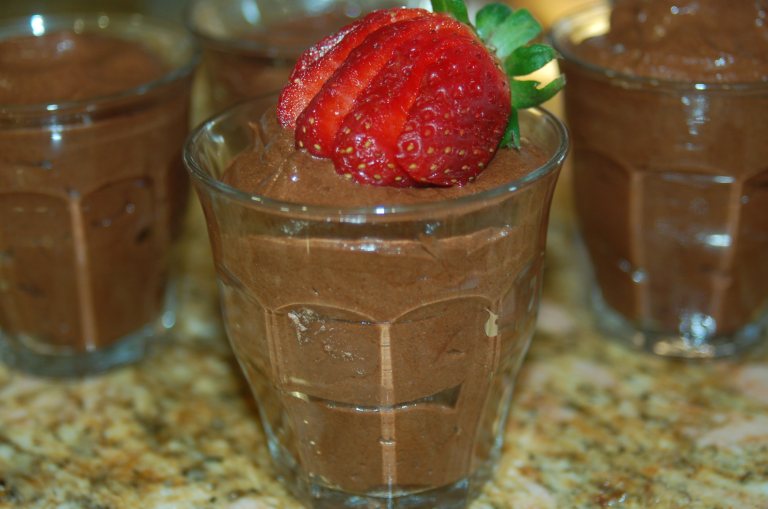
Third Course:  Chocolate Cinnamon Avocado Mousse

granola parfait
First Course: Greek Yogurt Parfait with Homemade Granola, Raspberries, Blueberries and Pomegranate Seeds
HGJAN2016-17
Egg, Vegetable and Croissant Breakfast Casserole (here with vegetarian sausage, caramelized onion, mushroom, broccoli and Manchego cheese)
Chocolate Cinnamon Avocado Mousse

Inspirations for 2016: What It Means to Be “Badass is Beautiful”

Happy 2016!

It’s hard to believe this will be my 5th year indulging in the sport of triathlons and my 3rd year learning ultra running. When I decided to race my first triathlon in 2011, my primary motivation was to force myself to get comfortable swimming in open waters. And so it began … I signed up for my first triathlon, but not the sprint distance nor the Olympic distance. I signed up for a half distance. Go big or go home as they say! If I was going to do an open water swim, I was going to swim more than a mile. By later 2011, I accomplished that goal. One year later, in 2012, I completed my first ultra distance triathlon, Ironman Canada, swimming 2.4 miles. Only a couple years earlier, I never would have imagined I would do such a thing!

I also could never have imagined all of the amazing experiences and people I would meet as a result of being involved in ultra endurance sports. One of these amazing experiences is being a member Team Betty 2016! This is my second year as an ambassador for Betty Designs, a pretty rad line of stylish, functional and high quality cycling, swimming, running and athletic wear for women designed by a pretty cool athlete, mom, graphic artist and entrepreneur named Kristin Mayer. I love our mottos: “Badass is Beautiful” and “Do Epic Shit”.   I was fortunate to be invited by Kristen to join this team of 200+ inspiring and badass female athletes (mostly triathletes and ultra runners) from all over the world and who do epic shit.

I had the pleasure of meeting one of these inspiring teammates, Katherine Biziarek English, last year when I traveled to Arizona. I first met Katherine at True Food Kitchen, a restaurant she recommended. The menu is based on Dr. Andrew Weil’s anti-inflammatory diet. Over one of the most delicious and healthiest brunches I’ve ever had, we enjoyed sharing stories of how we discovered and fell in love with triathlons. Since then, I’ve enjoyed following Katherine’s journey and think you’ll enjoy hearing about how a school teacher went from being bored with running to qualifying for USA Triathlon Age Group Nationals to be held in Omaha, Nebraska this year!

Katherine started training for her first triathlon in early 2008.   She had just completed a local half marathon and was bored with “just” running so she took swim lessons to figure out how to properly swim freestyle. I use to believe that most triathletes are long-time swimmers, who grew up swimming competitively. Like myself and many other triathletes, Katherine had to learn how “not to drown” and was intimidated with swimming in open waters. After beginning with a few duathlons she successfully completed her first open water triathlon in Flagstaff that summer! Although she felt she was slow, she was happy to have finished.

When I met Katherine for brunch, we chatted about our passion for food and commitment to healthy eating.

“Of course for years I thought I was in shape. I mean, I was a triathlete, right? I was by no means disciplined to a training schedule like I am now, never did two-a-day training, and my nutrition hadn’t changed one bit. I wasn’t fit, but in my mind, I was! I was probably 15-17 pounds heavier than I am now.”

In 2012, Katherine’s coach Frank Sole sat her down and talked to her about cleaning up her nutrition. They had already added strength training and Katherine was making gains. She focused on her diet, cut back on gluten, and started meal planning weekly. Within a year, Katherine was leaner and her overall energy had improved. Even her skin was clearer than ever. Katherine then connected with a local endurance dietitian, Brooke Schohl of Fuel to Finish. With the help of Brooke, they started looking at metabolic efficiency to tweak both training and racing nutrition, particularly since she began tackling 70.3’s (half distance triathlons). Katherine continued to lean out. With disciplined swim-bike-run and strength training and under the guidance of a new coach, Michellie Jones, who continues to support Katherine’s focus on good nutrition, Katherine started to increase speed and move up in her age group. And then it happened …

“I never EVER thought I would be on the podium and going to USAT Nationals. For years, I was satisfied with just finishing. I am a firm believer that nutrition is absolutely critical to athletic success. Of course, I still have my pizza or cupcake here and there, but overall, I am conscientious of what I eat daily, so I make smart choices. I know how certain foods impact my performance as well.”

Katherine’s husband Jon also benefitted from learning more about nutrition. Jon lost over 25 pounds mostly through nutritional changes. One of Katherine’s secrets to good nutrition is planning her meals weekly. As with any goal, whether it’s a race or overall health and fitness, you are more likely to achieve your goal with a good plan.

I was honored when Katherine reached out to me for suggestions on one of her weekly meal plans. This particular meal plan was special. Katherine was planning a healthy three course New Year’s Day brunch for her husband. To find out what I suggested, what Katherine made and recipes to a couple of the dishes, check out  “A Healthy Three Course New Year’s Breakfast” post.

Congratulations Katherine and Jon on your amazing journey and sharing your story!  Katherine, you are badass beautiful and I look forward to cheering you on at Nationals!   Maybe someday we can play Thelma & Louise and run a trail race together?

Katherine in 2015
Katherine in 2015
Katherine in 2011


Katherine and Jon 2015

Briley’s Fettuccine Alfredo with Broccoli, Peas, Mushrooms, and Sun-dried Tomatoes

What do you do when a 15 year old requests Fettuccine Alfredo for his birthday dinner?  First you cringe a little because this pasta with cream and butter has virtually no nutritional value and is truly bland in flavor.  Then you remember that even the Hungry Athlete loved Alfredo sauce when she was a kid.  With Halloween around the corner, looks like the Hungry Athlete had to use a little witch craft to create a healthier version of a teen’s favorite meal.  To ensure Briley’s birthday dinner would be a big treat, I had a couple tricks up my sleeve.

The first trick was to sneak in vegetables (muhahahaha).  I loaded the pasta with four vegetables which have some of the best sources of vegetable protein: peas, broccoli, sundried tomatoes and mushrooms.  In the version I made on Briley’s birthday, I confess to using a sleight of hand to hide the vegetables.  I simply diced the vegetables into the size of peas.  Now that my secret is out, the final recipe calls for larger bits of broccoli, mushrooms and sun-dried tomatoes.  This makes the pasta more pleasing, both visually and texturally.

The final trick is to turn the heavy cream into a disappearing act.  Typical American Fettuccine Alfredo is made with 1 1/2 cups of heavy cream, 2 tablespoons of butter and Parmigiano-Reggiano, along with a pinch of nutmeg.  I understand that the original and authentic Italian Alfredo sauce is made of only three ingredients: fettuccine, 2 sticks of butter (wow) and Parmigiano-Reggiano.  Either way, that’s a lot of cream or butter.  So instead of all the heavy cream, I threw into the cauldron some magic: Neufchatel.  No I didn’t sneeze and my cauldron was actually a large All-Clad saute pan.

Named after a town in Normandy, Neufchatel is one of the oldest of French cheeses and typically produced in the shape of a heart.  According to cheese folklore, American cream cheese was created when an American dairyman added cream to the recipe for Neufchatel.  Real French Neufchatel is made with raw cow’s milk. American Neufchatel is made with pasteurized cow’s milk and cream.  American Neufchatel has about 33% less fat than cream cheese and is sometimes called farmer’s cheese. Creamy and slightly tangy, it tastes a lot like cream cheese and a lot better than heavy cream.  It is found next to the cream cheese in the grocery store.

Neufchatel and Parmigiano-Reggiano combine with milk into a creamy Alfredo sauce.

Here’s how Neufchatel compares:

  • 2 tablespoons Neufchatel is about 70 calories and 6 g of fat
  • 2 tablespoons butter is about 240 calories and 24 g of fat
  • 2 tablespoons heavy cream is about 200 calories and 10 g of fat of which 7 g is unsaturated fat

I was afraid of disappointing a teenager on his birthday and tested a version with a couple tablespoons of cream, a version with whole milk and a third version with low-fat milk. I found the milk versions to be creamy, rich and delicious. Happy birthday Briley! This sauce was created just for you, to keep you healthy and to fuel your workouts.  May you continue to run those trails fast and strong for years to come.

If you prefer a non-vegetarian version, chicken, poached in a pan, adds more protein and accompanies the pasta nicely.  Check out this website for a foolproof, easy and fast way to prepare chicken for pasta and salads:

http://www.thekitchn.com/how-to-cook-moist-tender-chicken-breasts-every-time-cooking-lessons-from-the-kitchn-36891

Serving size: 4

Ingredients:

  • 8 ounces of your favorite pasta* (I prefer fettuccine or penne)
  • 3 tablespoons unsalted butter
  • 2/3 cup chopped white mushrooms
  • 1 large clove garlic, minced (or grated)
  • 1/2 teaspoon grated lemon zest
  • 3 tablespoons Neufchatel* cheese
  • ½ cup grated Parmigiano-Reggiano cheese
  • ¼ cup lemon juice
  • ¼ cup whole or low-fat milk (I prefer organic whole milk**)
  • ¼ teaspoon crushed red pepper flakes or ¼ teaspoon white pepper
  • pinch of fresh ground nutmeg
  • 1 cup chopped defrosted frozen broccoli
  • ¾ cup frozen peas
  • ¼ cup chopped parsley
  • ½ cup of chopped sun-dried tomatoes***
  • salt (You probably won’t need this. Any additional salt due to the saltiness of pasta water, the sundried tomatoes and Parmesan cheese.)

*Note: 8 ounces of uncooked long pasta shapes = 1 1/2-inch diameter bunch = 4 cups cooked pasta

**Note: Non-fat or reduced fat milk requires additional processing to remove the fat and then to put the 1% or 2% fat back.  I prefer less processed foods.  Your taste buds can easily be adjusted from non or low fat to whole milk.

***Note:  Sun-dried tomatoes in oil can be used however I prefer to use sun-dried tomatoes not in oil.  These has a longer shelf life however need to be soaked in water for about 30 minutes before chopping and cooking.

Directions:

Timing is everything in this dish.  As soon as the pasta is cooked it should be transferred directly to the pan with the Alfredo sauce.  The ensure good timing, prepare all of the ingredients in advance then start cooking the pasta.

alfredo7

If you are using dry pasta, allow 5 minutes to prepare the Alfredo sauce.  If you are using fresh pasta, have a pot of water boiling and ready for the pasta and toss in the pasta just before you finish making the Alfredo sauce.

To make the sauce, melt 1 tablespoon of butter in a large sauté pan over medium heat.  Sauté the mushrooms for a couple minutes, then remove from pan and set aside.

Melt the remaining butter in the same pan over medium heat.  Add the garlic, red pepper flakes and lemon zest.  Stir for 1 minute.

Lower the heat and whisk in the Neufchatel, Parmigiano-Regiano and lemon juice until cheese is melted and smooth.  Whisk in milk for 1 minute.  Whisk in fresh nutmeg for another minute.

As soon as the pasta is cooked al dente, place it into the pan and coat the pasta with the Alfredo sauce over medium heat.

alfredo1
Fettuccine is the traditional pasta used with Alfredo sauce. Here I used penne pasta.

Toss in mushrooms, broccoli, peas, sun dried tomatoes and half the parsley.

alfredo5

Serve immediately with remaining parsley garnished on top.

alfredo2

Colcannon with Poached Egg and Smoked Salmon

What’s as good as Colcannon (Irish mashed potatoes) for dinner?  Colcannon for breakfast of course!  I prepared this breakfast on a weekday morning in 5 minutes using colcannon left over from last night’s dinner.

The hardest part of this recipe is poaching the egg.  A fried egg works well too.  I have tried several methods of poaching eggs over the years.  The way my mother taught me to poach eggs works the best.  Mom and I tried using vinegar.  While vinegar helps to keep the egg whites pretty, I’m not a fan of vinegar flavored eggs so I don’t use it.  I also have an egg poaching pan and silicon egg poaching cups.  These gadgets work well when poaching several eggs at the same time but if you are just making a couple eggs, don’t bother using them.  The article below does an excellent job demonstrating how it’s done.  I often use a slotted spoon to lift the egg up and keep it from sinking.

How to Poach Eggs

This breakfast contains nutrient rich vegetables (potatoes, kale, cabbage and leeks) and protein (egg and smoked salmon).  I can’t wait to have it again tomorrow morning after my workout. The recipe for colcannon is found here: Crispy Salmon and Colcannon

Serving size: 1 Ingredients:

  • 3/4 cup of colcannon
  • 1 egg
  • wild smoked salmon
  • salt and pepper
  • chives for garnish

Directions:

Poach the egg as instructed above for 2 minutes for a runny yolk and up to 4 minutes for a firmer yolk.  Timing will also depend upon the size of your egg and how cold it is.  I have an ultra runner pal who likes to poach his eggs for 6 minutes.  To figure out how long you like to poach your eggs, gently lift the egg out with a slotted spoon.  If after inspecting the egg it needs more time, you can always drop it back in the water for another minute or two.

While the egg is poaching, warm the colcannon in the microwave.  Place the smoked salmon on the colcannon, then place the poached egg on top.  Make sure the egg is not wet.  Garnish with finely chopped chives and season with salt and pepper. DSC_7029

DSC_7031

Crispy Salmon and Colcannon (Irish Potatoes with Cabbage, Kale and Leeks)

Happy St. Patrick’s Day, Hungry Athlete style! Irish comfort food, colcannon, is mashed potatoes made with kale or cabbage. On Halloween, charms are hidden inside the colcannon. If you find a ring, it means you will someday marry; if you find a thimble, you are doomed to be a spinster.  Who knew mashed potatoes could be so exciting? There’s even a song about it: https://www.youtube.com/watch?v=TCQbksGz67U Colcannon is traditionally served with Irish bacon or boiled ham, however, since my coach is evaluating my diet this week, I decided to pair it with salmon.  I omitted the butter (and the ring and thimble) from the colcannon and saved it to prepare a sauce for the salmon.  And instead of using just kale or cabbage, I combined both and added leeks to pack a variety of nutrient rich vegetables into the colcannon.  The vegetables are typically chopped finely, blanched to soften, then combined with the potatoes.  To create a smoother colcannon, I lightly pulsed the vegetables in a food processor after blanching.  (A blender can be used as well.)  This saved me some chopping time and I liked the texture.  If you prefer a more rustic colcannon, just chop the vegetables up more finely at the beginning and skip the food processor. Colcannon is great for breakfast too!  Try using leftover colcannon for Colcannon with Poached Eggs and Smoked Salmon. Serving size: 4 Crispy Skin Salmon Ingredients:

  • 12 ounces of wild salmon, skin on (3 ounces per person)
  • 1/2 cup olive oil
  • Kosher salt and pepper
  • 1/2 teaspoon of lemon zest
  • juice of 2 lemons
  • 1 tablespoon finely chopped shallot
  • 4 tablespoons butter

Colcannon Ingredients:

  • 2 pounds of potatoes, peeled and cut in large even chunks
  • 1 leek, rinsed well and chopped
  • 3 scallions stalks or 2 spring onion stalks, finely chopped
  • 1/3 cabbage, rough chopped (about 4 cups)
  • 4 curly kale leaves, stem removed and rough chopped (about 4 cups)
  • 1/4 cup of milk or 2 tablespoons Greek yogurt
  • 2 tablespoons sour cream
  • Kosher salt and pepper

Directions: Colcannon Place the potatoes in a large pot of water with a little salt. Bring the water to a boil for 5 minutes or until potatoes are fork tender. Drain the water from the pot.

DSC_6999
If you prefer a more rustic colcannon, chop the vegetables up more finely than this and skip using the food processor or blender.

Bring another large pot of water to a boil. Blanch the vegetables. First, add the leeks and cabbage to the boiling water. After 5 minutes, add the kale and continue blanching for another 4 minutes until all the vegetables are bright in color and tender. Then add 2/3 of the scallions or spring onions for 1 more minute. DSC_7001 Reserve about 1/4 cup of the hot greenish water from the pot. The water contains nutrients and can be used to add moisture to the potatoes. Then strain or remove the vegetables from the water and place in a food processor or blender. Season with salt and pepper and pulse until all of the vegetables are combined.

DSC_7003
Pulse it gently for a more rustic texture but definitely do not puree it. Some texture is good.

Add sour cream and milk or Greek yogurt to the potatoes. Mash the potatoes. If it appears dry, add a splash of the reserved vegetable water. Season to taste with salt and pepper. Stir in the vegetable mixture until just combined. It’s a rustic dish so I prefer chunks of white mashed potato with the green vegetables speckled throughout. Place a lid on the pot to keep the colcannon warm.

DSC_7007
Traditionally, a well is created in the middle and a Irish butter is added. By adding sour cream or Greek yogurt, I didn’t miss the butter. In addition, that allowed me to allocate the butter to creating a lemon butter sauce for the salmon.

Salmon Rinse the salmon and remove any bones. Pat dry with paper towels then slice the salmon into 4 pieces. Score the skin of the salmon by making a few shallow, diagonal cuts on the skin. This will help the skin crisp up but not curl up when cooked. Coat each piece with 1 tablespoon of olive oil, then season well with salt and pepper. Allow the salmon to sit at room temperature for at least 10 minutes before cooking. In a large nonstick frying pan, heat the remaining olive oil on medium high heat. When the oil is hot, but not smoking, carefully drop the salmon on the pan, skin side down. Depending on the thickness of the salmon, cook for about 5 – 6 minutes watching the color change on the cut side of the flesh. When the color changes for 3/4 of the salmon, flip the salmon over and continue cooking for about 2 more minutes. This is called unilateral (uneven) cooking and ensures a crispy skin.  I usually   flake off a piece of the salmon with a fork to inspect for doneness.  A meat thermometer can also be used.  The salmon is done when the tiniest sliver of flesh is almost cooked or the temperature is 125F – 130F.  Remove the salmon from the pan and let it rest for at least 5 minutes.  The salmon will continue to cook through. After the salmon is removed, heat the pan back up on medium heat.  Add 1/2 teaspoon of lemon zest, lemon juice, shallot and a pinch of salt.  Stir and simmer until the lemon reduces almost in half, then slowly add slices of cold butter, swirling the pan around to incorporate the butter. Place the salmon on a bed of colcannon. Spoon over the lemon butter sauce.  Sprinkle some reserved green or spring onion on top for garnish. DSC_7019

Mango Salsa

Mangoes are one of my favorite fruits. I’ve been patiently waiting for mangoes to be in season. There are six different types of mangoes and each are in season during different months during the year:

  • Ataulfo
  • Francis
  • Haden
  • Keitt
  • Kent
  • Tommy Atkins

Right now, the Kent mangos are in season (January through March) and the season has just started for Ataulfo mangoes (March through July).

Mangoes are rich in vitamins C and A, potassium and fiber, and also contain a small amount of vitamin B-6, magnesium, iron and calcium. Mangoes contain the nutrient, beta-carotene and the antioxidant zeaxanthin, which filters out harmful blue light rays and is thought to protect against macular degeneration of the eye.

This sweet fruit is versatile; it can be enjoyed in desserts and in savory dishes. The key to enjoying a mango is knowing when it’s ripe. Those who are patient and allow the mango to sit on the counter at room temperature for 2 – 4 days to ripen are rewarded with tender, juicy and sweet flesh. Those who prematurely bite into an unripe mango may find it unpleasantly stringy and sour.

Here are some tips on how to pick a good mango: http://www.wikihow.com/Pick-a-Good-Mango

Now that you’ve picked a good mango, here’s how to cut it: http://www.simplyrecipes.com/recipes/how_to_cut_a_mango/

Serving size: 4

Ingredients:

  • 1 large ripe mango, peeled, pitted and diced
  • 1/4 cup red onion, finely chopped
  • 1 cup English cucumber, diced
  • 1 small Jalapeno pepper, seeded and minced
  • 1 red bell pepper, seeded and finely copped
  • 1/4 teaspoon freshly grated lime zest
  • 1/4 cup fresh lime juice
  • 1/4 cup fresh cilantro, finely chopped (optional)
  • Kosher salt & pepper to taste

Directions:

In a bowl, combine only half of the Jalapeno pepper with all of the ingredients. Taste and add more of the Jalapeno pepper based on taste. Cover and refrigerate at least 30 minutes.

Serve with chips or as a condiment over Fish Tacos with Mango Salsa or Vegetarian Tofu Tacos with Mango Salsa.

IMG_8474

Cod Baked with Tomatoes, Artichokes and Lemon (Psari Plaki)

Psari Plaki is a traditional Greek style of baking fish with olive oil, tomatoes and vegetables. The Hungry Athlete’s version is cooked in parchment paper and was inspired by one of my father’s best friends and tennis partner, Gene Cohen. Gene owned the Somerville Inn, a New Jersey restaurant and banquet hall, with his wife Barbara. Both had passed away over 20 years ago. Barbara Cohen was a successful children’s book writer. Her first book, The Carp in the Bathtub, is a childhood favorite of mine. I have a fond memory of Barbara reading this book to me. Barbara also introduced me to my first peach. She had a gentle way about her and taught me not to be afraid of the fuzzy fruit. I attempted  to eat three that day. If you are looking for good children’s books, I highly recommend her books. Here’s more about Barbara:

http://jwa.org/encyclopedia/article/cohen-barbara

One summer, my family was invited to the Jersey shore by the Cohens. Mr. Cohen prepared one of the most delicious fish I ever had as a child.  Whenever my father dined with friends at the Somerville Inn, Gene would not allow my father to order from the menu.  Gene insisted on asking my father what he felt like eating and my father always answered” You surprise me”.  My father told me that he “had wonderful meals, not from the menu.”

We must have had insatiable and disappointed eyes after we devoured the fish because Gene immediately ran out to buy more. When he returned with more fresh fish, Gene had my father’s and my undivided attention. Although we studied how Gene created this heavenly dish, all I remember now is that the fish was cooked in a tomato sauce, with possibly ketchup added, and wrapped in aluminum foil. But more than 30 years later, I remember how it tasted,

In my first few attempts to replicate Gene’s recipe, I experimented preparing the fish with canned diced tomatoes and ketchup. It didn’t achieve the flavors I remembered. Ketchup also has too much sugar in it so I substituted it with tomato paste. Next, I exchanged canned tomatoes for fresh tomatoes. The Jersey shore has lots of wonderful fresh tomatoes in the summer so I suspect Gene used fresh tomatoes. I also replaced the aluminum foil with parchment paper. The foil can react to and possibly impact the flavor of acidic ingredients, such as tomatoes, white wine and lemon juice.

Although my tongue cannot confirm for sure if I replicated the flavors from 30 years ago, I think it’s fairly close. With every bite, I am brought back to that evening, at the Jersey shore with Gene and Barbara Cohen, who introduced me to new foods when I was a child and who were great family friends.  No carp in the bathtub here, only cod in parchment.

Serving size: 2 

Ingredients:

  • 1 pound cod or halibut, cut in half
  • 1/2 cup of olive oil
  • 1 medium red onion (about 1 cup), sliced thin
  • 4 cloves of garlic, sliced
  • 1/2 cup white wine
  • 2 tablespoons tomato paste
  • 1 1/2 cups yellow and red grape tomatoes, cut in half lengthwise
  • 1/2 cup of rough chopped parsley
  • 2 sprigs of fresh thyme
  • 2 springs of fresh oregano
  • 2 teaspoons freshly grated lemon zest
  • 2 lemons, cut each lemon into 2 thin slices (4 slices in total) and then juice both lemons (about 1/2 cup lemon juice)
  • salt
  • pepper
  • 1 cup canned artichoke hearts, drained and cut in halves

Directions:

Preheat oven to 350F.

Inspect the fish for bones. I keep a tweezer in the kitchen specifically for removing small fish bones. After removing any bones, rinse the fish and pat it dry with paper towels. The fish should be dry to absorb all the great flavors you will be adding to it later. Set the fish aside. The fish should be covered and returned to the refrigerator if you have not prepared all the vegetables in advance.

In a fry pan over medium heat, sauté sliced red onion and sliced garlic in 1/4 cup of olive oil until tender and fragrant.

DSC_6908

Stir together tomato paste and white wine, then add the mixture to the onion and garlic.

Add the tomatoes and lemon zest. Season with salt and pepper, then continue to sauté for 5 minutes or until sauce thickens.  Stir in the fresh parsley, then remove it from the heat and set aside.

DSC_6910

Tear off two generous pieces of parchment paper large enough to wrap the fish with the tomatoes, onion and artichokes. To prepare the parchment packets, place one tablespoon of olive oil in the middle of each piece of parchment paper, then place the fish on top of the olive oil. Spoon another tablespoon of olive oil on top of the fish and pour 1/4 cup lemon juice on top of each fish fillet. Season the fish well with salt and pepper.  Next, place one sprig of thyme and one sprig of oregano on top of each fish fillet.

IMG_8433

Place 1/2 cup of artichokes around each fish. Finally, spoon the tomato mixture on top of the fish and artichokes. Be careful not to cover the thyme and oregano. This ensures you and your dinner guest will be able to see the herbs and put them on the side of the plate. Nobody really wants to eat whole sprig of thyme or oregano.

Wrap the parchment paper around the fish and ensure the edges are enclosed tightly. Here’s a video demonstrating how to wrap the fish the proper French way: http://www.finecooking.com/videos/fish-in-parchment.aspx . This method ensures the steam is trapped inside the packet, however when I’m in a rush, I wrap the fish by turning the fish so it’s longest horizontally.  I then grab the top and bottom ends of the parchment paper and and turn over the edges over a couple of times. Just make sure to fold it tightly together. Next I fold the long ends in, forming a triangle, like wrapping a present.  Lastly, I tuck in the triangle ends under the fish.

DSC_6724

DSC_6725

Bake for 15 minutes or more depending on the thickness of the fish. You can serve the fish in the parchment packet. Just cut a slit down the top of the paper to reveal the fish or you can carefully remove it from the parchment paper. Remember to tell your dinner guests to remove the sprigs of thyme and oregano.

Serve with brown rice or a Greek salad.

DSC_6907

IMG_8435

IMG_8443


Pomegranate and Roasted Lemon Salad

Have you seen Fifty Shades of Grey yet?  Well if you have the urge to smack something with the back of a spoon, may I recommend a pomegranate?  You can then add the luscious pomegranate arils (seeds) to my Pomegranate and Roasted Lemon Salad.

Winter’s fruits, the pomegranates and lemon together in a salad create a burst of bright flavors with every bite.  The lemon contains as much vitamin C as an orange and is one of the most nutrient dense fruits.  The rind contains the most nutrition.  Blanching then roasting the lemon eliminates the bitterness.  The pomegranate contains anti-inflammatory phytochemicals and antioxidants. Studies suggest the pomegranate fruit may help prevent or alleviate heart disease and atherosclerosis; high cholesterol; prostate cancer; and Alzheimer’s disease.

Don’t be intimidated by the pomegranate.  Here’s how to remove it’s arils quickly and easily: http://greatist.com/eat/pomegranate-deseed-trick

Serving size: 4 side salads or 2 meal size salads

Ingredients:

  • 1/4 cup and 1 tablespoons olive oil
  • 4 cups of mixed greens*
  • 2 large lemons (1 sliced lemon and juice of 1 lemon, about 1/4 cup)
  • 1 cup small assorted tomatoes, cut in half
  • 1/3 cup of pomegranate arils (seeds)
  • 1 medium red onion, sliced thin
  • 1 tablespoon balsamic vinegar
  • 1 tablespoon honey
  • salt & pepper
  • grilled or poached chicken (optional)

* Try using roasted Brussels sprouts.  My original recipe uses Brussels sprouts instead of mixed greens.  The recipe is here: Roasted Brussels Sprout with Lemon and Pomegranate

Directions:

Preheat oven to 425F

Wash the lemons well then slice one lemon into thin rounds. Place the lemon slices into a pot of boiling water. Blanch the lemon slices for 2 minutes. This will eliminate the bitterness from the rind. Remove the lemon slices from the boiling water and lay on a baking sheet lined with aluminum foil. Coat the lemon slices in 1 tablespoon of olive oil then roast for about 10-15 minutes until they start to caramelize a little.

Allow the lemon slices to cool slightly, then cut the slices in half.

In a measuring cup or small bowl, prepare the dressing by whisking together the remaining 1/4 cup of olive oil, the juice of the remaining lemon (about 1/4 cup), balsamic vinegar, honey and a pinch of salt and pepper.

In a medium bowl, toss the mixed greens, tomatoes and red onion slices in the dressing. Transfer to a serving bowl.  Decorate the top of the salad with the lemon slices and pomegranate arils.  Add either grilled or poached chicken to make this a meal.  This salad also accompanies a big bowl of soup nicely.

Swap out the Brussels sprouts with mixed greens for a salad with brightness in every bite.

Eggs with Garlicky Spinach & Tomatoes

I try to eat some protein and a nutrient dense vegetable in the morning as often as I can.  One of the easiest and fastest breakfasts to prepare are my Eggs with Garlicky Spinach & Tomatoes. According to the CDC, spinach is one of the top 5 most nutrient dense vegetable and tomatoes are one of the top 3 most nutrient dense fruits: CDC Nutrient List of Nutrient Dense Fruits & Vegetables

Serving Size: 1

INGREDIENTS:

  • 2 eggs
  • 2 tablespoons olive oil
  • 2 small cloves or 1 large clove of garlic, peeled, smashed and rough chopped
  • 2 heaping cups of fresh baby spinach
  • 1/3 cup of cherry tomatoes
  • juice of 1/2 of a lemon
  • salt and pepper
  • Worcestershire sauce (optional)

PREPPING IN ADVANCE:

To spare every precious minute in the morning, I prepare as much as possible the night before. I begin by washing and drying the spinach, tomatoes and lemon. I was taught by my wonderful home economics teacher, Mrs. Pfromm, to always wash the outside of all of my fruits before storing them in the refrigerator. I do this for citrus and apples but not berries. I only wash berries before I use them, otherwise the moisture will cause them to spoil faster.

Slice the tomatoes and lemon, then place them, along with the spinach, in a sealed plastic or glass container. Refrigerate overnight. In a small glass bowl, add smashed and rough chopped garlic with 1 tablespoon of olive oil. Cover with plastic wrap and refrigerate overnight.

DIRECTIONS:

Add 1 tablespoon of olive oil to the frying pan over medium heat. Smash, then rough chop the garlic before adding it to the warm oil. Sauté the garlic for about 1 minute until fragrant. Add the spinach and tomatoes to the garlic and olive oil.  Toss together until the spinach starts to wilt.  Season with salt and pepper, then move the spinach, tomatoes and garlic to one side of the pan.

On the empty half of the pan, add the remaining 1 tablespoon of olive oil. Fry the eggs on that side of the pan. Then cover the eggs and spinach. The egg only needs 1 or 2 minutes to cook when covered. The eggs can be prepared sunny side up, over easy or you can even poach the eggs in a separate pot. Just before removing the eggs, squeeze 1/2 of a lemon over the spinach and tomatoes.

Serve the eggs either to the side or over a bed of spinach and tomatoes.  I like to add a couple dashes of Worcestershire sauce to the top of the eggs.  I learned this from my parents growing up and have always eaten my fried eggs with Worcestershire sauce.  Give it a try.  It’s delicious.

DSC_6886

DSC_6889

Asian Pasta Salad

My Asian Pasta Salad is one of my go-to recipes when I need a dish that can be prepared in advance and left sitting at room temperature for a few hours without refrigeration. I make this dish for picnics, to bring to work for lunch and most recently at this weekend’s Super Bowl party.

This recipe includes one of my favorite vegetables, the sugar snap pea. Developed in 1979, the sugar snap pea is a relatively new food, and a hybrid of green peas and snow peas. They are sweet, crunchy, easy to chew, and a good source of fiber, iron, potassium and vitamin C.

Serving size: 6

Ingredients:

  • 12 ounces whole wheat angel hair or spaghetti noodles, cooked (optional gluten-free pasta)
  • 2 medium carrots, shredded
  • 1 red bell pepper, seeded and thinly sliced
  • 1 yellow bell pepper, seeded and thinly sliced
  • 3 cups sugar snap peas
  • 5 scallion (green onion) stalks, green and white parts finely diced
  • ¼ cup light soy sauce
  • 1 tablespoon honey
  • 1 teaspoon hot chili oil (add more if you like it spicier)
  • 2 tablespoons rice wine vinegar (can substitute with white vinegar)
  • 1 teaspoon freshly grated ginger
  • 3 tablespoons canola oil
  • 2 teaspoons sesame oil
  • 2 tablespoons black sesame seeds (optional)
  • 3 cups of grilled chicken (optional)

Cook the pasta noodles in salted boiling water, stirring frequently during the first couple of minutes, then occasionally to ensure the noodles do not stick together. Cook it until it is “al dente”. Drain and rinse in cold water to stop the cooking process. Place in large mixing bowl.

Add carrots, peppers and sugar snap peas to the pasta bowl. Reserve a tablespoon of scallions to use for garnish later and add the rest of the scallions to the pasta bowl.

In a measuring cup or small bowl, whisk together soy sauce, chili oil, vinegar, grated ginger, canola oil and sesame oil. Reserve 1 teaspoon of sesame seeds to use for garnish later and add the rest to the soy sauce dressing.

Add the dressing to the pasta bowl and toss thoroughly to ensure all the pasta and vegetables are coated with the dressing. Sometimes it’s easier to use clean hands to toss the pasta. The pasta can be served immediately, however I like to cover it and let it sit in the refrigerator for a couple hours to give the pasta a chance to absorb the dressing. Toss the pasta after removing it from the refrigerator. Sprinkle with reserved scallions and sesame seeds before serving.

DSC_4929

DSC_6848 DSC_6843