Easy Ramen Chicken Soup

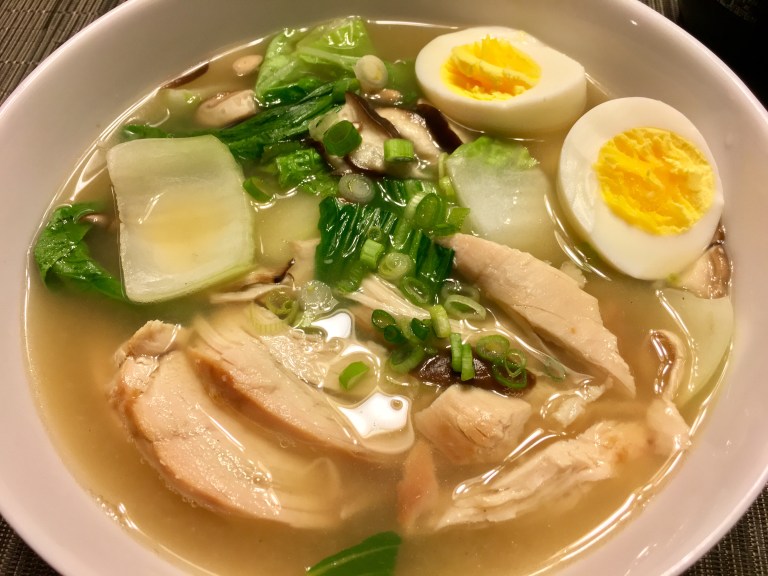
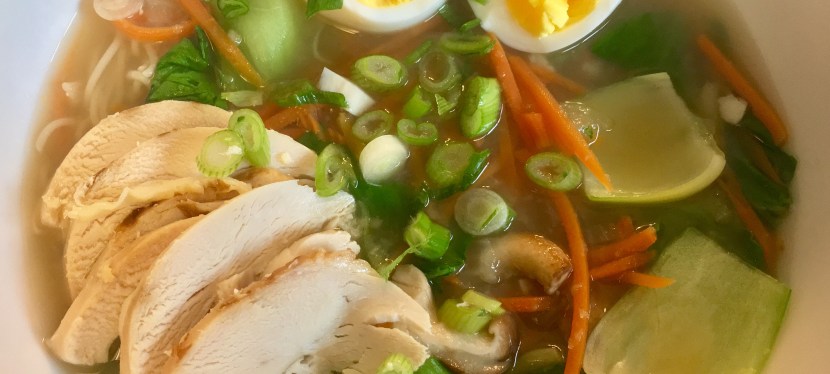
Soup is comfort and love in a bowl. Whenever I visited my parents, one of my mother’s many loving offerings included homemade soup. Today it was my turn to make the offering. My darling came home early from work with a low grade fever and headed straight for bed. I needed to get him some nourishment pronto. It needed to be easy to digest and quick to prepare. A quick assessment of our inventory revealed the usual staples on hand: chicken broth, ramen noodles, eggs, garlic, ginger, scallions and carrots. A fortuitous supply of bok choy, Napa cabbage and shiitake mushrooms left over from another meal spelled out “ramen soup” in my head, in flashing neon lights. I quickly ran off to purchase a store roasted chicken. About 40 minutes in the kitchen later, I offered him love in a bowl.

My version of Easy Ramen Chicken Soup uses both prepared broth and dried seasonings. Traditional Japanese ramen uses fresh noodles and the broth is created over many hours from ingredients like kelp, chicken or pork. Korean style ramen uses dried noodles and dried powdered seasoning. I love both styles so I took a short-cut, combining a bit of both and used a Chinese 5-spice powder. Please forgive me.

Serving size: 4

Ingredients:

  • 1 store roasted chicken, sliced; wings and bones removed and reserved (omit or substitute with tofu for vegetarian version)
  • 2 – 32 ounce low-sodium chicken or vegetable broth
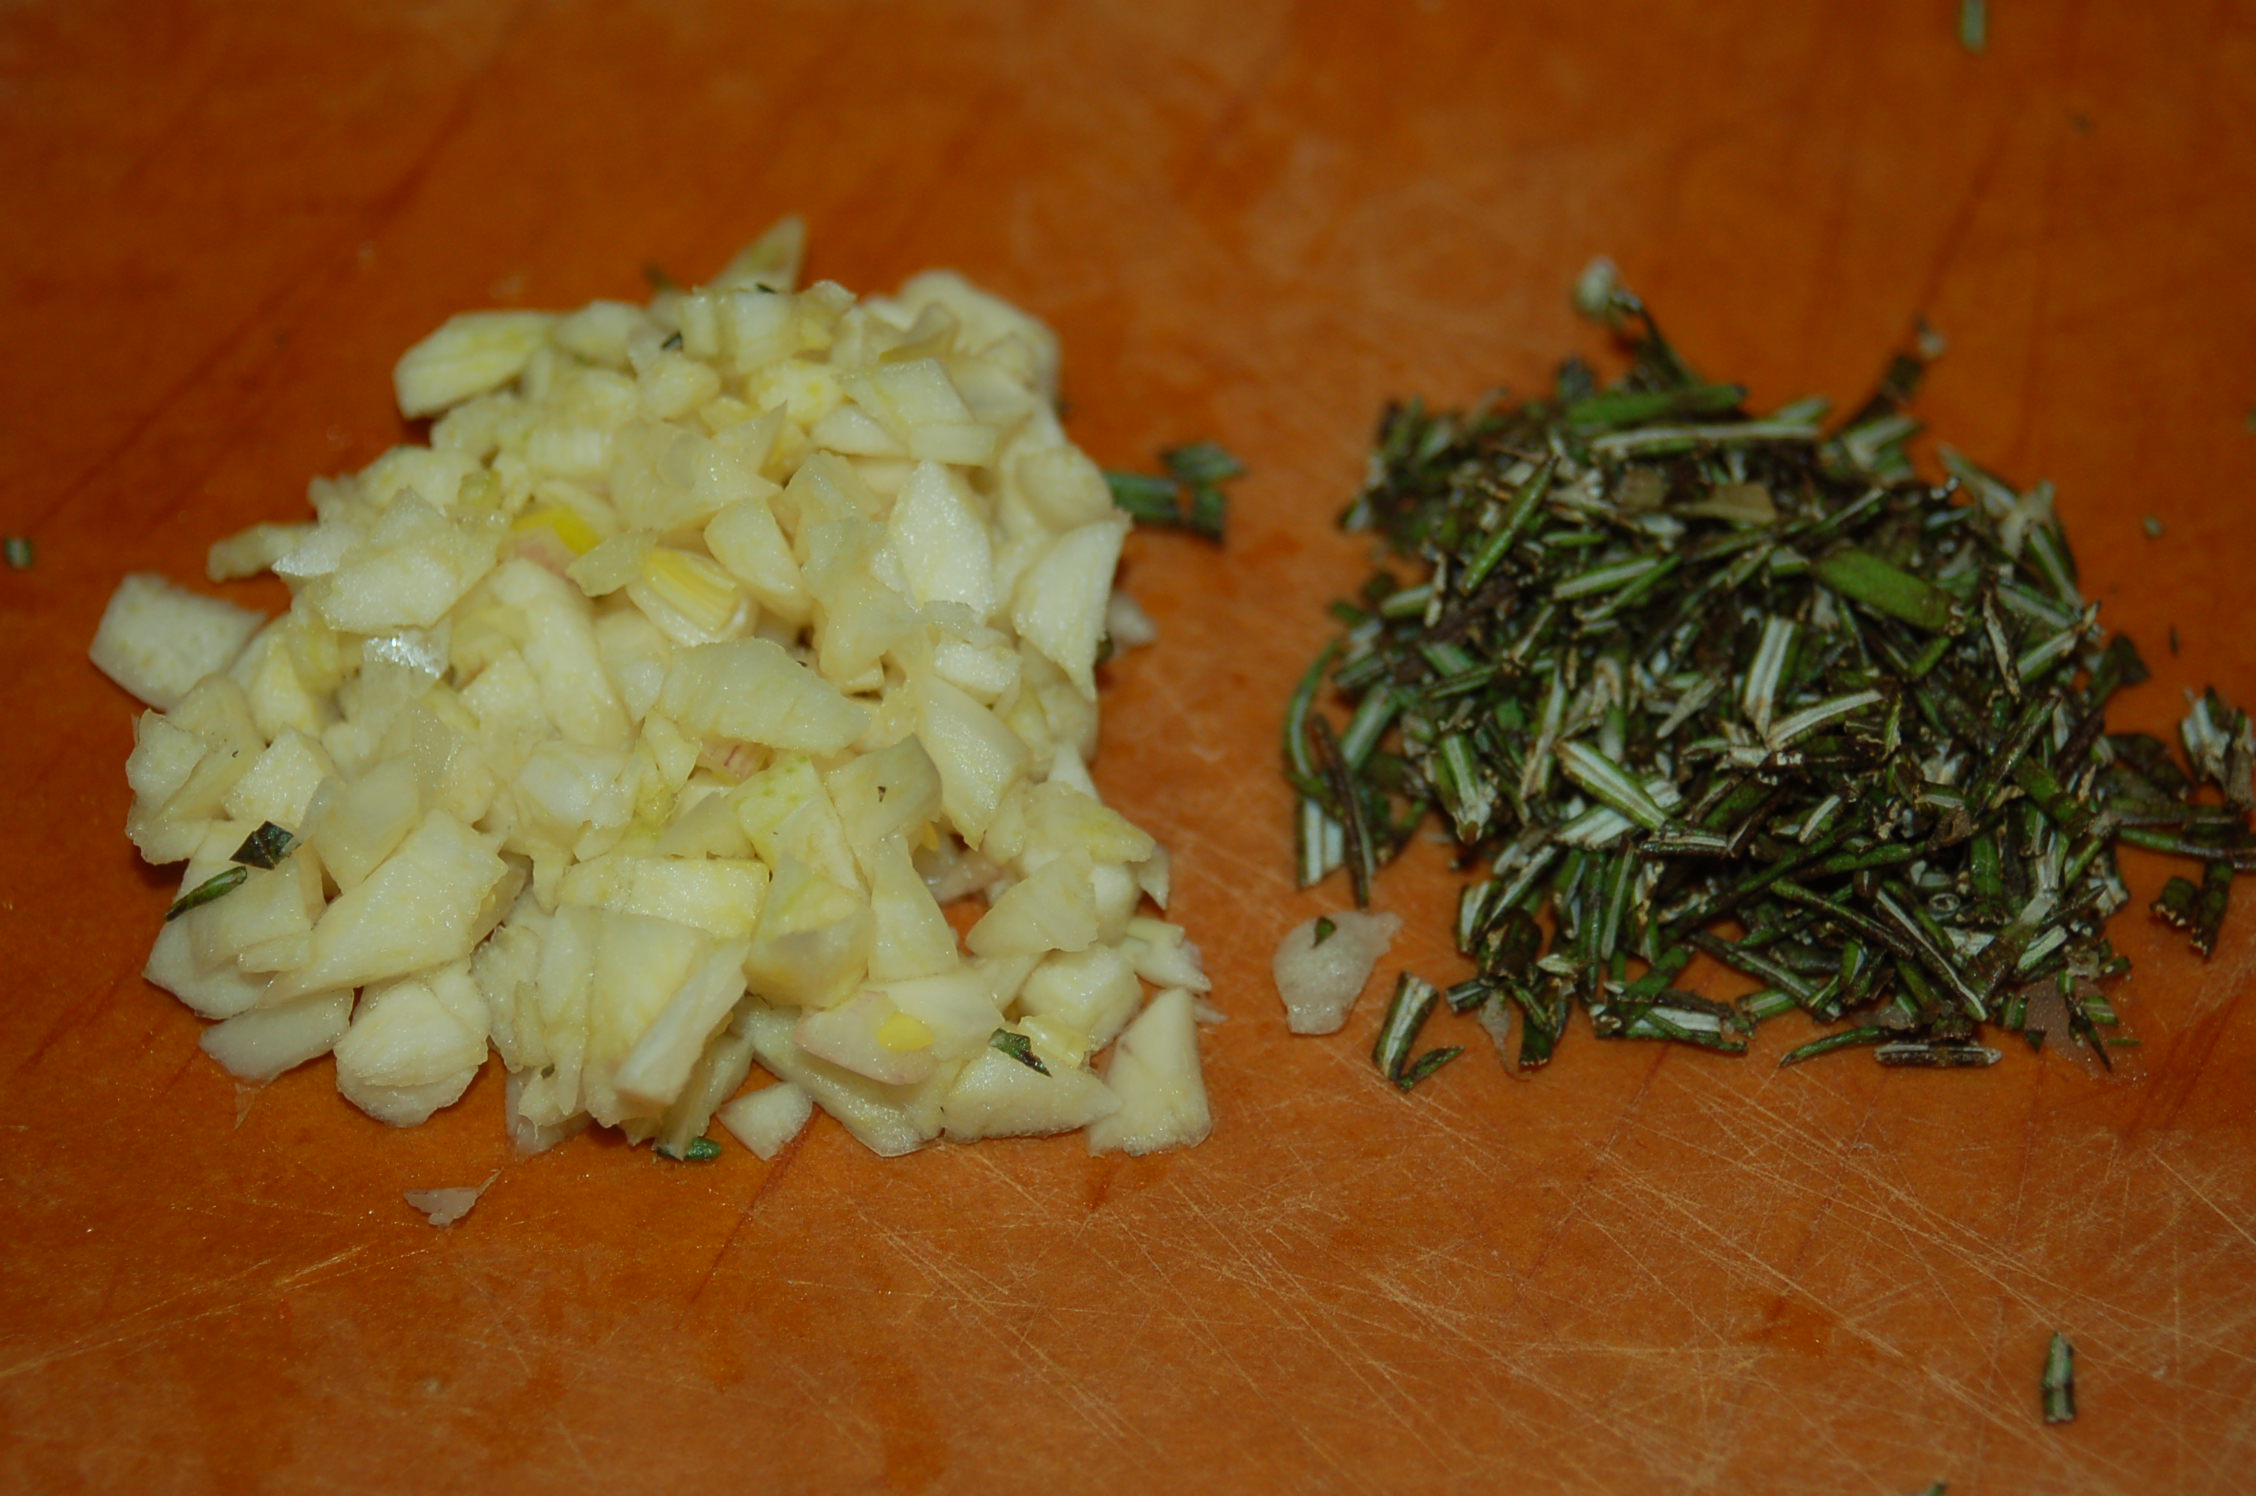
  • 1 tablespoon or about 2 inches of freshly grated ginger
  • 3 cloves of garlic, minced
  • 1 medium onion, sliced
  • 1 – 2 teaspoons of Chinese 5-spice (start with 1 teaspoon and add more to taste)
  • 1/4 cup of low-sodium soy sauce or tamari
  • 4 eggs, rinsed
  • 6 ounces of ramen noodles (I like the millet & brown rice ramen which is gluten-free)
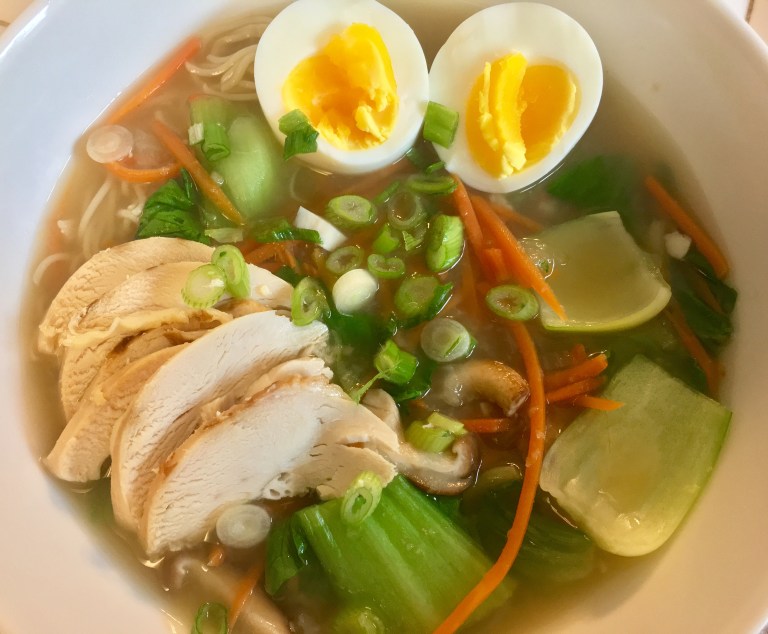
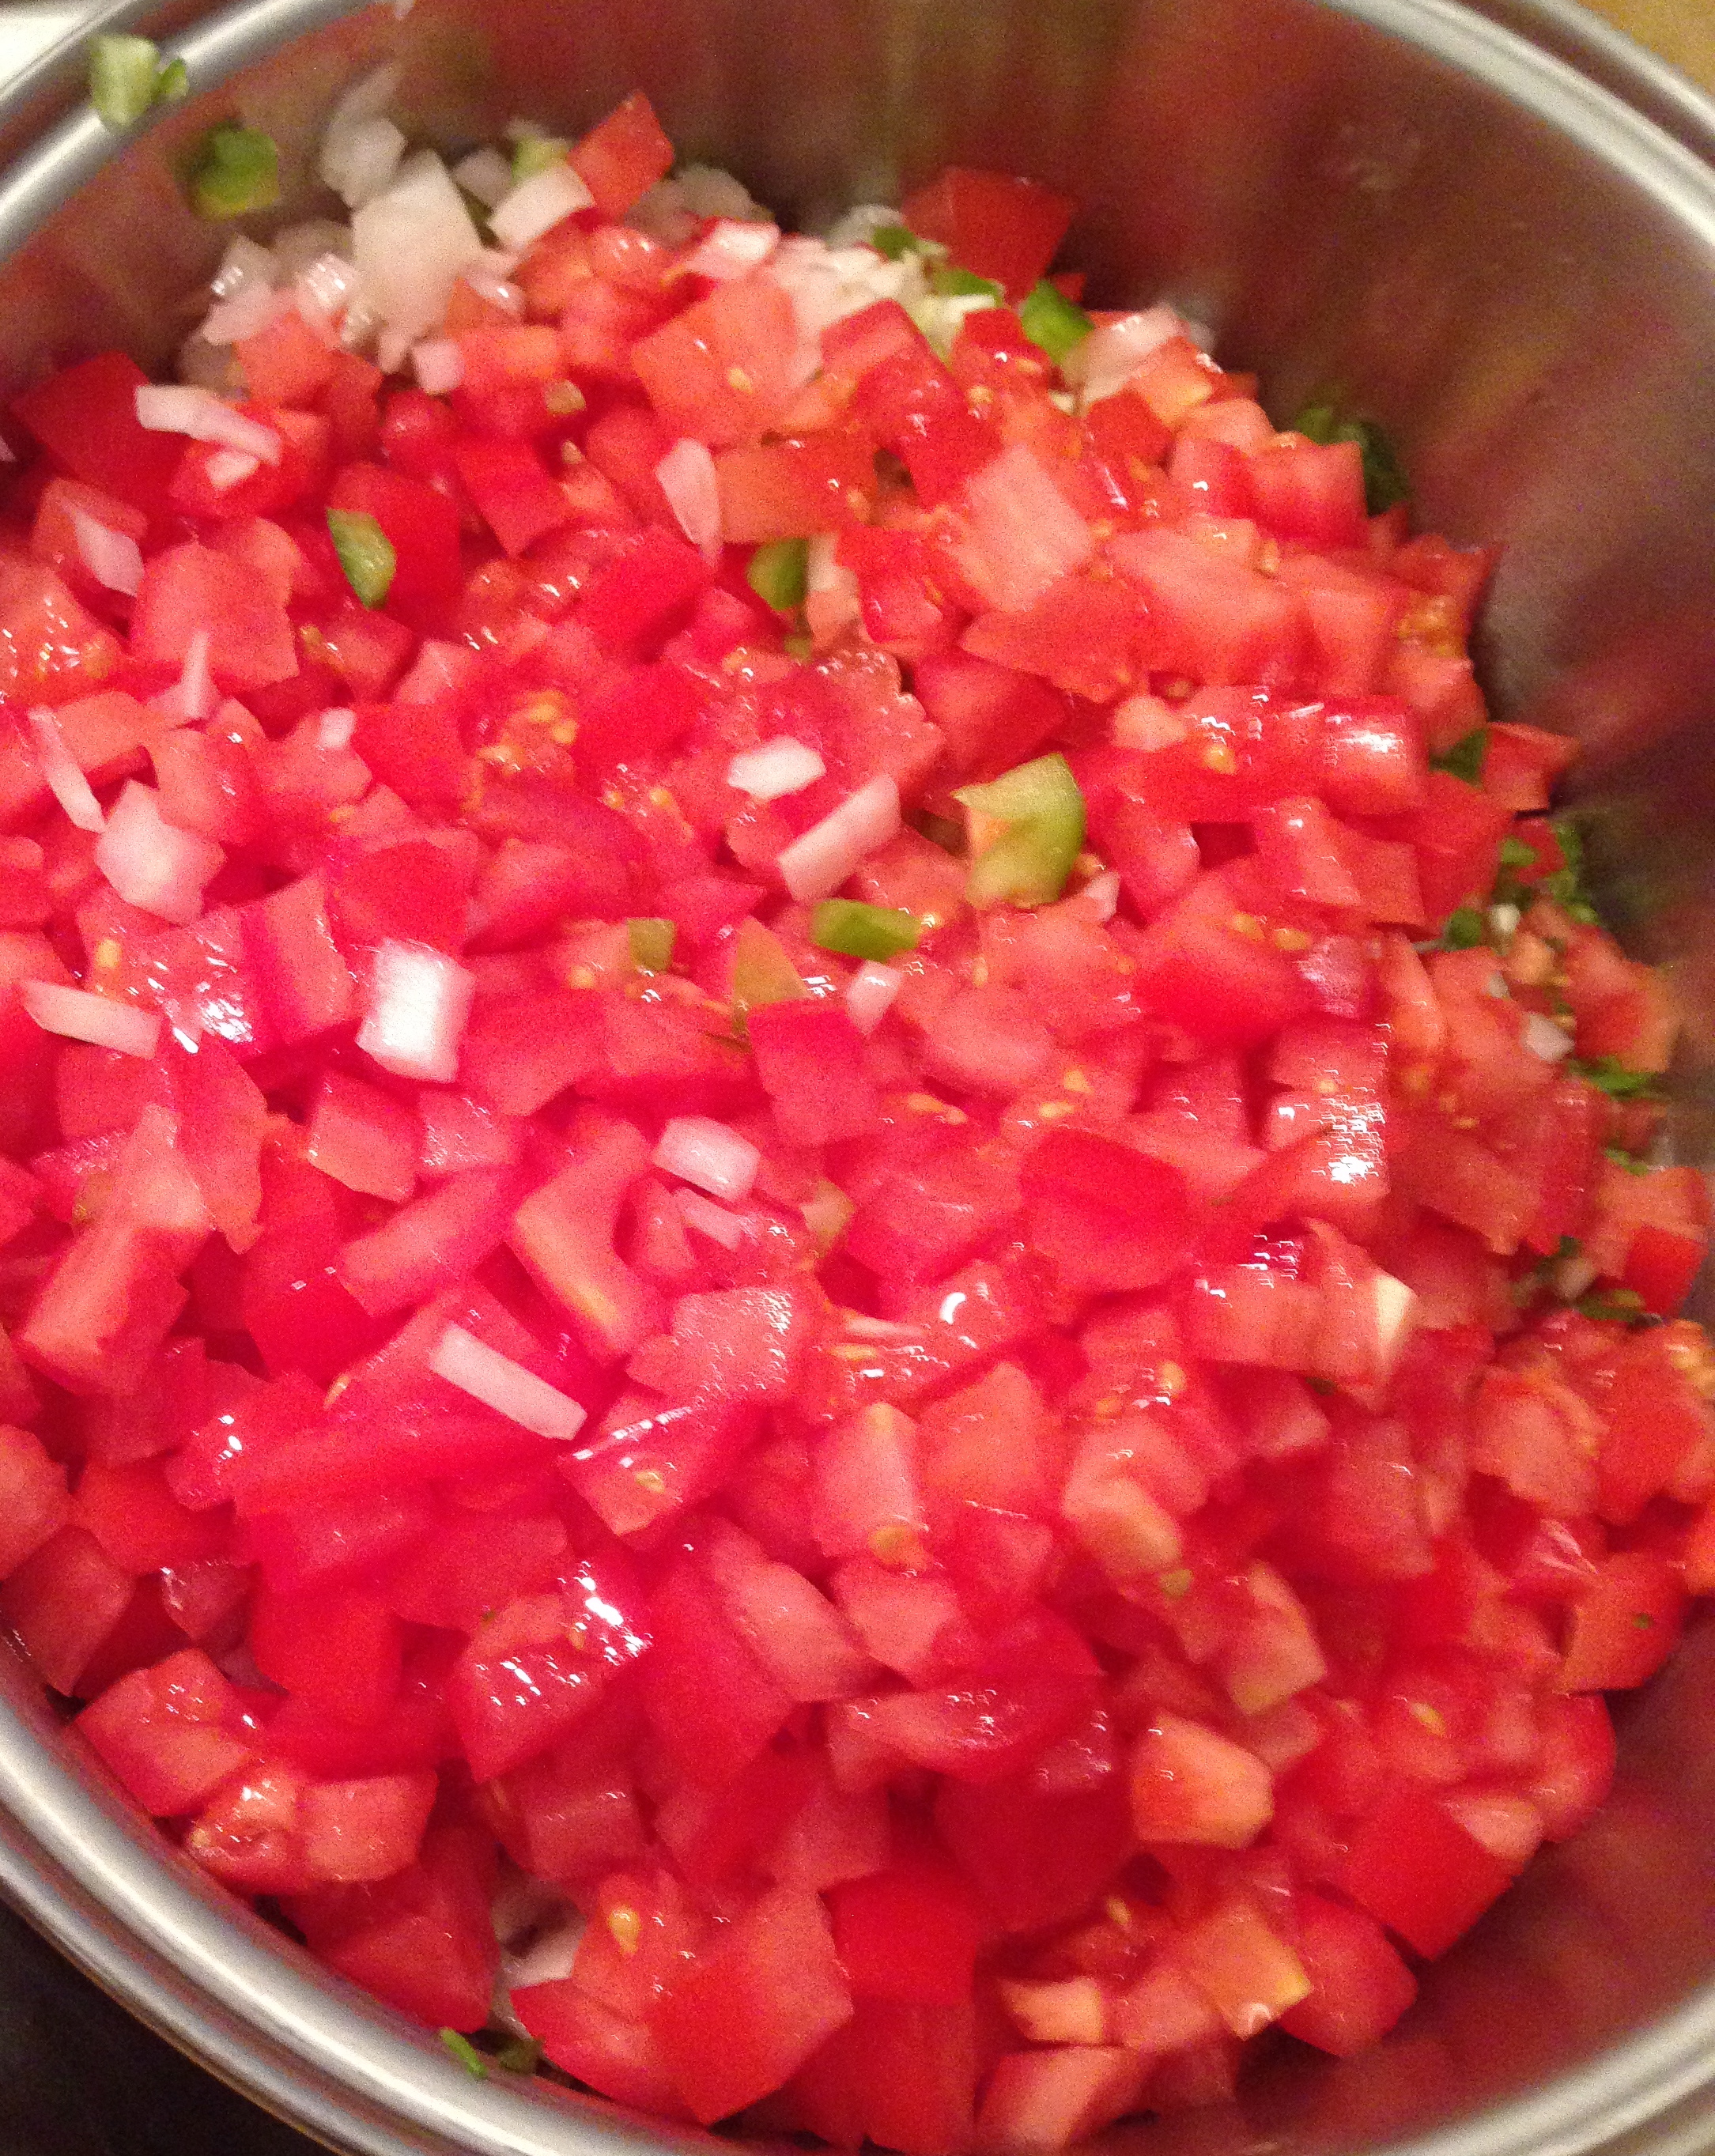
  • 4 cups of bok choy, napa cabbage or baby spinach (rough cut the bok choy or cabbage into 2 inch pieces)
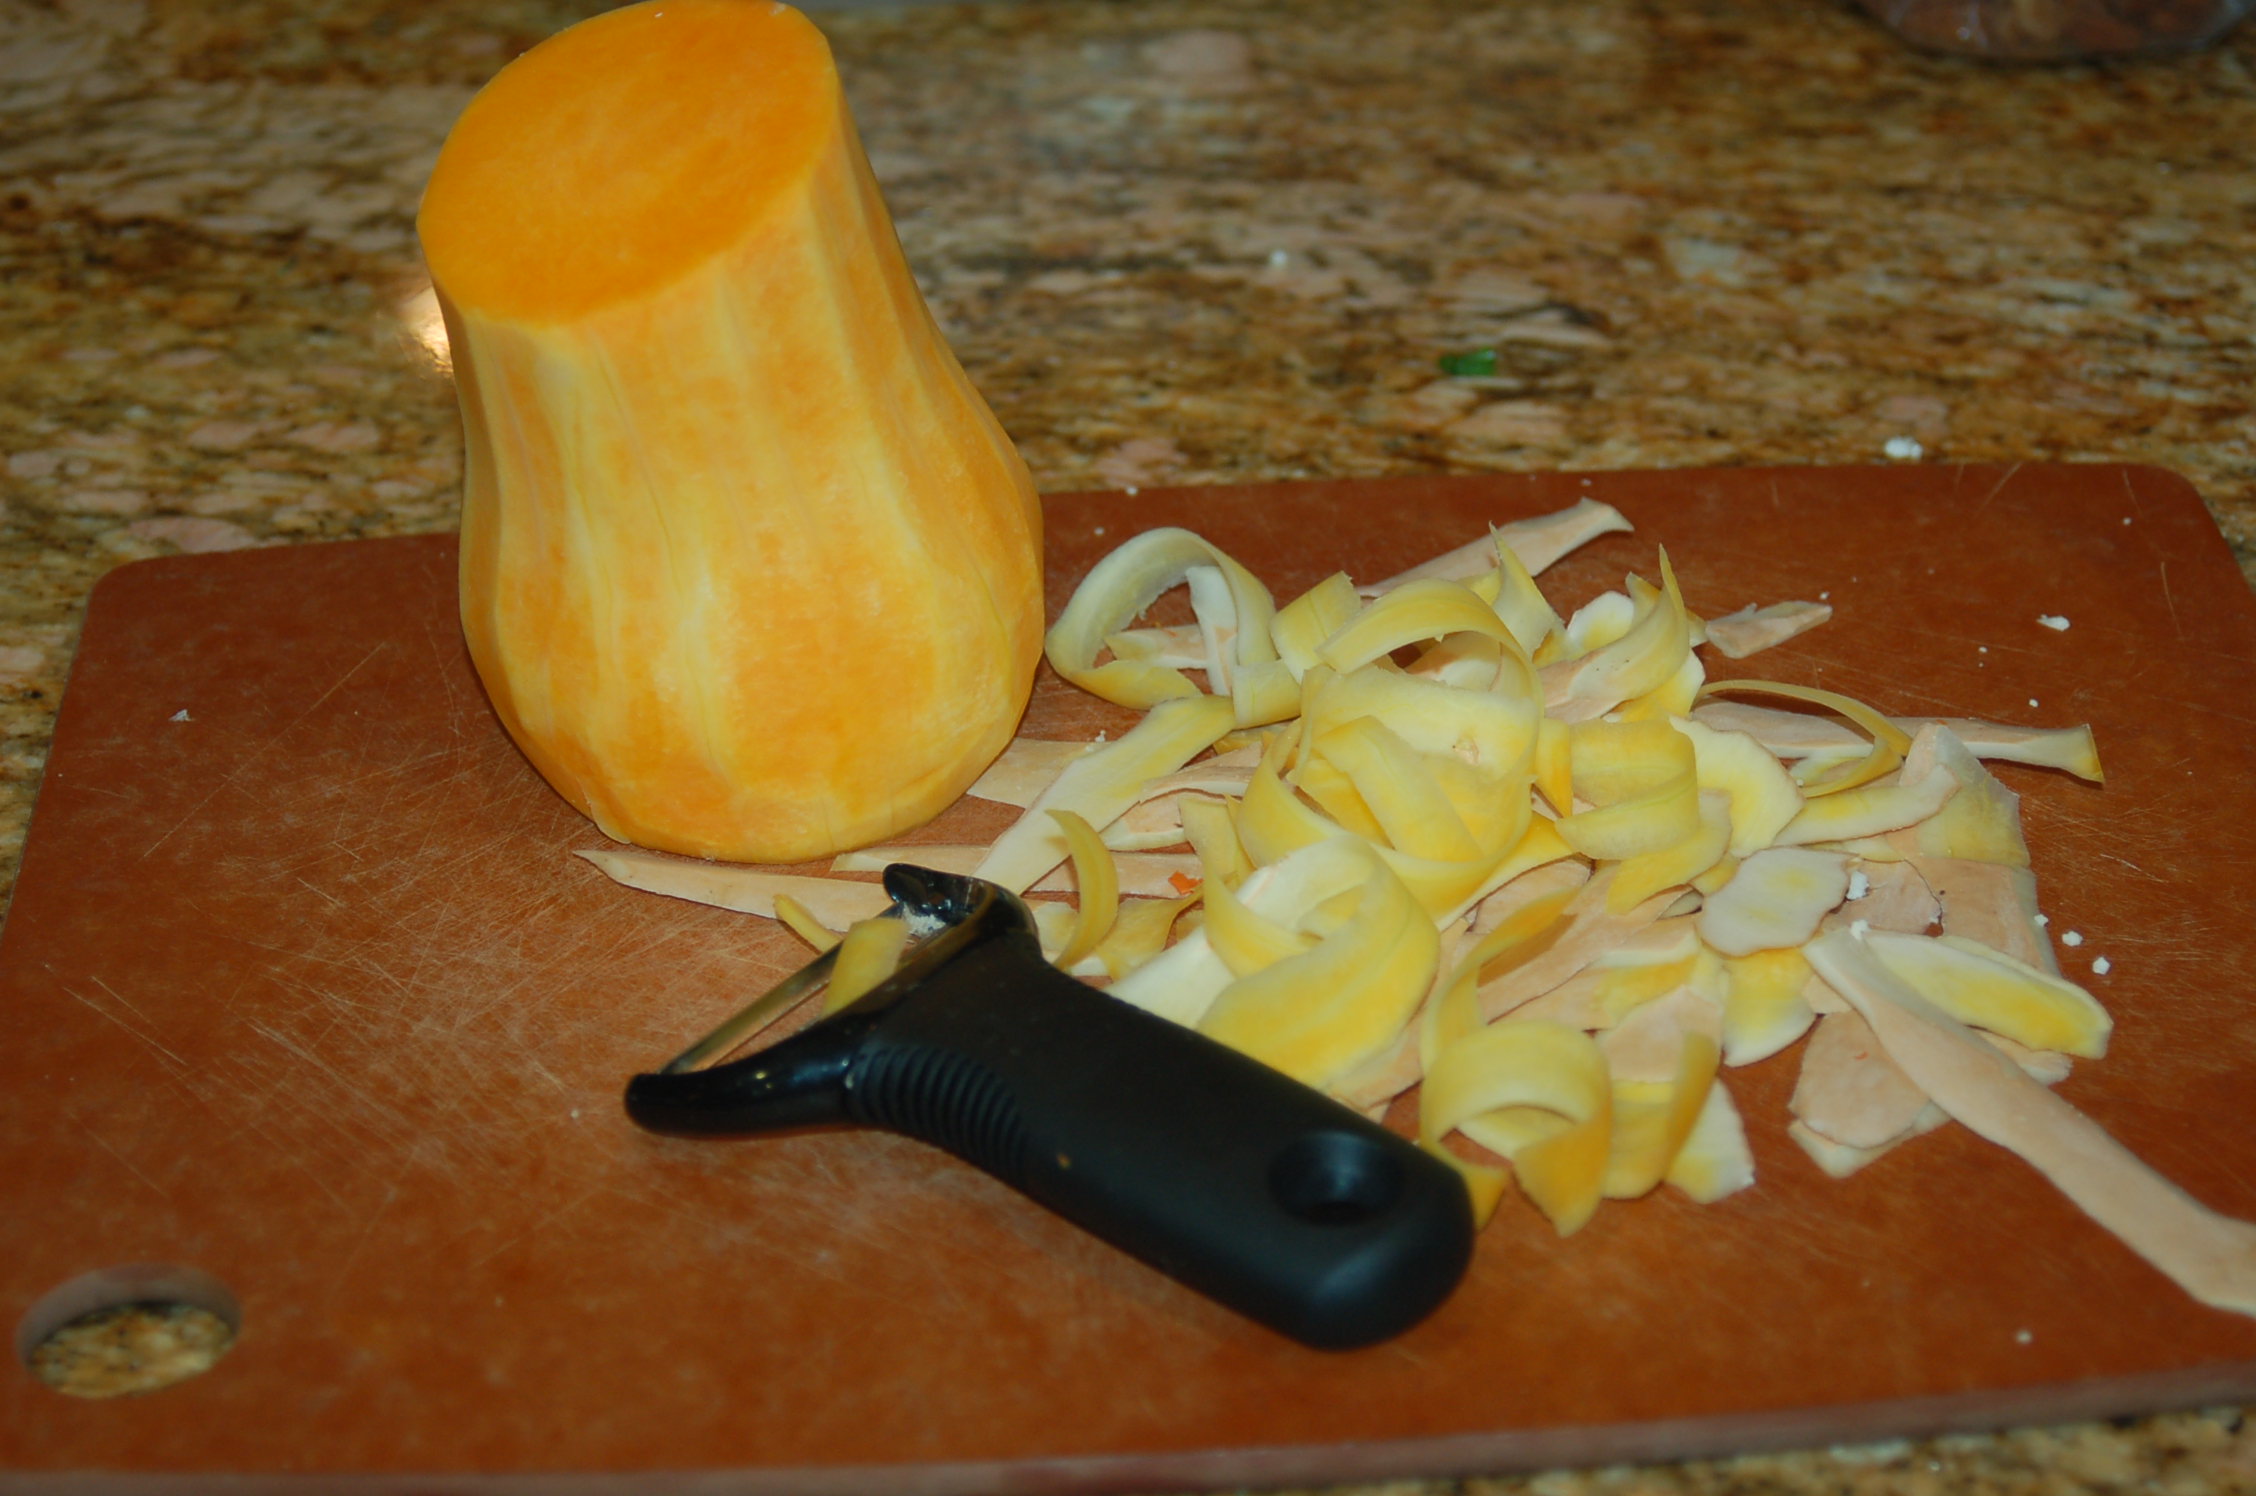
  • 2 cups carrots, grated or cut match stick size (Trader Joe’s sells grated and washed carrots)
  • 12 fresh shiitake mushrooms
  • 2 stalks green onion, thinly sliced
  • hot chili oil or sriracha hot chili sauce (optional)

Directions:

  1. Remove the chicken wings and set aside. Remove the meat from the thigh and leg, and set the bones aside. Careful, the chicken will be hot internally.
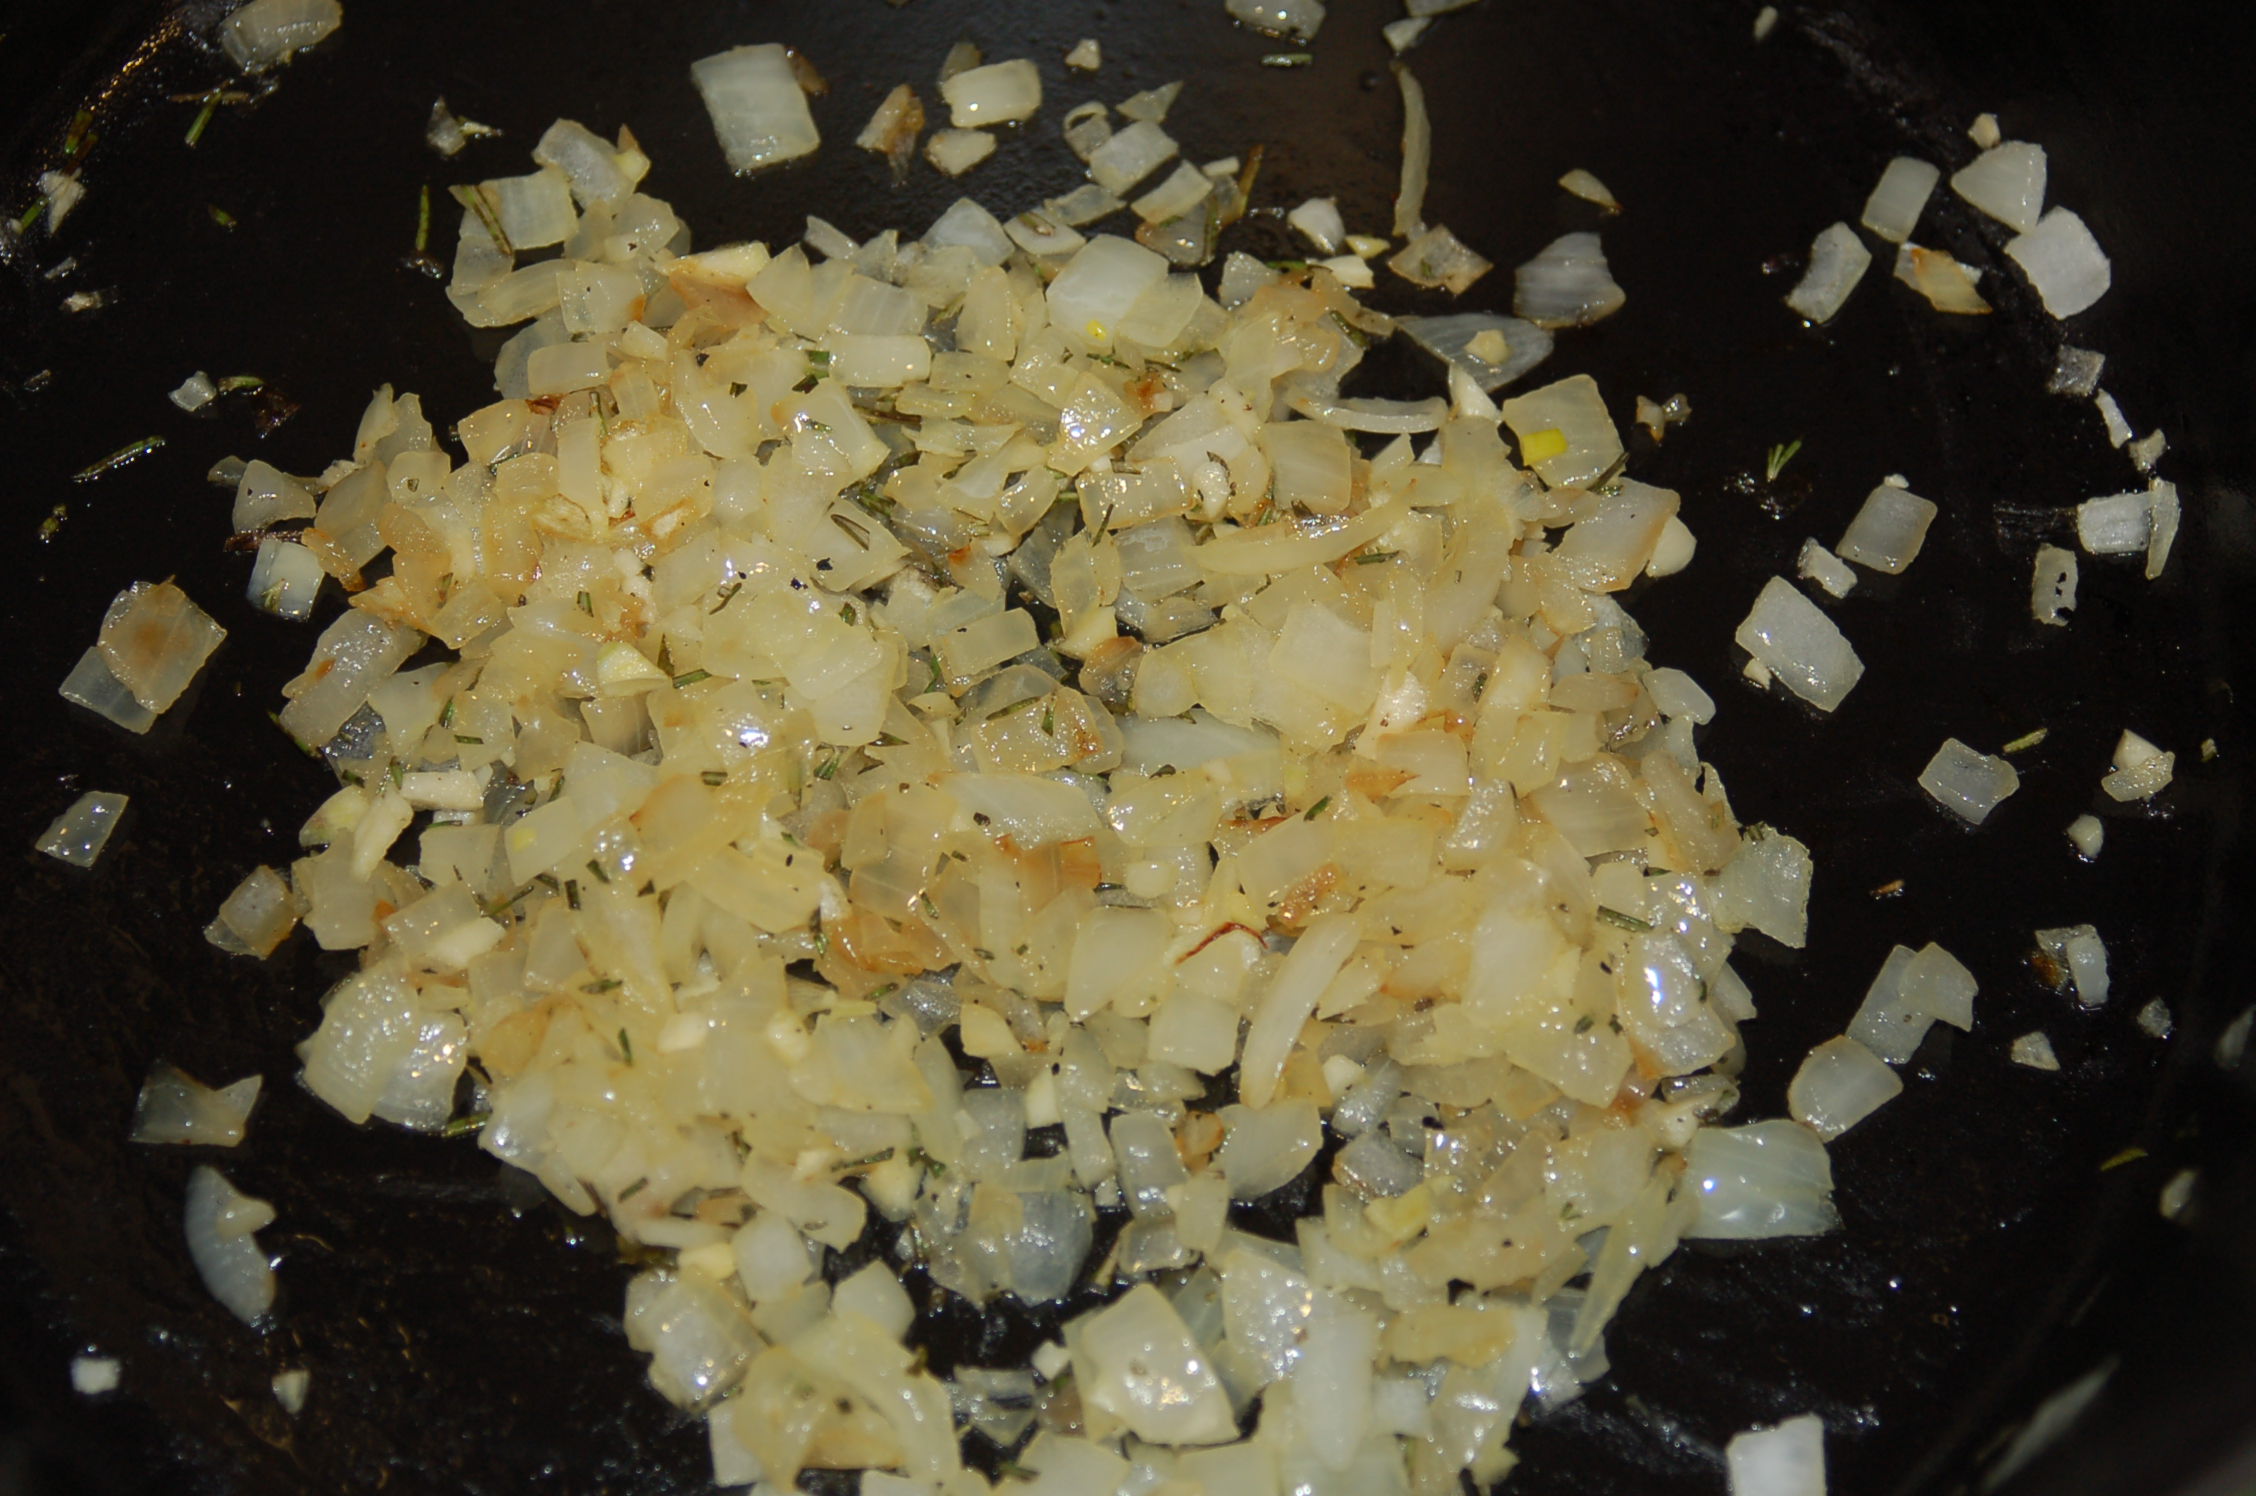
  2. In a medium pot, combine the wings, bones, broth, soy sauce, onions, ginger, garlic and 5-spice. Bring to a boil, then lower to medium-low heat and simmer for about 30 minutes.
  3. In another medium pot, bring water to a boil. Add the rinsed eggs and boil for about 7 – 9 minutes. (I prefer a 7 minute softer boiled egg.) You will want to rinse the eggs before because they will be cooking in the same boiling water as the ramen noodles. Cook the noodles according to package instructions, timing it so the eggs and noodles finish cooking at the same time. For example, the ramen noodles I purchased needed only 4 minutes to cook. So added the eggs to the boiling water and set the kitchen timer for 3 minute. After the eggs cooked for 3 minutes, I added the noodles, and set the timer for an 4 additional minutes.
  4. Once the eggs and noodles are cooked, remove the eggs and place them in cold water. This will make it easier to peel the egg shell.
  5. Using tongs, portion out the noodles into individual large bowls. Rinse out the pot and set it aside to use again. IMG_6241If you are on a gluten-free diet, I recommend this millet and rice ramen noodle brand.  IMG_6239
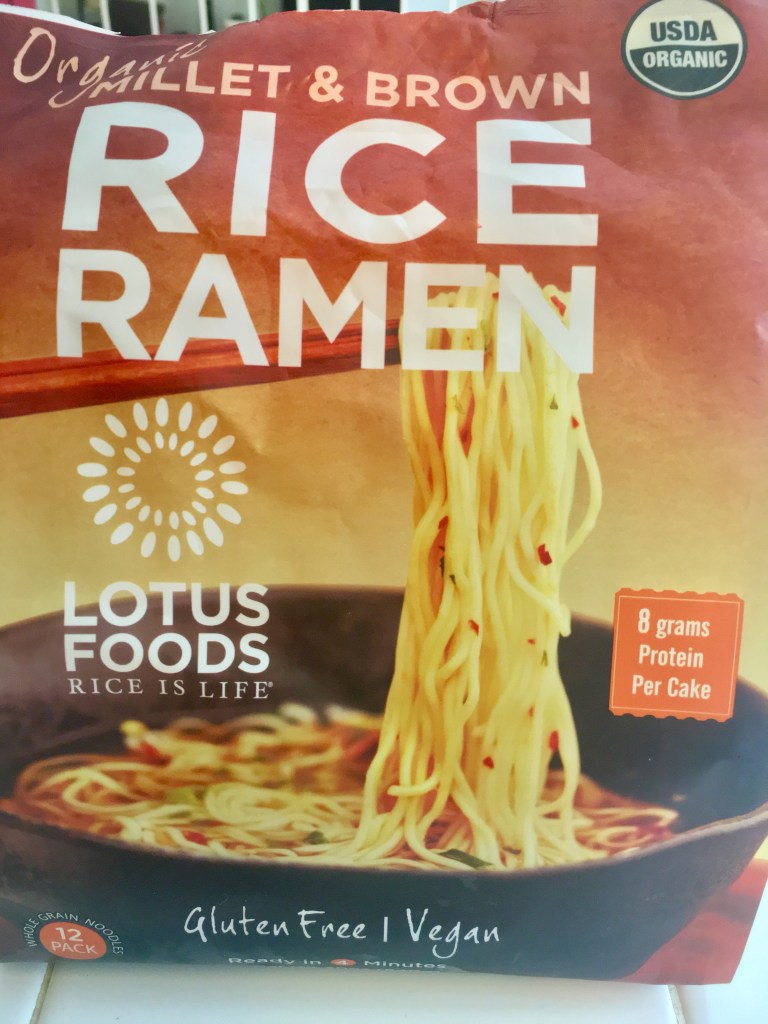
  6. Prepare the vegetables and finish slicing the chicken meat while the broth simmers.    IMG_6237.jpg
  7. Place the chicken on top of the noodles. Remember, a serving size of protein should be the size of a deck of cards (about 3-4 ounces). I tend to consume about 2 ounces or less for myself or I just omit the chicken since the egg is a source of protein.
  8. Peel the eggs and slice in half. Place two halves in each bowl. IMG_6244
  9. Once the broth has been simmering for about 30 minutes, turn off the heat. Place a fine meshed strainer over the empty pot used to boil the noodles and eggs. Carefully ladle the very hot broth over the strainer, transferring all the broth to the other pot. I like to pick out the onions and throw them back into the broth. You might find some good little pieces of chicken meat to toss back in too. Discard the bones and other solids.
  10. Carefully taste the hot broth and adjust the seasoning. You might be tempted to add a little hot chili oil or sriracha sauce too. Turn the heat back on to bring the broth back to a simmer. Toss in the grated carrots, greens and mushrooms. Stir and simmer for 2 minutes to soften the vegetables.
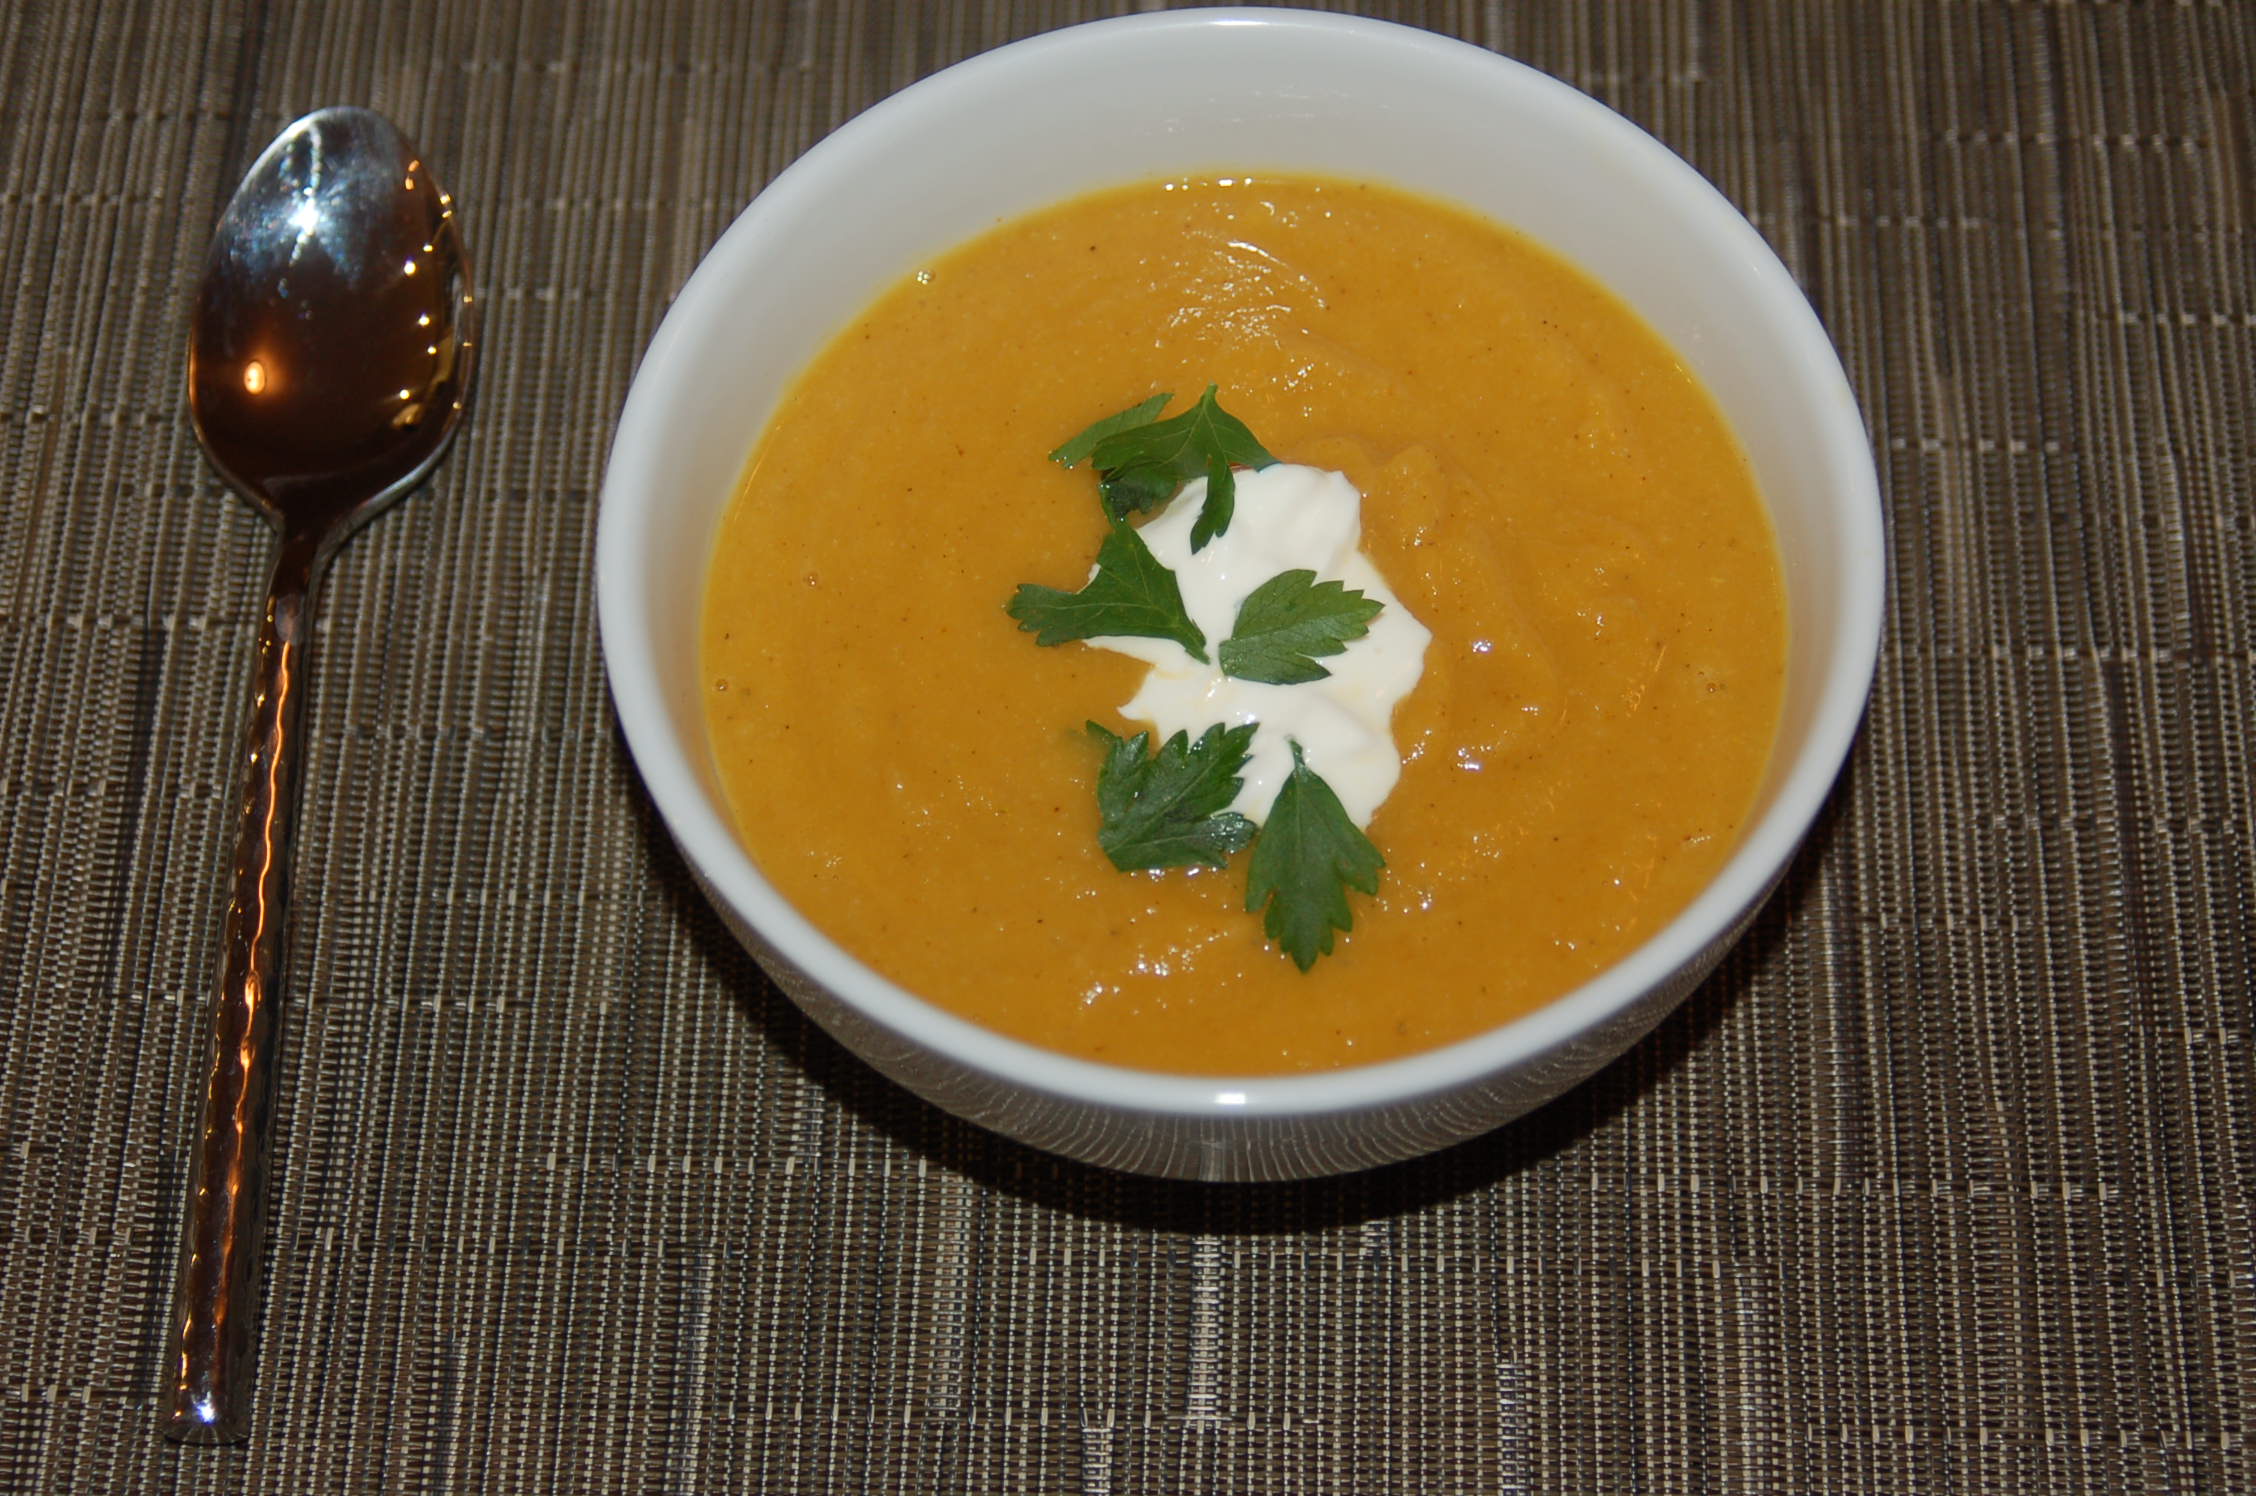
  11. Ladle over the noodles and chicken. Top with sliced green onions. Deliver with love. IMG_6175 IMG_6251


Mango Salsa

Mangoes are one of my favorite fruits. I’ve been patiently waiting for mangoes to be in season. There are six different types of mangoes and each are in season during different months during the year:

  • Ataulfo
  • Francis
  • Haden
  • Keitt
  • Kent
  • Tommy Atkins

Right now, the Kent mangos are in season (January through March) and the season has just started for Ataulfo mangoes (March through July).

Mangoes are rich in vitamins C and A, potassium and fiber, and also contain a small amount of vitamin B-6, magnesium, iron and calcium. Mangoes contain the nutrient, beta-carotene and the antioxidant zeaxanthin, which filters out harmful blue light rays and is thought to protect against macular degeneration of the eye.

This sweet fruit is versatile; it can be enjoyed in desserts and in savory dishes. The key to enjoying a mango is knowing when it’s ripe. Those who are patient and allow the mango to sit on the counter at room temperature for 2 – 4 days to ripen are rewarded with tender, juicy and sweet flesh. Those who prematurely bite into an unripe mango may find it unpleasantly stringy and sour.

Here are some tips on how to pick a good mango: http://www.wikihow.com/Pick-a-Good-Mango

Now that you’ve picked a good mango, here’s how to cut it: http://www.simplyrecipes.com/recipes/how_to_cut_a_mango/

Serving size: 4

Ingredients:

  • 1 large ripe mango, peeled, pitted and diced
  • 1/4 cup red onion, finely chopped
  • 1 cup English cucumber, diced
  • 1 small Jalapeno pepper, seeded and minced
  • 1 red bell pepper, seeded and finely copped
  • 1/4 teaspoon freshly grated lime zest
  • 1/4 cup fresh lime juice
  • 1/4 cup fresh cilantro, finely chopped (optional)
  • Kosher salt & pepper to taste

Directions:

In a bowl, combine only half of the Jalapeno pepper with all of the ingredients. Taste and add more of the Jalapeno pepper based on taste. Cover and refrigerate at least 30 minutes.

Serve with chips or as a condiment over Fish Tacos with Mango Salsa or Vegetarian Tofu Tacos with Mango Salsa.

IMG_8474

Pumpkin Oatmeal in a Slow Cooker

It’s just another early morning workout and I’m starving for a fast and warm breakfast.  I happen to have a extra unopened can of pumpkin puree left over from Thanksgiving.  Pumpkin is a nutrient dense fruit so I decided to add it to my slow cooker oatmeal routine. Unfortunately, the first attempt resulted in some unsavory burned pumpkin oatmeal on the edges of the slow cooker. In my second attempt, I turned my slow cooker into a double boiler. This yielded perfectly cooked, unburned oatmeal. Before I share this recipe, allow me to entertain you with a little Hungry Athlete story.

I’ve been ramping up for another 50K but I cannot get on the trails early enough in the afternoons to complete my scheduled midweek 8 mile runs while it’s still daylight. I got caught in the dark twice. On one occasion I talked the park ranger out of giving me a $200 ticket for being on the trails after sunset. The other time I was almost kidnapped by Thelma and Louise. I had exited a trail I had been running on and ran a quick out and back on a paved road. By the time I arrived back at that trail head, the gate was chained up. Since I could not run on the highway (the only other way back to where my car was parked) I was given a ride by two ladies who I will refer to as Thelma and Louis.  It was dark.  I was getting cold.  The only thing I had on me was the key to my car.  While I’m sitting in the back of Thelma’s car and headed down the highway, I hear the following:

T: “You know those runners … they never have any money on them.”

L: “Hahahaha.”

T: “Yeh, who accepts rides from strangers? What would you do to protect yourself?”

L: “I’d poke them in the eyeballs. They say you should go for the eyes”

T: “She’s a runner. She’d outrun us.”

T: “Hahaha.  Oh, we should stop.  Look at her.  She’s all quiet back there.”

Clearly the ladies were having fun with me and I lived to write this recipe, however the moral to the story is to plan your trail runs better.  Don’t get caught on the trails before they close.  Carry ID and your cell phone so you don’t have to accept rides from strangers and live to enjoy Pumpkin Oatmeal in the morning.

Serving size: 4 

Ingredients:

  • 1 cup steel cut oatmeal (also called Irish oatmeal)
  • 3/4 cup pumpkin puree
  • 1 1/2 cups water
  • 1 cup unsweetened Almond milk
  • 1 tablespoon dark brown sugar*
  • 1/4 teaspoon of vanilla
  • 1 teaspoon ground cinnamon
  • 1/2 teaspoon ground ginger
  • 1/4 teaspoon allspice
  • 1/4 teaspoon ground nutmeg (I prefer freshly grated)

Optional toppings:

  • Unsalted roasted chopped almonds or walnuts
  • Diced apple or sliced banana
  • Honey or maple syrup

* Note: Ideally, if you can do without the dark brown sugar, that is the healthiest option, but I personally prefer to have a small amount of it in my oatmeal. Since this recipe is a serving size for 4, one tablespoon isn’t so bad. I sometimes enjoy my pumpkin oatmeal with a diced raw apple or a sliced banana, which adds a natural sweetness to the oatmeal.  I found that by weening myself off of sugar, I can adapt to enjoying foods like oatmeal and coffee without sugar.

Directions:

Whisk all of the ingredients together and pour into an oven proof glass bowl that will fit inside the slow cooker. I used a 6.5 quart slow cooker but a smaller 4 quart slow cooker is all you need.

Fill the slow cooker with water covering the pumpkin oatmeal bowl at least half way. Cover and cook on a low temperature for 7 hours.  Start the slow cooker before you go to bed and wake up to perfectly cooked oatmeal.  Give the oatmeal a thorough stir before serving.

DSC_6902
Fill the slow cooker insert with enough water to cover the oven proof bowl half way. This is what the oatmeal will look when it’s finished cooking. Give it a thorough stir before serving.

If you prefer, serve with chopped nuts (i.e., walnuts or almonds) and / or with fresh fruit (i.e., diced apple or sliced banana). The leftover oatmeal and be stored in individual serving size containers in the refrigerator. Add a little almond milk to loosen up the oatmeal and warm it up in the microwave when you are ready to eat it. DSC_6905

Roasted Brussels Sprout Salad with Lemon and Pomegranate

I love winter fruits and vegetables. Last week one of my ultra running pals brought me a big stalk of Brussels sprouts. I knew right away I wanted to make some sort of Brussels sprout salad and searched for a couple other winter vegetables or fruits that would brighten it up with some sweetness and acidity.  I found those bright notes in a pomegranate and some lemons plucked from a tree in the back yard.

DSC_6864
An abundance of lemons this winter. I absolutely love not having to buy lemons.

The whole lemon is used in this recipe. Blanching the lemons, then roasting them, helps to eliminate the bitterness from the rind. You may be hesitant to bite into the lemon, rind and all, but you’ll be pleased to find the rind quite tender. You will want to try this because the peel of a lemon contains more vitamins than it’s juice. Lemon peels are an excellent source of fiber, potassium, magnesium, calcium, folate, beta carotene and vitamin C.

The lemons, pomegranate anvils and Brussels sprouts are tossed together with red onion and tomatoes to create a side salad that was not only visually bright but is also cheerful with each bite.

This salad was accompanied by a hearty bowl of my Minestrone Soup and served on a very rainy winter weekend.  The ingredients in this salad made for the perfect light and sunny Sunday night dinner

Serving size: 4-6

Ingredients:

  • 1/4 cup and 3 tablespoons olive oil
  • 12 heads or 3/4 pounds of Brussels sprouts*
  • 2 large lemons (1 sliced lemon and juice of 1 lemon, about 1/4 cup)
  • 1 cup small assorted tomatoes, cut in half
  • 1/3 cup of pomegranate arils (seeds)
  • 1 medium red onion, sliced thin
  • 1 tablespoon balsamic vinegar
  • 1 tablespoon honey
  • salt & pepper

* Brussels sprouts can be replaced with mixed greens

Directions:

Preheat oven to 425F

Cut the Brussels sprouts in half and place onto 2/3 of a baking sheet lined with aluminum foil. Leave the other 1/3 of the baking sheet empty. Lemon slices will be added to this space later. Toss the Brussels sprouts in 2 tablespoons of olive oil, then season well with salt and pepper. Roast the Brussels sprouts for about 20-25 minutes until tender and the edges are brown. Turn over the Brussels sprouts a few times while roasting to ensure even browning.

While the Brussels sprouts are roasting, wash the lemons well then slice one lemon into thin rounds. Place the lemon slices into a pot of boiling water. Blanch the lemon slices for 2 minutes. This will help to eliminate the bitterness from the rind. Remove the lemon slices from the boiling water and add it to the baking sheet with the Brussels sprouts. Coat the lemon slices in 1 tablespoon of olive oil then roast with the Brussels sprouts. Roast the lemon slices for about 10-15 minutes until they start to caramelize a little. Watch the Brussels sprouts and lemon slices carefully. The lemon slices may need to be removed from the baking sheet before the Brussels sprouts have finished roasting.

DSC_6852

Allow the Brussels sprouts and lemon slices to cool slightly, then cut both Brussels sprouts and lemon slices in half.

In a measuring cup or small bowl, prepare the dressing by whisking together the remaining 1/4 cup of olive oil, the juice of the remaining lemon (about 1/4 cup), balsamic vinegar, honey and a pinch of salt and pepper.

In a medium bowl, toss the Brussels sprouts, tomatoes and red onion slices in the dressing. Transfer to a serving bowl. Slice the lemon rounds in half and add to the top of the Brussels sprout salad. Top with the pomegranate arils.

DSC_6855

Swap out the Brussels sprouts with mixed greens for a salad with brightness in every bite.

Asian Pasta Salad

My Asian Pasta Salad is one of my go-to recipes when I need a dish that can be prepared in advance and left sitting at room temperature for a few hours without refrigeration. I make this dish for picnics, to bring to work for lunch and most recently at this weekend’s Super Bowl party.

This recipe includes one of my favorite vegetables, the sugar snap pea. Developed in 1979, the sugar snap pea is a relatively new food, and a hybrid of green peas and snow peas. They are sweet, crunchy, easy to chew, and a good source of fiber, iron, potassium and vitamin C.

Serving size: 6

Ingredients:

  • 12 ounces whole wheat angel hair or spaghetti noodles, cooked (optional gluten-free pasta)
  • 2 medium carrots, shredded
  • 1 red bell pepper, seeded and thinly sliced
  • 1 yellow bell pepper, seeded and thinly sliced
  • 3 cups sugar snap peas
  • 5 scallion (green onion) stalks, green and white parts finely diced
  • ¼ cup light soy sauce
  • 1 tablespoon honey
  • 1 teaspoon hot chili oil (add more if you like it spicier)
  • 2 tablespoons rice wine vinegar (can substitute with white vinegar)
  • 1 teaspoon freshly grated ginger
  • 3 tablespoons canola oil
  • 2 teaspoons sesame oil
  • 2 tablespoons black sesame seeds (optional)
  • 3 cups of grilled chicken (optional)

Cook the pasta noodles in salted boiling water, stirring frequently during the first couple of minutes, then occasionally to ensure the noodles do not stick together. Cook it until it is “al dente”. Drain and rinse in cold water to stop the cooking process. Place in large mixing bowl.

Add carrots, peppers and sugar snap peas to the pasta bowl. Reserve a tablespoon of scallions to use for garnish later and add the rest of the scallions to the pasta bowl.

In a measuring cup or small bowl, whisk together soy sauce, chili oil, vinegar, grated ginger, canola oil and sesame oil. Reserve 1 teaspoon of sesame seeds to use for garnish later and add the rest to the soy sauce dressing.

Add the dressing to the pasta bowl and toss thoroughly to ensure all the pasta and vegetables are coated with the dressing. Sometimes it’s easier to use clean hands to toss the pasta. The pasta can be served immediately, however I like to cover it and let it sit in the refrigerator for a couple hours to give the pasta a chance to absorb the dressing. Toss the pasta after removing it from the refrigerator. Sprinkle with reserved scallions and sesame seeds before serving.

DSC_4929

DSC_6848 DSC_6843

Curry Spiced Butternut Squash & Cauliflower Soup

My Curry Butternut Squash & Cauliflower Soup, with a little heat from cayenne pepper, warms the soul on cold winter days. This soup is made with two nutrient dense vegetables, which are low in fat, low in carbohydrates and high in dietary fiber.  Winning!

Technically a fruit, the butternut squash has a particularly high level of vitamin A and also has a high level of vitamin C. It has more potassium than a banana and its color indicates an abundance of carotenoids, which is believed to protect against heart disease.

When buying butternut squash, select the fruit that feels heavy for its size with a matte and unblemished skin. A glossy skin indicates that the squash was picked too early and will not be as sweet. Stored in a cool dry place with ventilation, not in the refrigerator, this fruit has a storage life of up to three months!

In an effort to increase the nutritional value of my recipes, I like to incorporate a variety of vegetables.  For this soup, I paired the butternut squash with cauliflower.  Cauliflower is a good source of vitamin C and contains folate. It is also a good source of minerals, including iron, calcium and potassium.

I prefer to roast the butternut squash, cauliflower and apple rather than boiling them to make this soup.  Roasting is one of my favorite ways to cook vegetables and allows the flavors to develop and intensify.

I used a Dutch oven and an immersion blender to make this soup however you can use a blender too. I do recommend investing in an inexpensive immersion blender.  They are easy to clean up and you can use it while the soup is still in the pot.

Serving size: 6

Ingredients:

  • 4 cups of butternut squash, peeled and cut into 1 inch cubes
  • 3 cups of cauliflower, cut into large florets
  • 1 cup finely diced sweet onion (half of a large onion)
  • 1 Granny smith apple, peeled and cut into cubes
  • 1 tablespoon minced garlic (about 2 cloves or 1 large clove)
  • 1 teaspoon fresh rosemary, chopped
  • 1 teaspoon curry powder
  • ¾ teaspoon salt
  • ½ teaspoon cumin
  • ¼ teaspoon cayenne pepper (use a pinch of cayenne to start if you do not like it spicy)
  • 6 cups vegetable broth
  • 1 tablespoon honey
  • 6 tablespoons crème fraiche (optional)
  • fresh parsley (optional garnish)

Directions:

Preheat oven to 400F.

When preparing the butternut squash, use a very sharp knife. Cut a thin layer off the top and bottom to create a level surface. Then remove the skin using a vegetable peeler and scrape the seeds out with a spoon.

DSC_6746

When cutting the squash, cauliflower and apple, try to create even pieces. This will ensure even roasting.

Toss butternut squash, cauliflower and apple in 2 tablespoons olive oil. Place on baking sheet lined with aluminum foil. Season with salt and pepper and roast in 400F oven for about 25-30 minutes until tender. Turn the fruits and vegetable over at least once to ensure even roasting.

DSC_6753

You may need to remove the apple cubes before the butternut squash or cauliflower is finished roasting.

DSC_6762

In a Dutch oven, sauté onion in 1 tablespoon olive oil until tender and translucent.

DSC_6752

Add garlic cloves, rosemary, curry powder, salt, cumin and cayenne pepper and sauté for another couple of minutes. Remove the onion mixture from heat if the fruits and vegetables are not done roasting to avoid burning the onion and garlic.

DSC_6750
Minced garlic and rosemary.

Once the butternut squash, cauliflower and apple are done roasting, add them to the onion mixture. Add vegetable broth and honey.  Simmer for 15 minutes.

Using an immersion blender, puree the mixture until smooth. You can also use a blender. If using a blender, add only a couple ladles full of soup at a time. Place a kitchen towel over the lid and hold down with your hand. This is to prevent the hot liquid from pushing out of the lid and burning your hand. Gently pulse to start, then blend until smooth.

Taste soup and adjust seasoning to your liking. Serve with a dollop of crème fraiche on top and garnish with fresh parsley.

DSC_6754

Simple Granola

Who doesn’t like granola?  My favorite way to enjoy granola is over Greek yogurt for breakfast. Sometimes I’ll add milk to a bowl of granola for a great alternative to cereal; sprinkle it over ice cream as a yummy crunchy topping; or add 1/3 cup of dried fruit, such as cranberries, cherries, raisins, dates or apricots, and eat it by the handful as a snack. The type of nuts or seeds can be swapped out. I sometimes use more walnuts and omit the pecans or use pepitas (pumpkin seeds) instead of sunflower seeds. Choose your favorite nuts. Just make sure the nuts are unsalted.  The granola can be stored up to 1 week in an airtight container.  Placed into a mason jar wrapped with a bow, fresh homemade granola makes a nice little gift.  Who doesn’t like granola?

Ingredients:

  • 3 cups old-fashioned oats (not instant or quick oats)
  • 1/3 cup unsalted sunflower seeds
  • 1/2 cup chopped, unsalted & roasted cashews
  • 1/2 cup chopped, unsalted & roasted pecans
  • 1/2 cup chopped, unsalted & roasted almonds
  • 1/2 cup chopped, unsalted & roasted walnuts
  • 1 teaspoon ground cinnamon
  • 1 teaspoon Kosher salt
  • 1/2 cup canola oil
  • 1/2 cup honey
  • 1/4 cup maple syrup
  • 2 teaspoon vanilla extract
  • 1/3 cup dried cranberries (optional)

Directions:

Preheat oven to 350F

Combine oats, sunflower seeds, chopped nuts, cinnamon and salt in large bowl. In separate small bowl, whisk together oil, honey, maple syrup and vanilla extract. Pour over oat mixture and combine thoroughly. Spread out evenly over parchment lined baking sheet. Bake for 30-35 minutes until golden brown, stirring granola every 12-14 minutes to ensure even browning. Allow granola to cool on pan completely unless you forgot to line the pan with parchment paper. Clean up might be easier if the granola is transferred from an unlined baking sheet to a glass casserole dish to cool. Otherwise, the granola will cool to crisp little chunks and slide right off the parchment paper. I prefer to leave the granola in some smaller chunks to store.

Cool and store in airtight container up to 1 week, if it lasts that long.

image

granola parfait

DSC_6707

I like a variety of nuts, including walnuts, almonds, pecans and cashews, in my granola.  Choose the combination of you enjoy most.
I like a variety of nuts, including walnuts, almonds, pecans and cashews, in my granola. Choose the combination of you enjoy most.

DSC_6703

The granola can be stored up to a week in an airtight container.  They also make nice gifts.
The granola can be stored up to a week in an airtight container. They also make nice gifts.

Vegetarian Butternut Squash Chili

How do you feed 30 athlete friends a vegetarian friendly meal, which you can prepare in advance and serve warm with minimal fuss? My Butternut Squash Chili was the winning answer, setting a PR* in my kitchen for nourishing the largest gang of hungry athletes in my house to date. Like an endurance athlete, the chili finished strong, held up to being kept warm for hours and with plenty to go around for seconds, thirds and eh hem, fourths.

A variety of beans keep it interesting; frozen corn kernels add a nice contrast of texture and sweetness while cornmeal is the secret ingredient to thicken it all up.

The chili freezes well and is also vegan and gluten-free.

* In case you are not familiar with the term PR, it’s short for personal record.

Serving size: 10-12

Ingredients:

  • 2 ½ pounds butternut squash, cut into 1 inch cubes
  • ¼ cup + 2 tablespoons olive oil
  • 4 ½ cups vegetarian broth
  • 1 large chopped onion
  • 2 tablespoons finely chopped garlic
  • 1 diced green bell pepper
  • 1 diced red bell pepper
  • 1 28-ounce can diced tomatoes
  • 2 tablespoons tomato paste
  • 1 4-ounce can dice green chili
  • 2 16-ounce can black beans
  • 2 16-ounce can garbanzo beans
  • 2 cups frozen corn (roasted frozen corn adds a nice smokey flavor)
  • 1 tablespoon Worcestershire sauce
  • 1 tablespoon Chipotle chili powder
  • 1/2 tablespoon chili powder (add more to taste)
  • 1 teaspoon cinnamon
  • 1 teaspoon cumin
  • Salt & freshly ground black pepper

Optional Ingredients: 

  • sour cream
  • chopped green onion
  • shredded cheddar cheese

Directions:

Preheat oven to 400F.

Peel the butternut squash with a vegetable peeler. With a very sharp knife, slice off the top and bottom of the butternut squash to create a level surface for it to stand on either end and cut crosswise into 2 halves. Cut each half lengthwise into 2 more halves. Scoop out seeds and stringy parts with a spoon. Cut into 1/2 inch cubes and place on baking sheet lined with aluminum foil. Toss in 2 tablespoons olive oil. Season with salt and freshly ground black pepper. Roast for about 20 minutes, tossing once, until tender. Remove from oven and set aside to cool.

In a large 6 quart Dutch oven, heat remaining olive oil. On medium heat, sauté chopped onion until soften.

Add ½ cup vegetable broth, onion, garlic, and chopped bell peppers. Stir over medium heat for another 5 more minutes.

Add remaining vegetable broth, diced tomatoes, tomato paste, green chili, beans, corn, beans, Worcestershire sauce and spices. Simmer for at least 1 hour but 2 hours is recommended.  Even better if prepared the day before and reheated. Season with salt to taste. Serve with shredded cheddar cheese, sour cream and sliced green onion. My favorite way is with a dollop of sour cream and green onion.


Acorn squash stuffed with Curry Mustard Quinoa, Butternut Squash, Spinach, Cranberries and Toasted Almonds

Thanksgiving kicks off one of my favorite times of year. As immigrants, my family was slow to embrace the American tradition of Thanksgiving. We really didn’t know much about eating or cooking turkeys. My mother made Peking Duck instead. It is one of my most favorite culinary guilty pleasures. Peking Duck is quite a laborious venture in the kitchen. The chore begins with my mother meticulously rigging a duck on a wire hanger and suspending it from a kitchen cabinet. Then over 2-3 days, the duck is basted and dried before it is roasted. The end result is the crispiest and tastiest skin that covers moist duck meat. However, one year, on day 2 of project Peking Duck, my mother went into labor with my sister. After giving birth, my mother asked my father what he did with the duck. He fried it. The story always makes me smile thinking how my mother went through all that effort to prepare the duck, only to have it deep fried. I suppose it’s no different than frying a turkey.

Fast forward to 2014, and now I’m in a relationship with someone who also has never had a traditional Thanksgiving turkey dinner. He’s a vegetarian athlete and his only request was that I not prepare Tofurky. I wanted to create something nutritious, packed with protein (like a turkey) and Thanksgiving-y.   Like my sister, my Acorn Squash stuffed with Quinoa, Roasted Butternut Squash, Spinach, Cranberry & Toasted Almonds was born on Thanksgiving day. Served with vegetarian side dishes, this main course satisfied my hungry athlete.

Serving size: 6

Ingredients:

  • 3 acorn squashes* (optional)
  • 6 tablespoons of butter (substitute 6 teaspoons of olive oil for vegan)
  • 3 cups of butternut squash* (about 1 ½ pounds), peeled and cut into ½ inch cubes (optional)
  • 2 tablespoons olive oil
  • 1/4 teaspoon kosher salt
  • 1 cup quinoa (rinsed well according to instructions)
  • 2 cups vegetable broth
  • 1 teaspoon Coleman’s English mustard powder
  • 1 teaspoon curry powder
  • 1/2 cup dried cranberries
  • 2/3 cup chopped toasted almonds
  • 2 1/2 tablespoons finely chopped shallots (about 2 small shallots)
  • 3 full packed cups baby spinach
  • Juice of 1/2 large lemon (about 2 tablespoon)
  • Salt and fresh cracked pepper

Directions:

Preheat over 400F.

Peel the butternut squash with a vegetable peeler. With a very sharp knife, slice off the top and bottom of the butternut squash to create a level surface. Then carefully cut into ½ inch cubes.

Line a baking sheet with aluminum foil.  Toss the butternut squash in 1 tablespoon olive oil and season with salt & pepper.  Bake for 25-30 minutes until tender, tossing once.

Microwave acorn squashes for 1 minute. Cut in half crosswise, dissecting the top and bottom. If necessary, slice a small piece off the top and bottom so that it sits level when served on a plate. Scoop out seeds and stringy parts.  Spread 1 tablespoon of butter (or 1 teaspoon of olive oil) inside of each acorn squash half, then season with salt and pepper. Wrap each half in aluminum foil**.

Noting the amount of time left to bake the butternut squash, bake the acorn squashes for 50-60 minutes or until fork tender.  The butternut squash will finish cooking and will need to be removed from oven while the acorn squash packets remain in the oven for it’s remaining baking time. The timing will ensure the acorn squash is still warm when served. Once the acorn squash are cooked and tender, keep them wrapped in aluminum foil to retain heat until the quinoa is ready to be served.

Bring vegetable broth to a boil then stir in quinoa.  Stir in dry mustard and curry powder.  Simmer covered for 15-20 minutes until water is absorbed or according to the package directions.

While quinoa is simmering, toast the almonds in the oven, on a baking sheet until lightly toasted and fragrant for about 5 minutes.   Allow it to cool, chop coarsely and set aside.

Once quinoa is cooked, remove from heat and toss in cranberries and stir in lemon juice. Taste the quinoa and season with salt if needed. I find that if the quinoa is cooked in vegetable broth, no additional salt is necessary. Cover and let sit for about 5 minutes. Remove lid and fluff quinoa with a fork.

With remaining 1 tablespoon of olive oil, sauté shallots until softened. Add butternut squash, quinoa and spinach.  Sauté spinach until wilted. Toss in toasted chopped toasted almonds just before serving. Spoon quinoa into acorn squash and serve.

Note:  You may prefer not to include both butternut squash and acorn squash in this dish.  I found there wasn’t enough flesh to enjoy inside the acorn squash I picked up.  Butternut squash added nice contrast in color, flavor and texture to each bite of the red quinoa.  Alternatively, this dish can be served without the acorn squash as shown in the photo below.

** Note:  The acorn squash can be baked without wrapping in aluminum foil however, creating individual packets of acorn squash makes it easier to find space for them when other side dishes are competing for oven space on Thanksgiving day. Here are other alternative ways to cook acorn squash:

  • MICROWAVE:  Lay acorn squash cut side down and microwave and cook at 5 minute intervals until fork tender, about 7-10 minutes.
  • BAKING UNWRAPPED:  Place unbuttered and unseasoned acorn squash, cut side down on a baking sheet lined with aluminum foil.  Add enough water to slightly cover the sides of the squash.  Bake at 350F for about 35-40 minutes.  Flip over, add butter & seasoning.  Continue to bake until fork tender, 5-10 minutes longer.

IMG_7480

IMG_7459


J’Wow’s Salsa

I had the pleasure of training for my first Ironman with Jerrold, a good friend and triathlete known as J’Wow.  He’s like a little brother to me.  He’s rescued me when I was suffering from heat exhaustion during a long training ride and encouraged me to run with him when I was suffering from stomach pain during our first Ironman.  And like any little brother, he thoroughly enjoys annoying me with his teasing.

I joined J’Wow at Lake Tahoe this summer when he came up to train with his coach.  This is when I discovered J’Wow’s delicious fresh salsa.  Fresh salsa is a very healthy snack.  Tomatoes, onions,  jalapeños and lime juice contain vitamin C.  Jalapeños contain capsaicin, which generates heat, increases the heart rate when consumed and naturally raises the metabolic rate.  Avocados contain healthy fats, mostly oleic acid, which helps reduce bad cholesterol.  In addition, avocados contain protein, fiber and is an excellent source of potassium.  What a delicious way to consume raw and nutritious fruits and vegetables.

J’Wow prefers chips with a hint of lime flavor to serve with the salsa.  I’ve used the salsa with fish tacos, burritos and a variety of chips.  Although you can serve the salsa right away, it tastes even better the next day after all the flavors have had a chance to marry.  We had 6 people in the house and this recipe made enough salsa for us to enjoy for 2 days.

Serving size: 12

Ingredients:

  • 10 tomatoes on the vine diced
  • 1 large yellow onion diced
  • 1 green bell pepper diced
  • 3 ripe avocado diced
  • ¼ cup finely chopped cilantro
  • 2 – 2 1/2 jalapeño peppers, seeds removed and minced
  • ½ cup of lime juice (4 medium fresh limes)
  • Salt & pepper to taste

Directions:

In a large bowl, dice the tomatoes, onion, green bell pepper and avocado.  Add finely chopped cilantro and minced jalapeno peppers.  I removed the seeds and was careful to wash my hands well after handling the peppers.  Add more or less peppers depending on your taste and how hot the peppers are.

Add the lime juice. One fresh medium lime should yield about 2 teaspoon of juice.  If the limes are small or dry, you may need more than 4 limes to yield ½ cup.  To get the most juice out of a lime, I put pressure roll it on the cutting board while putting pressure on it with the palm of my hand. I then use a reamer.  You can also put it in the microwave for 20 seconds before squeezing.

Toss all of the ingredients together.  Add salt and pepper to taste.

IMG_6022

IMG_6004

IMG_6006

IMG_6018