Asian Pasta Salad

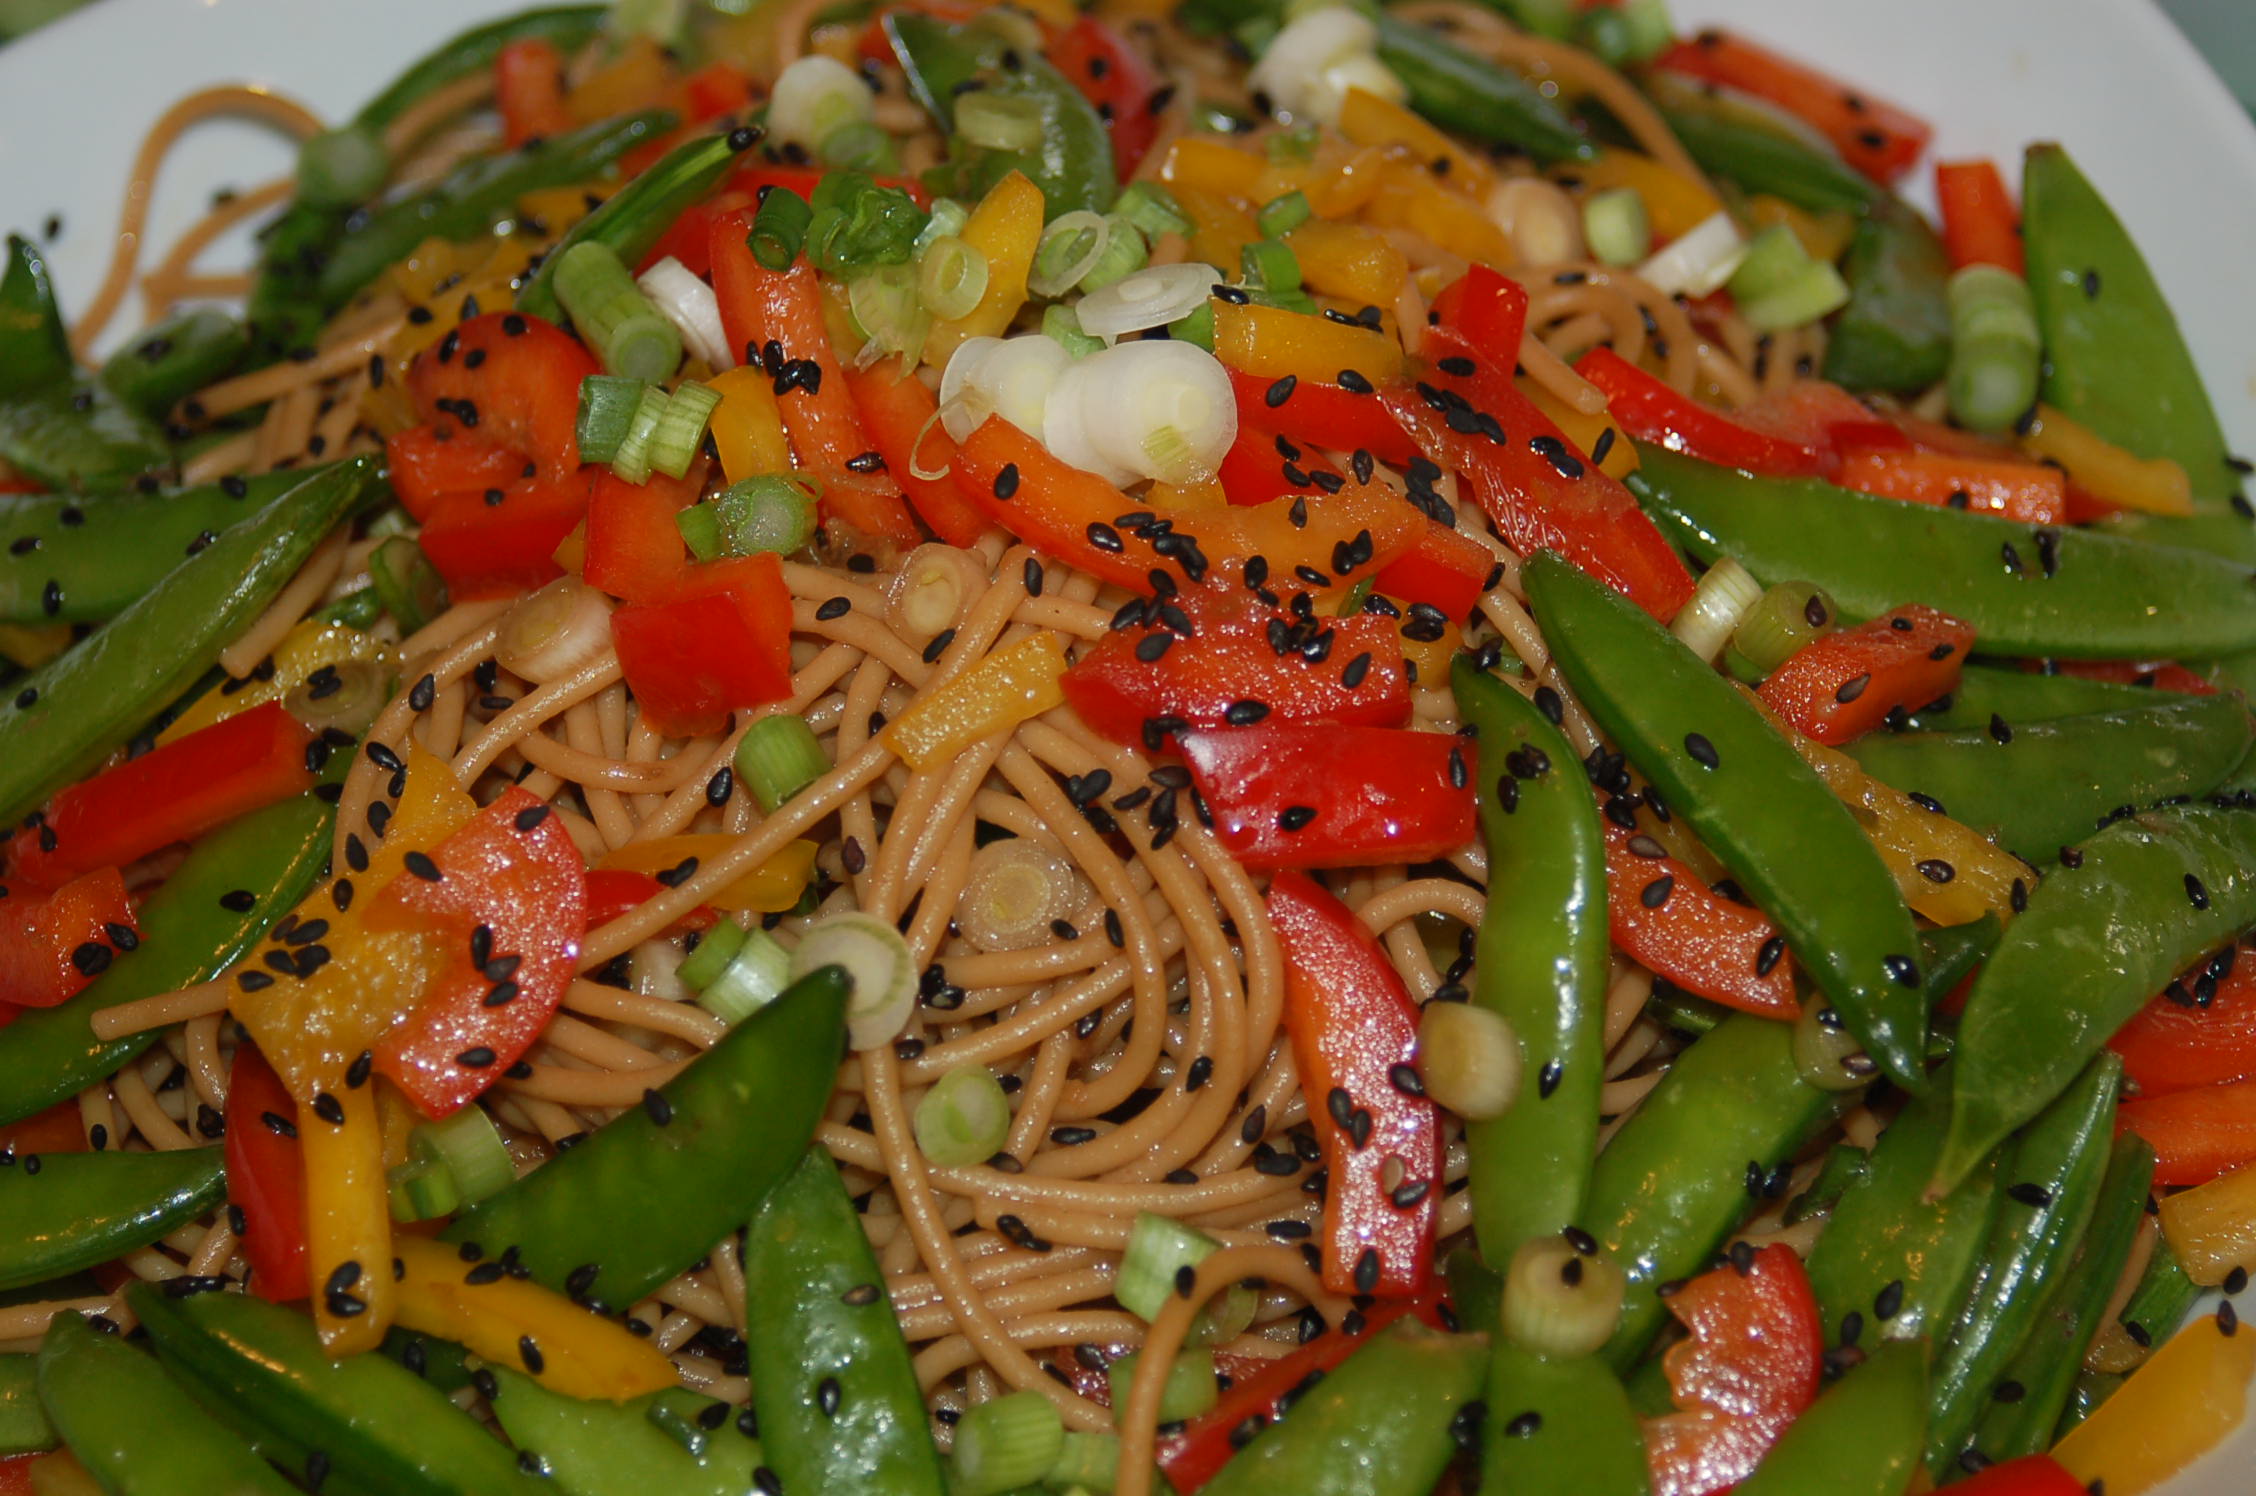
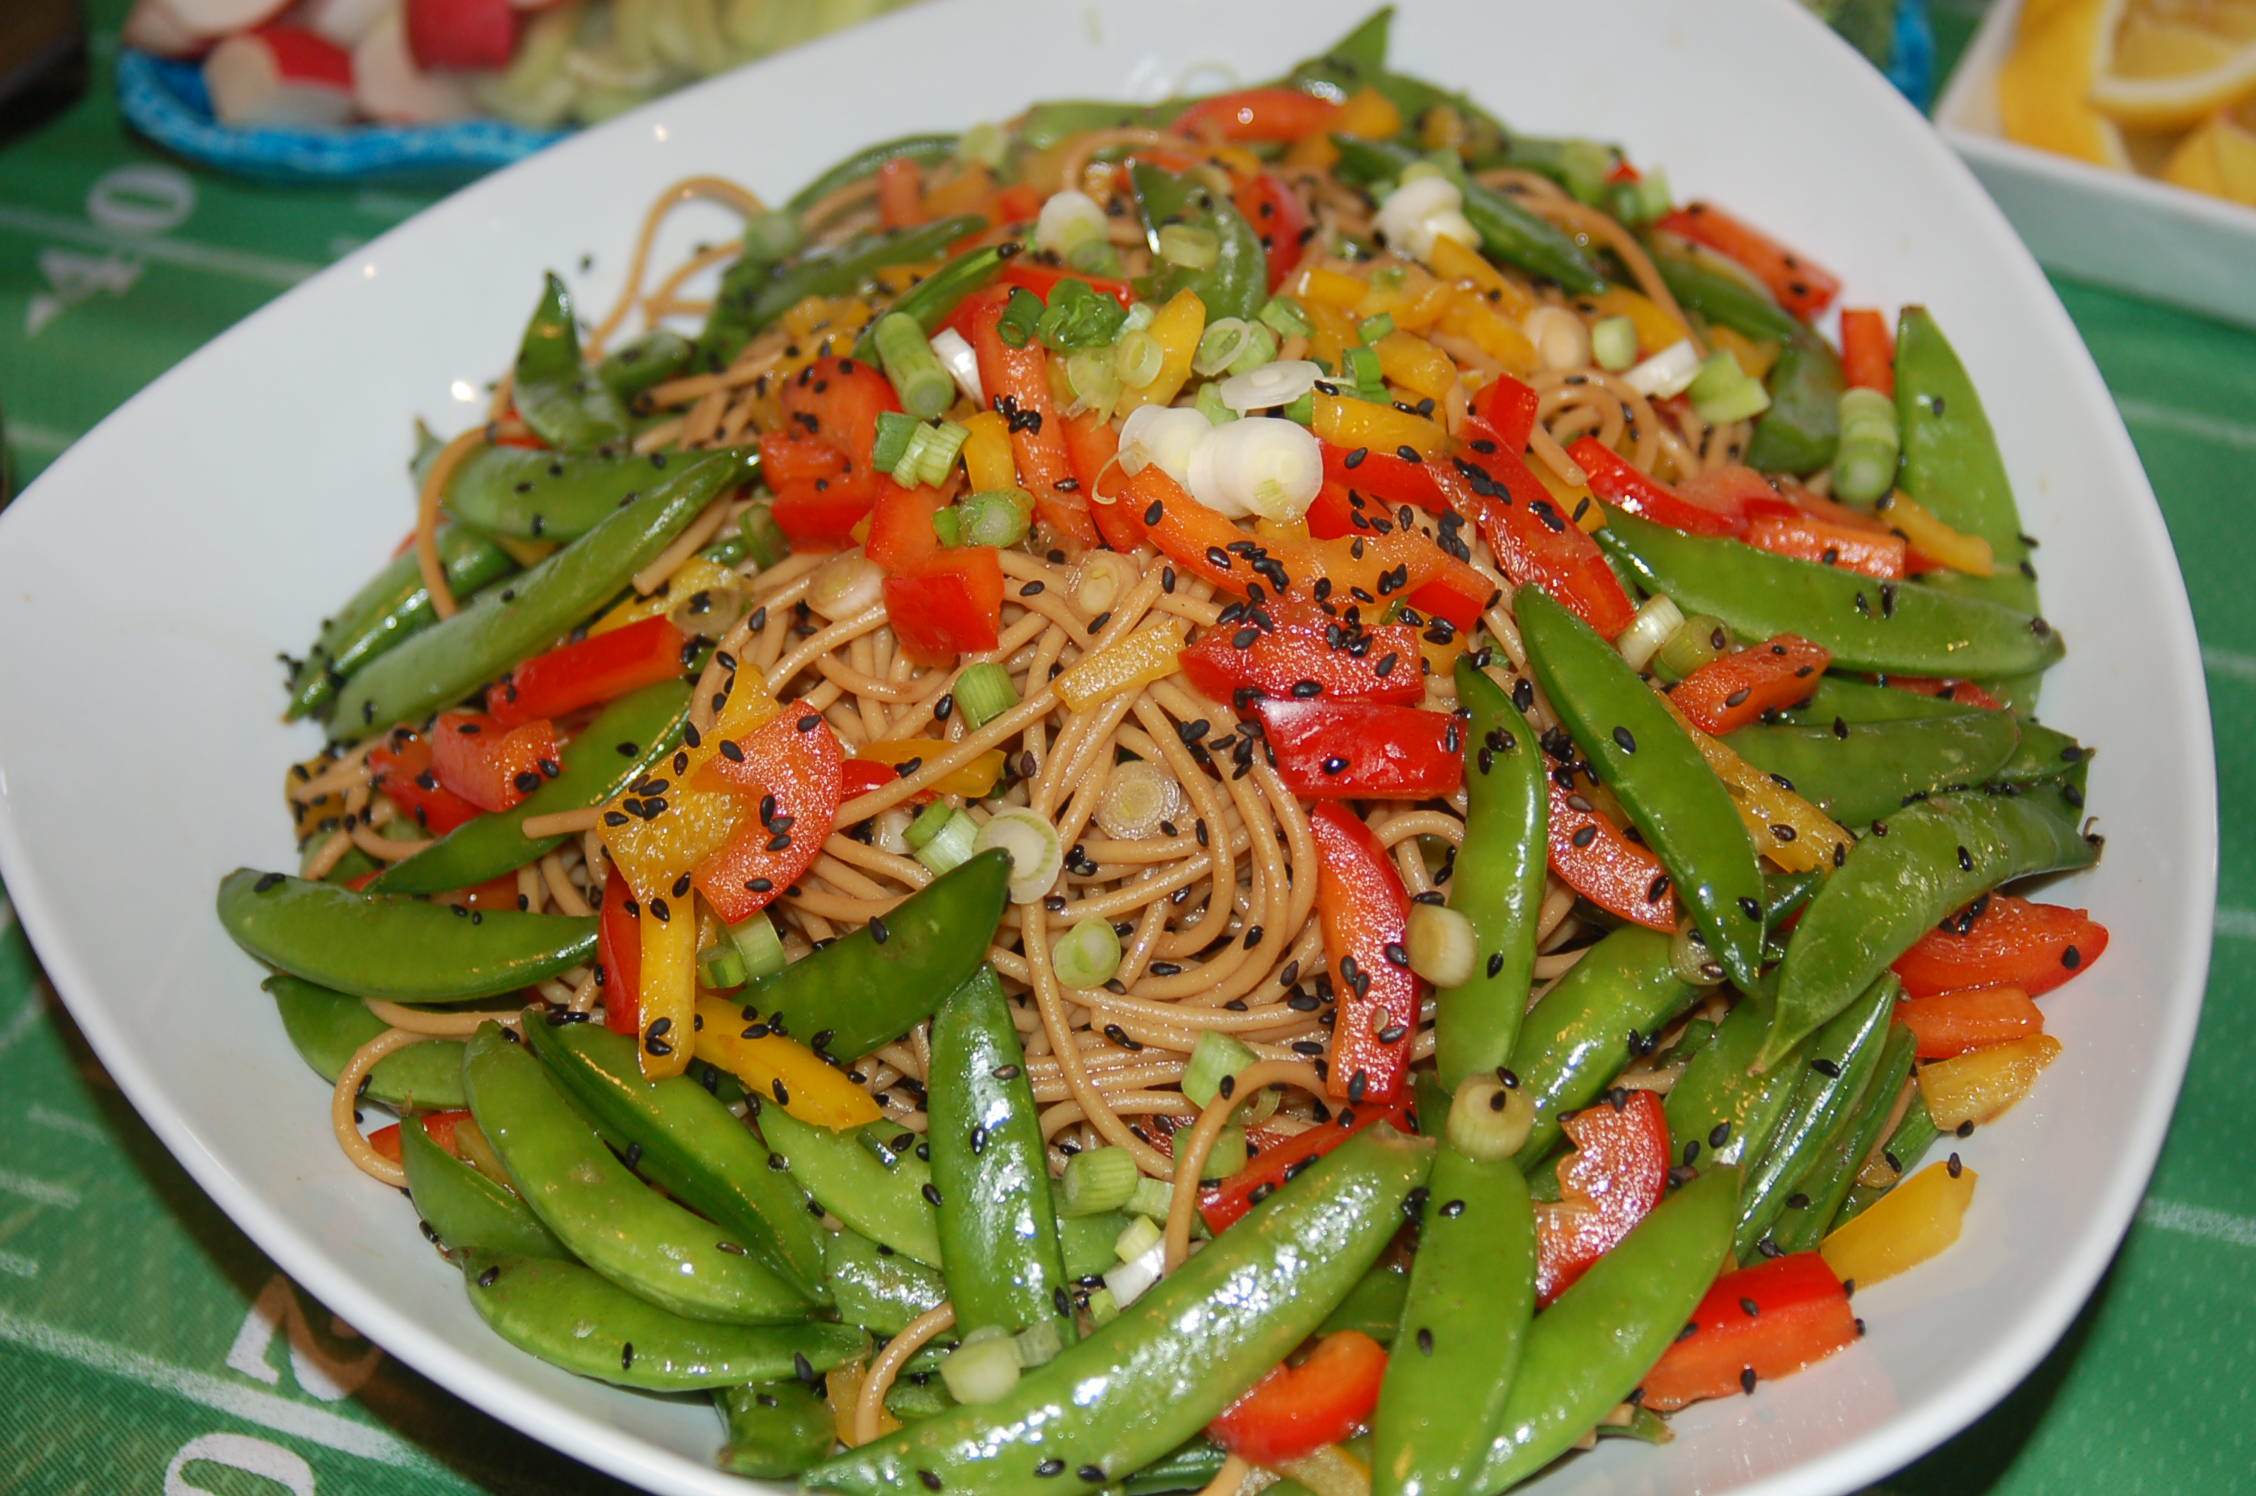
My Asian Pasta Salad is one of my go-to recipes when I need a dish that can be prepared in advance and left sitting at room temperature for a few hours without refrigeration. I make this dish for picnics, to bring to work for lunch and most recently at this weekend’s Super Bowl party.

This recipe includes one of my favorite vegetables, the sugar snap pea. Developed in 1979, the sugar snap pea is a relatively new food, and a hybrid of green peas and snow peas. They are sweet, crunchy, easy to chew, and a good source of fiber, iron, potassium and vitamin C.

Serving size: 6

Ingredients:

  • 12 ounces whole wheat angel hair or spaghetti noodles, cooked (optional gluten-free pasta)
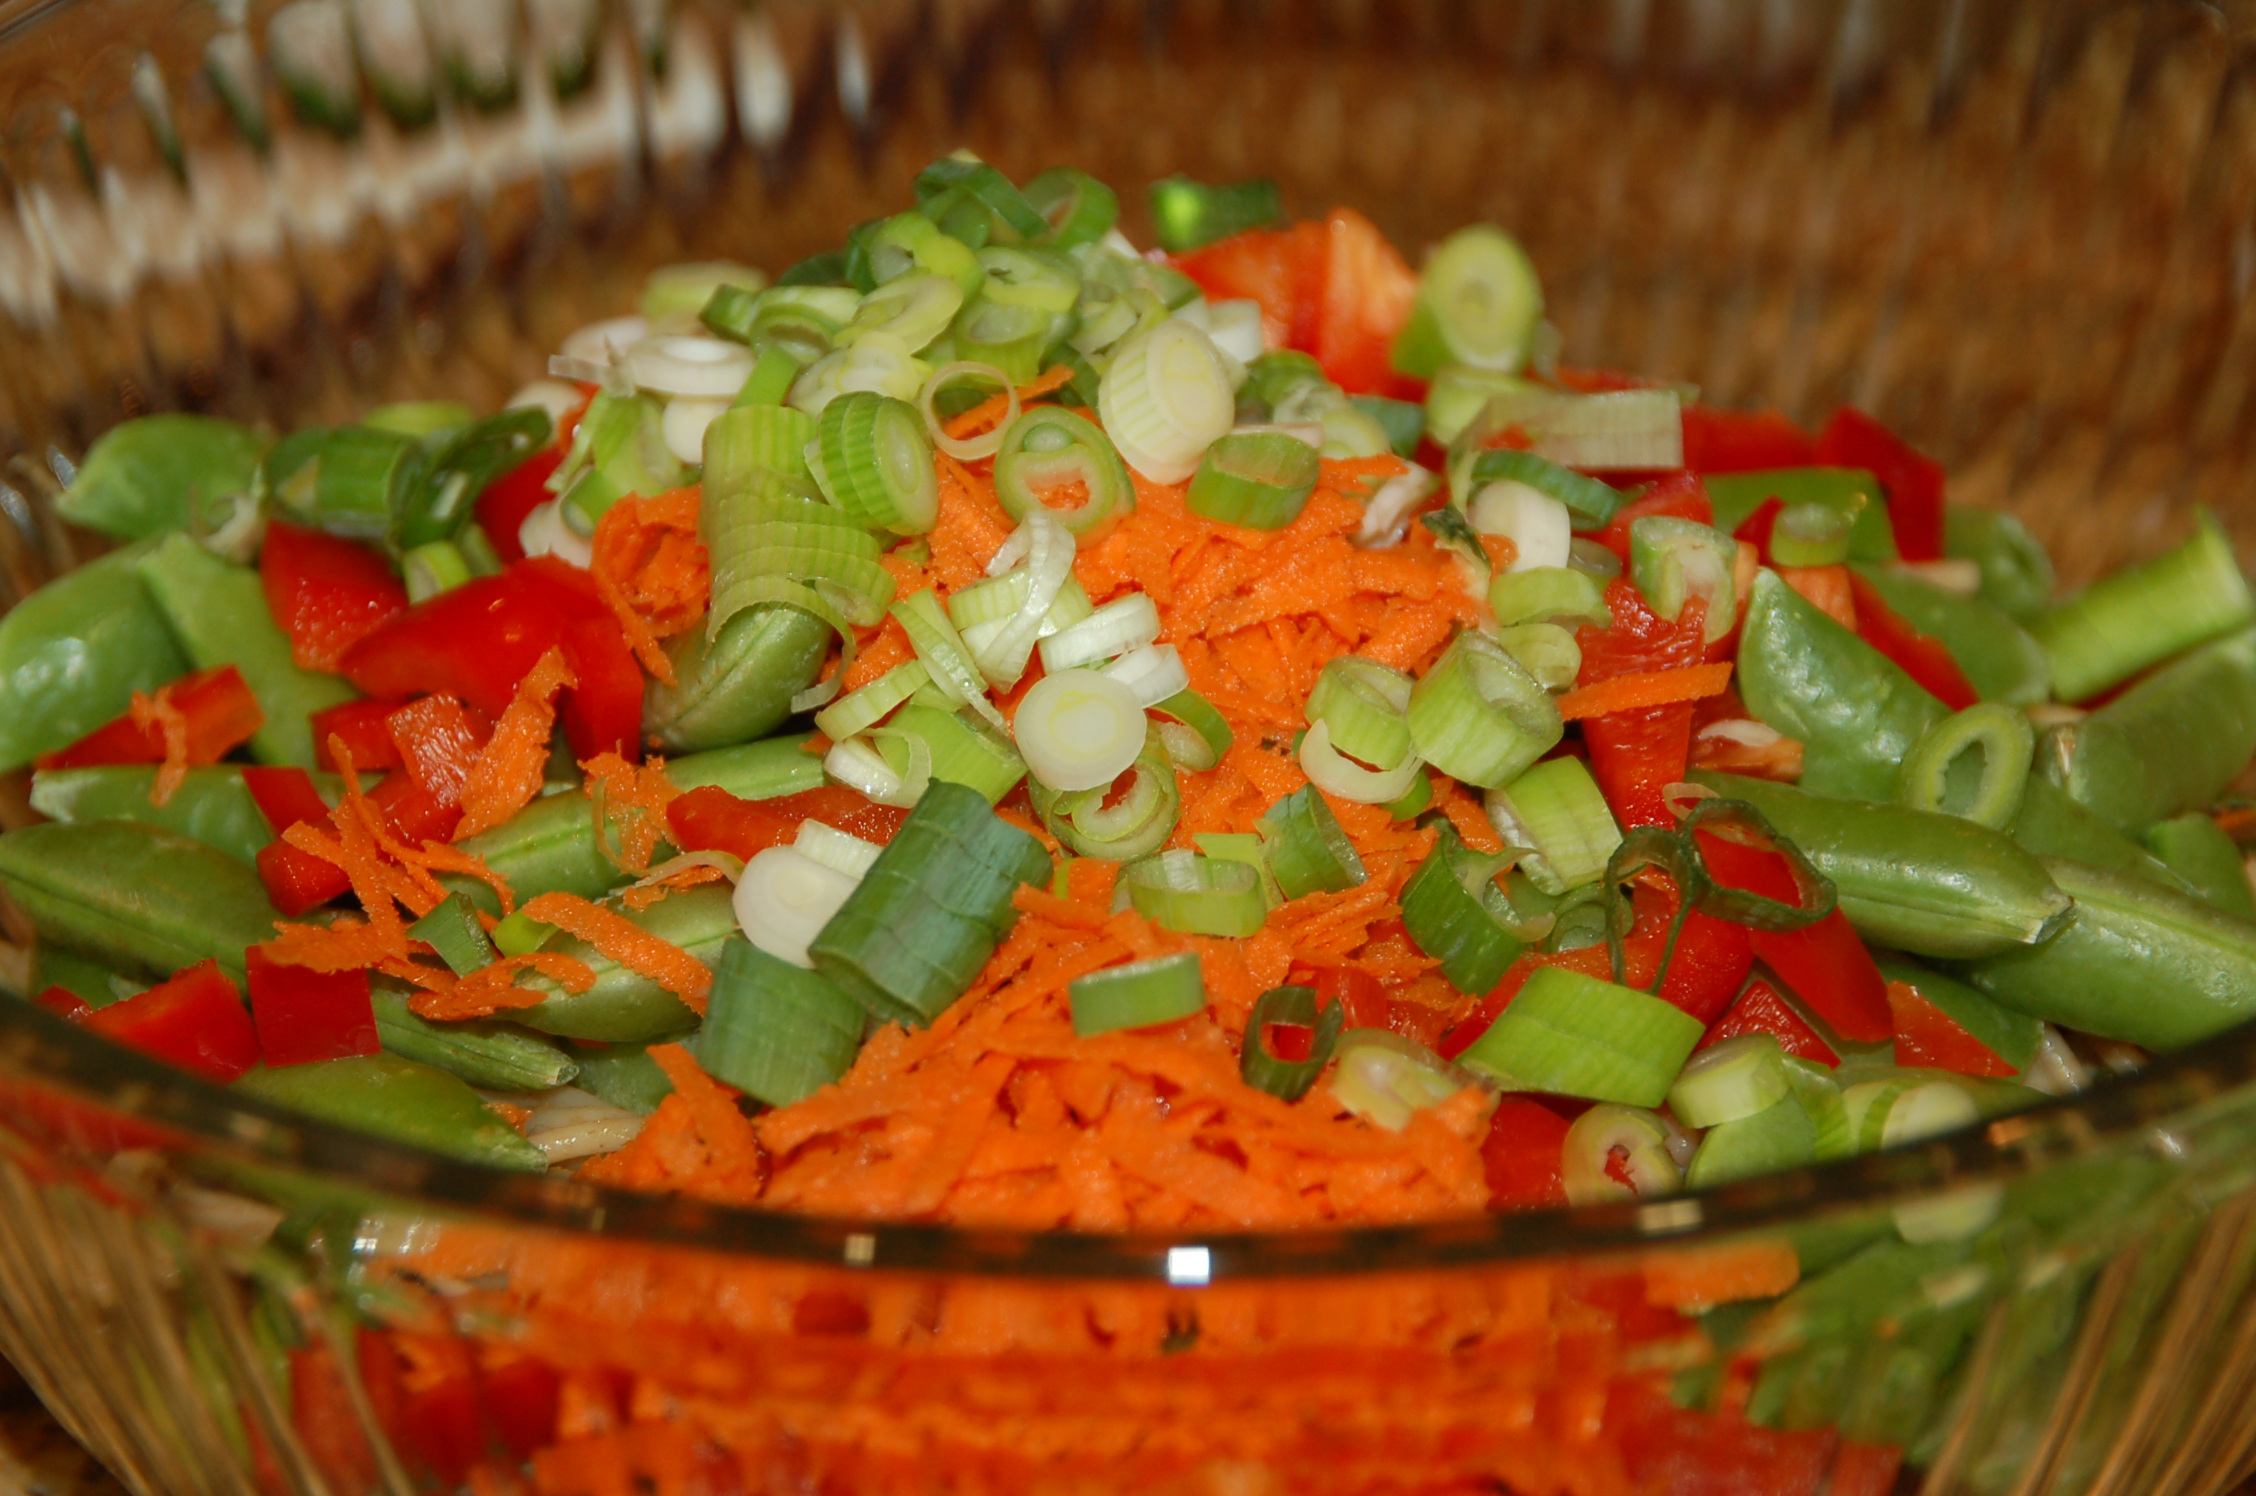
  • 2 medium carrots, shredded
  • 1 red bell pepper, seeded and thinly sliced
  • 1 yellow bell pepper, seeded and thinly sliced
  • 3 cups sugar snap peas
  • 5 scallion (green onion) stalks, green and white parts finely diced
  • ¼ cup light soy sauce
  • 1 tablespoon honey
  • 1 teaspoon hot chili oil (add more if you like it spicier)
  • 2 tablespoons rice wine vinegar (can substitute with white vinegar)
  • 1 teaspoon freshly grated ginger
  • 3 tablespoons canola oil
  • 2 teaspoons sesame oil
  • 2 tablespoons black sesame seeds (optional)
  • 3 cups of grilled chicken (optional)

Cook the pasta noodles in salted boiling water, stirring frequently during the first couple of minutes, then occasionally to ensure the noodles do not stick together. Cook it until it is “al dente”. Drain and rinse in cold water to stop the cooking process. Place in large mixing bowl.

Add carrots, peppers and sugar snap peas to the pasta bowl. Reserve a tablespoon of scallions to use for garnish later and add the rest of the scallions to the pasta bowl.

In a measuring cup or small bowl, whisk together soy sauce, chili oil, vinegar, grated ginger, canola oil and sesame oil. Reserve 1 teaspoon of sesame seeds to use for garnish later and add the rest to the soy sauce dressing.

Add the dressing to the pasta bowl and toss thoroughly to ensure all the pasta and vegetables are coated with the dressing. Sometimes it’s easier to use clean hands to toss the pasta. The pasta can be served immediately, however I like to cover it and let it sit in the refrigerator for a couple hours to give the pasta a chance to absorb the dressing. Toss the pasta after removing it from the refrigerator. Sprinkle with reserved scallions and sesame seeds before serving.

DSC_4929

DSC_6848 DSC_6843

Spicy Dark Chocolate, Pretzel & Caramel Surprise Cookie (aka “The Ultimate Tailgating Cookie”)

Warning.  These adult cookies are a bit naughty.  These not-so-kid-friendly treats have a spicy afternote, deep dark chocolate richness, salty crunch and sweet surprise that prefer to be chased by a cold beer over a glass of milk.

The decadent cookies were inspired by Sports Illustrated writer, Peter Bukowski, who had me thinking, what cookie would pair well with beer at a football tailgate?  I immediately enlisted Tracy, one of my best childhood pals, cookie queen and fellow Ironman triathlete, to help create the cookie.  Not only is Tracy a great cook; she also enjoys beer. While most of my recipes are healthy, this Hungry Athlete believes that it’s ok to indulge a little, every now and then.  I’ll be serving these cookies to a bunch of ultra runners this Super Bowl Sunday.  They’ll be burning a lot of calories prior to the game, so let’s indulge.

NOTE:  The caramel candy filling is optional.  I love caramel however I personally can only eat one of anything caramel.  To satisfy those who love to gobble up lots of caramel, I fill only half the batch with the Dove caramels.  For the best results, place the Dove caramels in the freezer for at least 30 minutes.  Plain caramel candies hardened up too much at room temperature.

Serving size: 16-18 cookies

  • 1/2 cup plus 2 tablespoons of unsalted butter
  • 1/4 cup plus 2 tablespoons unsweetened dark cocoa powder
  • 1/4 teaspoon cayenne pepper
  • 1 teaspoon instant espresso
  • 1 large egg
  • 1/3 cup ultrafine or superfine baking sugar
  • 1/2 cup dark brown sugar
  • 1 teaspoon vanilla extract
  • 1 cup all purpose flour
  • 1/2 teaspoon baking soda
  • 1/2 teaspoon Kosher salt
  • 3/4 cup thick medium sized pretzels (I used Snyder Old Thyme), rough chopped to the size of two chocolate chips
  • 1 teaspoon vanilla extract
  • 3/4 cup semi sweet chocolate chips
  • 1 package Dove caramel candies (optional), placed in freezer for 30 min

Directions:

Preheat the oven to 350F and place the Dove chocolates in the freezer for about 30 minutes.

In a saucepan over low to medium heat, melt the butter.  Whisk in cocoa until smooth, then whisk in instant espresso and cayenne pepper.  Remove the saucepan from the heat and set it aside.

In a medium size bowl, sift the flour, baking soda and Kosher salt together.  Set it aside.

Using an electric mixer, on medium speed, with a whisk attachment, mix the egg and both sugars together.  Scrape the side of the bowl while mixing to ensure everything is well combined.  Add vanilla extract and continue mixing for another minute. Add the cocoa mixture and mix on medium speed until combined.  Then add the flour mixture and mix again until just combined.

With a spatula or wooden spoon, mix in chocolate chips and pretzel pieces by hand.  It might be easier to just use your fingers but don’t over mix.  There may be loose pieces of pretzels in the bowl.  You can redistribute those when forming the cookies.

Using your hands, shape the dough into 2 1/2 inch wide round cookies.  The dough will not spread much when baking. If you are incorporating caramel, wrap the dough around the caramel candy until it’s completely covered.  I try to cover up the pretzels so it’s a nice salty and crunchy surprise when biting into the cookie. It’s ok if some of the pretzel pieces are poking through. Place the formed cookie dough on a baking sheet lined with parchment paper and bake for 8-9 minutes.   Since you won’t be able to gauge the doneness of the cookies by observing how brown it is, I recommend test baking a couple cookies to determine the best baking time. Allow the cookies to cool slightly or completely.  Cookies will cool to a crisp on the outside and stay tender on the inside.  The caramel will remain soft at room temperature.

If you enjoy these cookies, stay tuned! Tracy and I are working on more cookies with beer.

Use the larger size pretzels and and rough chop about double the size of two chocolate chips.
On the left, with a caramel candy; on the right, without a caramel candy.

DSC_6832

Curry Spiced Butternut Squash & Cauliflower Soup

My Curry Butternut Squash & Cauliflower Soup, with a little heat from cayenne pepper, warms the soul on cold winter days. This soup is made with two nutrient dense vegetables, which are low in fat, low in carbohydrates and high in dietary fiber.  Winning!

Technically a fruit, the butternut squash has a particularly high level of vitamin A and also has a high level of vitamin C. It has more potassium than a banana and its color indicates an abundance of carotenoids, which is believed to protect against heart disease.

When buying butternut squash, select the fruit that feels heavy for its size with a matte and unblemished skin. A glossy skin indicates that the squash was picked too early and will not be as sweet. Stored in a cool dry place with ventilation, not in the refrigerator, this fruit has a storage life of up to three months!

In an effort to increase the nutritional value of my recipes, I like to incorporate a variety of vegetables.  For this soup, I paired the butternut squash with cauliflower.  Cauliflower is a good source of vitamin C and contains folate. It is also a good source of minerals, including iron, calcium and potassium.

I prefer to roast the butternut squash, cauliflower and apple rather than boiling them to make this soup.  Roasting is one of my favorite ways to cook vegetables and allows the flavors to develop and intensify.

I used a Dutch oven and an immersion blender to make this soup however you can use a blender too. I do recommend investing in an inexpensive immersion blender.  They are easy to clean up and you can use it while the soup is still in the pot.

Serving size: 6

Ingredients:

  • 4 cups of butternut squash, peeled and cut into 1 inch cubes
  • 3 cups of cauliflower, cut into large florets
  • 1 cup finely diced sweet onion (half of a large onion)
  • 1 Granny smith apple, peeled and cut into cubes
  • 1 tablespoon minced garlic (about 2 cloves or 1 large clove)
  • 1 teaspoon fresh rosemary, chopped
  • 1 teaspoon curry powder
  • ¾ teaspoon salt
  • ½ teaspoon cumin
  • ¼ teaspoon cayenne pepper (use a pinch of cayenne to start if you do not like it spicy)
  • 6 cups vegetable broth
  • 1 tablespoon honey
  • 6 tablespoons crème fraiche (optional)
  • fresh parsley (optional garnish)

Directions:

Preheat oven to 400F.

When preparing the butternut squash, use a very sharp knife. Cut a thin layer off the top and bottom to create a level surface. Then remove the skin using a vegetable peeler and scrape the seeds out with a spoon.

DSC_6746

When cutting the squash, cauliflower and apple, try to create even pieces. This will ensure even roasting.

Toss butternut squash, cauliflower and apple in 2 tablespoons olive oil. Place on baking sheet lined with aluminum foil. Season with salt and pepper and roast in 400F oven for about 25-30 minutes until tender. Turn the fruits and vegetable over at least once to ensure even roasting.

DSC_6753

You may need to remove the apple cubes before the butternut squash or cauliflower is finished roasting.

DSC_6762

In a Dutch oven, sauté onion in 1 tablespoon olive oil until tender and translucent.

DSC_6752

Add garlic cloves, rosemary, curry powder, salt, cumin and cayenne pepper and sauté for another couple of minutes. Remove the onion mixture from heat if the fruits and vegetables are not done roasting to avoid burning the onion and garlic.

DSC_6750
Minced garlic and rosemary.

Once the butternut squash, cauliflower and apple are done roasting, add them to the onion mixture. Add vegetable broth and honey.  Simmer for 15 minutes.

Using an immersion blender, puree the mixture until smooth. You can also use a blender. If using a blender, add only a couple ladles full of soup at a time. Place a kitchen towel over the lid and hold down with your hand. This is to prevent the hot liquid from pushing out of the lid and burning your hand. Gently pulse to start, then blend until smooth.

Taste soup and adjust seasoning to your liking. Serve with a dollop of crème fraiche on top and garnish with fresh parsley.

DSC_6754

Overnight Slow Cooker Cinnamon Apple Steel Cut Oatmeal

When I first started training for endurance sports, I made the mistake of eating flavored instant oatmeal for breakfast. Just add boiling water and a tasty bowl of sugary oats was ready within minutes. I’ve since learned that steel cut oats (also known as Irish oats) is much healthier.

  • Steel cut oats contain no sugar, unlike flavored instant oatmeal which is loaded with sugar. Some rolled oats also contain sugar.
  • Both steel cut oats and rolled oats have a lower glycemic index. Glycemic index (GI) measures how carbohydrates in foods affect blood sugar and insulin. The lower the GI, the slower the glucose enters the bloodstream. Because steel cut oats are denser, they will take longer to digest and be absorbed. This causes a steady rise in blood sugar rather than a sudden spike. Foods with a lower GI will also make you feel full longer. (For more information on glycemic index: http://www.webmd.com/diabetes/glycemic-index-good-versus-bad-carbs)
  • Steel cut oats undergo less processing than rolled oats and instant oats.

The problem with steel cut oats is that it takes about 20-30 minutes to prepare. I tried soaking steal cut oats in water overnight. Although that helped to reduce the cooking time, it still wasn’t fast enough for me. So I tried preparing the oatmeal the night before, storing it in the refrigerator, then warming it up in the microwave the next morning. Unfortunately, I did not enjoy how the oatmeal congealed into a mushy glob. Finally, I tried cooking the oatmeal in a slow cooker overnight. That was a huge success!

I mixed all of the ingredients into a slow cooker before I go to bed and then voila, I wake up to warm, cooked and delicious oatmeal.

Since it’s important to refuel within 20 minutes after a workout, I will pack another serving of oatmeal to bring to work. I’ll either eat it cold or warm it up in the microwave. Yes, this means that on the mornings I workout, I have 2 breakfasts. In addition, I like to consume a protein along with a second serving oatmeal, such as a hard boiled egg or Greek yogurt with fruit and/or granola.

Serving size: 4 

Ingredients:

  • 1 cup steel cut oatmeal (also called Irish oatmeal)
  • 2 cups water
  • 1 apple, pealed and cut into ½ inch cubes
  • 1 cup Almond milk
  • 1 tablespoon dark brown sugar*
  • 1/4 teaspoon of vanilla
  • 1/4 teaspoon ground cinnamon
  • 1/8 (pinch) of ground nutmeg (freshly grated if you have it)
  • Unsalted roasted chopped almonds or walnuts (optional)

Note: Ideally, if you can do without the dark brown sugar, that is the healthiest option, but I personally prefer to have a small amount of it in my oatmeal. Since this recipe is a serving size for 4, one tablespoon isn’t so bad. The apples also help to naturally sweeten the oatmeal.  If you prefer your oatmeal on the sweeter side, you may want to add up to another tablespoon full, however I encourage you to try to savor the natural sweetness from the apple and avoid adding more sugar.

Directions:

Mix all of the ingredients and pour into crockpot.

I used a 6.5 quart slow cooker with a non-stick insert but a smaller 4 quart slow cooker is all you need. If the insert is not a non-stick surface, you will want to spray it with oil.

Cover and cook on a low temperature for 7 hours.  If you prefer, serve with chopped walnuts or almonds.

I recommend you test this recipe out during the daytime, to determine if you can achieve the desired results with your slow cooker.  If the oatmeal is too dry, you may need to add more liquid at the beginning. You may also want to experiment plugging your slow cooker into a timer and cooking the oatmeal for fewer hours. My slow cooker does not work with a timer, so I need to leave it on for at least 7 hours.

DSC_6735

DSC_6738

DSC_6744

Garlicky Roasted Vegetable Pasta with Pesto

Leftover roasted vegetables are great ingredients to have in the refrigerator when you need to cook a fast and healthy weeknight meal. I had extra roasted zucchini and bell peppers left over after making my Vegetable Lasagna. The day after I made the lasagna, I used some of the roasted vegetables as a topping for homemade pizza. A couple days later, I used the remaining roasted vegetables in this Garlicky Roasted Vegetable Pasta with Pesto. The basil pesto used in this recipe can also be made in advance and stored frozen up to 3 months. I am not ashamed to admit that I used store bought basil pesto; in addition, I used store bought garlic paste since I like my pesto garlicky. This healthy and delicious dinner was ready in 20 minutes.

Serving size: 2

Ingredients for Basil Pesto:

  • 2 cups packed fresh basil leaves
  • 3-4 cloves garlic (I like mine garlicky)
  • 1/4 cup pine nuts
  • 1/2 cup extra-virgin olive oil, divided
  • 1/2 cup grated Parmigiano-Reggiano cheese
  • Kosher salt and freshly ground black pepper, to taste

Ingredients for Pasta:

  • 2 cups of cooked pasta (use your favorite pasta; gluten-free if you pefer; I used whole wheat)
  • 1/4 teaspoon garlic paste (optional and used only because the store bought pesto was not garlicky enough)
  • pinch of red chili flakes
  • 1/4 cup roasted bell peppers, sliced*
  • 1/2 cup roasted zucchini slices*
  • 1 cup miniature heirloom tomatoes, sliced
  • 3 tablespoons basil pesto
  • 2 tablespoons of freshly grated Parmigiano-Reggiano cheese

* Note: For directions on how to roast bell peppers and zucchini, follow the instructions on the Vegetable Lasagna recipe.

Directions:

In a food processor, pulse basil, garlic and pine nuts a few times until just combined. Then, while the food processor is running, slowly drizzle in olive oil. It’s important to do this slowly to ensure it will emulsify. Season to taste with salt and black pepper. If you are using the pesto immediately, stir in the cheese. Otherwise, store and freeze without the cheese. You can add freshly grated cheese once you are ready to thaw out and use the pesto.

Cook pasta in salted water and drain. Add the pasta back to the same pot. On medium heat, add the garlic paste, red chili pepper flakes, roasted peppers, roasted zucchini and tomatoes. Stir together and heat until vegetables are warmed through. Combine pesto and heat for 2 additional minutes. Just before serving, sprinkle freshly grated Parmigiano-Reggiano cheese.

DSC_6710

Left over roasted zucchini and bell peppers were also used  to make pizza.
Left over roasted zucchini and bell peppers were also used to make pizza.

Simple Granola

Who doesn’t like granola?  My favorite way to enjoy granola is over Greek yogurt for breakfast. Sometimes I’ll add milk to a bowl of granola for a great alternative to cereal; sprinkle it over ice cream as a yummy crunchy topping; or add 1/3 cup of dried fruit, such as cranberries, cherries, raisins, dates or apricots, and eat it by the handful as a snack. The type of nuts or seeds can be swapped out. I sometimes use more walnuts and omit the pecans or use pepitas (pumpkin seeds) instead of sunflower seeds. Choose your favorite nuts. Just make sure the nuts are unsalted.  The granola can be stored up to 1 week in an airtight container.  Placed into a mason jar wrapped with a bow, fresh homemade granola makes a nice little gift.  Who doesn’t like granola?

Ingredients:

  • 3 cups old-fashioned oats (not instant or quick oats)
  • 1/3 cup unsalted sunflower seeds
  • 1/2 cup chopped, unsalted & roasted cashews
  • 1/2 cup chopped, unsalted & roasted pecans
  • 1/2 cup chopped, unsalted & roasted almonds
  • 1/2 cup chopped, unsalted & roasted walnuts
  • 1 teaspoon ground cinnamon
  • 1 teaspoon Kosher salt
  • 1/2 cup canola oil
  • 1/2 cup honey
  • 1/4 cup maple syrup
  • 2 teaspoon vanilla extract
  • 1/3 cup dried cranberries (optional)

Directions:

Preheat oven to 350F

Combine oats, sunflower seeds, chopped nuts, cinnamon and salt in large bowl. In separate small bowl, whisk together oil, honey, maple syrup and vanilla extract. Pour over oat mixture and combine thoroughly. Spread out evenly over parchment lined baking sheet. Bake for 30-35 minutes until golden brown, stirring granola every 12-14 minutes to ensure even browning. Allow granola to cool on pan completely unless you forgot to line the pan with parchment paper. Clean up might be easier if the granola is transferred from an unlined baking sheet to a glass casserole dish to cool. Otherwise, the granola will cool to crisp little chunks and slide right off the parchment paper. I prefer to leave the granola in some smaller chunks to store.

Cool and store in airtight container up to 1 week, if it lasts that long.

image

granola parfait

DSC_6707

I like a variety of nuts, including walnuts, almonds, pecans and cashews, in my granola.  Choose the combination of you enjoy most.
I like a variety of nuts, including walnuts, almonds, pecans and cashews, in my granola. Choose the combination of you enjoy most.

DSC_6703

The granola can be stored up to a week in an airtight container.  They also make nice gifts.
The granola can be stored up to a week in an airtight container. They also make nice gifts.

Vegetable Lasagna

I was challenged this holiday to come up with festive meals that would satisfy both vegetarian and carnivore hungry athletes at the same table. When I developed the menus, I had 3 requirements: 1) Each of the main ingredients’ attributes should stand on it’s own. For example, I’m not a fan of tofurkey, chick’n or any food being doctored up to substitute real meat. If tofu is an ingredient, then it should be prepared in a way that it can be savored; 2) The dish should be worthy of special occasions, requiring a little labor of love and; 3) The dish should be comforting.

Voila. For Christmas eve, the main dish was Vegetable Pot Pie and for Christmas day, the main course was Vegetable Lasagna. Each of these recipes can be modified to include protein, such as meat or tofu.  The lasagna freezes well and is a fast and nutritious meal that heats up quickly after a workout or for a busy weekday dinner.  If you have extra mozzarella and Parmesan cheeses, make a little extra tomato sauce and roast a little extra zucchini and roasted peppers.  You can use these ingredients to make a nice pizza the next day.

Here’s how I made the lasagna.

Serving size: 8-10

Ingredients:

  • 2 tablespoons olive oil
  • 1/2 of large onion, diced (about 2 cups)
  • 8 cloves garlic, minced (about 2 tablespoons)
  • 1 28-ounce can petite diced tomatoes
  • 1 28-ounce can tomato puree
  • 1 6-ounce can tomato paste
  • 1 bay leaf
  • 1 teaspoon sugar
  • 1/2 teaspoon dried basil
  • 1/2 teaspoon dried oregano
  • 1/2 teaspoon dried thyme
  • 1/2 teaspoon red pepper flakes
  • 1/4 cup freshly grated Parmesan-Reggiano cheese
  • 15 ounces ricotta cheese
  • 16 ounces shredded mozzarella
  • 2 small zucchini, sliced 1/4 inch thick and roasted
  • 1 cup frozen spinach, thawed and squeezed dry
  • 2 roasted red peppers, cut into strips
  • 8 ounce package oven-ready, no boil lasagna noodle

Directions:

Preheat to 375F 

Sauce:

In 3.5 quart French oven, sauté diced onion in olive oil over medium heat until soft and translucent. Add garlic and sauté for about 2 minutes more. Add diced tomatoes, tomato puree, tomato paste, bay leaf, sugar, basil, oregano, thyme and red pepper flakes. Simmer, stirring occasionally for about 30 minutes.

Roast red bell peppers:

While the tomato sauce simmers, roast bell peppers. There are several ways to roast peppers. I like to blister the whole peppers over a gas flame.  Allow the peppers to cool and remove the charred skin.  I don’t bother to place them in a paper bag or cover with plastic wrap.  It’s not necessary for this recipe to remove all of the skin.

Core the peppers and cut into quarters. On a baking sheet lined with parchment paper, place the pepper quarters skin side up and roast in oven at 375F for about 20 minutes or until softened.

Roast zucchini:

Using a mandolin, slice zucchini into 1/4 inch strips. Brush both sides with olive oil and season with salt and pepper. Place on parchment lined baking sheet and roast in over at 375F. Turn over after 10 minutes and continue to toss until softened.

Building first layer of lasagna:

Remove bay leaf from tomato sauce. Coat the bottom of lasagna pan with tomato sauce. I used a 10.5 x 8.75 x 2.5 inch ceramic casserole dish. Place first layer of lasagna noodles over the tomato sauce, overlapping each noodle by ¼ inch. Gently spread ricotta cheese over the noodles being careful not to break noodles. Lay roasted zucchini strips. Sprinkle with mozzarella cheese and cover with thin layer of tomato sauce making sure to coat the noodles.

Gently spread a thin layer of ricotta cheese over lasagna noodles.

DSC_6684

Second layer of lasagna:

Place next layer lasagna noodles over the zucchini and tomato sauce. Spread thin layer of ricotta cheese over the noodles, lay roasted peppers, sprinkle with mozzarella cheese and cover with another thin layer of tomato sauce.

DSC_6687

Third layer of lasagna:

Place third layer of lasagna noodles over roasted peppers and tomato sauce. Spread with thin layer of ricotta cheese. Squeeze out all the moisture from spinach and spread evenly over ricotta and noodles. Repeat layering with mozzarella and tomato sauce.

DSC_6690

Last layer of lasagna:

Place forth and last layer of lasagna over the spinach layer. Cover with remaining tomato sauce. Sprinkle with remaining mozzarella cheese and Parmesan-Reggiano cheese.

Cover with aluminum foil and bake at 375F for 40 minutes.

DSC_6691

DSC_6701


Use the extra mozzarella, parmesan, tomato sauce, roasted zucchini and roasted peppers to make a pizza the next day.  Enjoy it with champagne like I did here.
Use the extra mozzarella, parmesan, tomato sauce, roasted zucchini and roasted peppers to make a pizza the next day. Enjoy it with champagne like I did here.

Vegetarian Butternut Squash Chili

How do you feed 30 athlete friends a vegetarian friendly meal, which you can prepare in advance and serve warm with minimal fuss? My Butternut Squash Chili was the winning answer, setting a PR* in my kitchen for nourishing the largest gang of hungry athletes in my house to date. Like an endurance athlete, the chili finished strong, held up to being kept warm for hours and with plenty to go around for seconds, thirds and eh hem, fourths.

A variety of beans keep it interesting; frozen corn kernels add a nice contrast of texture and sweetness while cornmeal is the secret ingredient to thicken it all up.

The chili freezes well and is also vegan and gluten-free.

* In case you are not familiar with the term PR, it’s short for personal record.

Serving size: 10-12

Ingredients:

  • 2 ½ pounds butternut squash, cut into 1 inch cubes
  • ¼ cup + 2 tablespoons olive oil
  • 4 ½ cups vegetarian broth
  • 1 large chopped onion
  • 2 tablespoons finely chopped garlic
  • 1 diced green bell pepper
  • 1 diced red bell pepper
  • 1 28-ounce can diced tomatoes
  • 2 tablespoons tomato paste
  • 1 4-ounce can dice green chili
  • 2 16-ounce can black beans
  • 2 16-ounce can garbanzo beans
  • 2 cups frozen corn (roasted frozen corn adds a nice smokey flavor)
  • 1 tablespoon Worcestershire sauce
  • 1 tablespoon Chipotle chili powder
  • 1/2 tablespoon chili powder (add more to taste)
  • 1 teaspoon cinnamon
  • 1 teaspoon cumin
  • Salt & freshly ground black pepper

Optional Ingredients: 

  • sour cream
  • chopped green onion
  • shredded cheddar cheese

Directions:

Preheat oven to 400F.

Peel the butternut squash with a vegetable peeler. With a very sharp knife, slice off the top and bottom of the butternut squash to create a level surface for it to stand on either end and cut crosswise into 2 halves. Cut each half lengthwise into 2 more halves. Scoop out seeds and stringy parts with a spoon. Cut into 1/2 inch cubes and place on baking sheet lined with aluminum foil. Toss in 2 tablespoons olive oil. Season with salt and freshly ground black pepper. Roast for about 20 minutes, tossing once, until tender. Remove from oven and set aside to cool.

In a large 6 quart Dutch oven, heat remaining olive oil. On medium heat, sauté chopped onion until soften.

Add ½ cup vegetable broth, onion, garlic, and chopped bell peppers. Stir over medium heat for another 5 more minutes.

Add remaining vegetable broth, diced tomatoes, tomato paste, green chili, beans, corn, beans, Worcestershire sauce and spices. Simmer for at least 1 hour but 2 hours is recommended.  Even better if prepared the day before and reheated. Season with salt to taste. Serve with shredded cheddar cheese, sour cream and sliced green onion. My favorite way is with a dollop of sour cream and green onion.


Flourless Banana and Egg Pancakes

Stop the presses.  This is the most awesome two ingredient pancake to hit the griddle, and my stomach.  Technically it’s three ingredients, since one additional ingredient is needed to keep the pancakes from sticking to the griddle.  Embellish the pancakes with cinnamon, nuts, yogurt, and berries, and now you have a few more ingredients but the pancake itself can be made with just one banana and one egg.  That’s it.  Our wonderful run coach, Lisa Engles shared this recipe with me while at dinner at our team’s favorite healthy post-track hangout.

More information about our amazing Coach Lisa Engles can be found here:   http://innerstatecoaching.com 

A ripe banana provides enough sweetness that additional syrup or sugar is not needed.  These pancakes are even sweet enough to enjoy as a healthy dessert, which is how I first savored them since I tested the recipe after dinner.

Serving size: 2 (4 small pancakes)

Ingredients:

  • 2 ripe bananas
  • 2 eggs
  • 1/8 teaspoon cinnamon
  • 1 teaspoon coconut oil
  • 1 teaspoon toasted and finely chopped almonds (optional)
  • Greek yogurt (optional)
  • Fresh berries (optional)

Directions:

Using an electric or hand mixer, combine bananas and eggs until smooth.   This can be done by hand but it’s obviously much faster and easier with a mixer.  It’s not necessary to mix until completely smooth however the batter should be mostly smooth with very few lumps.  If necessary, mash out lumps with a fork or the back of a spoon.

On medium high heat, add the coconut oil to the griddle or frying pan.  Spoon the batter into four small pancakes on the griddle.  Sprinkle finely chopped toasted almonds on top of each pancake.  Cook until the top side of the pancake starts to dry out and the side down is golden brown.  Flip over and cook until other side is golden brown.

Top with Greek yogurt and fresh berries.

Sprinkle toasted and finely chopped almonds to add a nice crunch to the pancake.


DSC_6643


Coach Lisa
Coach Lisa

Cherry-Chocolate Chip Oatmeal Cookies aka “Triathlon/Pre-Race/Post-Race Cookies”

I recently responded to a New York Times Food tweet:

‏”@nytfood This cookie battled it out against other holiday treats in a ‪#CookFight. What’s your go-to cookie?”

My response was the Cherry-Chocolate Chip Oatmeal Cookies, which I adapted slightly from a 1998 Bon Appétit recipe.  These cookies are also known among my athlete friends as “triathlon cookies” or “pre-race / post-race” cookies.  They are my go-to cookies during the holidays and to pack for out of town triathlon trainings or races.  I also stashed a few cookies inside my hydration pack when I raced my first 50 km ultra marathon this past weekend.  Packed with dried cherries, chocolate chips and toasted almonds, these cookies are great for refueling.

My good childhood friend Tracy, who is an accomplished 2x Ironman triathlete shared this recipe with me. Upon her advice, I eliminated the almond extract from the original recipe.  I also experimented with different ratios of sugar and butter in an attempt to make it a little healthier.  I found that the original dough recipe was pretty darn good as is.  So instead of altering the amount of sugar and butter, I decided to load the cookie up with more dried cherries, and chocolate chips.  Aside from the occasional runaway dried cherry left on the baking sheet, the cookie held all of it’s yummy stuff together. The trick is to refrigerate the dough so it firms up.  The dough can be frozen up to 3 months.  I like to have a few batches in the freezer to bake up a quick dozen or two.

Adapted from Bon Appétit, February 1998

Makes: 2 dozen

Ingredients:

  • 1/2 cup slivered almonds, toasted
  • 1 cup all purpose flour
  • 1/2 teaspoon baking soda
  • 1/4 teaspoon salt
  • 1/2 cup plus 2 tablespoons (1 1/4 sticks) unsalted butter, room temperature
  • 1/2 cup sugar
  • 1/2 cup (packed) dark brown sugar
  • 1 large egg
  • 1 teaspoon vanilla extract
  • 1 cup old-fashioned oats (not quick or instant)
  • 1 1/2 cups semisweet chocolate chips (12 ounce bag)
  • 1 1/4 cup dried tart cherries (2 5-ounce bags)

Directions:

Preheat over 325F.

Position one rack in the middle and the 2nd rack just above. You will be baking 2 pans of cookies at a time. Line 2 large baking sheets with parchment paper.

In a medium bowl, sift the flour, baking soda and salt together. Set aside. Using a stand mixer with a paddle attachment, handheld mixer or wooden spoon, cream together the butter, granulated sugar and brown sugar in a large mixing bowl until light and fluffy. If using an electric mixer, this will take about 4-5 minutes on medium speed or up to 10 minutes if using a wooden spoon.

Beat in the egg and vanilla extract for 2-3 minutes until thoroughly combined. Scrape the bowl at least once to ensure all of the ingredients are thoroughly incorporated.

Slowly beat in the flour mixture.  Scrape the sides of the bowl a couple times to ensure the flour is incorporated.

DSC_6634

Stir in oats, chocolate chips, cherries and toasted almonds.

DSC_6636

The dough can be baked immediately however I find that it bakes more evenly and forms into a better cookie shape if I chill the dough, covered, for at least 1 hour.

Scoop out an overflowing spoonsful amount of dough.  Using your fingers, press the dough together firmly ensuring the dried cherries and chips are sticking to the dough.  Shape into a slightly flatted rounds.  Place onto baking sheet, about 2 inches apart.

DSC_6638

Bake for 12 minutes, then switch and rotate baking sheets and bake for 6 minutes longer, until golden brown on edges. Either cool the cookies on the baking sheet or carefully transfer the soft cookies onto a cooling rack or plate. I like to wait a couple minutes so the cookie starts to firm up a little before handling. The cookies will firm into a crisp cookie when cooled.

Note: To freeze dough, wrap in wax paper then place inside a freezer zip lock bag. The cookie dough can be stored frozen up to 3 months.

IMG_0153