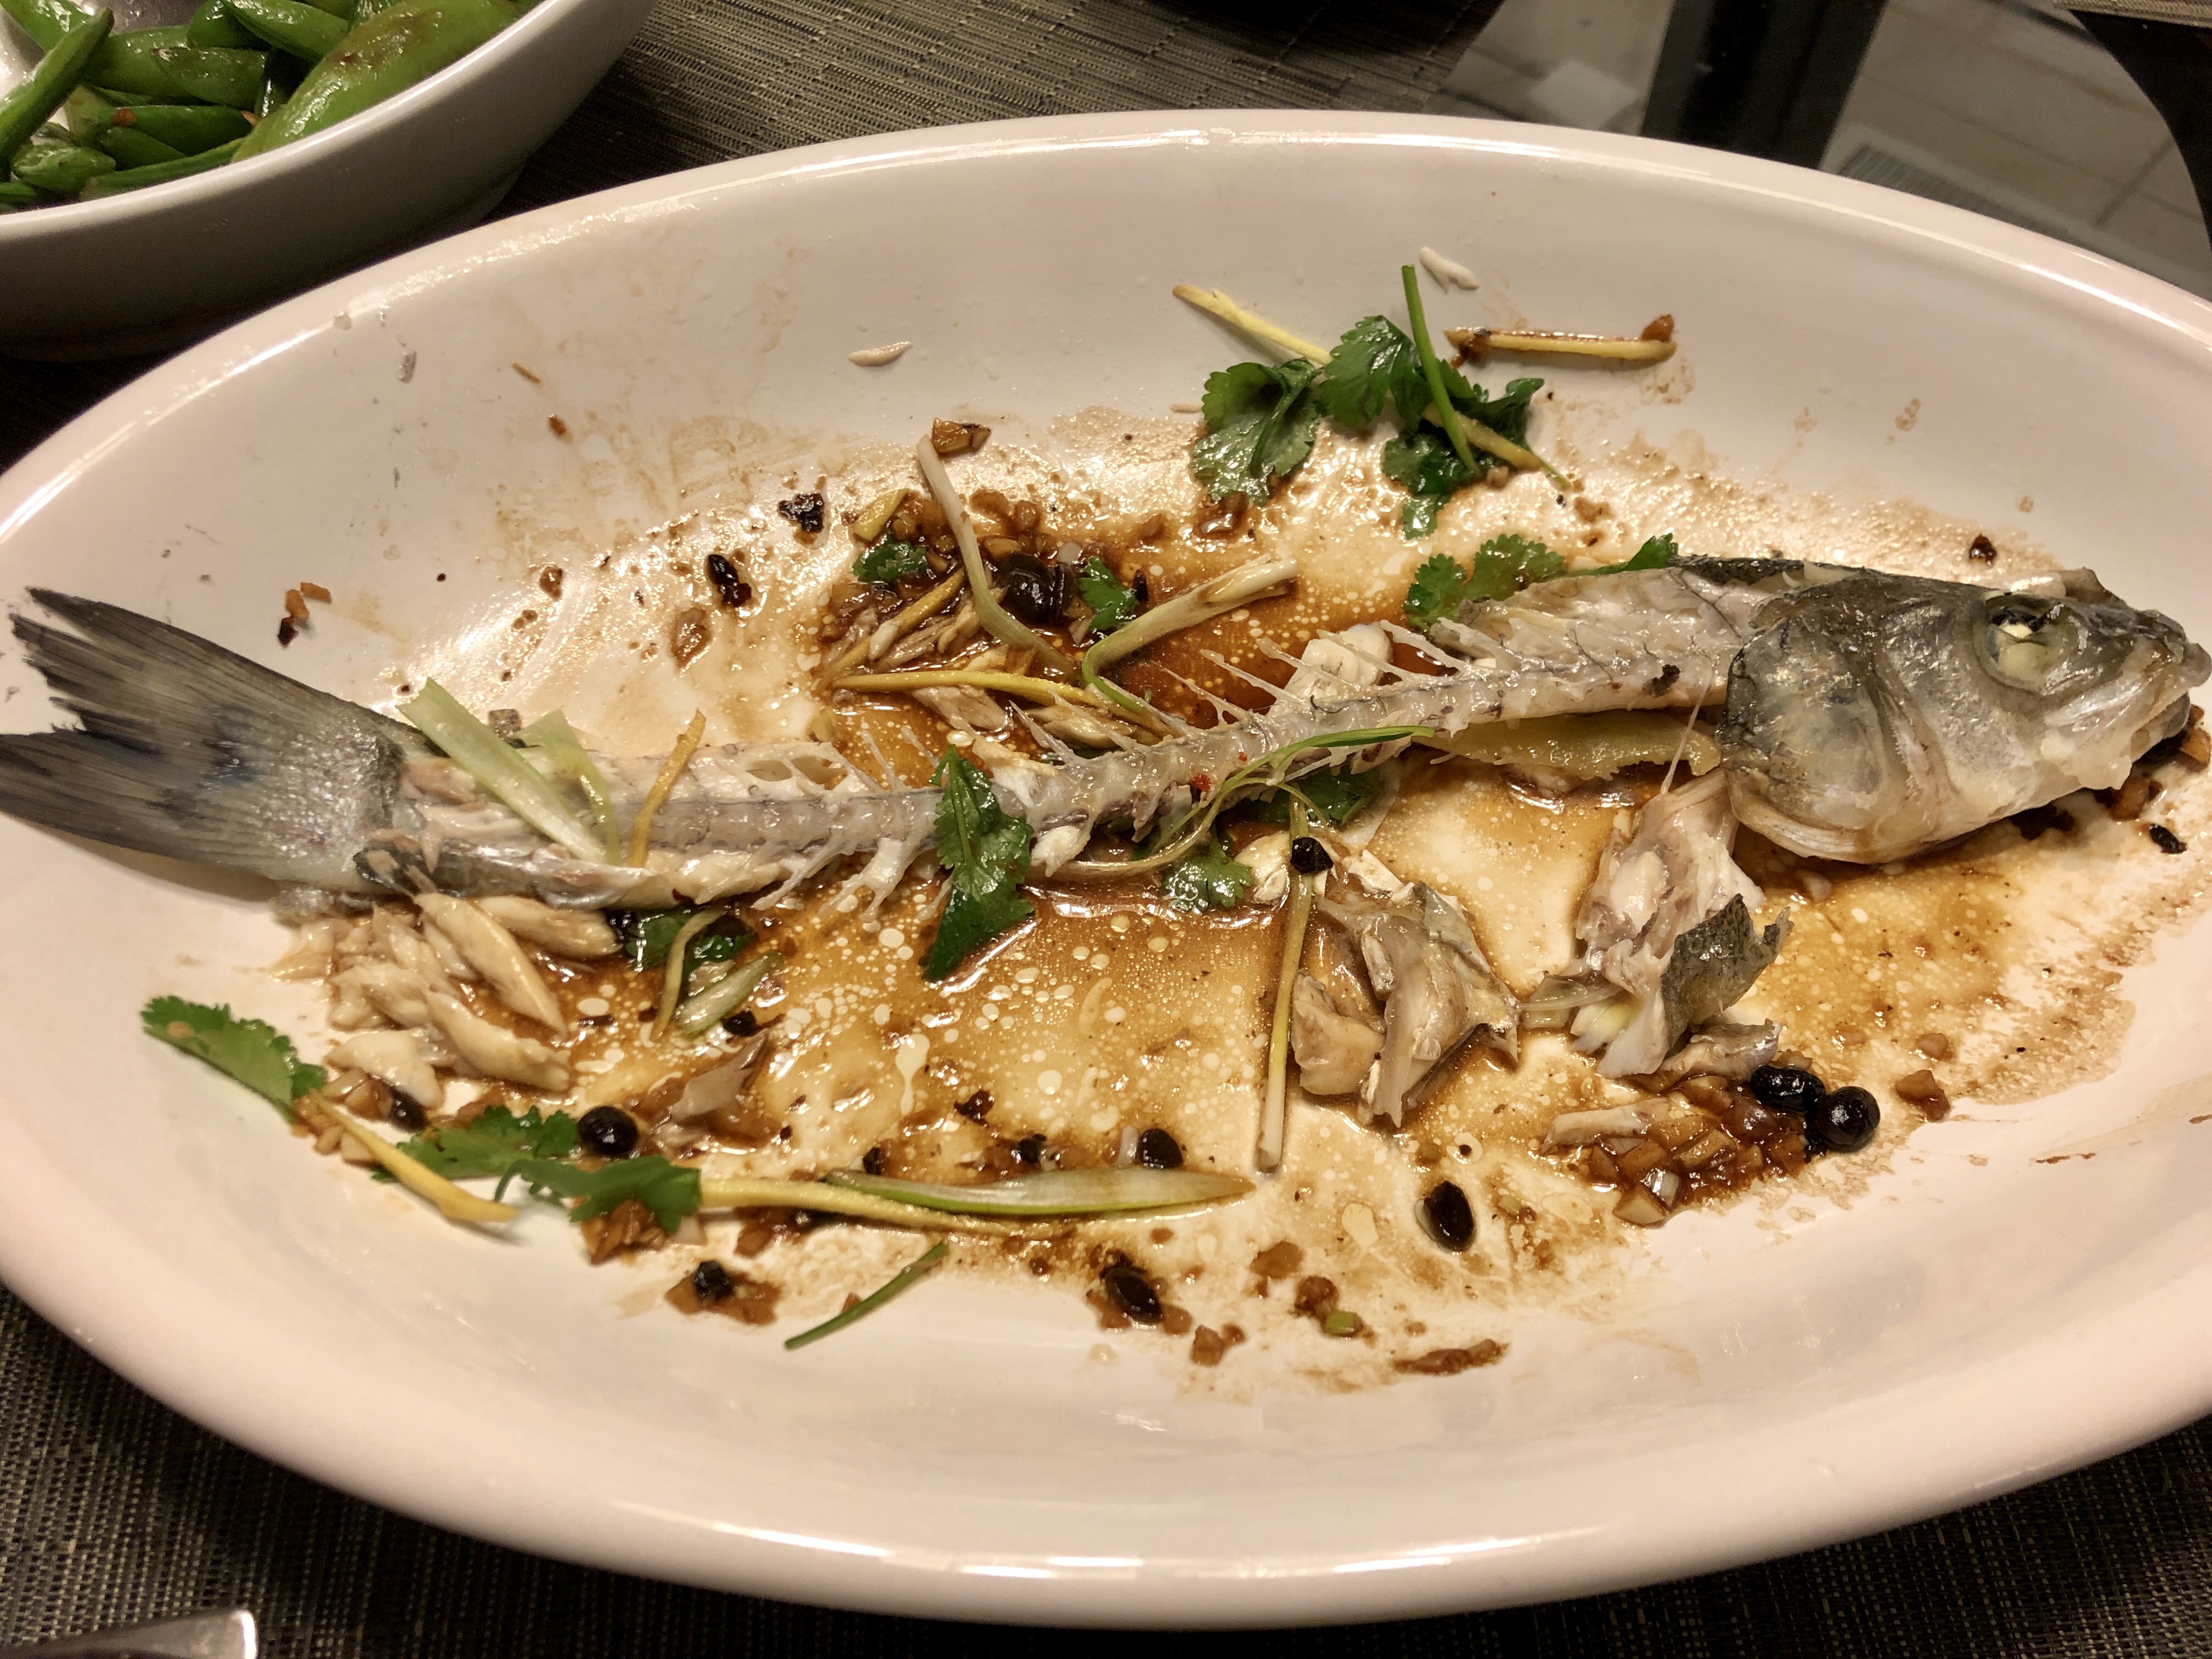
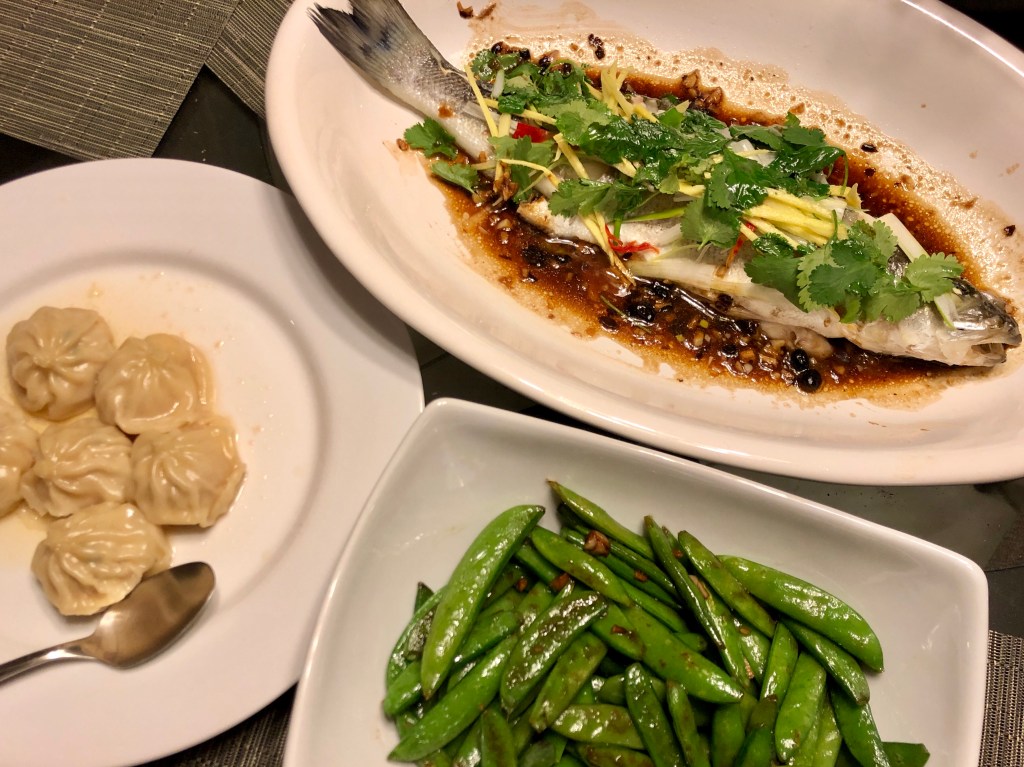
Happy Lunar New Year! I celebrated my Thai, Chinese and Vietnamese heritage with a customary whole steamed fish whose head and tail was kept intact, even when served. While dining, the dish is presented with the head of the fish directed at the guest of honor. The flesh is removed and served at the table without disturbing he head or tail. At the end of the meal, you are left with an impressive fish skeleton. It’s almost like a cartoon, where a character puts a whole fish in the mouth, head first, then and pulls out only the bones.
This dish is ridiculously easy to cook and done in 8-10 minutes depending on the size of the fish. Steaming also allows for a margin for error. You are almost guaranteed a moist and flaky fish even if you overcook it. I unintentionally tested this out. I do recommend not overcooking the fish.
This is a Chinese style recipe. The Thai style uses fish sauce in place of soy sauce, lime juice and palm sugar instead of rice wine, adds lemongrass, and of course, a generous amount of Thai bird chili peppers. Although there are a few different ways to prepare the Chinese style, there are typically only 3 basic ingredients (other than the fish itself): fresh ginger, scallion (green onion) and a salty sweetish sauce made of either fermented black bean paste, soy sauce with sugar, hoisin sauce, oyster sauce or some other similar sauce that is salty and slightly sweet.
I selected a combination of light soy sauce and fermented black bean paste as the base for my sauce. Since the black bean paste I used was already sweetened with brown sugar and pineapple juice, I did not add any additional sugar. As we all know, sugar is not good for us and unless it is imperative to what I’m cooking, I avoid adding it. To add a bit more tang, I included a Thai bird chili pepper with the seeds removed for a gentle heat along with white pepper, garlic and rice wine.
Some recipes do not include pouring hot oil over the fish as the final step. I included this step because the hot oil infuses the fish with the flavors of the herbs and spices laid on top of the fish. Some recipes have a larger quantity of sauce poured over the fish. My version offers a smaller amount of sauce poured around the fish. This way, you can enjoy the delicate flavor of the fish with some sauce on the side to compliment it. For me the star of this dish is the delicate fish, infused with ginger, scallions, coriander (cilantro) and a hint of Thai bird chili pepper. The co-star is the black bean sauce.
NOTES:
* Any mild whole white fish can be used. A flatter fish steams better. For this recipe, I found a nice barramundi, also called Asian sea bass. Take a moment to inspect the fish before you purchase it. Fresh fish should not smell too fishy. Also, the skin, should be shiny, the flesh should be firm, the gills should be red and the eyes should appear clear. Ask your fish monger to scale and gut the fish.
** Fermented black bean paste is made of dried soybeans that have been fermented with salt and spices such as chili peppers and/or wine and possibly ginger. The brand I used is made with ginger, pineapple juice and tamari. You could use just the fermented black beans, (called Douchi) and take a few additional, but simple steps to rinse the beans, then make your own paste by mashing them with garlic, spices and a little brown sugar or pineapple juice.
*** Chinese rice wine or Shaoxing is not the same as rice wine vinegar so be careful when reading the label. The Japanese rice wine is called mirin and is sweeter.
Serving size: 2
Ingredients:
- 1 pound whole mild white fish*, scaled and gutted, (barramundi, striped bass, flounder, red snapper or branzino), scaled and gutted. (If using a larger whole fish, score** both sides of the fish.)
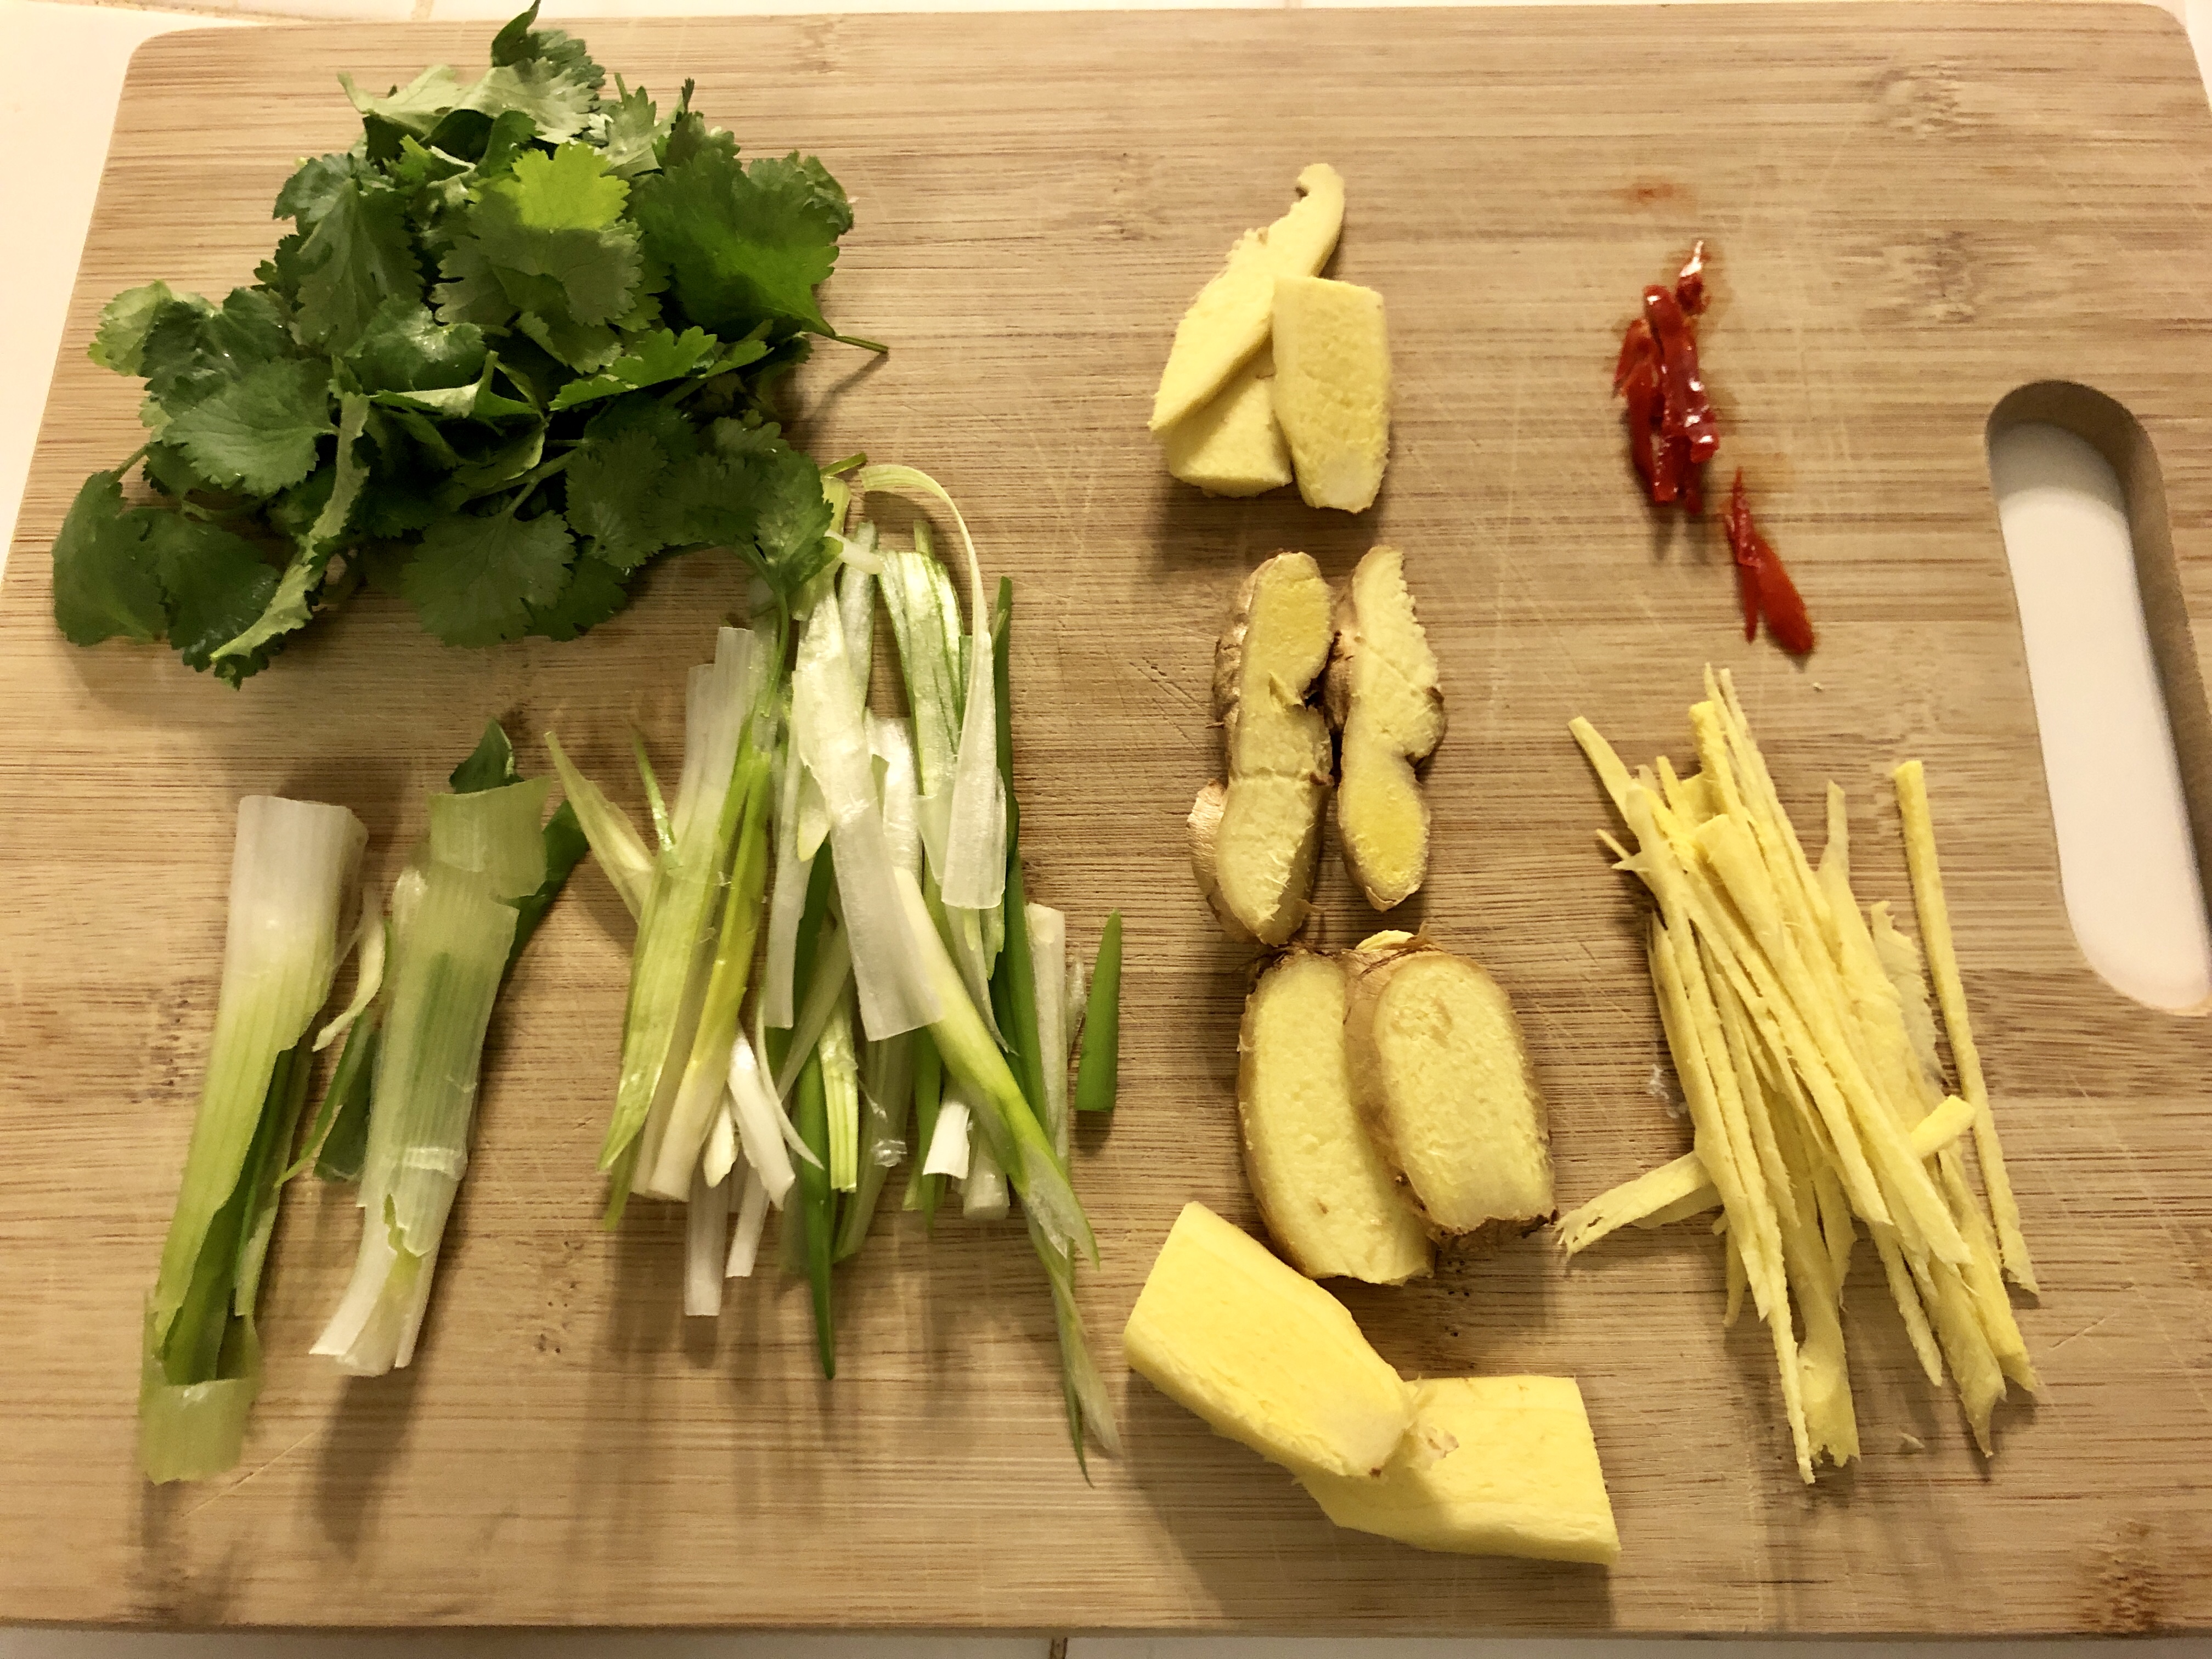
- 3 inch nub of ginger, 1/3 julienned and 2/3 cut into large ¼ inch thick slices (you do not need to remove the skin off of the piece that is julienned)
- 5 stalks of scallion (green onion), 1/3 julienned and 2/3 cut into 2 inch pieces
- 1 – 2 fresh Thai bird chili pepper, julienned (this can be omitted or the seeds can be removed for a milder taste)
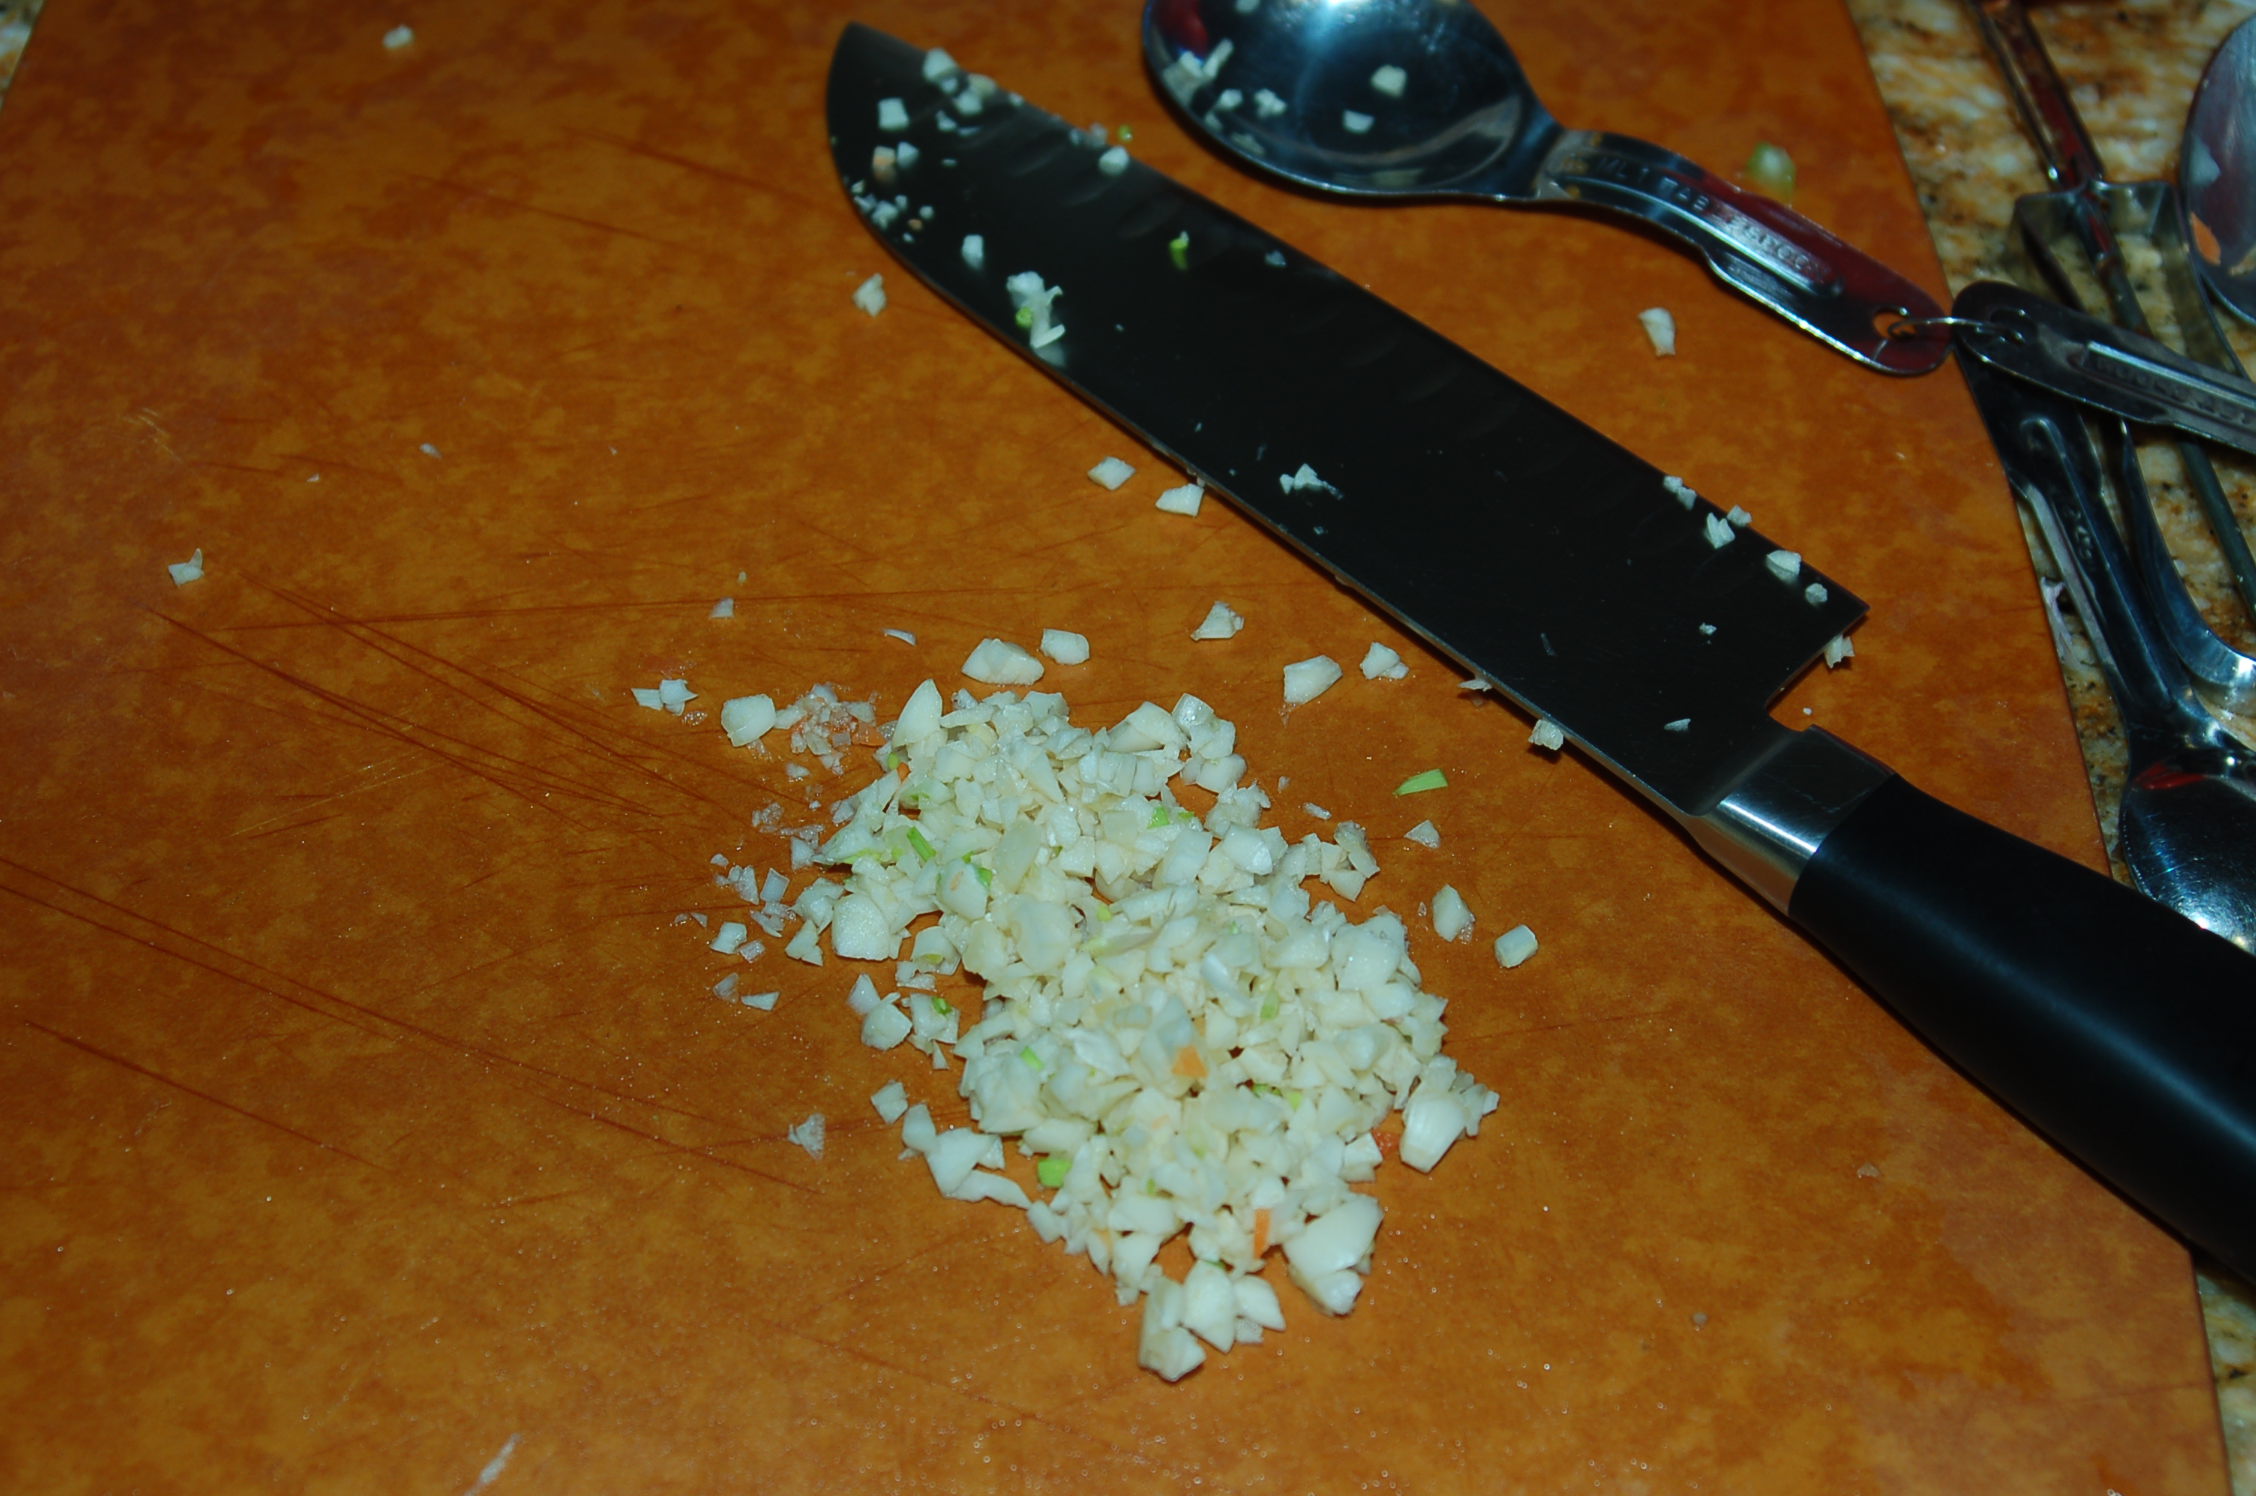
- 1 small clove garlic, minced
- 1 tablespoon fermented black bean paste
- 1 tablespoon Chinese rice wine (Shaoxing)*** or pale dry sherry
- 1 tablespoon good quality low sodium soy sauce
- 2 teaspoons sesame oil
- 2 tablespoons water
- 2 tablespoons waterhandful of coriander (cilantro) leaves, plucked from the stems
- couple pinches of Kosher salt or sea salt
- couple pinches of white pepper
- 1 tablespoon vegetable oil
Directions:
- Rinse the fish well, both inside and out. If the fish is large (e.g., 2 pounds or more), score it at an angle all the way to the bone on both sides. Remember to score it in the opposite direction on the other side. This will help a larger size fish cook faster and more evenly.
- Season with Kosher salt or sea salt and white pepper on both sides and inside of the cavity.
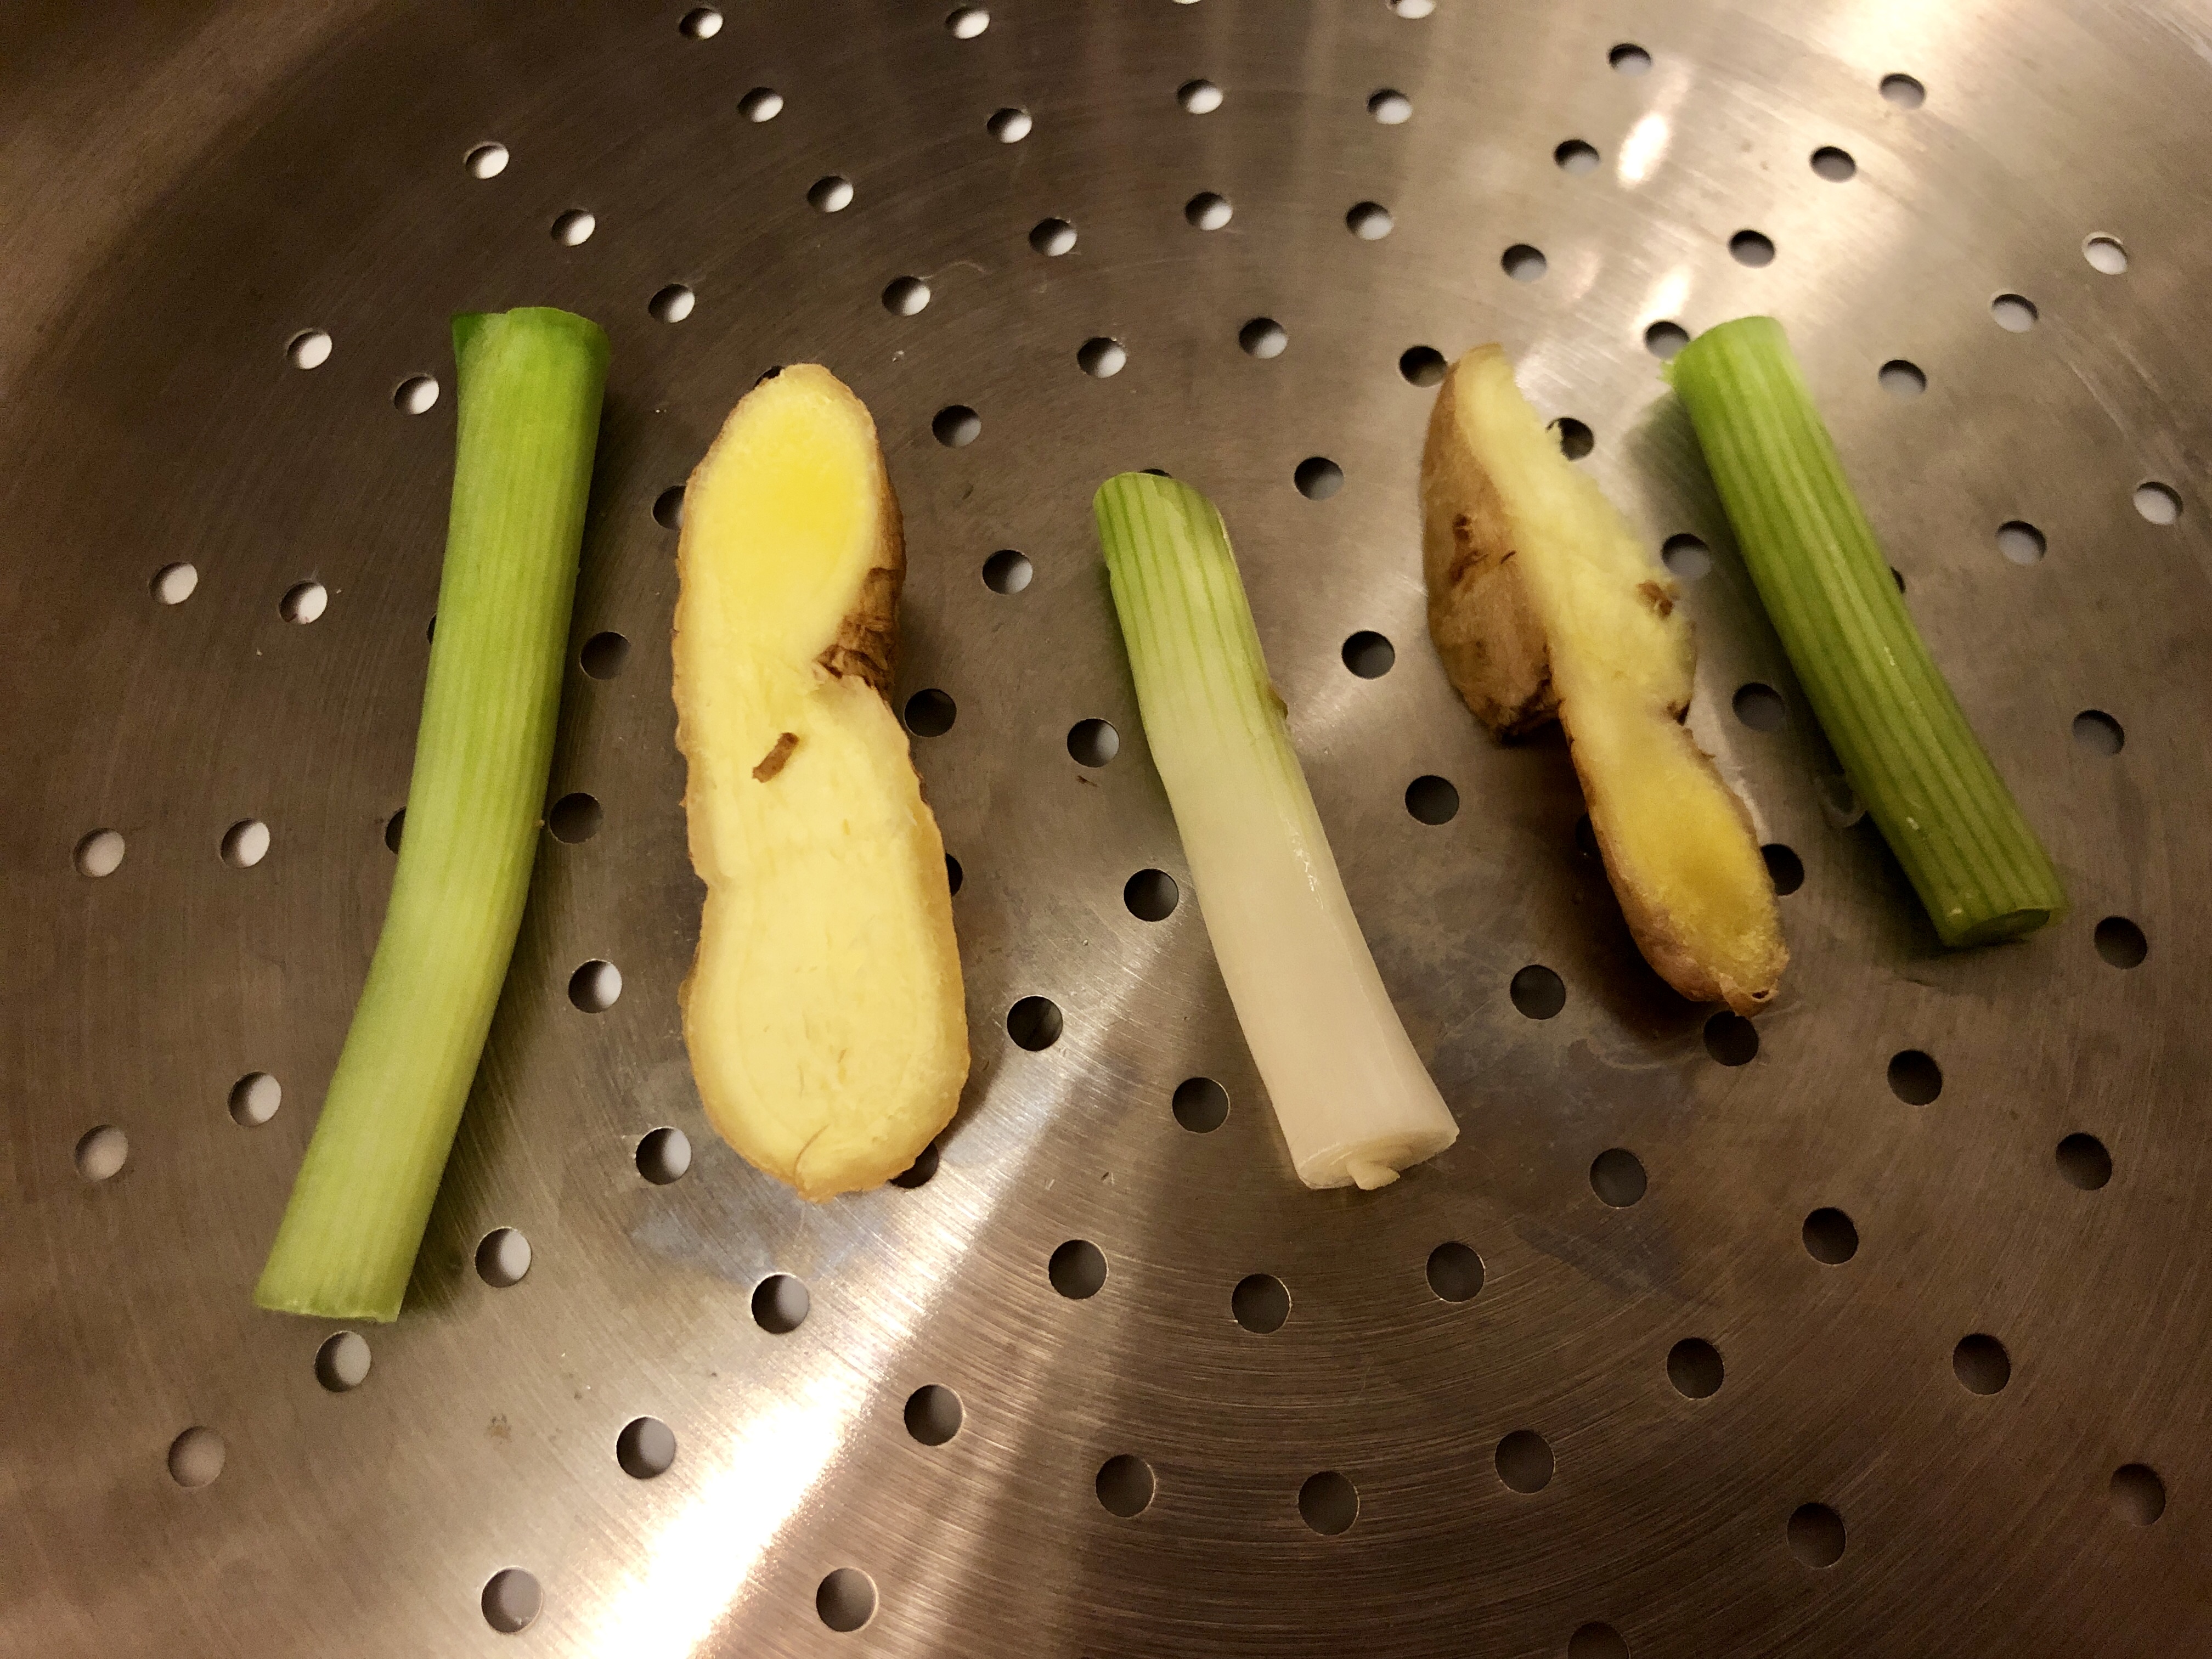
- Smash a couple 2-inch stalks of scallions with the side of a knife to release it’s flavor. Place the smash scallions along with a couple large slices of ginger in the cavity of the fish.
- Place the remaining 2-inch stalks of scallions and remaining large slices of ginger on the bottom of a steamer basket/insert.
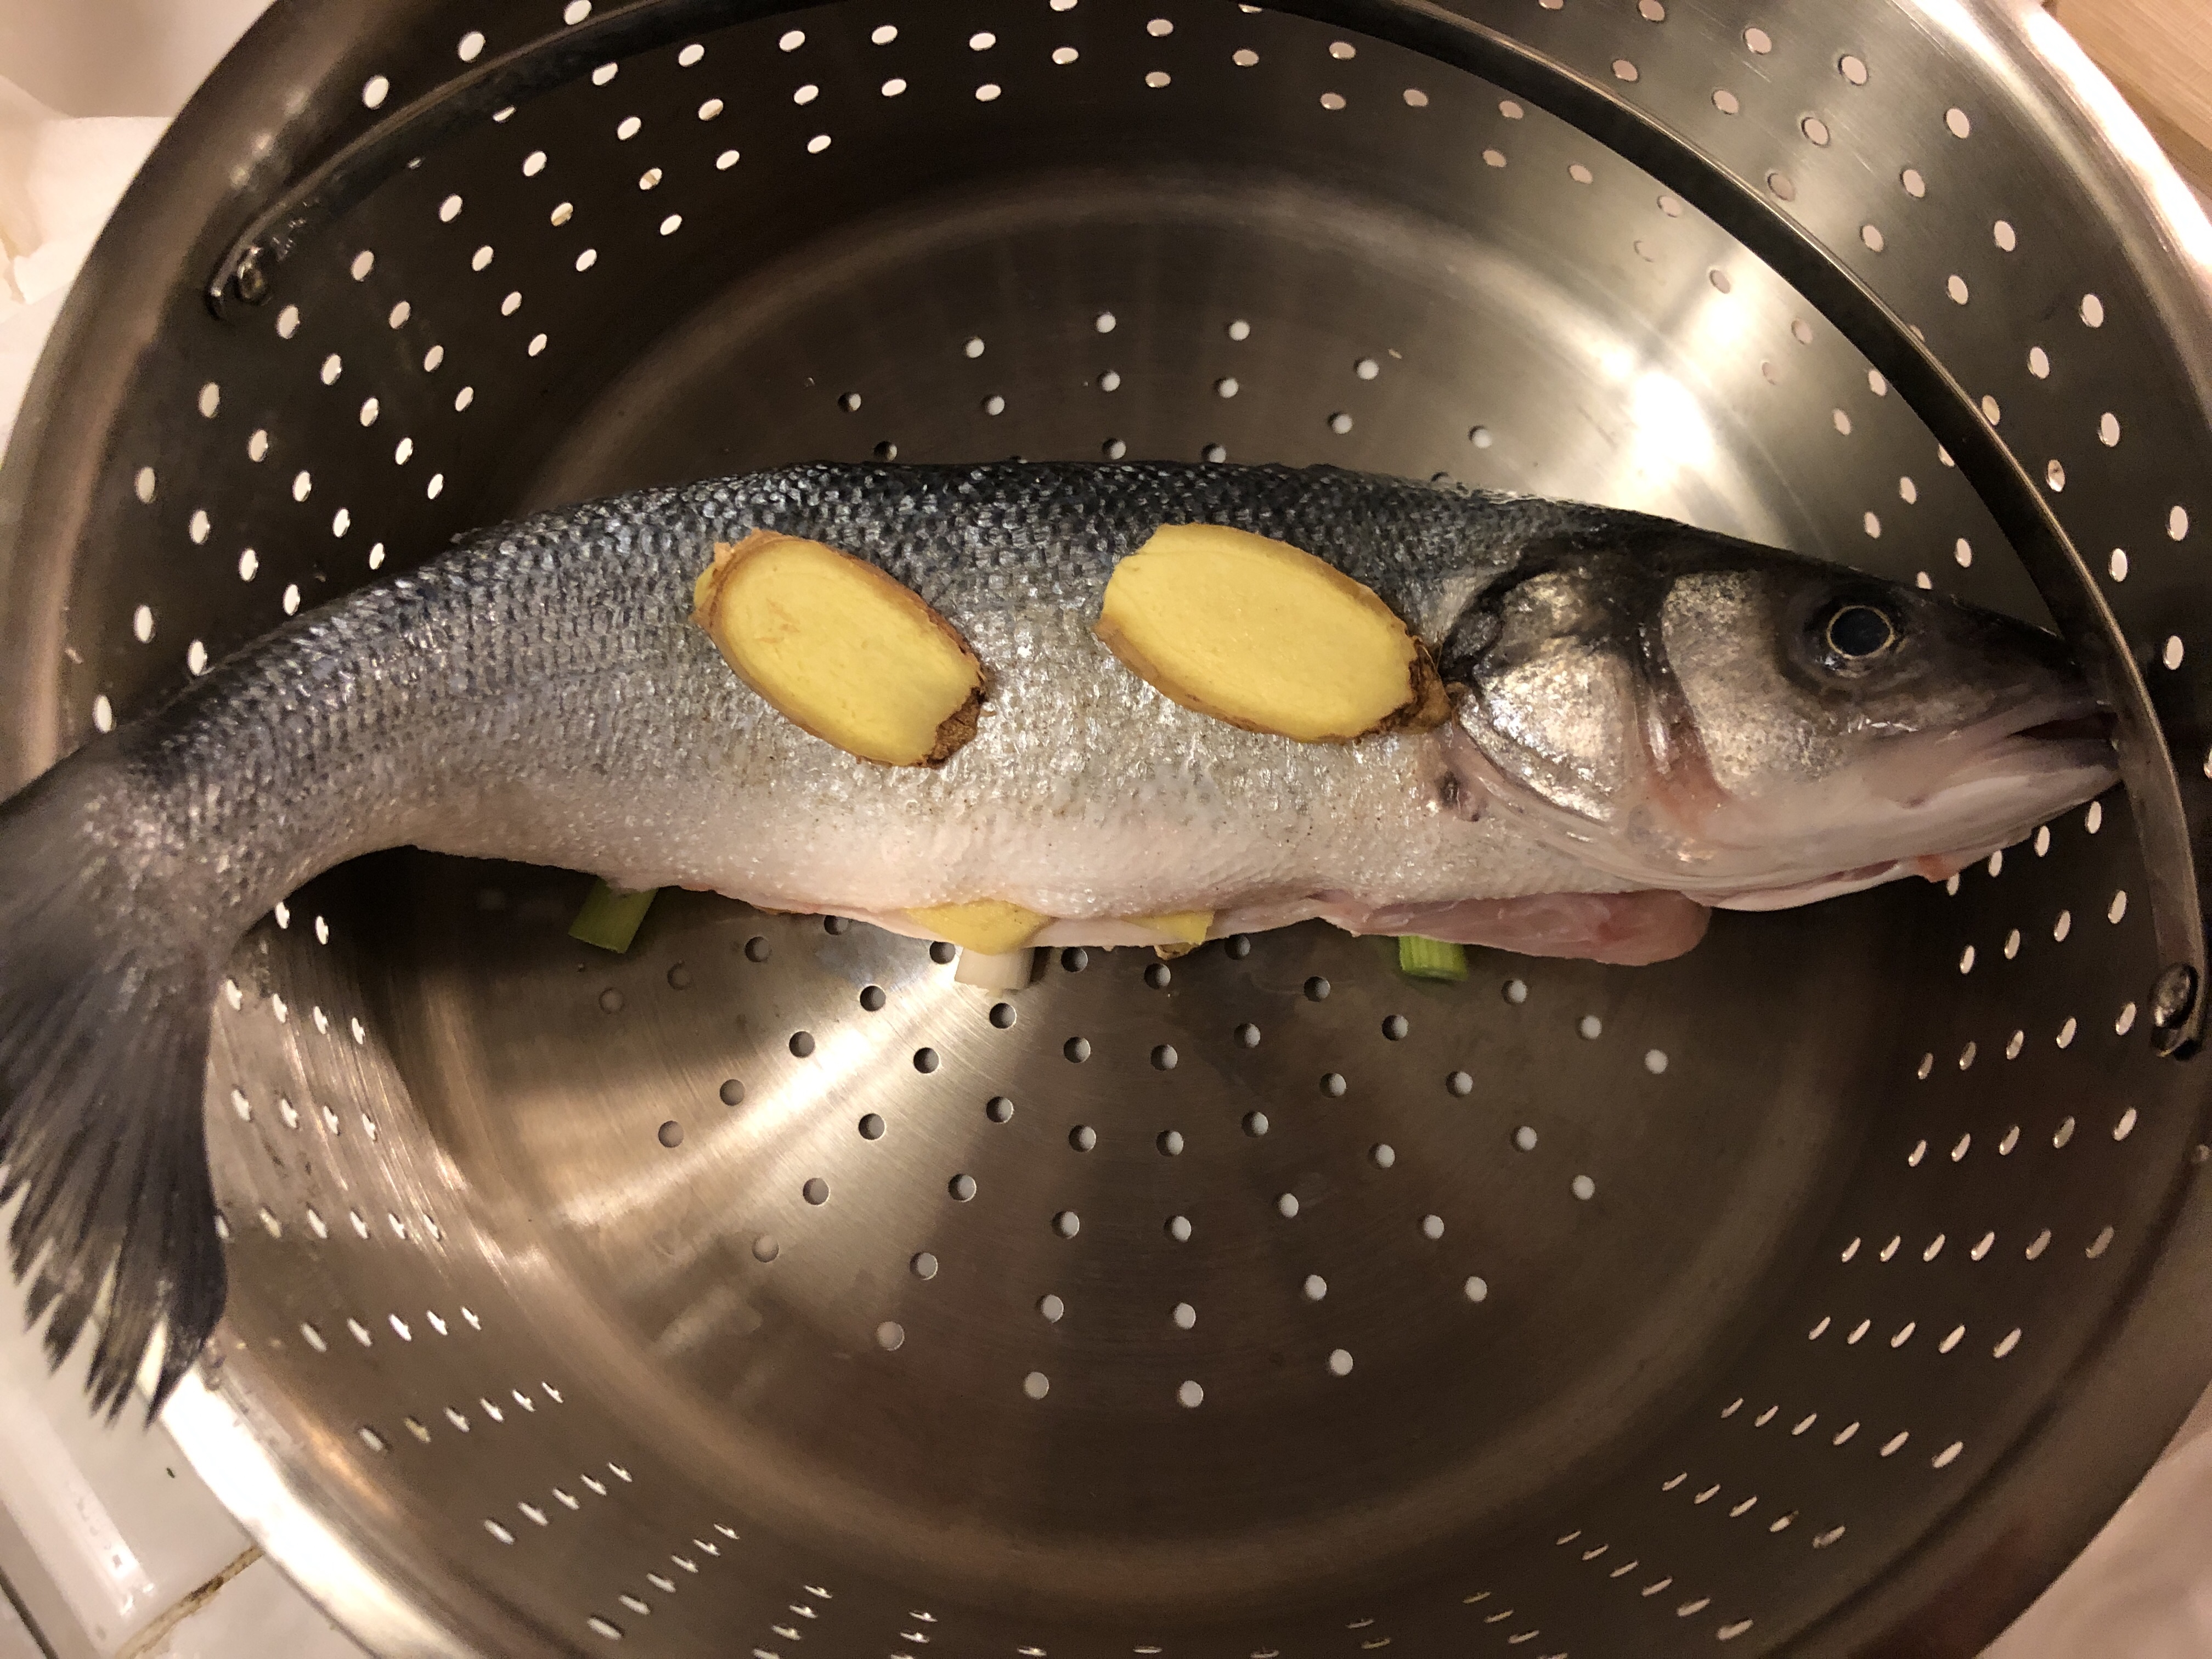
- Lay the fish on top of the scallions and ginger. This is important to do if you are steaming the fish on a plate because the ginger helps to elevate the fish, allowing the steam to reach the bottom side of the fish.
- Arrange the julienned ginger on top of the fish. Steam for 8-10 minutes for a 1 – 1/2 pound fish.
- Increase to 15-18 minutes for a large size fish. The fish is done when the flesh is no longer opaque, is flaky and lifts easily off the bone.
- While the fish steams, whisk together minced garlic, black bean paste, rice wine, soy sauce, sesame oil and water. Over medium heat, simmer in a small sauce pan with a lid on for 3-4 minutes then reduce the heat to low to keep it warm.
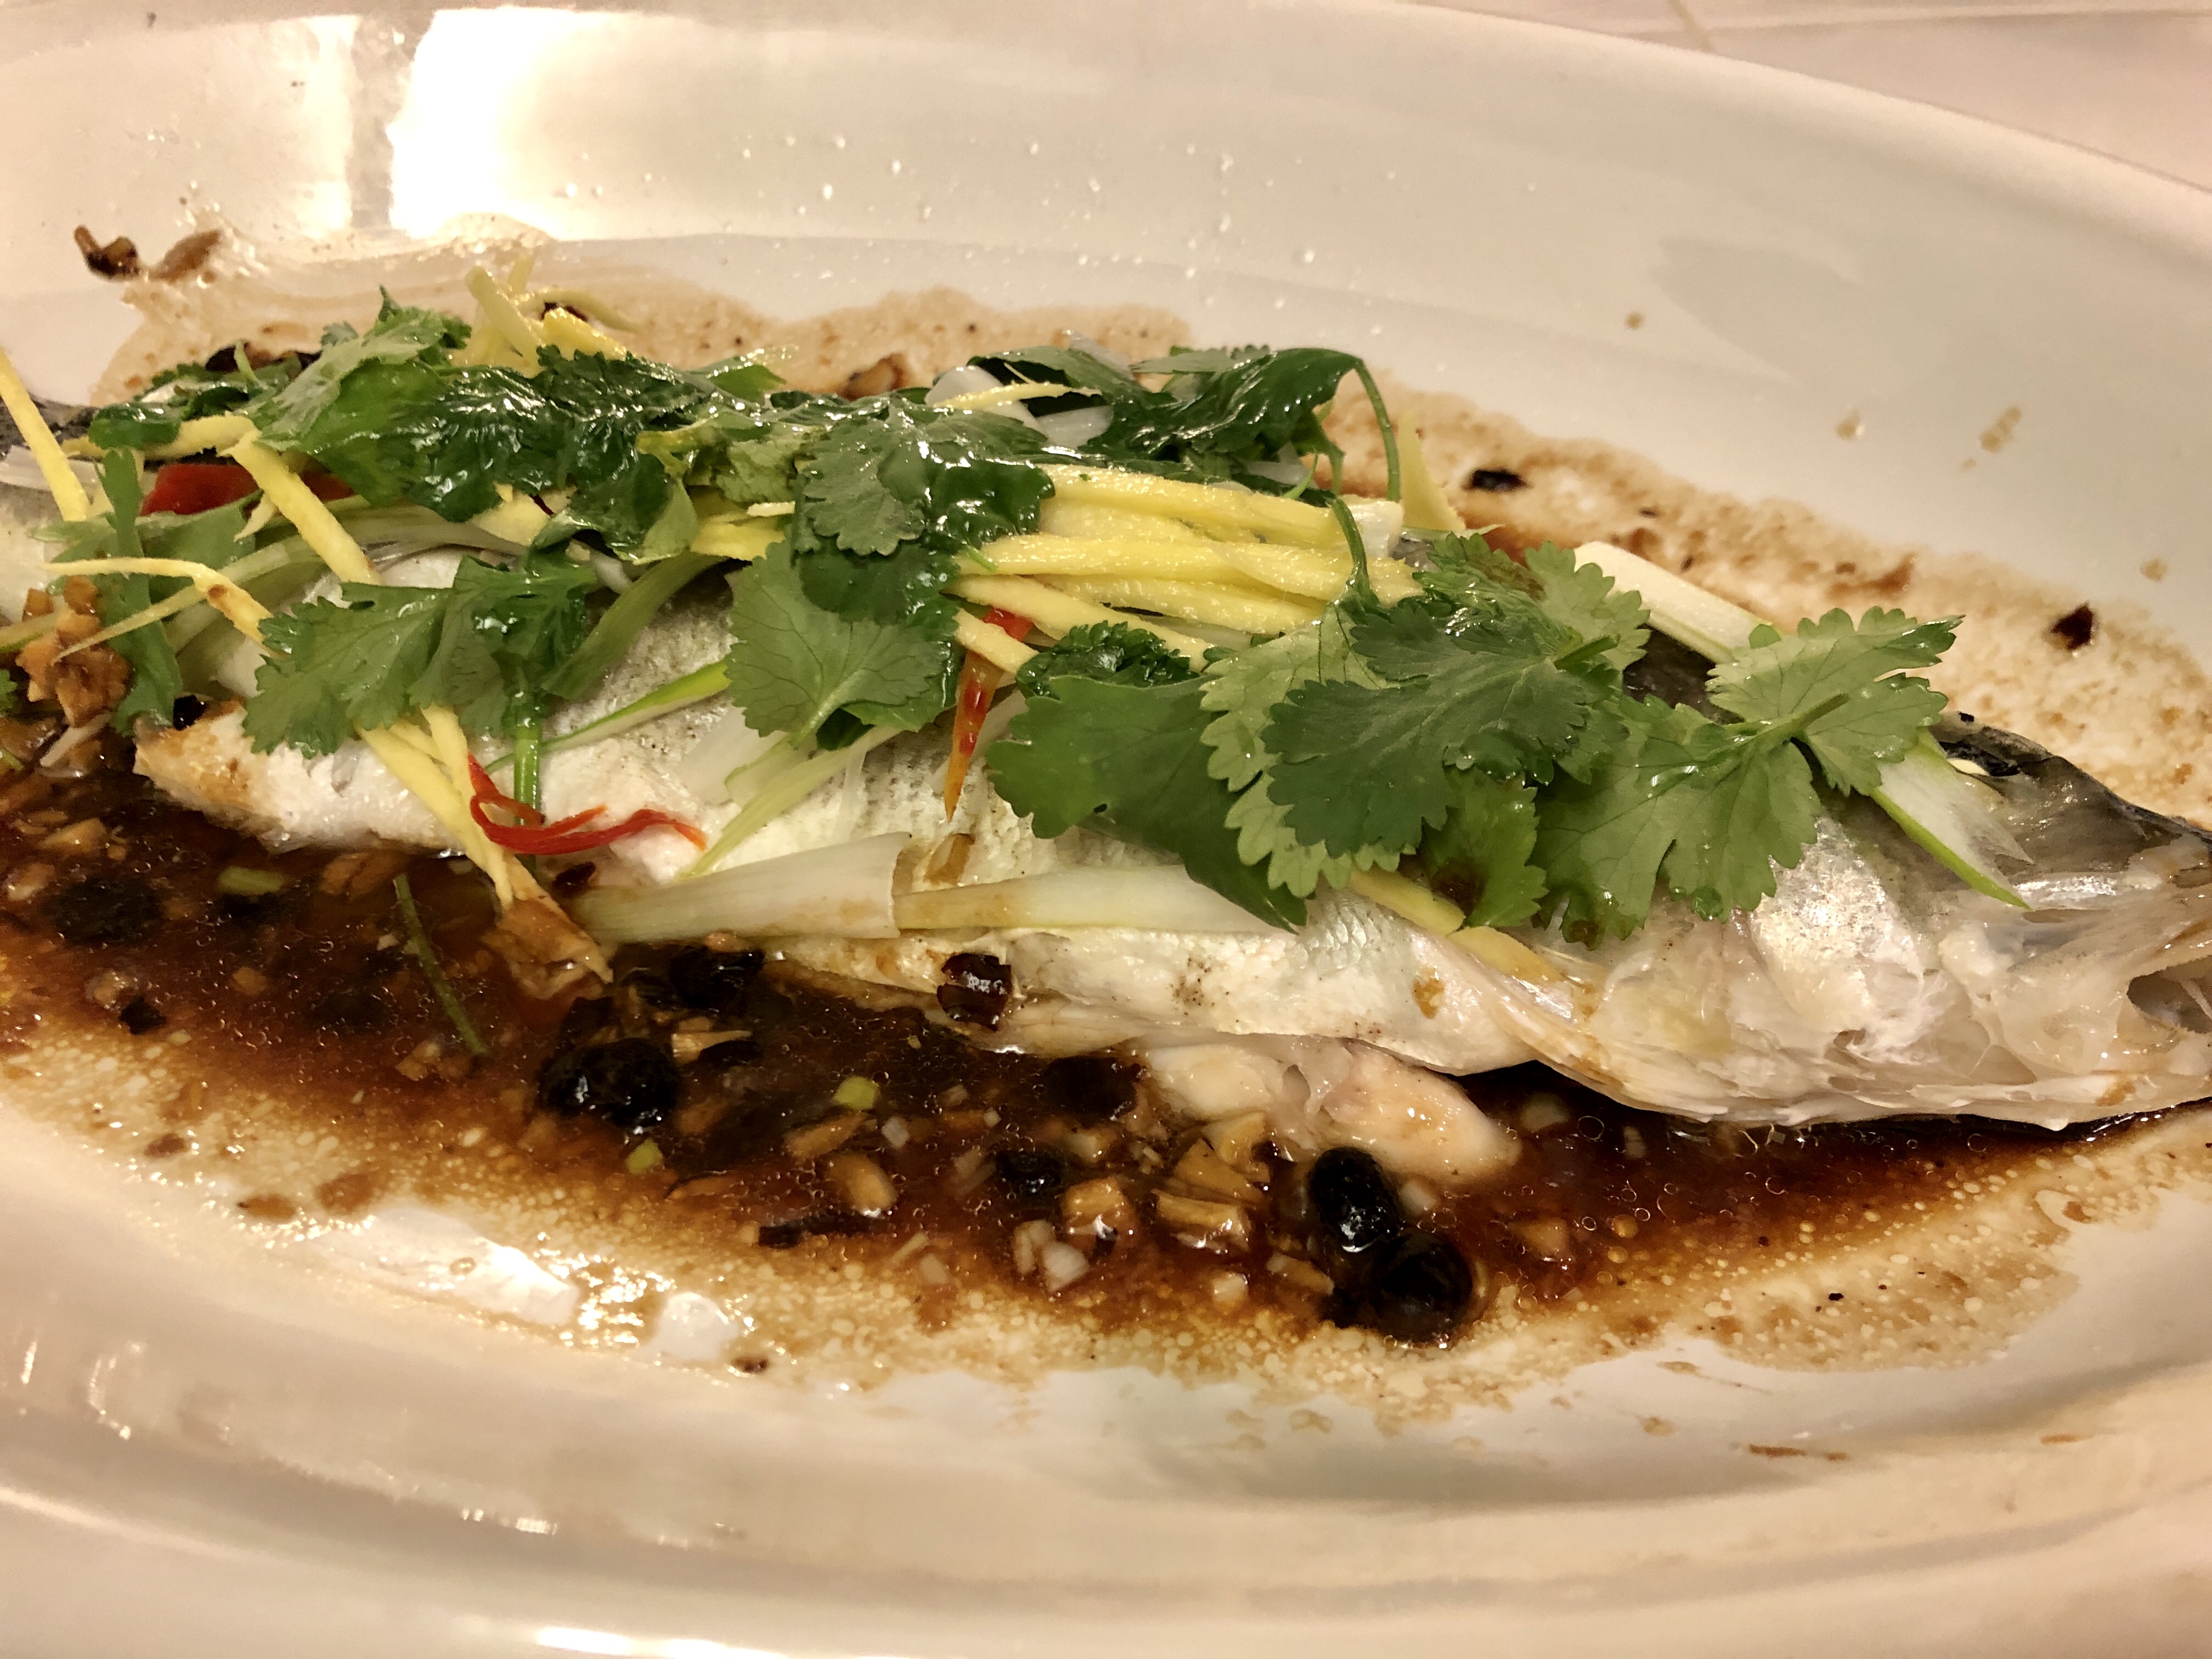
- Carefully remove the fish from the steamer basket and onto a serving plate. If using a plate, discard any liquid. It will not contribute good flavor and may even be bitter.
- Remove and discard the large pieces of ginger and scallion on the bottom side of the fish and inside the cavity but keep the julienned ginger on top of the fish.
- Top the fish with julienned scallions, Thai bird chili pepper and cilantro. Heat vegetable oil until hot and smoking. Pour the black bean sauce around the fish. If you prefer, pour the sauce directly over the fish. Some chefs recommend pouring the sauce around the fish so the sauce does not overwhelm the delicate flavor of the fish.Pour the hot oil over the fish. The hot oil will infused the fish further with the flavors from the scallions, coriander and Thai bird chili pepper.
- Smash a couple 2-inch stalks of scallions with the side of a knife to release it’s oil. Place the smash scallions along with a couple large slices of ginger in the cavity of the fish.
- Place the remaining 2-inch stalks of scallions and remaining large slices of ginger on the bottom of a steamer basket. Lay the fish on top of the scallions and ginger. This is important to do if you are steaming the fish on a plate because the ginger helps to elevate the fish, allowing the steam to reach the bottom side of the fish.
- Arrange the julienned ginger on top of the fish.
- Steam for 8-10 minutes for a 1 – 1/2 pound fish. Increase to 15-18 minutes for a large size fish. The fish is done when the flesh is no longer opaque, is flaky and lifts easily off the bone.
- While the fish steams, whisk together minced garlic, black bean paste, rice vinegar, soy sauce, sesame oil and water. Over medium-low heat, simmer in a small sauce pan with a lid for a couple minutes then reduce the heat to low to keep it warm.
- Carefully remove the fish from the steamer basket and onto a serving plate. If using a plate, discard any liquid. Remove and discard the large pieces of ginger and scallion on the bottom side of the fish and inside the cavity but keep the julienned ginger on top of the fish.
- Top the fish with julienned scallions, Thai bird chili pepper and cilantro.
- Heat vegetable oil until hot and smoking.
- Pour the black bean sauce around the fish. If you prefer, pour the sauce directly over the fish. Some chefs recommend pouring the sauce around the fish so the sauce does not overwhelm the delicate flavor of the fish.
- Pour the hot oil over the fish. The hot oil will infused the fish further with the flavors from the scallions, cilantro and Thai bird chili pepper.